We Made a Copilot Tool for you to Unlock the Power of Git History
・ ・ 1 min read
- #opensource
- #git
- #ai
The AM6 comes in a nice box and is very well protected with foam.
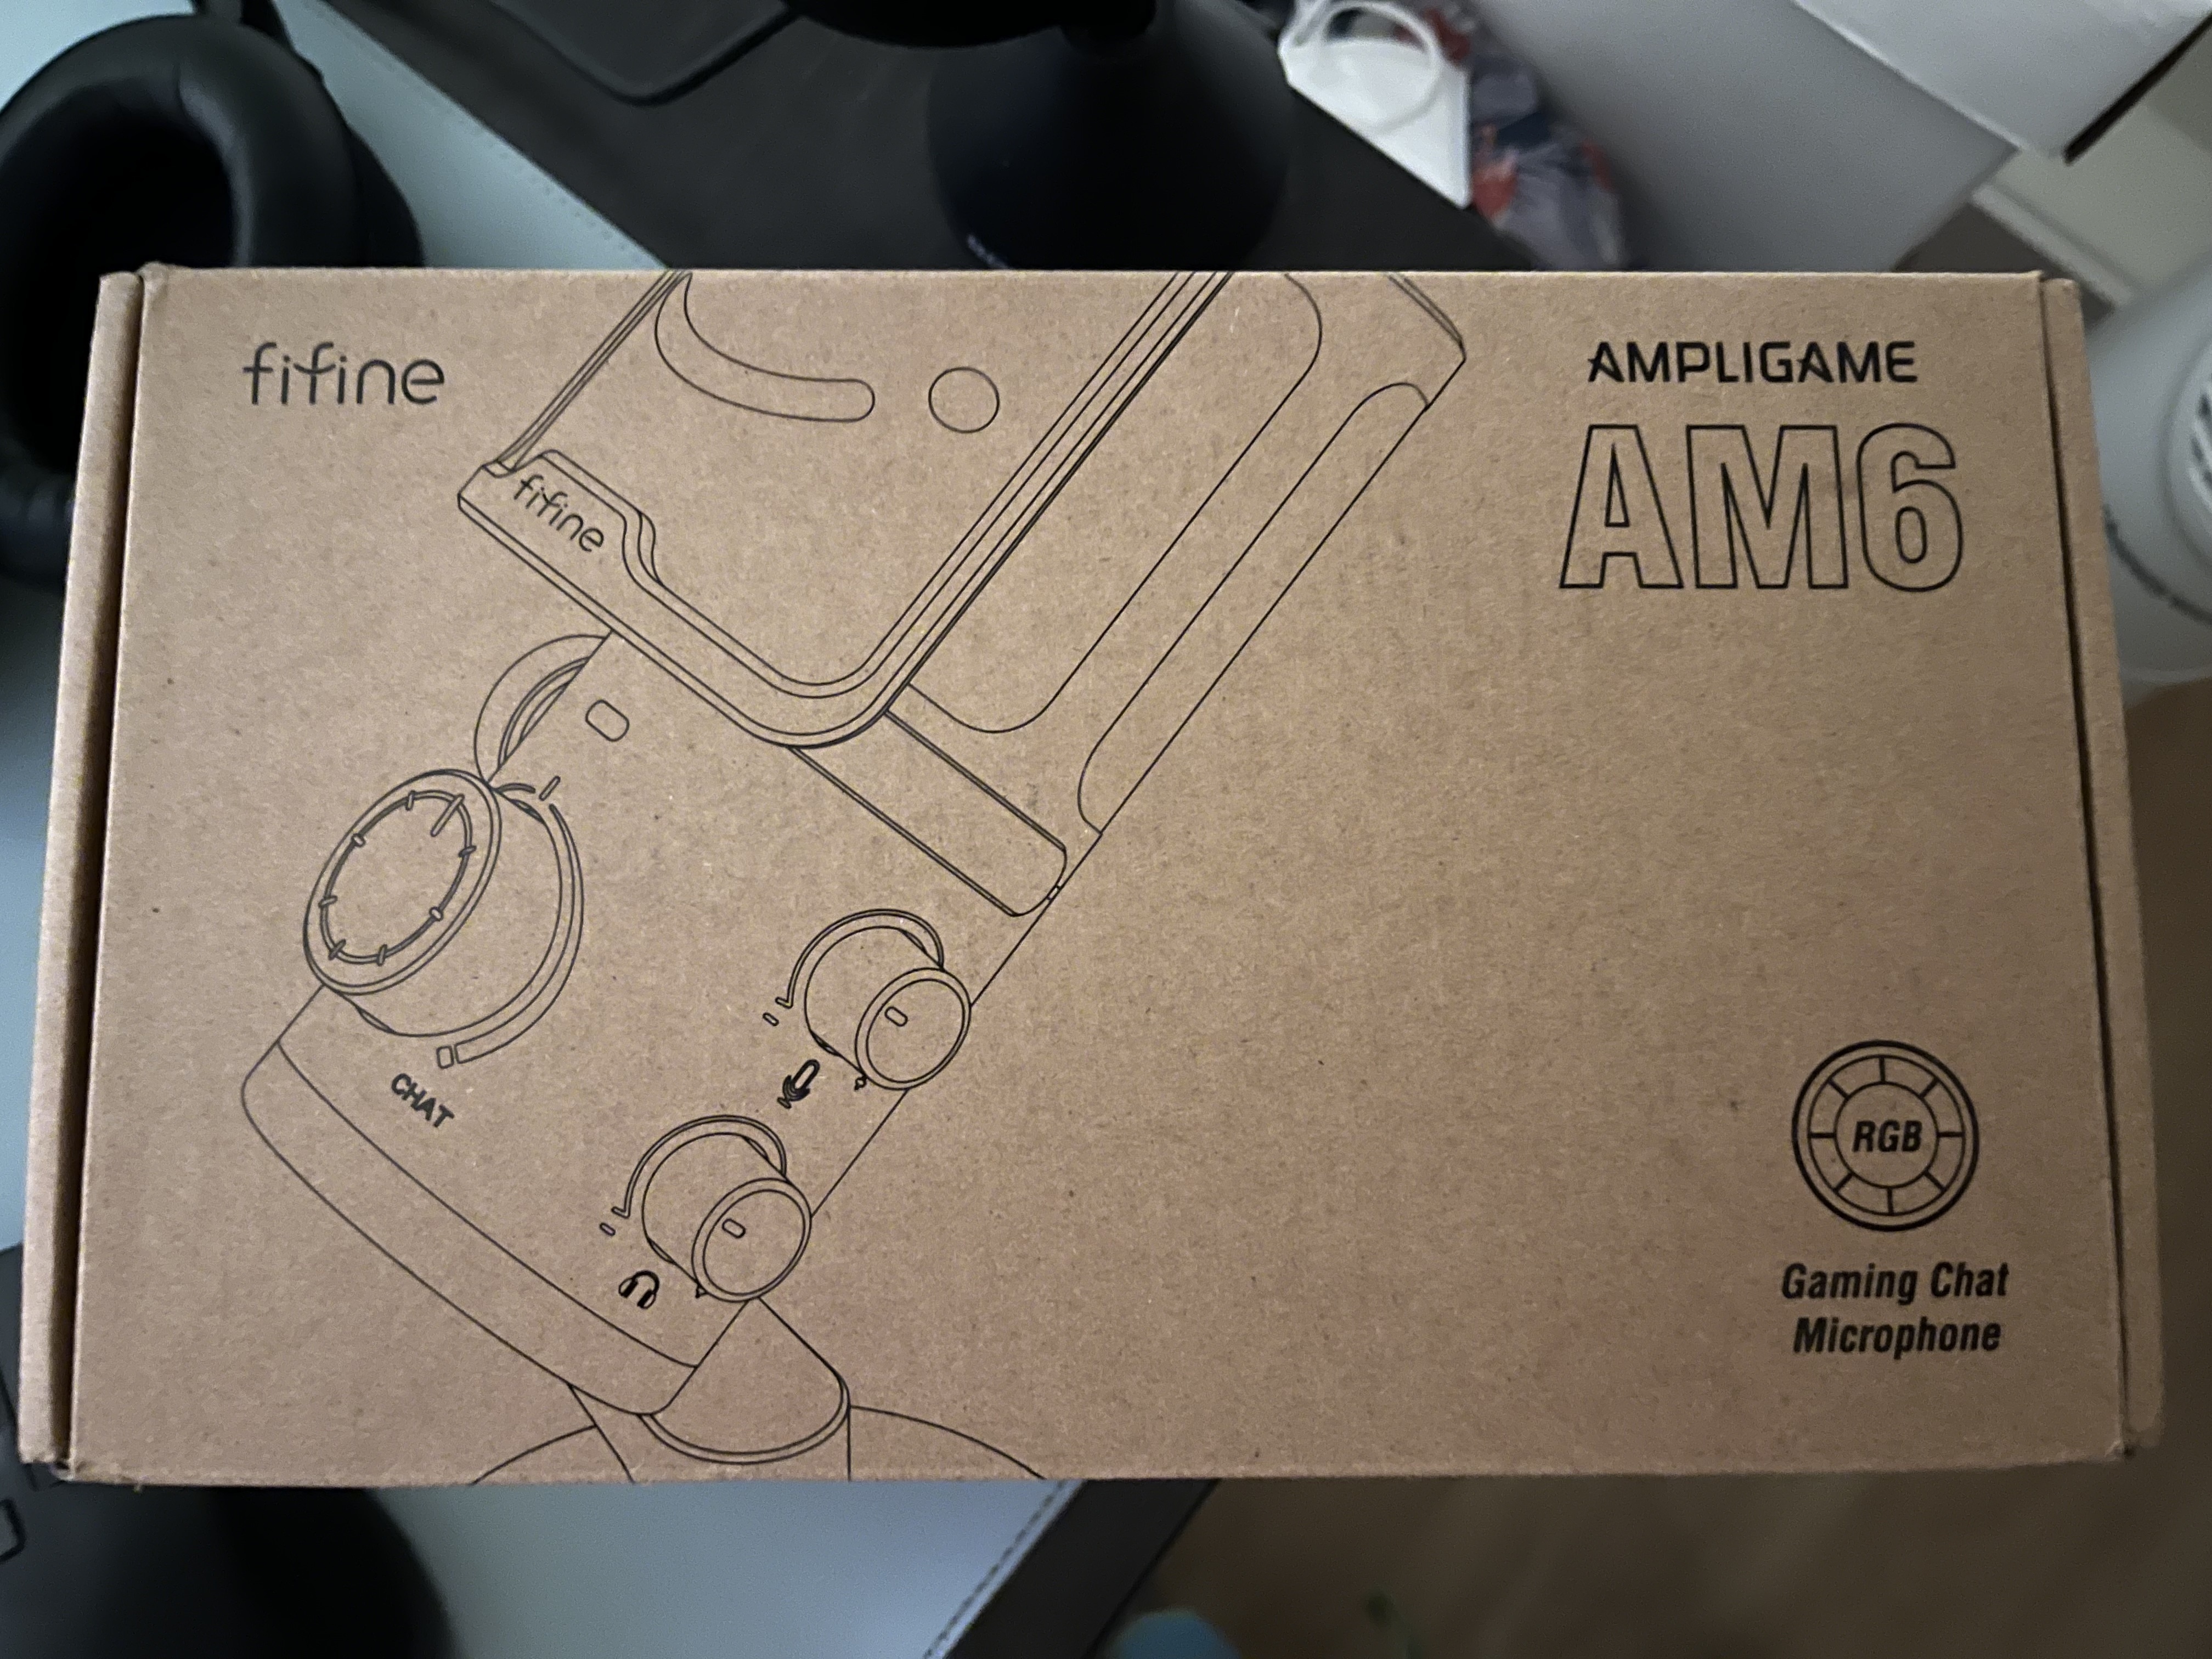

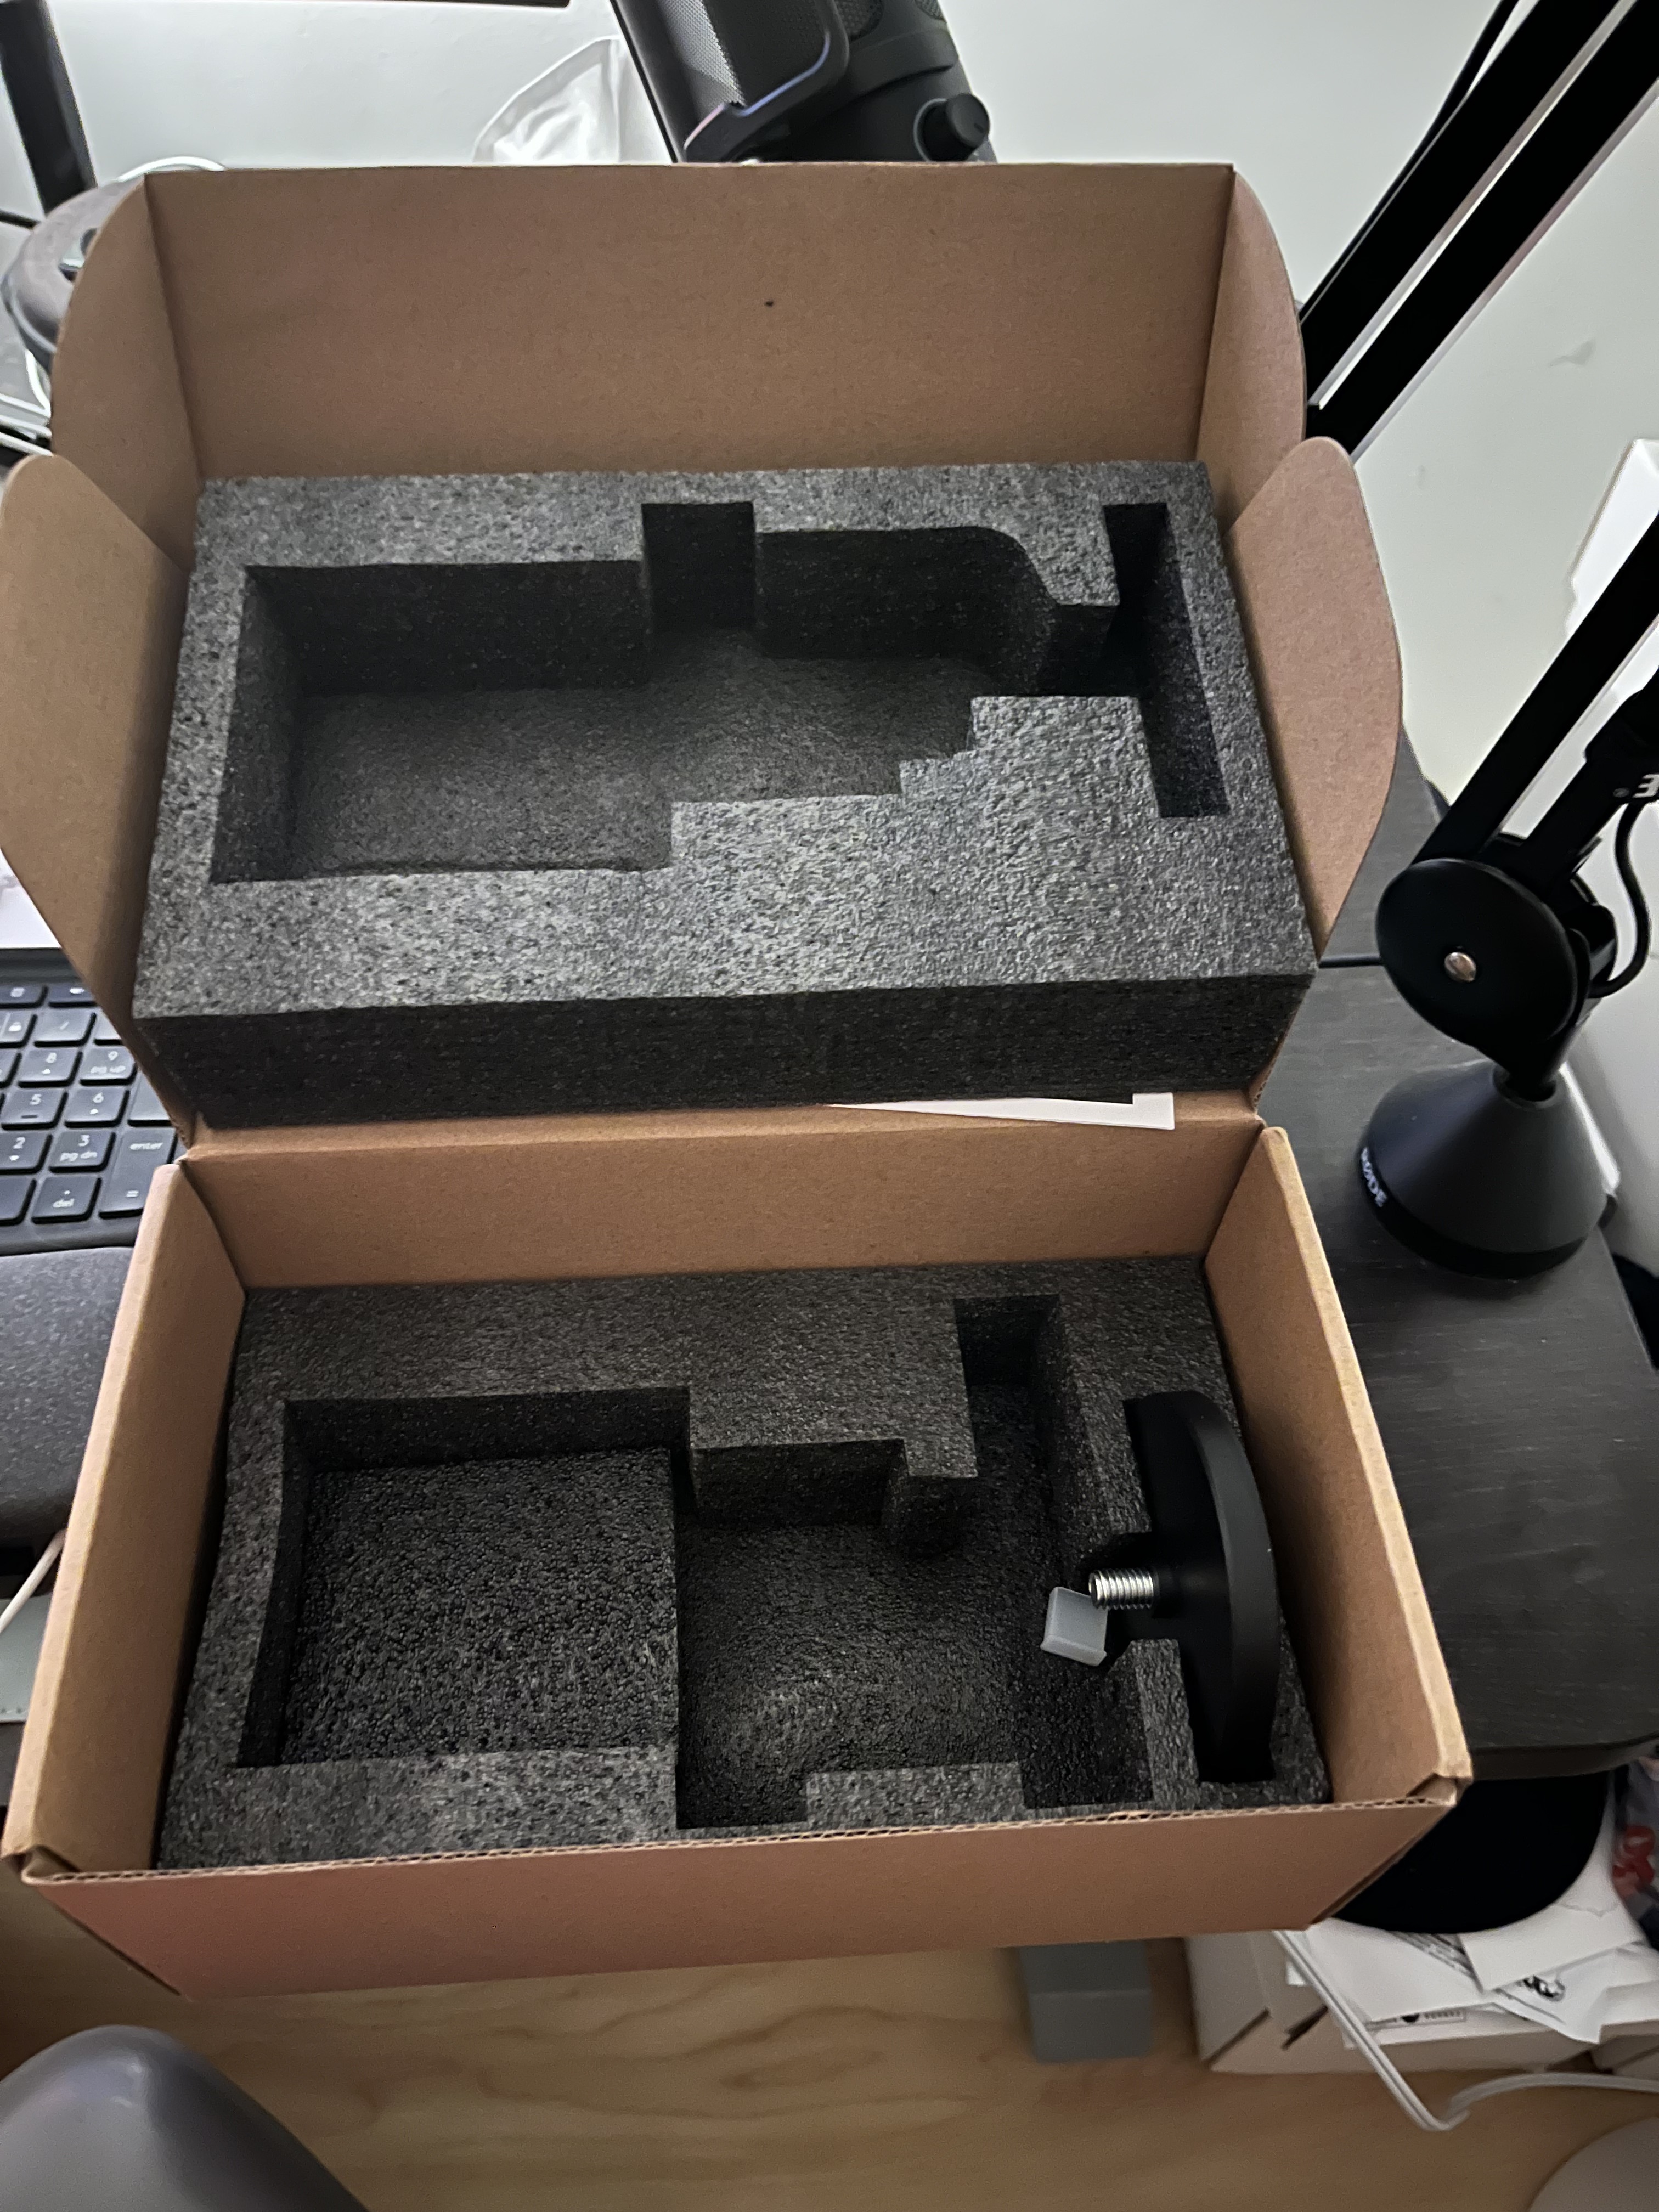
You probably could have dropped it from a few floors and the mic probably would've still been fine in the box. 😅
I didn't realize it initially, but the AM6 is mainly hard plastic compared to other microphones like my previous one, the Blue Yeti. That means, if you're not careful, you could damage or chip it.
Because it's casing is hard plastic, it's much lighter. I had to tighten my mic boom arm a bit to prevent it from popping up, which wasn't an issue with my previous heavier mic. Not a big deal, but just something to be aware of.
On the top of the microphone, you tap it to mute/unmute. This works really well. The only minor issue I have with this is I can't see the light indicating whether it's muted (red) or not (green). I need to look just under the pop filter, as it obscures the light with the way it's on my mic boom arm.
On the bottom there's a noise-cancelling button, button for changing the microphone lighting color, and a headphone jack.
Aside from that, there's a dial for the gain, another dial for the headphone volume and one last dial that allows you to switch between gaming and chat mode. I don't really game, so I have it turned all the way to the right for chat.
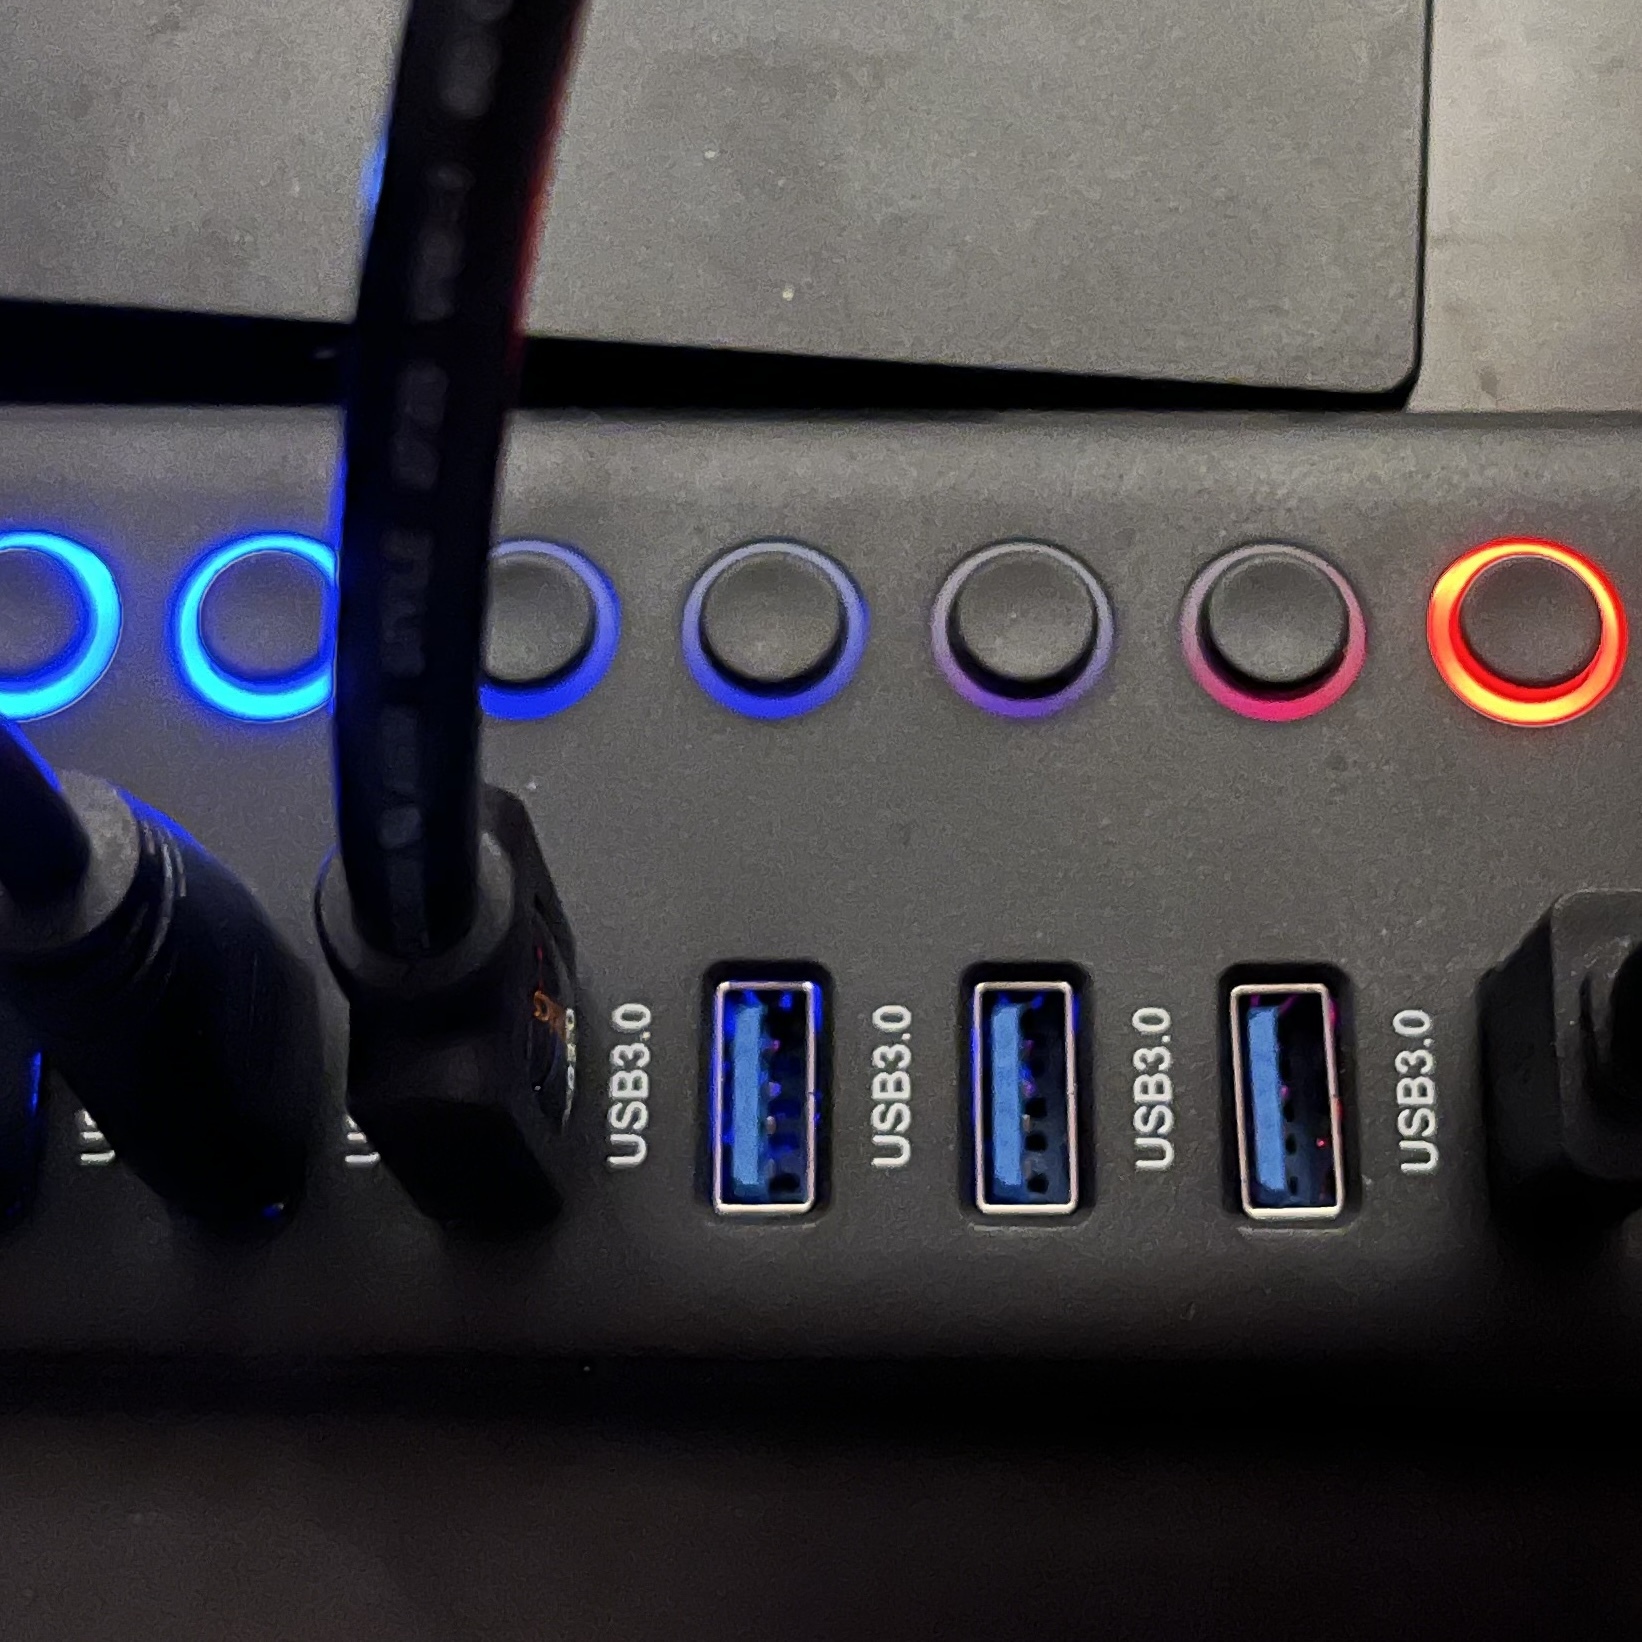
It's a USB microphone that comes with a USB-A to USB-C cord.
The one thing the microphone doesn't have is an off button, but for my setup this is a non-issue as I have a USB hub with physical buttons to turn ports on and off.
The microphone looks fantastic.
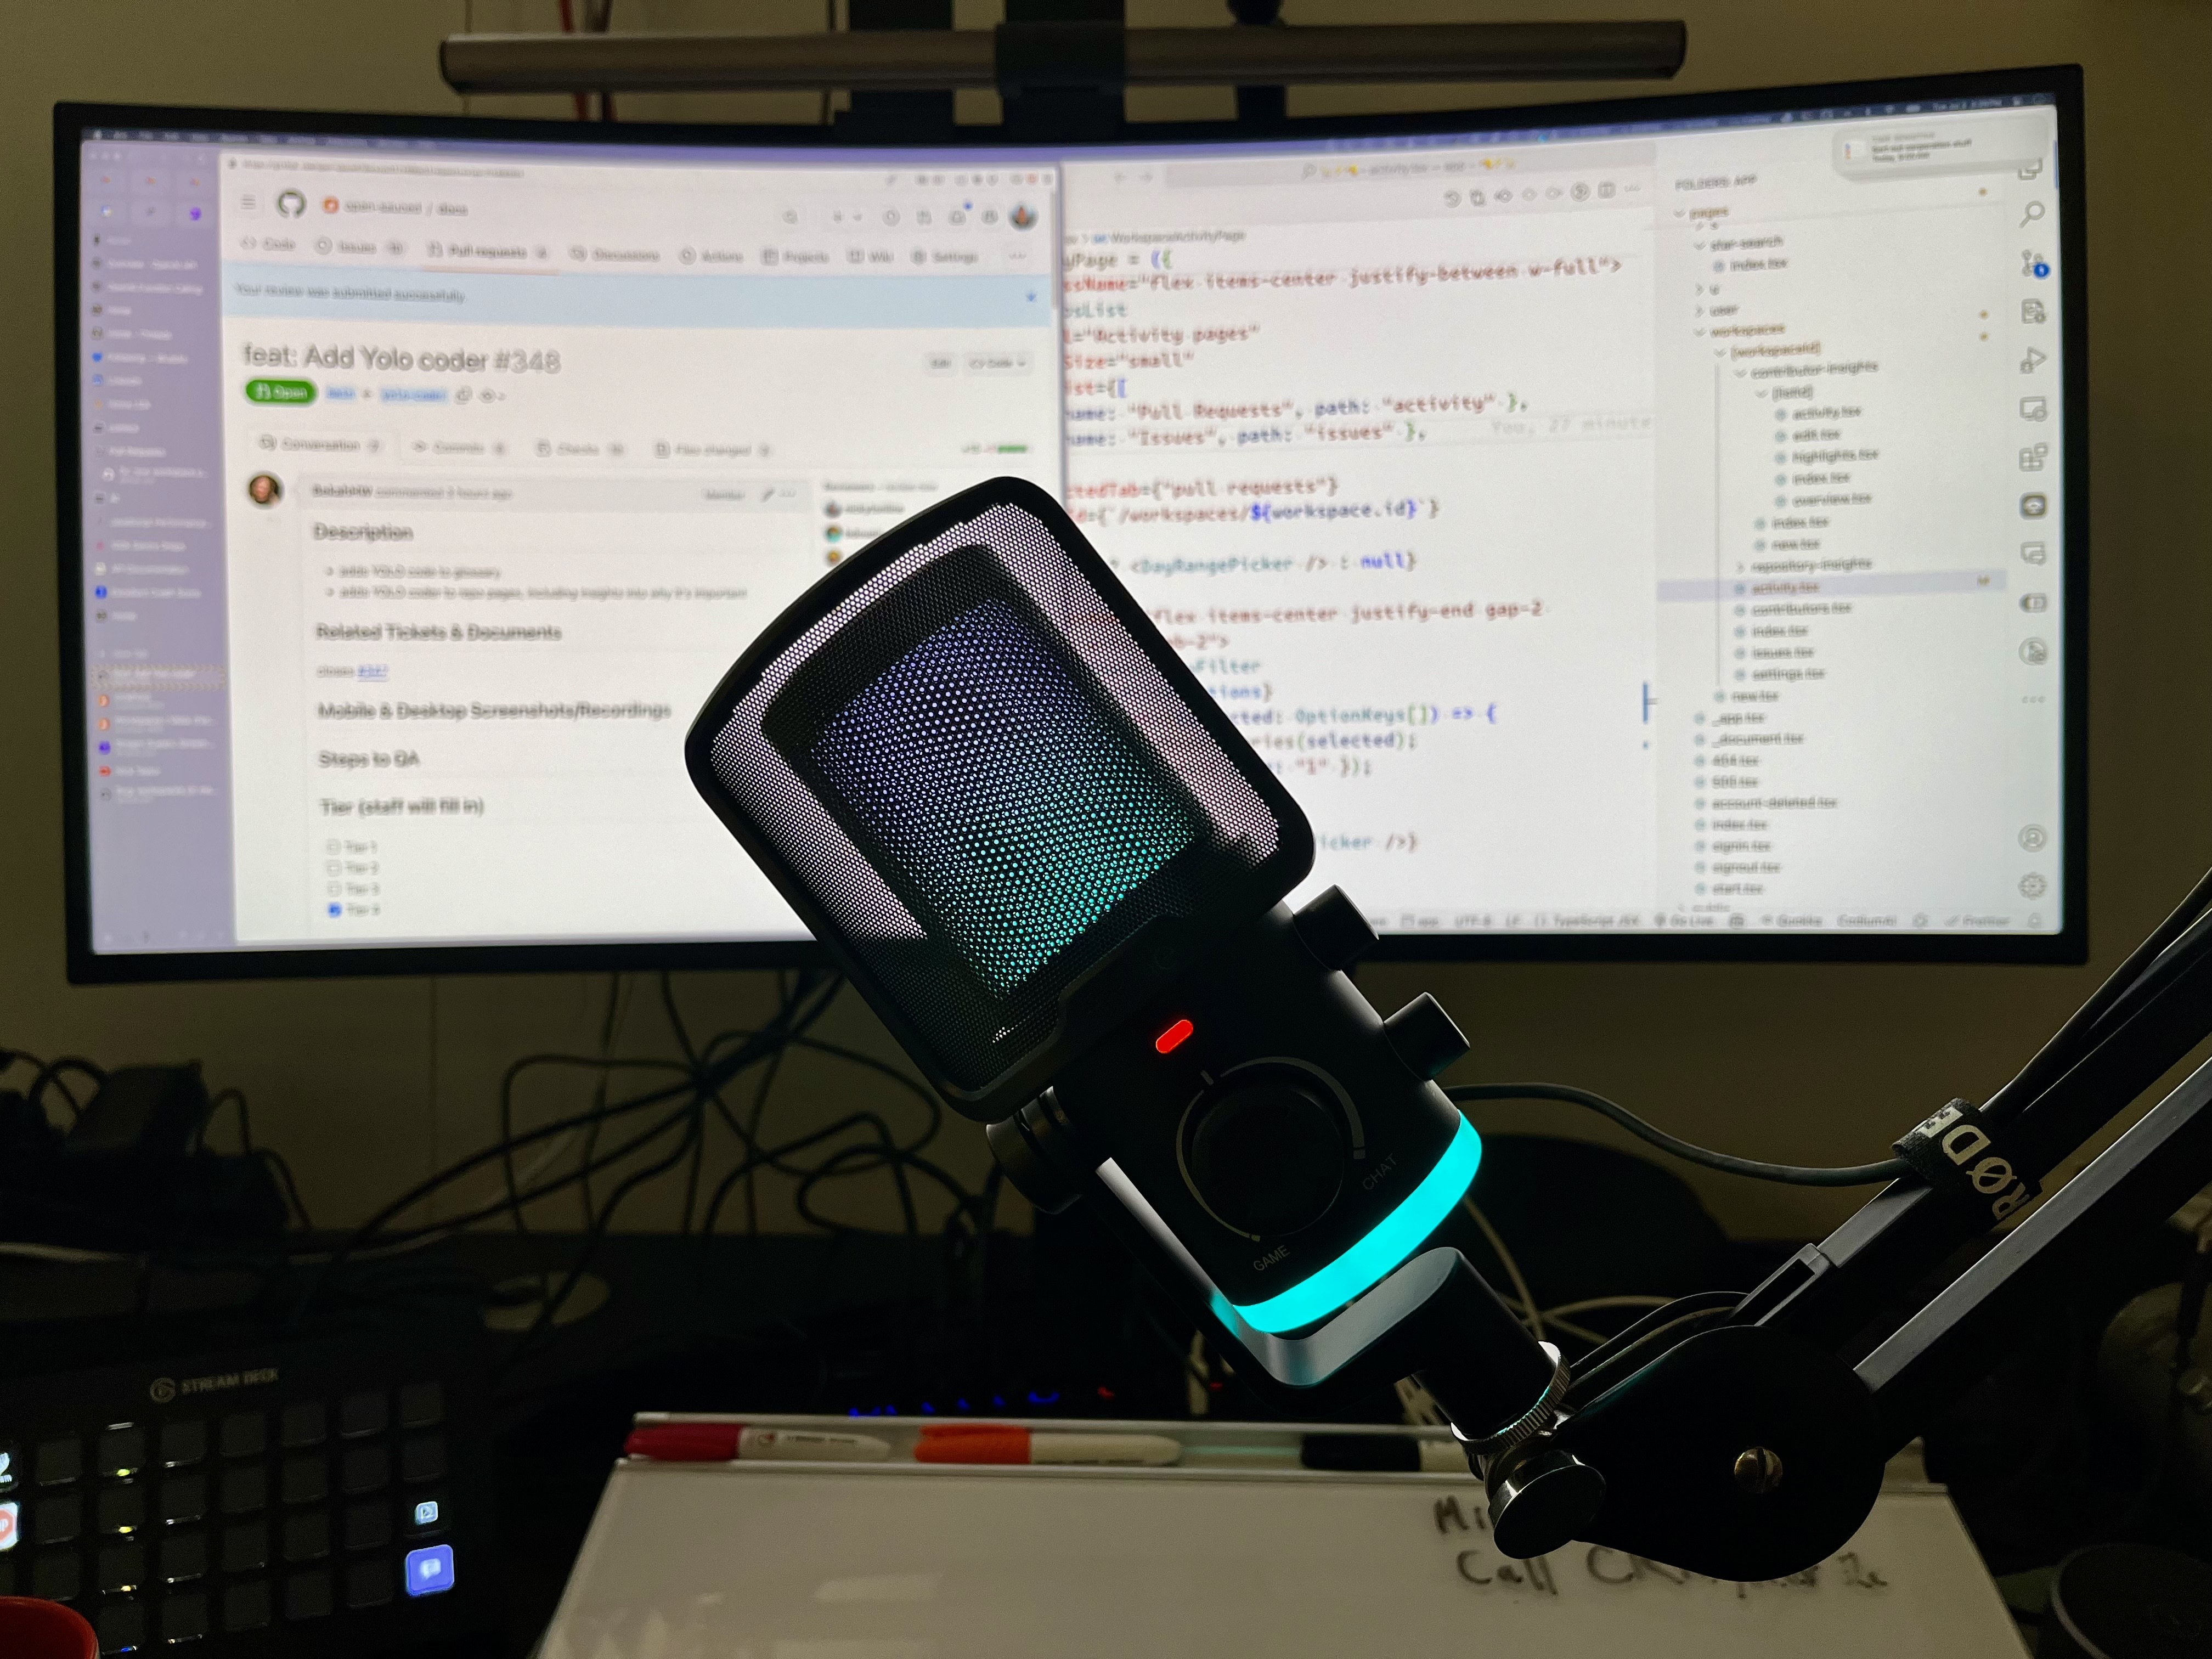
I love the aesthetic of the pop filter and the fact that it lights up, and you can change the colour of the mic.
I'm not an audiophile, but this mic is a condenser mic which is typically better than a dynamic mic from what I've understood especially for something like what I do, coding on live streams and interviewing people.
You can hear in this clip from a recent livestream of mine. Someone asked if the gain was at different levels between the Blue Yeti and the Fifine AM6, but they were both cranked to the max so I honestly think the AM6 sounds better.
If you're looking for a budget microphone, the AM6 packs a lot of punch for the price point (80$ CAD currently). As someone who is not a sound guy, I really like the look, the controls and the sound quality. It definitely suits my needs as a content creator.
useRef hook is, some examples of how it can be used, and when it shouldn't be used.
The useRef hook creates a reference object that holds a mutable value, stored in its current property. This value can be anything from a DOM element to a plain object. Unlike component state via say the useState hook, changes to a reference object via useRef won't trigger a re-render of your component, improving performance.
In React, state manages data that can trigger re-renders. But what if you need a way to directly access document object model (DOM) elements that shouldn't cause re-renders? That's where the useRef hook comes in.
Typically, you'd do something like this.
import { useEffect, useRef } from "react";

export const SomeComponent = () => {
  const firstNameInputRef = useRef<HTMLInputElement>(null);

  // for plain JavaScript change the above line to
  // const firstNameInputRef = useRef(null);

  useEffect(() => {
    firstNameInputRef.current?.focus();
  }, []);

  return (
    <form>
      <label>
        First Name:
        <input type="text" ref={firstNameInputRef}/>
      </label>
    </form>
  );
}
firstNameInputRef using useRef to reference the DOM element (initially null) and use useEffect to focus the input element on the initial render.useEffect, we check if firstNameInputRef.current exists (it will be the actual DOM element after the initial render). If it does, we call focus() to set focus on the input.Recently, I was working on Open Sauced's StarSearch, a Copilot for git history feature we released at the end of May 2024. You can read more about StarSearch in the blog post below.
The ask was to be able to start a new StarSearch conversation. To do so, I had to stop the current conversation. If you've worked with the OpenAI API or similar APIs, they typically return a ReadableStream as a response.
A ReadableStream is a web API that allows data to be read in chunks as it becomes available, enabling efficient processing of large or real-time data sets. In the context of API responses, this means we can start handling the data immediately, without waiting for the entire response to complete.
I initially had this feature working, but ran into issues if the response started to stream. The solution, create a reference to the readable stream via the useRef hook and when a new conversation is started, cancel the one in progress. You can see these changes in the pull request (PR) below
So now, if someone presses the Create a New Conversation button, I cancel the current streaming response from StarSearch, e.g.
  const streamRef = useRef<ReadableStreamDefaultReader<string>>();

  // for plain JavaScript change the above line to
  // const streamRef = useRef();
...

  const onNewChat = () => {
    streamRef.current?.cancel();
    ...
  };

...
streamRef using useRef to hold a reference to the current ReadableStreamDefaultReader.onNewChat function checks if streamRef.current exists (meaning a stream is ongoing).cancel() on streamRef.current to stop it before starting a new conversation.useRef was the perfect solution for my use case. Maybe you'll find the useRef hook useful for something other than referencing a DOM element as well.
You can store almost anything in a reference object via the useRef hook, and it won't cause re-renders in your component. If you're persisting component state, opt for useState or other hooks like useReducer so that the component does re-render.
For further reading on the useRef hook, I highly recommend checking out the React documentation for the useRef hook.
Stay saucy peeps!
If you would like to know more about my work in open source, follow me on OpenSauced.
]]>If video is your jam, check out this highlight from the live stream that summarizes the history of Valibot.
During his thesis work, developer Fabian Hiller found himself with dedicated time to pursue an idea he'd been mulling over - creating a new modular data validation library for JavaScript. This led to the birth of Valibot.
Fabian had previously worked on Modular Forms, but he wanted to bring that same modular philosophy to data validation. While popular validation libraries like Zod offer excellent APIs, Fabian felt there was room to take modularity even further.
"For Zod, it doesn't make sense to make it extremely modular as Valibot, because most Zod users love Zod for its API", Fabian explained. "This would probably be too big of a breaking change."
Instead of trying to rebuild Zod from the ground up, he decided a fresh start made more sense. Valibot aims for ultimate modularity, allowing developers to compose small, reusable validation units together.
Fabian didn't work in isolation. He reached out to Zod's creator Colin McDonnell, but the timing didn't line up for deeper collaboration initially. Fabian remains in touch with McDonnell and other open source maintainers though.
"I'm sure improvements I made in Valibot will hopefully improve other libraries, and other libraries will hopefully affect and improve Valibot," he said. "I hope at the end we end up with great open source projects, and the community can choose what they prefer."
With Valibot, Fabian hopes to provide developers a new, composable approach to data validation. And by cross-pollinating with other libraries, he aims to push the entire JavaScript validation ecosystem forward.
If you want to experiment with Valibot, I recommend you check out the Valibot playground. Fabian actually made a change to enable prettier support after our live stream! 🤩
Also, version 0.31.0 was recently released with a whole rework of the API.
Let's start of simple. We want to create an e-mail validator. Valibot makes this pretty easy for us.
import * as v from 'valibot';

const EmailSchema = v.pipe(v.string(), v.email());

const validEmail = v.safeParse(EmailSchema, 'jane@example.com');

console.log(validEmail);
First, we import the Valibot package. Next, we create a schema for a valid email, const EmailSchema = v.pipe(v.string(), v.email());
v.pipe is so powerful. It allows us to chain validators. First, we check that the input is a string via v.string(), and next, if it's a valid email via v.email().
If you run this in the playground, you'll get the following output.
[LOG]: {
  typed: true,
  success: true,
  output: "jane@example.com",
  issues: undefined
}
You can view the following example in this Valibot playground.
Let's see what happens when we have an invalid email.
import * as v from 'valibot';

const EmailSchema = v.pipe(v.string(), v.email());

const validEmail = v.safeParse(EmailSchema, 'janeexample.com');

console.log(validEmail);
If we run the updated playground, it will now output the following:
[LOG]: {
  typed: true,
  success: false,
  output: "janeexample.com",
  issues: [
    {
      kind: "validation",
      type: "email",
      input: "janeexample.com",
      expected: null,
      received: "\"janeexample.com\"",
      message: "Invalid email: Received \"janeexample.com\"",
      requirement: RegExp,
      path: undefined,
      issues: undefined,
      lang: undefined,
      abortEarly: undefined,
      abortPipeEarly: undefined
    }
  ]
}
You can view the updated example in this Valibot playground.
You can see an example of valibot in action in a recent pull request of mine.
  if (context.query.id) {
    try {
      sharedChatId = parseSchema(UuidSchema, context.query.id);
      searchParams.set("id", sharedChatId);
    } catch (error) {
      captureException(new Error(`Failed to parse UUID for StarSearch. UUID: ${sharedChatId}`, { cause: error }));
      throw new Error("Invalid shared Chat ID");
    }
  }
Valibot is open source, like many things in the JavaScript ecosystem.
The project has a low lottery factor, and it also has high contributor confidence (many stargazers and forkers come back later on to make a meaningful contribution).
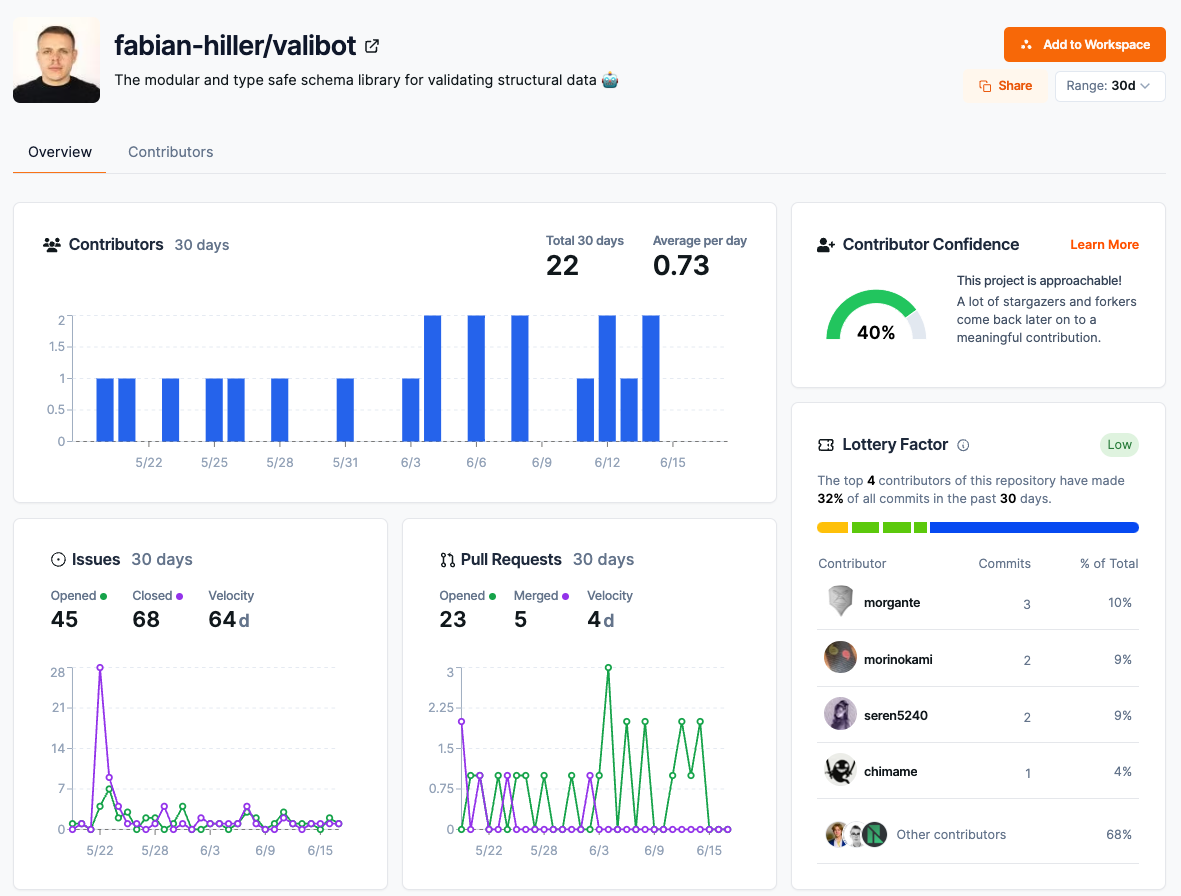
If you're looking to contribute to open source in the JavaScript/TypeScript ecosystem, Valibot might be up your alley.
We only scratched the surface of Valibot, but I encourage you to check it out. Valibot was highlighted in the latest bytes.dev issue, VALIBOT AND THE CIRCLE OF LIFE. You know a library is gaining traction if bytes.dev covers it!
Stay saucy peeps!
If you would like to know more about my work in open source, follow me on OpenSauced.
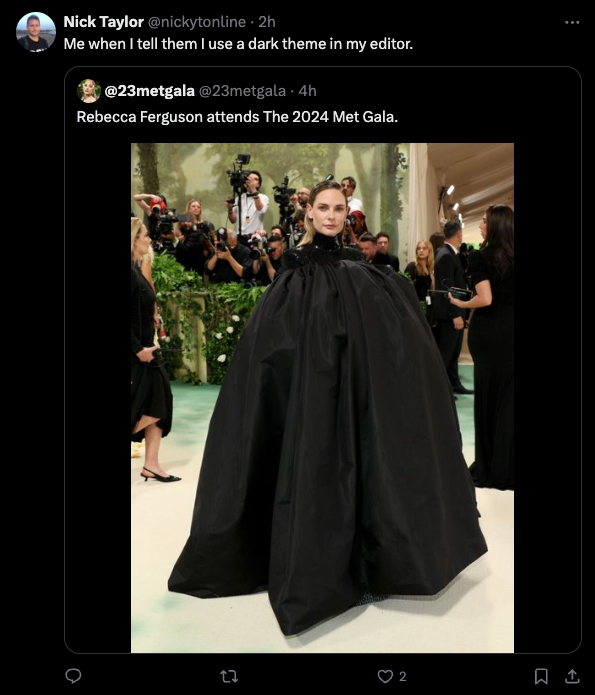
]]>This whole discussion came about because of a Tweet from Jeff Fritz that I saw on my timeline.
A bit of background for this conversation. I haven't done any .NET since 2016 and Brandon used to be on the Xamarin team/Microsoft.
If you'd prefer to watch the video instead, here you go!
Nick Taylor: I just know him as CSharpFritz...
Brandon Minnick: Jeff, Jeff Fritz.
Nick Taylor: Thank you. He was part of the thing that got brought up was like, we were talking, he's talking about the ecosystem is, is pretty vast, even though people don't realize it and there's a lot of FUD and one of the things people were talking about was like tooling.
So like, I remember. Like Visual Studio or Visual Studio .NET. They both used to be super expensive, but at one point there was a community edition. I know and like there's also Visual Studio Code but like I guess my question is like if I were to start like i'm just like I want to go build a Xamarin app right now like Is is there a cost to tooling if I were to build it like I know riders JetBrains so that you would pay for obviously JetBrains is, you know, they make money. But say you weren't using Rider. Could I have a good tooling set up to build something in .NET MAUI right now without dropping a dime? And I don't mean that because I'm cheap. I'm happy to pay for tools. But this is like a common question that I saw in that whole thread when people were saying, Yeah, but the tooling, you know, and stuff.
And just curious about your thoughts on that.
Brandon Minnick: There are a couple of layers to this. So we'll start, we'll start zoomed in, zoomed way in, then we'll kind of, bring it back out a little bit. So, short answer. Absolutely. Yes. if you download Visual Studio, as you install it, you'll see a prompt comes up and it's like, Hey, what are you working on?
And this is where you can select the additional. net workloads. So .NET's also broken apart. Like the core. NET, like if you're just building a hello world console app, is you don't have to install as much. If you want to install additional workloads like Maui or blazer, you'll get this little prompt that says little check boxes.
You'll say, check the .NET MAUI box. And then. And then yeah, Visual Studio, it's called the Community Edition. It's totally free. The only kind of guardrails Microsoft puts in place, and if I'm being honest, it's mostly on the honor system, but you should honor the honor system is once you have a company that's, I forget the exact parameters.
I think it's either five employees or annual revenue of a million dollars. Then you're required to pay for the business license. But
Nick Taylor: okay.
Brandon Minnick: Again, for me, you and me, like I make 0 off my mobile apps in the app store. So
Nick Taylor: I can
Brandon Minnick: Use a community edition. No problem. But that's on Windows. Now, if we shift over to the Mac because I'm on a Mac, I've been using Mac to write my C# apps for gosh, almost a decade now.
There was Visual Studio for Mac, which fun fact came from us at Xamarin. We had our own IDE called Xamarin Studio. Yeah, which is built on mono develop. So more through lines back to the mono days. When Microsoft acquired Xamarin, like, Oh cool, you can write C# code in an IDE on the Mac.
Why don't we just rename that from Xamarin Studio to Visual Studio for Mac? And all of us were like, no, don't do that because. It's literally only made for Xamarin. Like, yes, Xamarin C#, but like, if you try to make an ASP. NET core app using Xamarin studio, you're going to have a bad time. Did the marketing team listen?
Of course. Yeah. RIP right. Violated sign. Absolutely. So no, they didn't listen to us, and they rebranded it as Visual Studio for Mac. And then again, everybody who never heard of Xamarin studio, all of a sudden, was like, oh shoot, Microsoft's got an IDE for the Mac. Sweet. I'm going to try it out. And then everybody hated it because you couldn't do, it wasn't one-to-one with Visual Studio on the PC.
So you couldn't do like your Azure stuff at first. You couldn't do, ASP. NET core stuff at first. And so slowly over time, they added more and more functionality to it. But the Visual Studio on the PC was always like the crown jewel. Whereas Visual redheaded stepchild was like, are we ever going to get that feature from Visual Studio that you just announced and celebrated to the world, Microsoft?
Microsoft announced that they're getting rid of it. They're deprecating it later this year. And what really sucks is they don't have another tool for us to use. So they're working on Visual Studio Code support.
Which, yeah, you can totally make your Xamarin app or your .NET MAUI apps, in Visual Studio Code. There's a little, Visuals, I think it's called the C# Dev Kit, and there's a .NET MAUI C# Dev Kit, Visual Studio Code extension you can add. If I'm being honest, the experience isn't there yet.
It's not what, you know, We would expect to C# developers just become in like, I know, like, here's my build button. Here's my debug button. Here's how my breakpoints work, you know, VS Code puts stuff in different places. A lot of stuff gets hidden. And again, the one-to-one functionality is not there.
So that's why I use JetBrains Rider on the Mac now because RIP Visual Studio for Mac, JetBrains does require a license. But it is awesome. I mean, I'm paying for this. I pay for JetBrains out of my pocket, I think 150 bucks a year. That's what I use to make the NET MAUI course. So for me, it's totally worth it.
Cause it's so good. Like it's way better than Visual Studio for Mac ever was, but I wish they also had a free community edition, so I could save a little bit of money, but also if you're on a Mac, you can do what I do. And. Let's see if this works in the screen share, but I have, Parallels installed. I was going to say, you might as well just go VM and so like here's Windows 11 running on my Mac and you can even see like, yeah, there's, here's my C# code and here's Visual Studio installed and this works great too. So, if you want to go a more freemium route, spin up a virtual machine on your Mac, install Windows, then you can get Visual Studio and everything just, everything just works.
So lots of free routes, but certainly easier if you're on Windows.
Until the next one!
]]>One thing to mention before we get started is that these are the tools that make me productive. Maybe they won't make you productive like the way they do for me. I always say, use the tools that make you the most productive.
Some of these tools are free but some are paid. I personally think the paid ones are worth it, but I leave that up to you and your wallet.
Note: I've put some referral links in here. Just want to be upfront about that is all.
It all starts with the editor. Visual Studio Code (VS Code) is my go-to editor. I was using the Insider’s Edition for the longest time, but some extensions would try to log in and redirect to VS Code regular edition, so I decided to go back to it. That said, VS Code Insider's is very stable.
I was a big fan of the Dank Mono for the longest time, but GitHub released a bunch of monospaced fonts this year and I've been loving Monaspace Krypton.
For the theme, it varies. I've been on the light modern default theme recently as I find it's better for my live streaming, but I'm also a fan of the Houston and Fortnite themes.
Although I have iTerm installed, a great terminal for macOS, I honestly live in the VS Code terminal 99.999% of the time.
If you're interested in my editor settings, here's my current settings.
One of the more fun ones is you can change the title bar, so I've added some emojis to mine.
"window.title": "🦙⚡🫡 – ${activeEditorShort}${separator}${rootName} – 🫡⚡🦙",

Another setting that I find super handy is terminal.integrated.autoReplies. I never want to source my .env file and this handles it perfectly.
  "terminal.integrated.autoReplies": {
    "dotenv: found '.env' file. Source it? ([Y]es/[n]o/[a]lways/n[e]ver)": "e\r"
  },
I do want to give a shout out to the Zed editor. I use it occasionally and it’s super fast, but it hasn’t become my main editor yet. I think once the extension ecosystem blows up a little more is when I move to this. Maybe in the next year. We’ll see. 😎
I don't use all of these everyday, but these are my go-to browser extensions.
These are most of the desktop apps that I use every day. Let's get started with some general ones.
Arc Browser is a Chromium-based browser that, in my opinion, has nailed a tonne of the user experience (UX) issues I've encountered with any other browsers. Vertical tabs, command palette, and auto-picture in picture video to name a few.
I used Vanilla for the longest time for my top menu bar icons, but once I got a MacBook Pro with the notch, it just didn't work well. I've since moved on to Bartender for managing my menu bar.
The emoji picker on macOS isn't that great, but Rocket makes it so easy to add emojis. I can't tell you how many times a day I use this.
Raycast is my go-to replacement for macOS' spotlight. It's like Spotlight on steroids. I previously used Alfred, another outstanding Spotlight alternative, but for some reason Raycast grew on me. I also use it for window management.
For those evenings where I'm in front of the computer, f.lux is a must. Like some wise person said, "Be kind to your eyeballs". macOS's Nightshift kind of works, but f.lux destroys it.
For managing meetings, Dato is a better date app for macOS. It's great for having multiple time zones in the address bar. I have my local time as well as UTC. I also use it for upcoming meetings and events. Previously I was using Meeter which is great for this, but it's one less app I need now.
I take screenshots or short video recordings almost daily, and Cleanshot X is so great for this.
I do most of my "git"ing on the command line, but sometimes I need a graphical user interface (GUI) to really understand what's going on. When I need that, I reach for Fork.

Shoutout to Cassidy (@cassidoo) for the awesome GIF!
If you're using Git, which I imagine most of you are, signing your commits is super important. GPG Suite makes this easy to set up.
I do a lot of work building user interfaces (UIs) and these are some indispensable tools for that kind of work.
xScope is a fantastic tool set for frontend development. Rulers, guides etc.
Figma is where I live when I need to coordinate with our designer, look at designs, or pull some assets.
I had heard about Polypane before and I think I may have tried it a few years ago, but nowadays, It's a must for frontend. It helps you build out responsive, accessible apps with all kinds of goodies. Curious about it? I hung out with the creator of Polypane, Kilian Valkhof (@kilianvalkhof), on a live stream earlier this year.
For color contrast issues, TPGi's Color Contrast Analyzer is top tier. I can't recommend it enough. Thanks to Todd Libby (@colabottles) for recommending this to me last year.
I'm sure there are streamers with bigger audiences that have a better setup, but this is how I roll.
Restream.io is what I use to stream to multiple platforms, currently Twitch, YouTube, X/Twitter, and LinkedIn.
OBS is used by many including myself. It's a great piece of open source software. I use it for streaming instead of Restream Studio or similar tools like Streamyard because I have custom overlays and some other customizations.
The https://github.com/obsproject/obs-studio repository on GitHubKrisp is outstanding for filtering out unwanted noise on calls and streams. Say goodbye to fire engines in the background while you stream. 🤣
I use Loopback for virtual audio sources. This is super helpful because I create an audio source, which is my microphone and the guest's (guests') audio, and treat it as one input source. I use this audio source as the audio source for live captioning.
I don't have a fancy camera for streaming. I used to use my Logitech webcam, which was fine, but when I finally got a decent iPhone, I was like the camera on this is amazing! So I decided to use that for live streaming. Camo makes it possible to do that, and it has plenty of niceties like zooming, watermarks, filters, etc.
For the longest time, I couldn't figure out how people brought guests on to livestreams. In my early days of streaming, I used to bring in the full Discord screen and share that on my live stream. Although that worked, it was not ideal. I also tried Zoom similarly, and then I also started cropping parts of Zoom on my screen, but again, not ideal.
Eventually, I discovered vdo.ninja. The TLDR is, it uses peer-to-peer technology to bring remote cameras into OBS or other studio software.
The https://github.com/steveseguin/vdo.ninja repository on GitHubIt's a fantastic project and I highly recommend it. If your guest has a Twitch account, another similar piece of software is Twitch's Stream Together. I use this as well, depending on the guest.
I don't have many CLI tools, but here are some of my go-to ones:

If you're curious about the reset of my setup like hardware and office setup or what I bring when I'm on the go, feel free to check out my uses page.
Until the next one!
]]>Having said that, I do want to thank all of you who have subscribed over the past couple of years.
It's not all doom and gloom, though. I'm going to be putting more of my energy into my live stream, nickyt.live if you weren't aware, as well as what, I think, might be a bit more unique in terms of a newsletter/video shorts, OneTipAWeek.com. I'm pretty busy with work and streaming atm, so not sure when I will start OneTipAWeek.com, but you are welcome to subscribe.
Thanks, peeps!
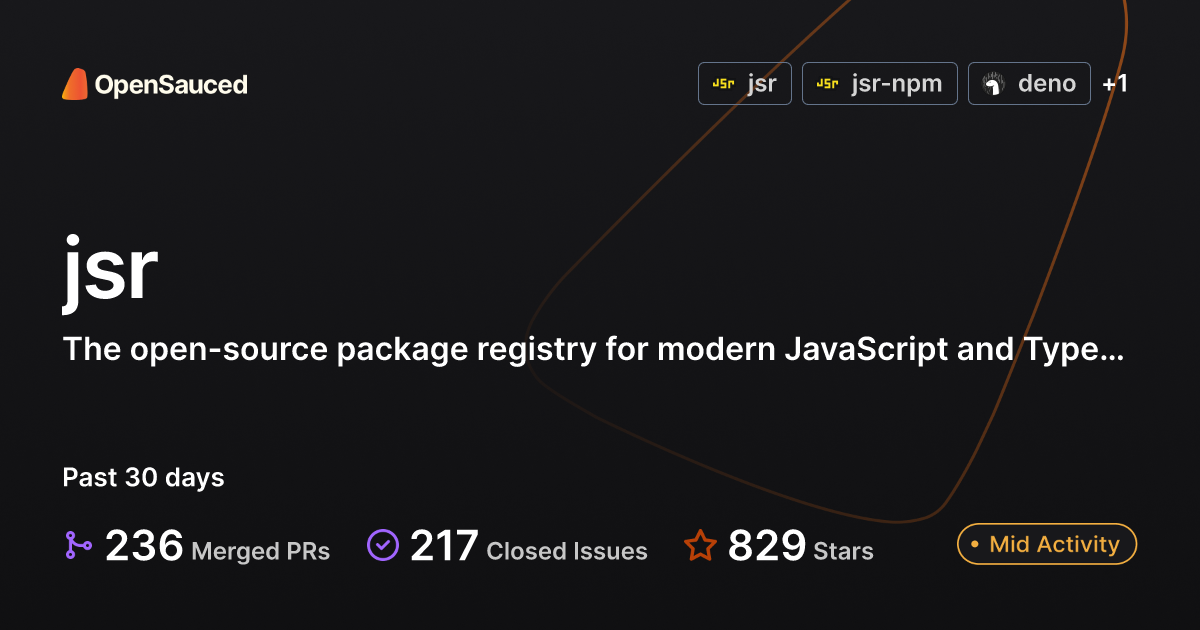
]]>I recently built out a couple of OG images for Open Sauced for a couple of features we've rolled out over the past couple of months, Workspaces and Repository pages. They're great features that I encourage you to check out, and I encourage you to share them on socials so our beautiful OG images pop.
For example, here's an OG image for a workspace for jsr. JSR is the new JavaScript registry from the folks from Deno.
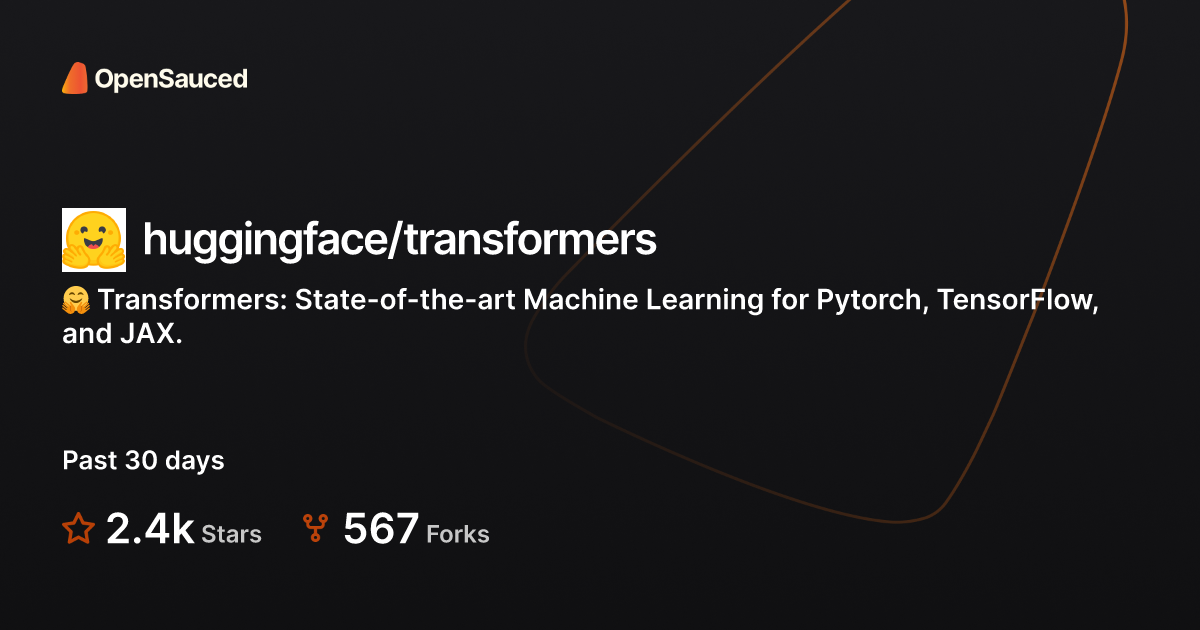
And here's the OG image for a repository page for huggingface/transformers.
Looking at the image for the jsr workspace, there is a template for the image, but there are several dynamic portions to the image.
All the sections denoted by green outlined squares are dynamic.
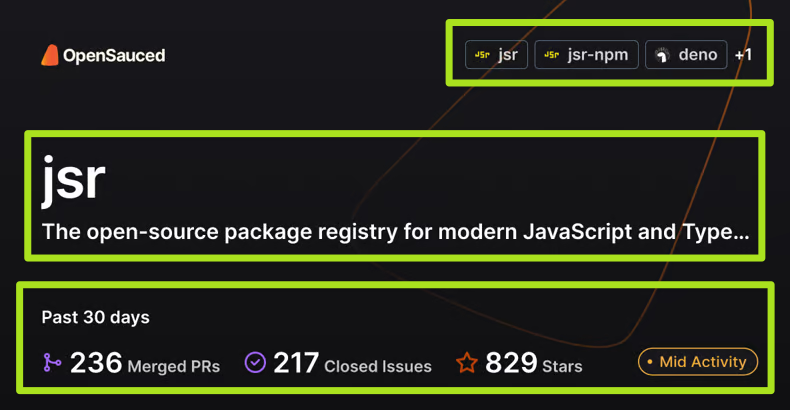
This dynamic info gets pulled in for the most part from the OpenSauced API.
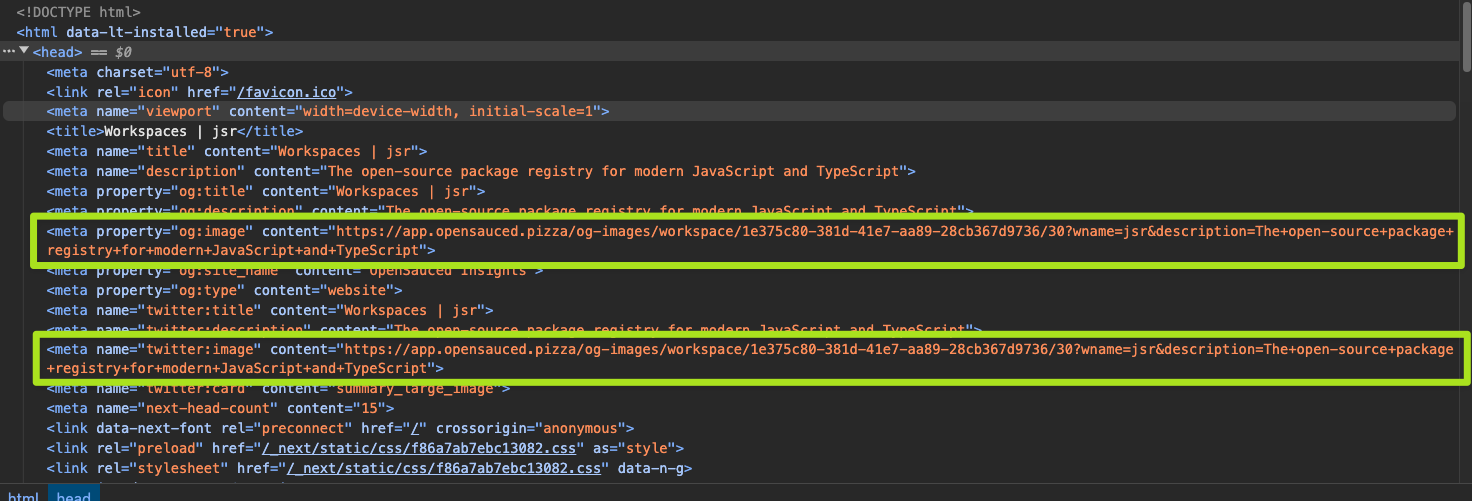
Other parts are pulled in from the URL, like 30 for the day range, and the description comes from the query string in the OG image URL.
So, how do we use React to generate an image?
We're using og_edge from my old co-worker Matt Kane (@ascorbic), but og_edge is a direct port of @vercel/og that works on Deno and Netlify Edge Functions which run on Deno.
The https://github.com/ascorbic/og-edge repository on GitHubUnder the hood, og_edge and @vercel/og use the Satori library.
The https://github.com/vercel/satori repository on GitHubSatori: Enlightened library to convert HTML and CSS to SVG.
The API for the og_edge module is pretty straightforward. It exposes an ImageResponse constructor with the following options and that's it.
new ImageResponse(
  element: ReactElement,
  options: {
    width?: number = 1200
    height?: number = 630
    emoji?: 'twemoji' | 'blobmoji' | 'noto' | 'openmoji' | 'fluent' | 'fluentFlat' = 'twemoji',
    fonts?: {
      name: string,
      data: ArrayBuffer,
      weight: number,
      style: 'normal' | 'italic'
    }[]
    debug?: boolean = false

    // Options that will be passed to the HTTP response
    status?: number = 200
    statusText?: string
    headers?: Record<string, string>
  },
)
Code snippet above care of the official og_edge API reference.
To build out these OG images, we have a background image, some icons, like a star and fork icon, and we also pull in the repository organization or user's avatar. With a bit of vanilla CSS, we can position things just right. We also pull in the Inter font as that's what we use at OpenSauced.
As far as I know, og_edge does not support Tailwind like @vercel/og does. Not a dealbreaker at all, but just something to be mindful of.
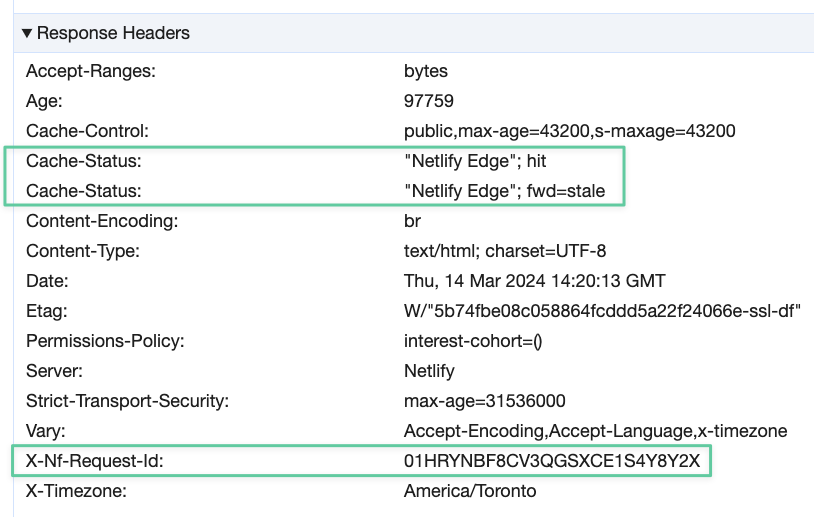
One other thing we do is set cache headers as these are dynamic images where the data changes over time. Having said that, some social networks cache OG images very aggressively.
      headers: {
        // cache for 2 hours
        "cache-control": "public, s-maxage=7200",
        "content-type": "image/png",
      },
Here's the pull requests for the initial work on these two OG images.
The https://github.com/open-sauced/app/pull/2939 repository on GitHubBeautiful and dynamic OG images are a must if you're looking to stand out when sharing links on socials, and og_edge and @vercel/og are great options if you also want to leverage your existing React skill set.
Now go out and build your own OG images! 🖼️
Stay saucy peeps!
If you would like to know more about my work in open source, follow me on OpenSauced.
]]>HTML Forms are cool because they have plenty of built-in features.
For example, they have native form validation and access to all the inputs in a form, and at some point, because you need to submit the form, there is a mechanism to do that as well. You can use a button, <button>submit</button> or an input of type submit, <input type="submit" />, although the latter isn't used as much these days in new sites, from what I've seen.
Here is a simple form to exhibit this.
See the Pen https://codepen.io/nickytonline/pen/JjVOarX by nickytonline (@nickytonline) on CodePen.
If you fill out the form and click submit, the form will submit and add a paragraph with dark green text client-side that says, "Form submitted".
There are other things in the simple form, like form validation via the required attribute on inputs, but that's not what we're here to discuss.
What we want to touch on is that the form was able to handle the submit event because it had a submit button associated with it, which was defined in HTML within the form element.
Note: you can press enter in fields to submit a form, but again, not what we're here to discuss.
This brings us to a new feature that I was working on for OpenSauced for a few months, workspaces. I encourage you to create your own, but for now, let's get back to the business of forms.
Here's our beautiful workspaces settings page that I implemented.
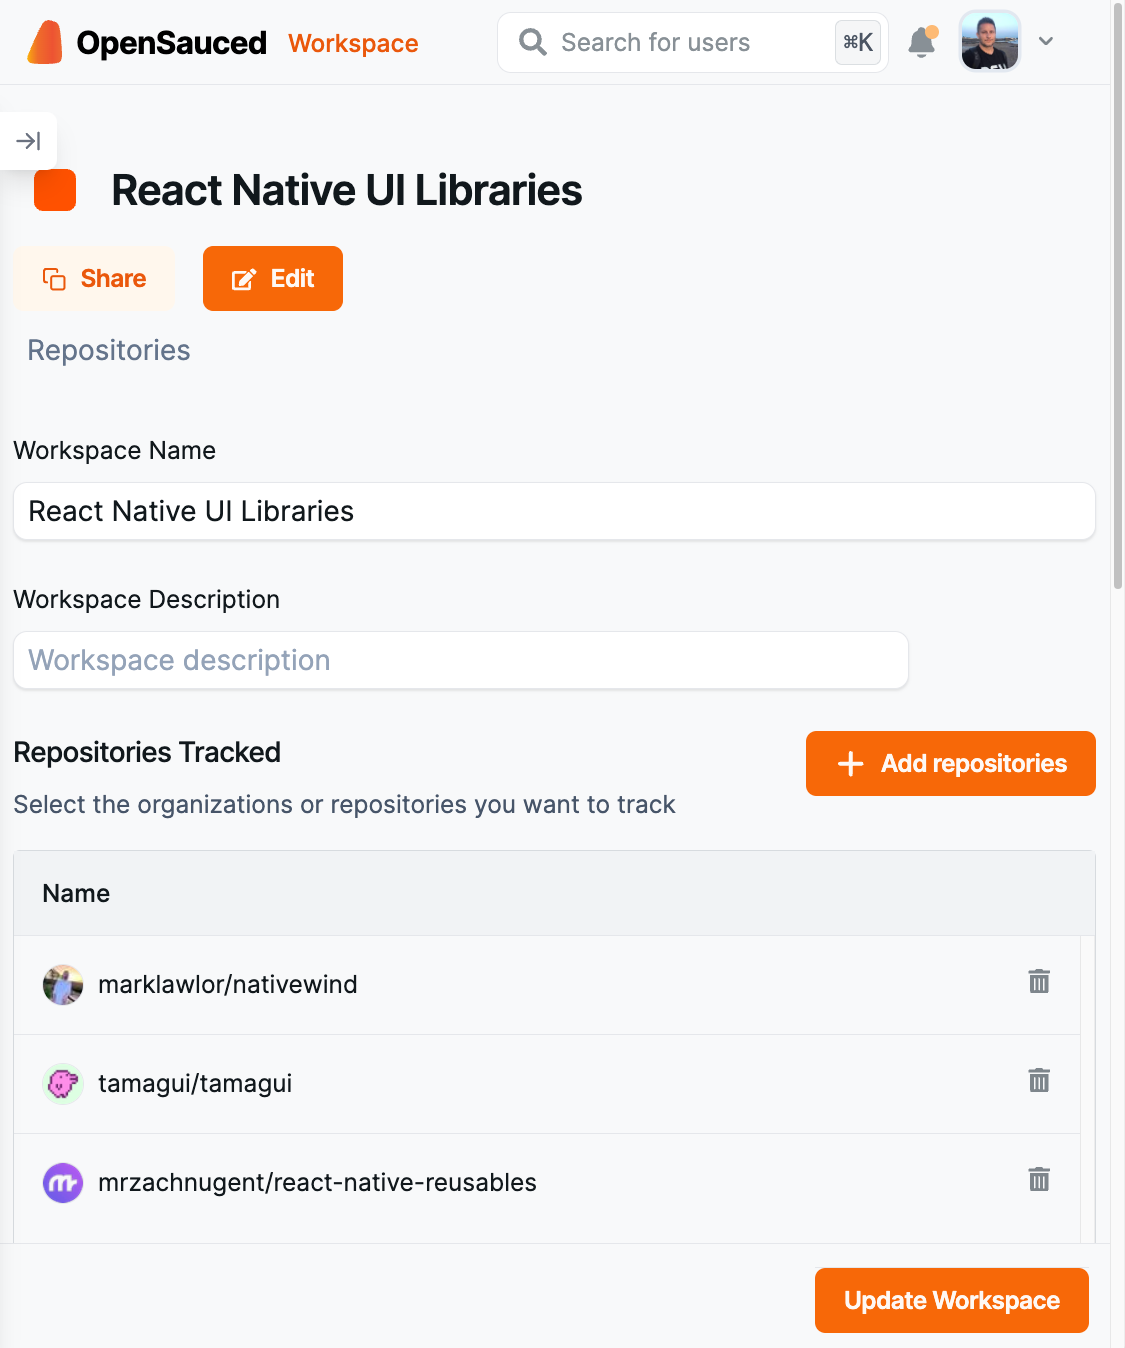
Recently, there were styling changes, which is what you see above.
The https://github.com/open-sauced/app/pull/2982 repository on GitHubEverything looked great, and I had tested it.
Narrator: he thought he had tested it, and we shipped things to production.
Once things went live, I decided to do some smoke tests, which I usually do. I went over to the beautiful workspace settings I had worked on, made some changes in the settings, and then clicked Update Workspace button. Hmm, no toast message saying the settings were updated. I checked the browser dev tools to see if there were any JavaScript errors. Nothing related to the updates. And then it dawned on me. The submit button was outside the form, and I just broke some key functionality in the app.

Side note, but luckily thanks to Netlify's deployment rollback feature, I was able to revert to the previous production deployment within about a minute of the workspace settings page being broken 😅
So how did I fix it? We needed this new styling to fix several other issues related to z-indexes and layout.
For some context, the OpenSauced application is a Next.js site, so React, but I decided to put on my old school HTML hat and remembered that form elements can be associated to a form via a form attribute. What you need to do is give the form an id attribute, and the form element that you want to associate the form to needs to have a form attribute whose value is the value of the id attribute for the form.
Here's another simple form demonstrating a simplified version of my fix.
See the Pen https://codepen.io/nickytonline/pen/XWQzPOX by nickytonline (@nickytonline) on CodePen.
I encourage you to remove the form attribute from the button in the above CodePen to see the issue I caused.
Here's the fix I rolled out to production.
The https://github.com/open-sauced/app/pull/3003 repository on GitHubLearning a framework is great, and I'm a big proponent of just building something, but as you continue on in your career, it's great to start getting some fundamentals into the mix.
Also, this is a perfect example of why using semantic HTML is important! It definitely helped me get out of jam! 😅
Stay saucy peeps!
If you would like to know more about my work in open source, follow me on OpenSauced.
]]>Middleware is something that happens in the middle of a user or some service interacting with a site or API call and happens at the framework level.
It runs before a page loads or an API endpoint is called, or more generally a route. There are many reasons why you might want to do that:
Let's dig in!
Authentication and authorization are two great candidates for guarding certain routes, although it’s still good to guard access to privied resources in API endpoints and pages. In this context, think of the middleware as the first line of defense.

In the OpenSauced application, when a user logs in and the path is /workspaces we redirect them to their workspace.
  if (session?.user && req.nextUrl.pathname === "/workspaces") {
    const data = await loadSession(req, session?.access_token);
    const workspaceUrl = getWorkspaceUrl(req.cookies, req.url, data.personal_workspace_id);

    return NextResponse.redirect(`${workspaceUrl}`);
  }
So what is a cookie?
A cookie is a way to set a piece of user-specific data. This could be a session ID for someone who is logged in to a site, or it could be some other user data. Note that the data in a cookie is typically not that large, but according to MDN, there is no size limit to the name or value of a cookie.

Cookies that are HTTP only can be accessed on the server-side, but for cookies that are not HTTP only, they can be accessed server-side and client-side. For example, you wouldn't want someone to tamper with your session ID on the client-side, so this type of cookie is set as HTTP only.
We recently shipped a new feature at OpenSauced, called Workspaces. You can read all about it in this great post from my co-worker Bekah (@BekahHW).
TLDR; a Workspace acts like a workspace in other software you may have used, like Notion. One thing required for this feature is when a user navigates to the /workspaces URL, it has to load the last accessed workspace. If a user has never accessed a workspace before, it should default to their personal workspace. This is a perfect use case to leverage using a cookie.
When someone logs in, we check if they have a workspace ID cookie set. If they don’t, we grab their personal workspace ID, a type of workspace every user has.
The code for this was in the code snippet in the last section.
const workspaceUrl = getWorkspaceUrl(req.cookies, req.url, data.personal_workspace_id);
Let's take a peek into the getWorkspaceUrl function.
export function getWorkspaceUrl(cookies: RequestCookies, baseUrl: string, personalWorkspaceId: string) {
  if (!cookies.has(WORKSPACE_ID_COOKIE_NAME)) {
    cookies.set(WORKSPACE_ID_COOKIE_NAME, personalWorkspaceId);
  }

  // @ts-expect-error the cookie value will be defined
  const workspaceId = cookies.get(WORKSPACE_ID_COOKIE_NAME).value;

  return new URL(`/workspaces/${workspaceId}`, baseUrl);
}
If there is no workspace cookie set, we create a cookie and set its value to the user's personal workspace ID.
After that, we read the cookie, we build a URL with it and the user is redirected to the workspace.
The other piece of this that doesn't occur in middleware is when a user visits a valid workspace page they have access to, we set the workspace ID cookie. Next time they go to the /workspaces link, the cookie will exist, and a URL using new URL() will be used to redirect them to the last accessed workspace homepage.
The page will call the OpenSauced app's setCookie function.
export function setCookie({
  response,
  name,
  value,
  maxAge = 31536000,
  sameSite = "Lax",
}: {
  response: Response;
  name: string;
  value: string;
  maxAge?: number;
  sameSite?: SameSite;
}) {
  response.setHeader(
    "Set-Cookie",
    `${name}=${value}; Max-Age=${maxAge}; Path=/; HttpOnly; SameSite=${sameSite}; Secure`
  );
}
Although cookies are their own thing, you have set them in a header.
As mentioned in the previous section, you set cookies via a header. So what is a header, more specifically, an HTTP header?
Headers are a set of key value pairs to let a browser know how to behave, for example, should a page be cached? It can also be custom key value pairs that your application or services might need. For example, when I worked at Netlify, for the CDN to work, there would be Netlify-specific headers that once inside the internal network would allow Netlify to do some magic.
If you go to my website, nickyt.co, and open the network panel in the dev tools of your browser of choice, you'll see some Netlify-specific headers.
I recently gave a talk on Fresh, a full-stack framework for Deno at Node Summit '24. The recording isn't up yet, but here's the slide deck and code from the demo for anyone interested.
In Fresh middleware, this is how you could set a header.
export async function handler(
  request: Request,
  ctx: FreshContext<State>
) {
  const response = await ctx.next();
  response.headers.set("x-fresh", "true");

  if (request.url.includes("joke-of-the-day")) {
    response.headers.set("x-joke-page", "true");
  }

  if (request.url.includes("movie/")) {
    response.headers.set("x-movie-page", "true");
  }

  return response;
}
In the above code snippet, we're checking to see if a specific route contains a certain string and if it does, we set a custom header, e.g.
response.headers.set("x-joke-page", "true");
Page redirection allows you to have a URL go to another URL. You might do this for a couple of reasons. Maybe a bunch of links on your site changed, and you need to have them go to a new set of links, or you have a URL that needs to redirect to a user-specific page.

For non-trivial redirects like the workspaces redirect URL mentioned in one of the previous sections, middleware is a great place for handing redirects.
  if (session?.user && req.nextUrl.pathname === "/workspaces") {
    const data = await loadSession(req, session?.access_token);
    const workspaceUrl = getWorkspaceUrl(req.cookies, req.url, data.personal_workspace_id);

    return NextResponse.redirect(`${workspaceUrl}`);
  }
In this case, when someone in the OpenSauced application goes to /workspaces we redirect them to a user-specific URL.
return NextResponse.redirect(`${workspaceUrl}`);
Not a hard and fast rule, but if you have trivial redirects like redirect /old-blog-path/* to /blog/*, consider using your hosting platform's redirects instead of middleware.
You can also do URL rewrites. It's like a redirect, but the URL never changes. Frameworks like Next.js provide this out of the box in their configuration file, but for more complex handling, you may want to do it in middleware. So what is a URL rewrite? A rewrite will preserve the existing URL but will render content from another URL.

Here's a slightly modified example straight out of the Next.js middleware documentation:
import { NextResponse } from 'next/server'
import type { NextRequest } from 'next/server'

export function middleware(request: NextRequest) {
  if (request.nextUrl.pathname.startsWith('/dashboard')) {
    return NextResponse.rewrite(new URL('/dashboard/user', request.url))
  }
}
In the above snippet, all users have a /dashboard page they go to, but every user's dashboard is different. In this case, the user will always see the page as /dashboard but it loads the specific user's dashboard.
Here's the documentation for middleware of the mentioned frameworks:
Middleware is a great tool and if your framework of choice supports middleware (most do), I encourage you to read up on how to leverage it in that framework.
What use cases have you used middleware for? Please let me know in the comments.
Stay saucy peeps!
If you would like to know more about my work in open source, follow me on OpenSauced.
]]>Venue: Confoo 2024
Summary: Fresh is a web framework based on Web standards built to run on the edge anywhere you can run Deno.Fresh takes inspiration from existing frameworks to provide features like file-based routing, Islands architecture, server-side rendering and Typescript.
We’ll go through the features and architecture so that you can get up and running with Fresh today.
Links:
]]>Venue: Global Summit for Node.js '24
Summary: Fresh takes inspiration from existing frameworks to provide features like file-based routing, Islands architecture, server-side rendering and Typescript. We'll cover what makes Fresh possible, i.e. Deno and Preact, then dive into what Fresh is (a metaframework).Links:
]]>Venue: Confoo 2024
Summary: We discuss the fundamentals of browser extensions (Chromium browsers & Firefox), explore the current options available for end-to-end testing, and dive in to some live coding to see it in action.By the end of this presentation, you'll have the knowledge and skills to implement end-to-end testing for your own browser extension.
Links:
]]>If you're pretty well versed with Tailwind, this article might not be for you, but who knows? Read on and maybe you'll learn something.
I'm coming in with what, I think, is a fresh perspective. I'm using Tailwind for the first time professionally. Furthermore, I don't consider myself a CSS expert, but I think I have pretty solid CSS skills.
I mention all this, to convey a sentiment, I've seen many people exhibit. You're using Tailwind because you don't understand CSS. I do understand CSS.
So the first thing that I've seen when people say when they do not like Tailwind, is that it's not CSS, or it's inline CSS. This is completely false, even coming in as a newbie to Tailwind, all Tailwind is, at the end of the day, once it's compiled, is CSS utility classes.
So let's look at some comparisons between Tailwind and "real" CSS. I'm going to put the vanilla CSS in a style tag, but you could also put it in a .css file and link it in the head of your HTML or however your application bundles CSS. This is just for the sake of comparison.
Vanilla CSS
<style>
  .my-list {
    display: flex;
    flex-direction: column;
    gap: 1.5rem;
  }

  .my-list li {
    border-width: 1px;
  }
</style>
<ul class="my-list">
  <li>Item 1</li>
  <li>Item 2</li>
  <li>Item 3</li>
</ul>
Tailwind
<ul class="flex flex-col gap-6">
  <li class="border">Item 1</li>
  <li class="border">Item 2</li>
  <li class="border">Item 3</li>
</ul>
So the first thing someone might say is that Tailwind is repeating the border CSS class on a list item, <li>, instead of using a selector that can target the li DOM elements. This is true, but Tailwind allows you to create the equivalent of .my-list li. You can do the following:
<ul class="flex flex-col gap-6 [&_li]:border">
  <li>Item 1</li>
  <li>Item 2</li>
  <li>Item 3</li>
</ul>
This is probably where someone might say, "Well, now you're just writing inline CSS." This is also false. It will generate a CSS rule based on the [&_li]:border CSS class name. It will compile it to literal CSS that will generate an equivalent CSS rule comparable to the CSS rule for the .mylist li selector.
In fact, this is what it compiles to. I've formatted it since it gets minified.
.\[\&_li\]\:border li {
  border-width: 1px;
}
You could make an argument that the "real" version looks nicer, but this isn't a strong argument, and you have CSS source maps if you open the browser dev tools.
I'll say it here and repeat it again later. Tailwind is a utility-first CSS framework. It's not inline CSS.
If you want to see an example of this in production grade code, check out a recent pull request (PR) of mine to the OpenSauced app repository.
The https://github.com/open-sauced/app/pull/2524 repository on GitHubWhat about something more complex like pseudo-elements? Let's take the ::before pseudo-element for a spin.
Vanilla CSS
<style>
.pizza-time::before {
  content: attr(data-inset-label)
}
</style>
<p data-inset-label="🍕" class="pizza-time">
  OpenSauced is awesome!
</p>
Tailwind
<p data-inset-label="🍕" class="before:content-[attr(data-inset-label)]">
  OpenSauced is awesome!
</p>
Here's what it generates as CSS when Tailwind compiles that CSS class.
.before\:content-\[attr\(data-inset-label\)\]:before{
  --tw-content:attr(data-inset-label);
  content:var(--tw-content)
}
You could complain that that is one hell of a bloated CSS class name, but again, I don't think this is a colossal deal.
If you want to see an example of this in production grade code, check out a recent PR of mine to the OpenSauced app repository.
The https://github.com/open-sauced/app/pull/2552 repository on GitHubIf you're looking to add animations, Tailwind ships with plenty of useful animations and CSS classes to leverage them.
Need a custom animation? You can do that as well. I won't go into it here, but here's a great post about writing custom animations in Tailwind.
You've got all these cool animations, but what if someone has specified prefers-reduced-motion? Tailwind can handle that for you as long as you prefix your animation with motion-safe:, e.g.
<p class="motion-safe:animate-spin">Spinning text</p>
There's other useful Tailwind classes for accessibility, like sr-only, which will remain in the page, but only be visible to screen readers.
I think something that would be interesting to add to the Tailwind a11y story is using Tatiana Mac's (@tatianamac) approach of taking a no-motion-first approach to animations.
I'm all for components, and I'm a big fan of JSX. Tailwind pairs nicely with components, but I do think that it's still good to have some base styles defined, even if you are using components.
For example, a base font size and colour, focus state styles, headings etc. This is what I ended up doing in the OpenSauced app repository.
Tailwind CSS on its own is not like bootstrap. It's just CSS utility classes, whereas bootstrap is UI components and CSS.
I've never used it, but maybe you could fall into this trap with Tailwind UI.
Like many things, there are tradeoffs. I think the biggest one is learning the Tailwind CSS classes and naming conventions for building them, but I think the benefits outweigh this. And to be honest, once you start writing the classes frequently, the naming convention just sticks in your head.
And if you have some super complex CSS, for whatever reason, Tailwind can't handle, there's nothing wrong with adding some custom CSS.
I literally only started using Tailwind September 18th of 2023 when I started at OpenSauced.
Tailwind has made me super productive while building out OpenSauced, and I've used it in some other projects since then.
Remember, Tailwind is a utility-first CSS framework. It's not inline CSS.
I encourage you to give Tailwind a go. They have outstanding documentation and great IDE support to help you along the way.
If you give it a go and say it's not for me, that's OK. Use what makes you the most productive.
Stay saucy peeps!
If you would like to know more about my work in open source, follow me on OpenSauced.
]]>It's something I enjoy doing even though I don't have tens of thousands of followers like some other live streamers. I do make some money from Twitch at the moment, but it's pretty negligible at the moment. This is also why I've been pretty conservative in regards to equipment (for now), although my microphone isn't too bad (Blue Yeti) and a couple years ago, I treated myself to a Stream Deck.
When it comes to cameras and lighting though, I can't justify breaking the bank, at least for now where I am in my live streaming career. Up until last Saturday, I was live streaming using two super cheap ring lights. One clipped to my cupboard above my desk, and one on the left side of my desk. They've done a good job up until now.

I can't remember where I came across the Logitech Litra Glow, but I read up on it and it received amazing reviews. I had a gift card to Best Buy Canada, so I decided to purchase it.
It's the start of the year, but I'm pretty certain this will be one of my best purchases for the year.
There's not much to the light in a good way. It sits on you monitor and you can adjust the height as well as change the angle of the light,
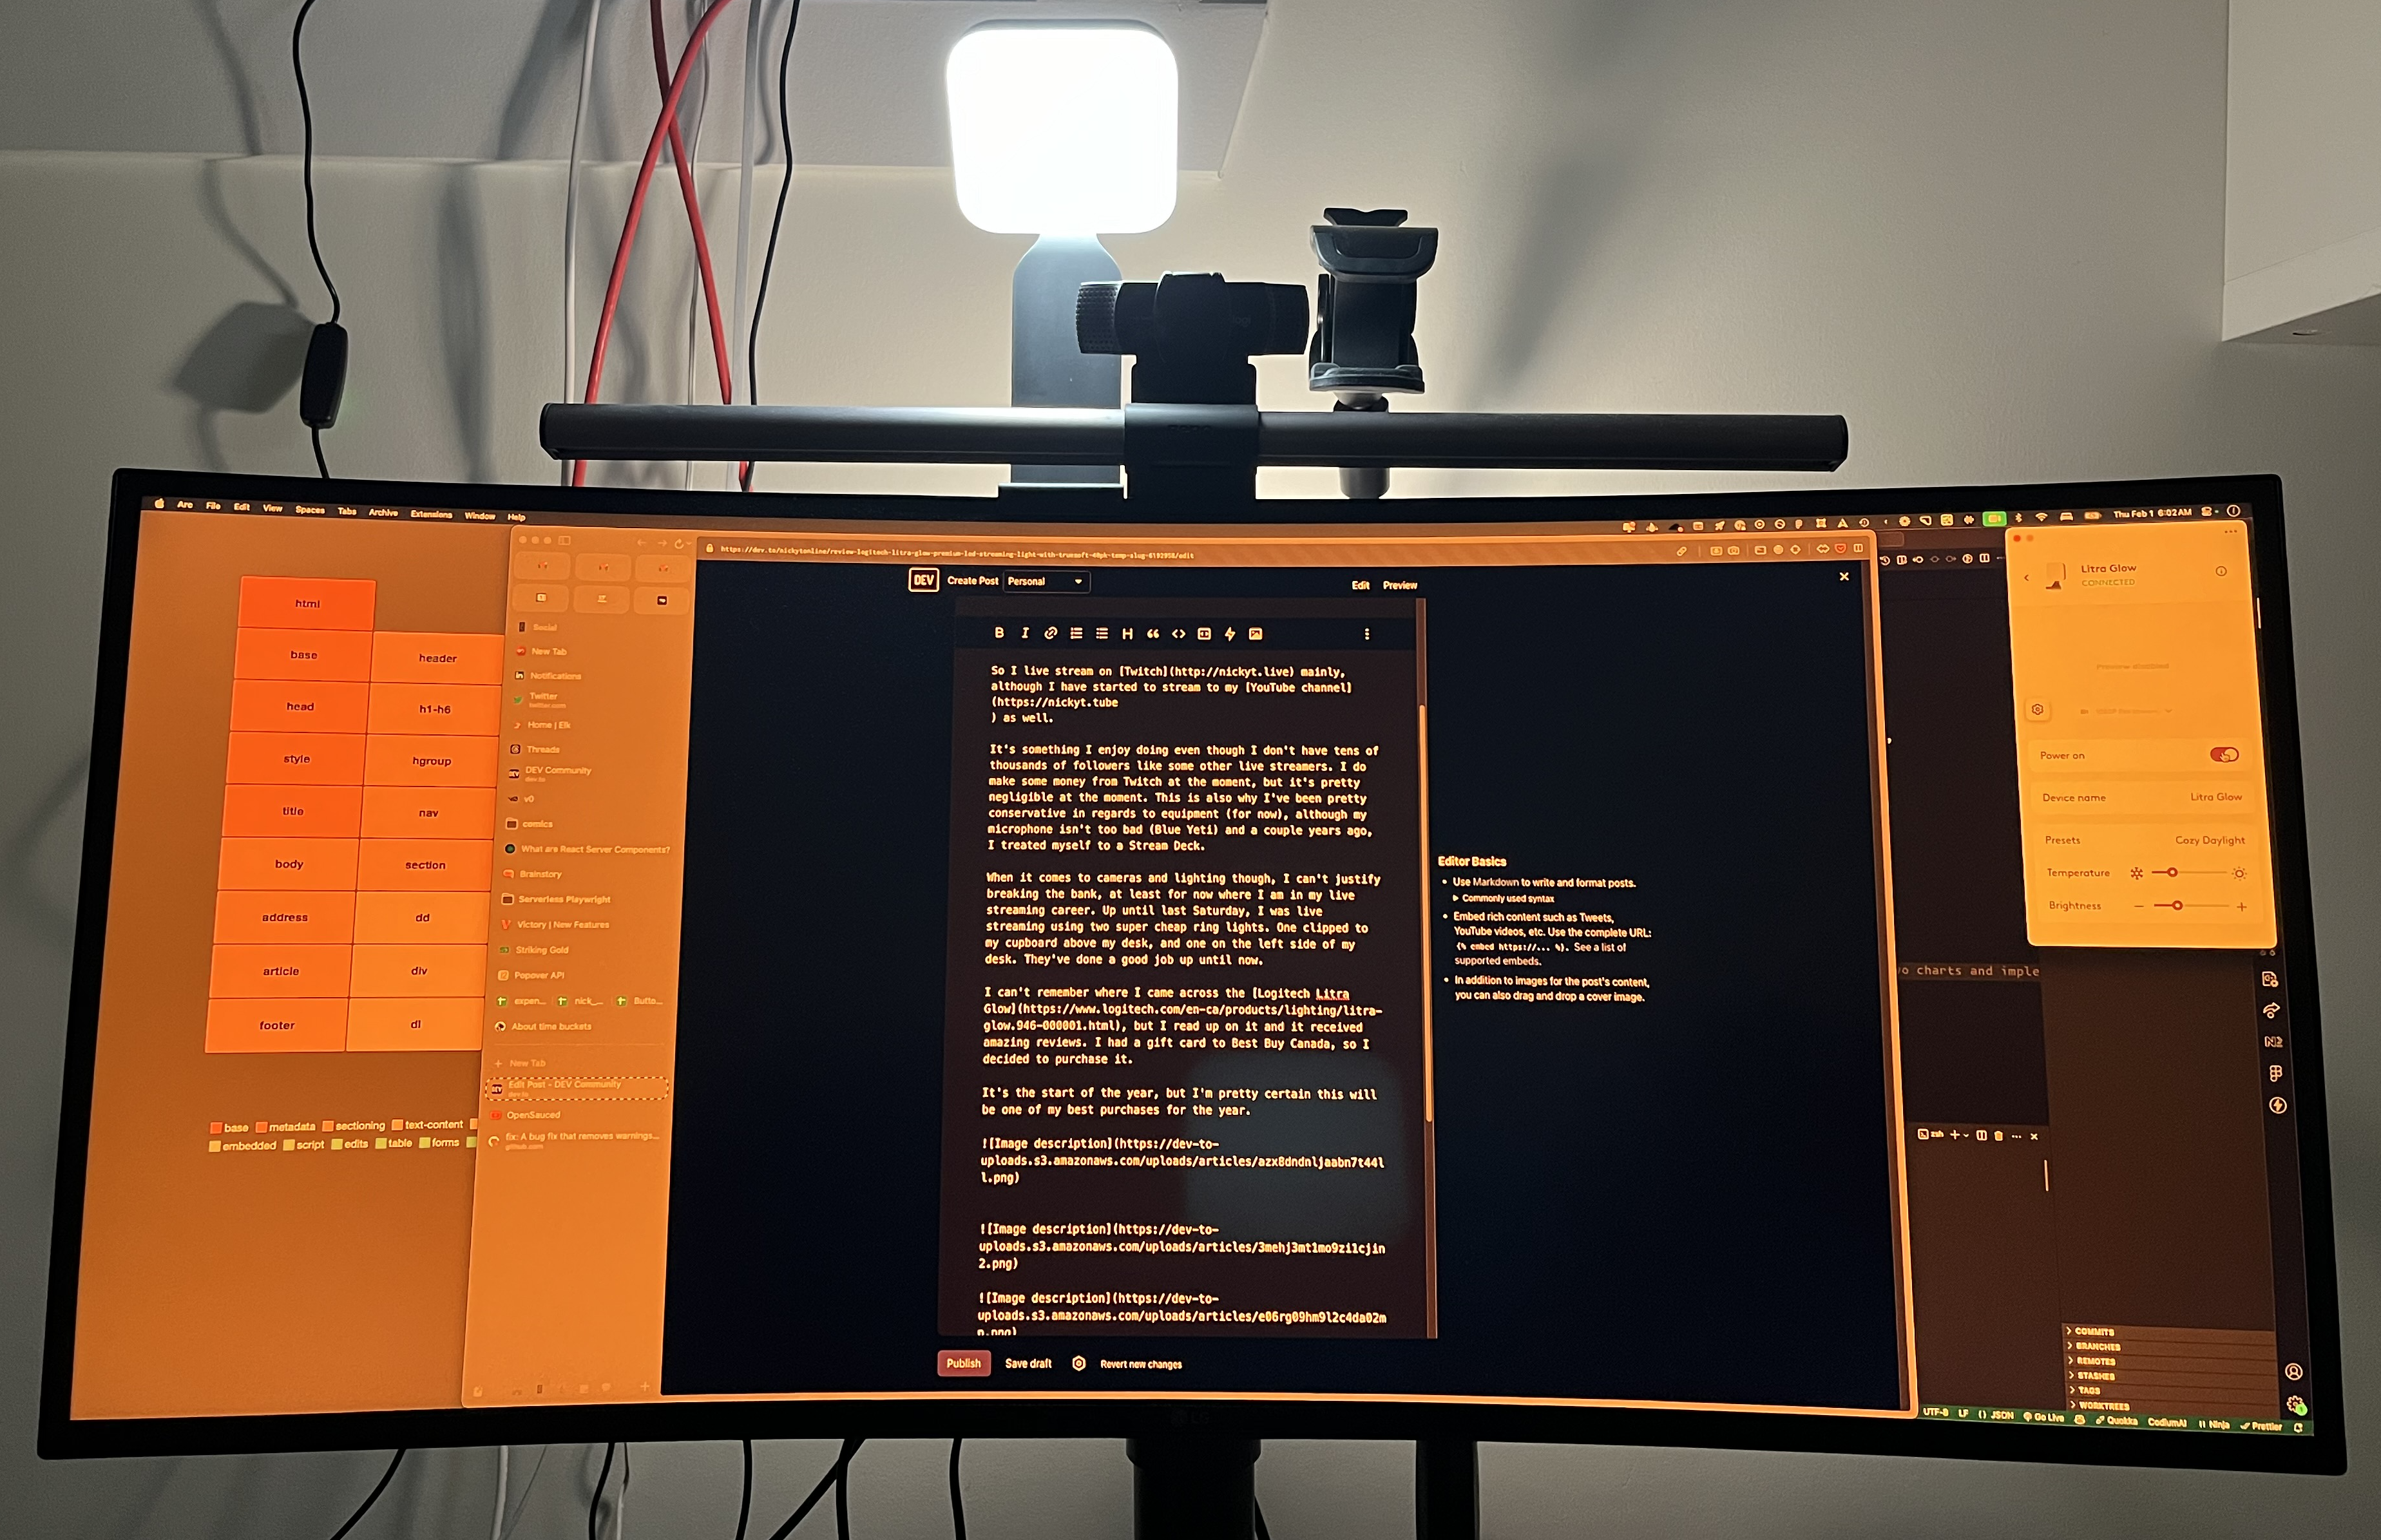
On the rear of the Litra Glow are physical buttons to turn it on, change brightness or change the colour temperature.

The light was already amazing, but once I installed the software for the Litra Glow, I was blown away how well and easy it worked.
First off you can turn it on and off using the software which is nice so that I don't have to fumble around behind my monitor.
Tweaking the temperature of the light is super easy as well. You can adjust it manually or choose a preset.
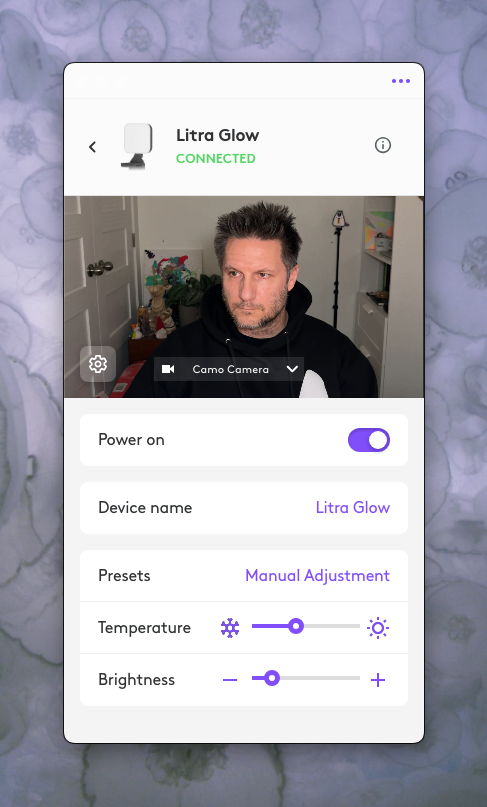
I've currently been enjoying the Cozy Daylight preset.
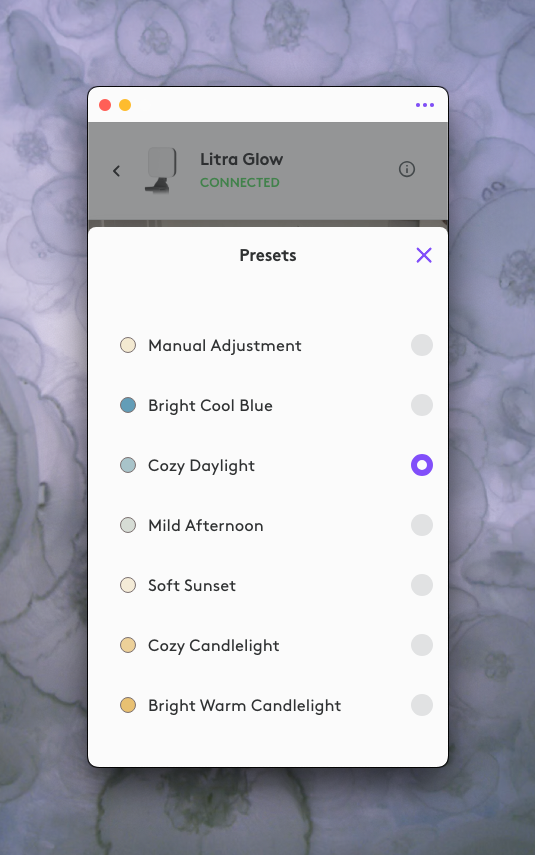
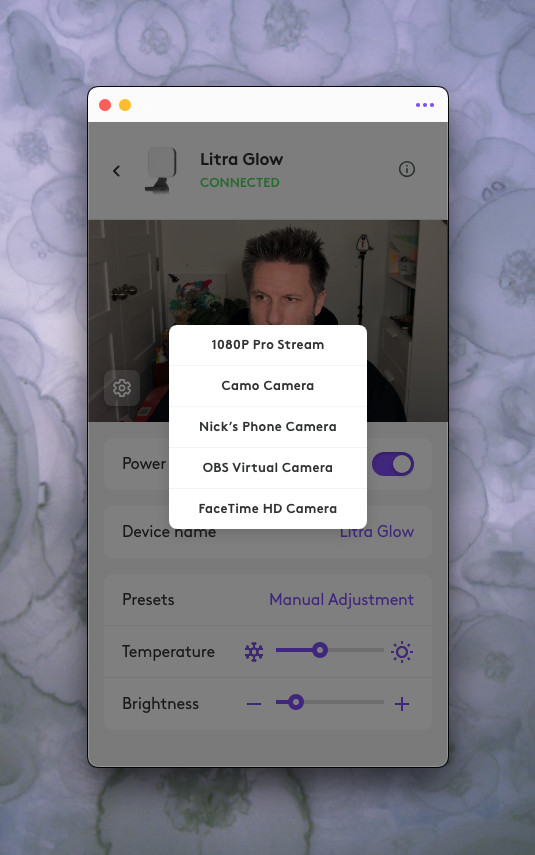
You can also preview your camera to adjust the lighting.
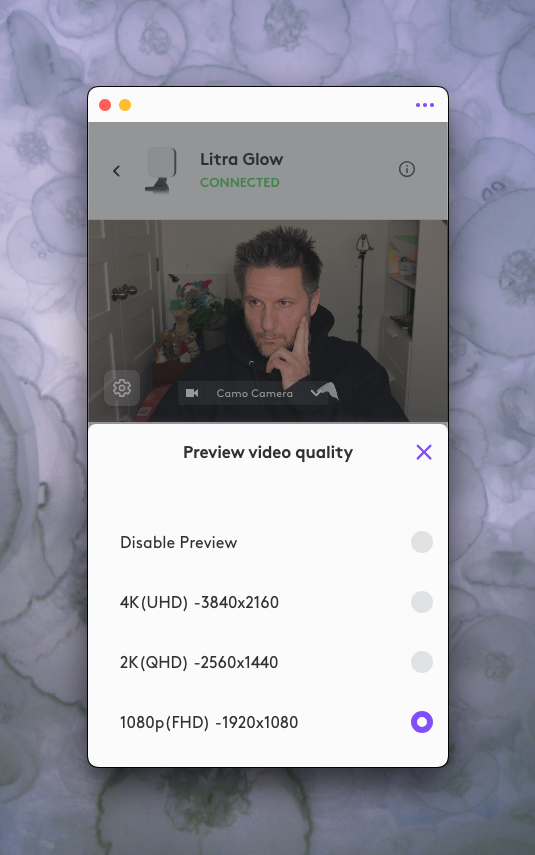
You can also set the resolution of the preview
This was a really nice upgrade for me, and again, I know there are better lights out there, but for 80$ CAD + taxes, this is a really great budget light for streaming/meetings that you should consider.
]]><dialog > element. Why add this HTML element? User land code, code that developers write to fill in gaps of the browser, was doing similar things repeatedly, especially around focus trapping, and browser engines responded by adding this functionality directly in the browser.
What is focus trapping? It's a feature where you do not want focus outside a specific element, and that element typically contains focusable elements.
For example, a form in a modal to confirm an action: As a user uses the keyboard to navigate, they go to the next focusable element, e.g. a button.
If they reach the last focusable element in the modal, without focus trapping, the focus would go to the next focusable element in the document object model (DOM). With focus trapping, you go from the last focusable back to the first focusable element in the parent element.
In user land, popular packages like focus-trap have enabled developers to incorporate focus trapping.
With the dialog element, you get this for free, although there is a gotcha. If you add a dialog element to the page with the open attribute set, the dialog element will become visible on the page; however, focus trapping will not work as you'd expect in a modal.
From the API documentation:
Note: While you can toggle between the open and closed states of non-modal dialog boxes by toggling the presence of the open attribute, this approach is not recommended.
To get focus trapping working, the JavaScript API is required. You can display a modal on the screen by calling the HTMLDialogElement showModal method.
Note that you'll need to view this CodePen in full view because, for some reason, modal dialog focus trapping does not work in the CodePen editor view.
See the Pen https://codepen.io/nickytonline/pen/NWJvbPe by nickytonline (@nickytonline) on CodePen.
Not only do you get focus trapping, you also get modal close functionality that people have come to expect via the Escape key.
All of that is already amazing, but another common thing people were doing in user land was adding a background to block out users from interacting with the page. With the <dialog> element, we can add a ::backdrop pseudo-element that does this for you. All you need to do is style it. In the CodePen above, uncomment out this code in the CSS panel to see this in action.
dialog::backdrop {
  background-color: purple;
  opacity: 0.55;
  filter: blur(100px);
}
The structure of a non-modal dialog element is the same as a modal dialog. The main difference is to show a non-modal dialog, you need to call the HTMLDialogElement show method.
With a non-modal dialog, the user is not blocked from navigating the rest of the page, i.e. no focus trapping, and the Escape key will not automatically close the dialog.
See the Pen https://codepen.io/nickytonline/pen/ExMvNJw by nickytonline (@nickytonline) on CodePen.
To close a dialog or modal, we can use the HTMLDialogElement close method.
const modal = document.querySelector("dialog");

// some button in the dialog that has a click event listener registered
modal.querySelector("button").addEventListener("click", () => {
  modal.close();
});
The web platform keeps getting better. It's great to see pain points in user land that had user solutions come natively to browser land.
Stay saucy peeps!
If you would like to know more about my work in open source, follow me on OpenSauced.
]]>2022 ended with layoffs at Netlify, so coming back from the Christmas break still felt a bit weird. I was glad that I was not part of the layoffs, but it still felt weird surviving them.
Regardless, I got back in the saddle for 2023. Being on the frameworks team at Netlify means you never have a dull day. 😅
I ended up creating the Remix Netlify Edge Functions adapter.
The https://github.com/netlify/remix-compute/pull/16 repository on GitHubI also, along with the rest of the team, continued to work on the Next.js runtime for Netlify.
The https://github.com/netlify/next-runtime repository on GitHubEventually, the Remix Netlify Functions adapter made its way into the remix-compute repository, but that was more Logan from the Remix team than me. I just brought it across the finish line.
The https://github.com/netlify/remix-compute/pull/83 repository on GitHubMore layoffs happened at Netlify in July, which I did survive once again, but I saw some great teammates leave the organization. It was stressful, and the work I did on the frameworks team was pretty demanding as well, and I kind of got burnt out.
That said, my team there is still awesome and my manager, Marc Littlemore (@marclittlemore) was the best. Always championing for me and always up for a good chat even during stressful times. Aside from Marc, Claire Knight, who was my previous manager and then director of my part of the organization, was also wonderful. Both are really great, genuine people who have your back. No Game of Thrones shit going on there. I was so lucky to have them as managers.
In the end, though, it was time for a change. I want to thank all my Netlipeeps for being so awesome while I was there.
For those that know me, I'm a big fan of open source. I've been working in open source since 2015, and professionally since January 2020. I actually used to work at dev.to where you might be reading this year in review post.
The way I decide to contribute to open source projects is I find a project I like, use, or both. That's how it started for DEV, and that's how it started for where I work now, OpenSauced!
I think my first contribution to the OpenSauced organization was a couple of years ago. I was a fan of all the work Brian Douglas (@bdougieyo) had been doing at GitHub in DevRel, and in his new company, OpenSauced.
I first met bdougie on the DEV Twitch stream a couple of years ago where we discussed Hacktoberfest, open source and OpenSauced.
And then we hung out again a couple of times on my own Twitch stream.
Fast-forward to me contributing to some of the projects in the OpenSauced org, and now I work there as a Senior Software engineer!
I started there, September 18th and haven't looked back. We had a successful Product Hunt launch in the fall, I shipped a tonne of stuff, and we've got all kinds of goodies coming in 2024!
It was another big year for content creation for me.
First off, I have to give a big shoutout to my good friend and now co-worker Bekah (@BekahHW). Although I had blogged before working at OpenSauced, she pushed me to blog more.
I'm not going to list all my posts, but I wanted to drop a few that, I thought, were pretty solid.
It was another big year for me on Twitch. Consistency is the name of the game. So many great guests throughout the year. I wrapped up the 2023 live stream season with Saron Yitbarek (@saronyitbarek) with a great discussion about Not A Designer.
I've been a fan of Brian Rinaldi's (@remotesynth) for a while. He's doing so many great things in the developer community, so when he asked if I'd like to start guest streaming on the CFE YouTube channel, it was a no-brainer.
The live stream is called 2 Full 2 Stack and I do it once a month, typically the second to last week of the month.
Here's one of the episodes if you want to get a feel for the live stream.
My own podcast went to the wayside in 2023. I've got to get that back up and running in 2023. 😅
I still managed to make it on a bunch as a guest, though.


I gave some more talks at meetups and lunch and learns, but this year was the first time I gave a conference talk. Unfortunately, it wasn't in person, but it still felt good to give my first conference talk.
Once again, I was a part of the front-end test fest expoert panel. It was great hanging with Colby and Christina and Joe.
Here's all my talks if you want to check them out.
This was my first year attending conferences. Originally, I had planned to attend the one conference, RenderATL thanks to my work education stipend, but Netlify also sent me to Remix Conf. Later in the summer, I decided to attend one in Toronto on my own dime which was super fun as well, Refactor: DX.
I finally got to meet a tonne of people that I'd only ever spoken to on Zoom or Twitter. So great connecting with so many folks.
Here's a few pics:
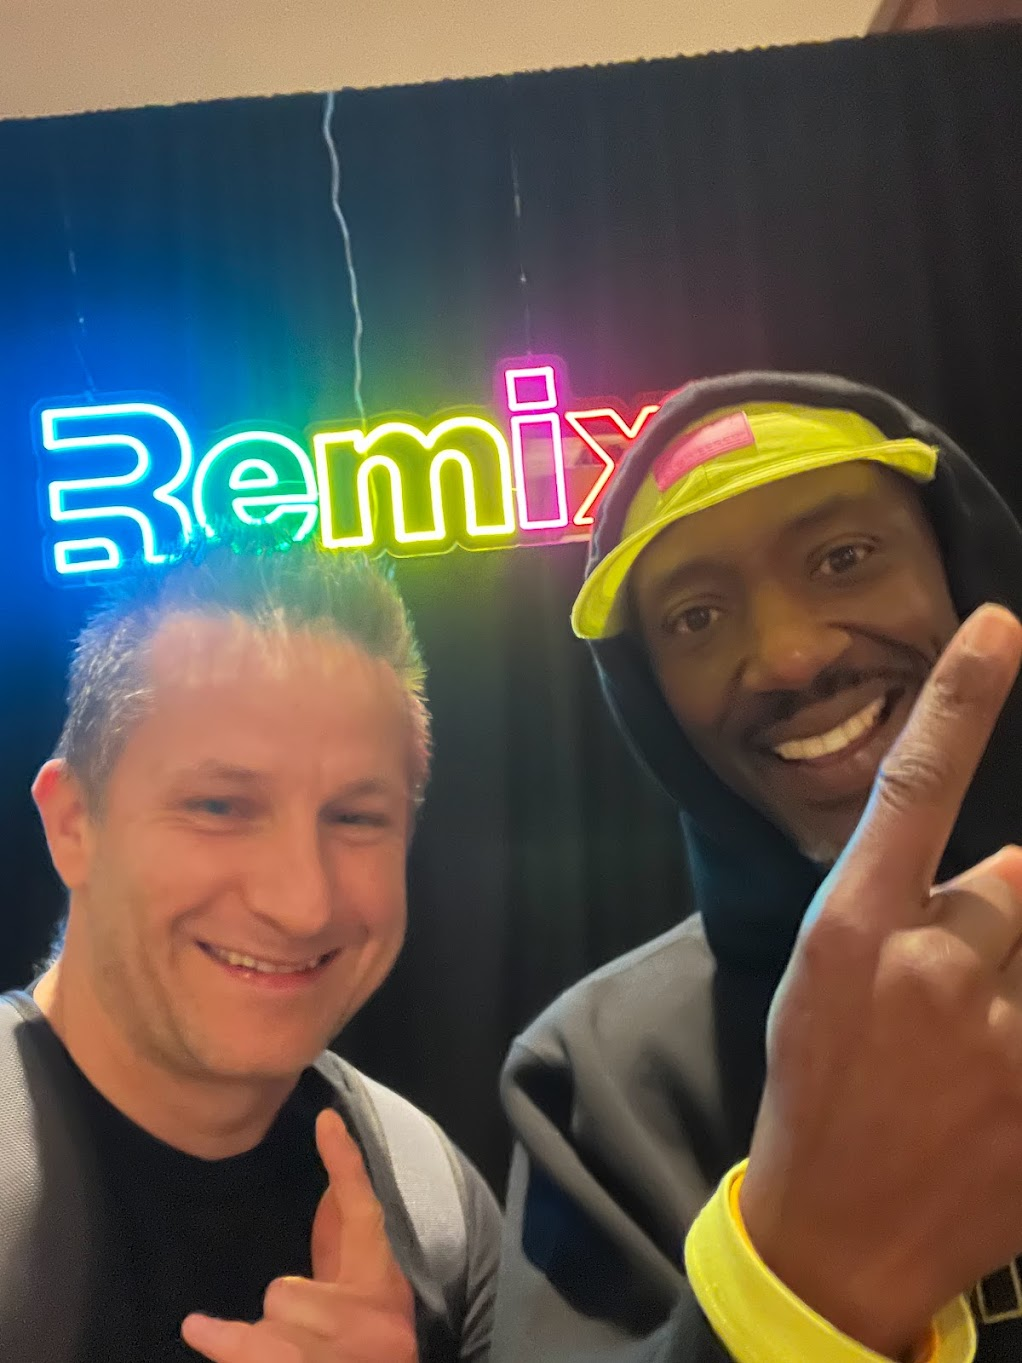
Remix Conf


Here's my whole Remix Conf 2023 album for anyone interested.
RenderATL

Here's my whole RenderATL 2023 album if folks want to check out more pics.
Refactor: DX


Here's my whole Refactor: DX 2023 album if folks would like to check out more pics.
What a whirlwind year 2023 was. It started off with coming back from Christmas break post layoffs at Netlify and finishing off the year with making a big impact at OpenSauced.
I'm pumped for 2024! How about you?
Photo by Kajetan Sumila on Unsplash
]]>I recently migrated the OpenSauced app repository to Vitest. Here's the pull request if you're interested.
The https://github.com/open-sauced/app/pull/2296 repository on GitHubBoth Jest and Vitest are great testing frameworks, so why bother switching?
Vitest supports ECMAScript modules (ESM), TypeScript out of the box.
Jest requires additional setup for both, although there is experimental support for ESM.
Vitest is also fast. Yes, it depends, but in general, it's faster. (See the Vitest comparison with other test runners)

If you're already using Vite in your project or the meta-framework you're using is based on Vite, using Vitest is a no-brainer as you're already in the Vite ecosystem.
If your project isn't using Vite, e.g. Next.js, it's still a great move.
Vitest makes it effortless to migrate from Jest. It supports the same Jasmine like API.
TLDR; You don't need to update existing tests, as it’s mostly a drop-in replacement for Jest.
Some other niceties are a default watch mode care of Vite instant Hot Module Reload (HMR).
The first thing you want to do is install Vitest.
The https://github.com/vitest-dev/vitest repository on GitHubRun npm install vitest -D in the terminal to install Vitest as a dev dependency.
Next up, create a vitest.config.ts file in the root of your project. Even if you're not using TypeScript, name it vitest.config.ts.
In that file, add the following code and save it.
import { defineConfig } from "vite";

// https://vitejs.dev/config/
export default defineConfig({
  test: {
    // some paths to the files that are test files
    include: ["./**/*.test.ts", "./**/*.test.tsx"],
  },
});
You can explicitly import describe, it/test, expect or you can have it work like in Jest where they're all globals. All you need to do is set globals to true in the Vitest configuration.
 import { defineConfig } from "vite";

 // https://vitejs.dev/config/
 export default defineConfig({
   test: {
     include: ["./**/*.test.ts", "./**/*.test.tsx"],
+    globals: true,
   },
 });
At OpenSauced, we're using Next.js to build out the main application.
Vitest is based off Vite which supports React via their plugin ecosystem, so you'll need to install the Vite React plugin to get React support.
Run npm install @vitejs/plugin-react -D to install the plugin as a dev dependency.
Update the Vitest configuration to add the React plugin.
 import { defineConfig } from "vite";
 import react from "@vitejs/plugin-react";

 // https://vitejs.dev/config/
 export default defineConfig({
+  plugins: [react()],
   test: {
     include: ["./**/*.test.ts", "./**/*.test.tsx"],
     globals: true,
   },
 });
If you happen to be using React Testing Library in your project, you'll need to keep the jsdom dev dependency installed.
Next, add jsdom to your Vitest configuration.
 import { defineConfig } from "vite";
 import react from "@vitejs/plugin-react";

 // https://vitejs.dev/config/
 export default defineConfig({
   plugins: [react()],
   test: {
     include: ["./**/*.test.ts", "./**/*.test.tsx"],
     globals: true,
+    environment: "jsdom",
   },
 });
Your project might be using aliases for paths. For example, in the OpenSauced app repository, components, lib, and img are aliases to folders.
If you need to support aliases, Vitest has you covered.
Here's an example of supporting the above-mentioned aliases.
 export default defineConfig({
   plugins: [react()],
+  resolve: {
+    alias: {
+      components: fileURLToPath(new URL("./components", import.meta.url)),
+      lib: fileURLToPath(new URL("./lib", import.meta.url)),
+      img: fileURLToPath(new URL("./img", import.meta.url)),
+    },
+  },
   test: {
     include: ["./**/*.test.ts", "./**/*.test.tsx"],
     globals: true,
     environment: "jsdom",
   },
 });
If you're using TypeScript, you can add the types for Vitest to the project.
In your tsconfig.json file, add the types in the compiler options section of the TypeScript configuration file.
 {
   "compilerOptions": {
     // . .. other compiler options in your project
+    "types": ["vitest/globals"]
   }

   // . .. other TypeScript configuration options in your project
 }
To run tests using Vitest, you can run vitest. By default, it will go into watch mode. If you only want to run the test suite once, e.g. for the CI/CD pipeline, run vitest run.
If your project is a TypeScript project, you probably have the types for Jest in your project. If you do, run the following to remove the Jest TypeScript types.
npm uninstall -D @types/jest
Uninstall Jest itself.
npm uninstall jest jest-environment-jsdom -D
And that's it! Happy testing!
Stay saucy peeps!
If you would like to know more about my work in open source, follow me on OpenSauced.
]]>The graph is interactive, where you can navigate with the keyboard or hover over parts of the graph and a list item is bolded.
Here's the pull request.
The https://github.com/open-sauced/app/pull/2158 repository on GitHubSo what's this have to do with HTML data attributes? Well, before we get into that, what is an HTML data attribute? And what is an HTML attribute?
HTML elements have a predefined set of attributes that are valid attributes. You are probably familiar with a lot of them.
For example, a text input, is an input HTML element that has a type equal to text. type is an attribute.
Another one you are likely familiar with is class. This is the attribute you use to add one or more CSS classes to an HTML tag.
<a href="/awesome-product" class="funky-link">Awesome Product</a>
Note: If you've worked mainly with React, the className prop on a component generates an HTML class attribute when your component renders.
You can create non-standard attributes, like item or productId that will work, but if you want to access them, you would have to access them via the attribute getter, e.g.
// Get the awesome product HTML element.
const someElement = document.querySelector('#awesome-product');

// get attribute returns the value or if there is none, it returns null
const productId = someElement.getAttribute('productId');
If you have a lot of these bespoke attributes, you'll always have to use .getAttribute().
Insert "There must be a better way" GIF here. 🤣
There is a better standard way to go about this, data attributes. Data attributes are a standard part of HTML. All you need to do is have them begin with data- and if the rest of the attribute is more than one word, separate them with hyphens.
For example, our productId would now become data-product-id. That looks like many extra characters, and we're still using .getAttribute.
Although, .getAttribute works, it's not necessary. HTML elements, when accessed via JavaScript, have a special property called, dataset. The dataset property contains all the data-* attributes.
So for example, if I wanted to get the value of the data-product-id attribute, I can do the following:
// Get the awesome product HTML element.
const someElement = document.querySelector('#awesome-product');

const productId = someElement.dataset.productId
So a few things are happening under the hood. All the data attributes when accessed via the dataset property no longer have data- in their names, and when the attribute has more than one word in it like data-product-id, it gets converted to camel case, productId.
The real power of this is if there are several of these attributes on an element, they're all available under the dataset property.
As mentioned at the beginning, I'm currently using a data attribute in the graph I made, but if you happen to be reading this on dev.to, they leverage data attributes quite a bit.
DEV is a Rails monolith, which uses Preact in the front-end using islands architecture. The reason why I mention all this is that it's not a full-stack JavaScript application, and there is no state management library like Redux or Zustand in use. The data store, for the most part on the front end, is all data attributes.
If you use the browser tools to inspect the home page of DEV, you'll see that the body HTML element is jam packed with data attributes.
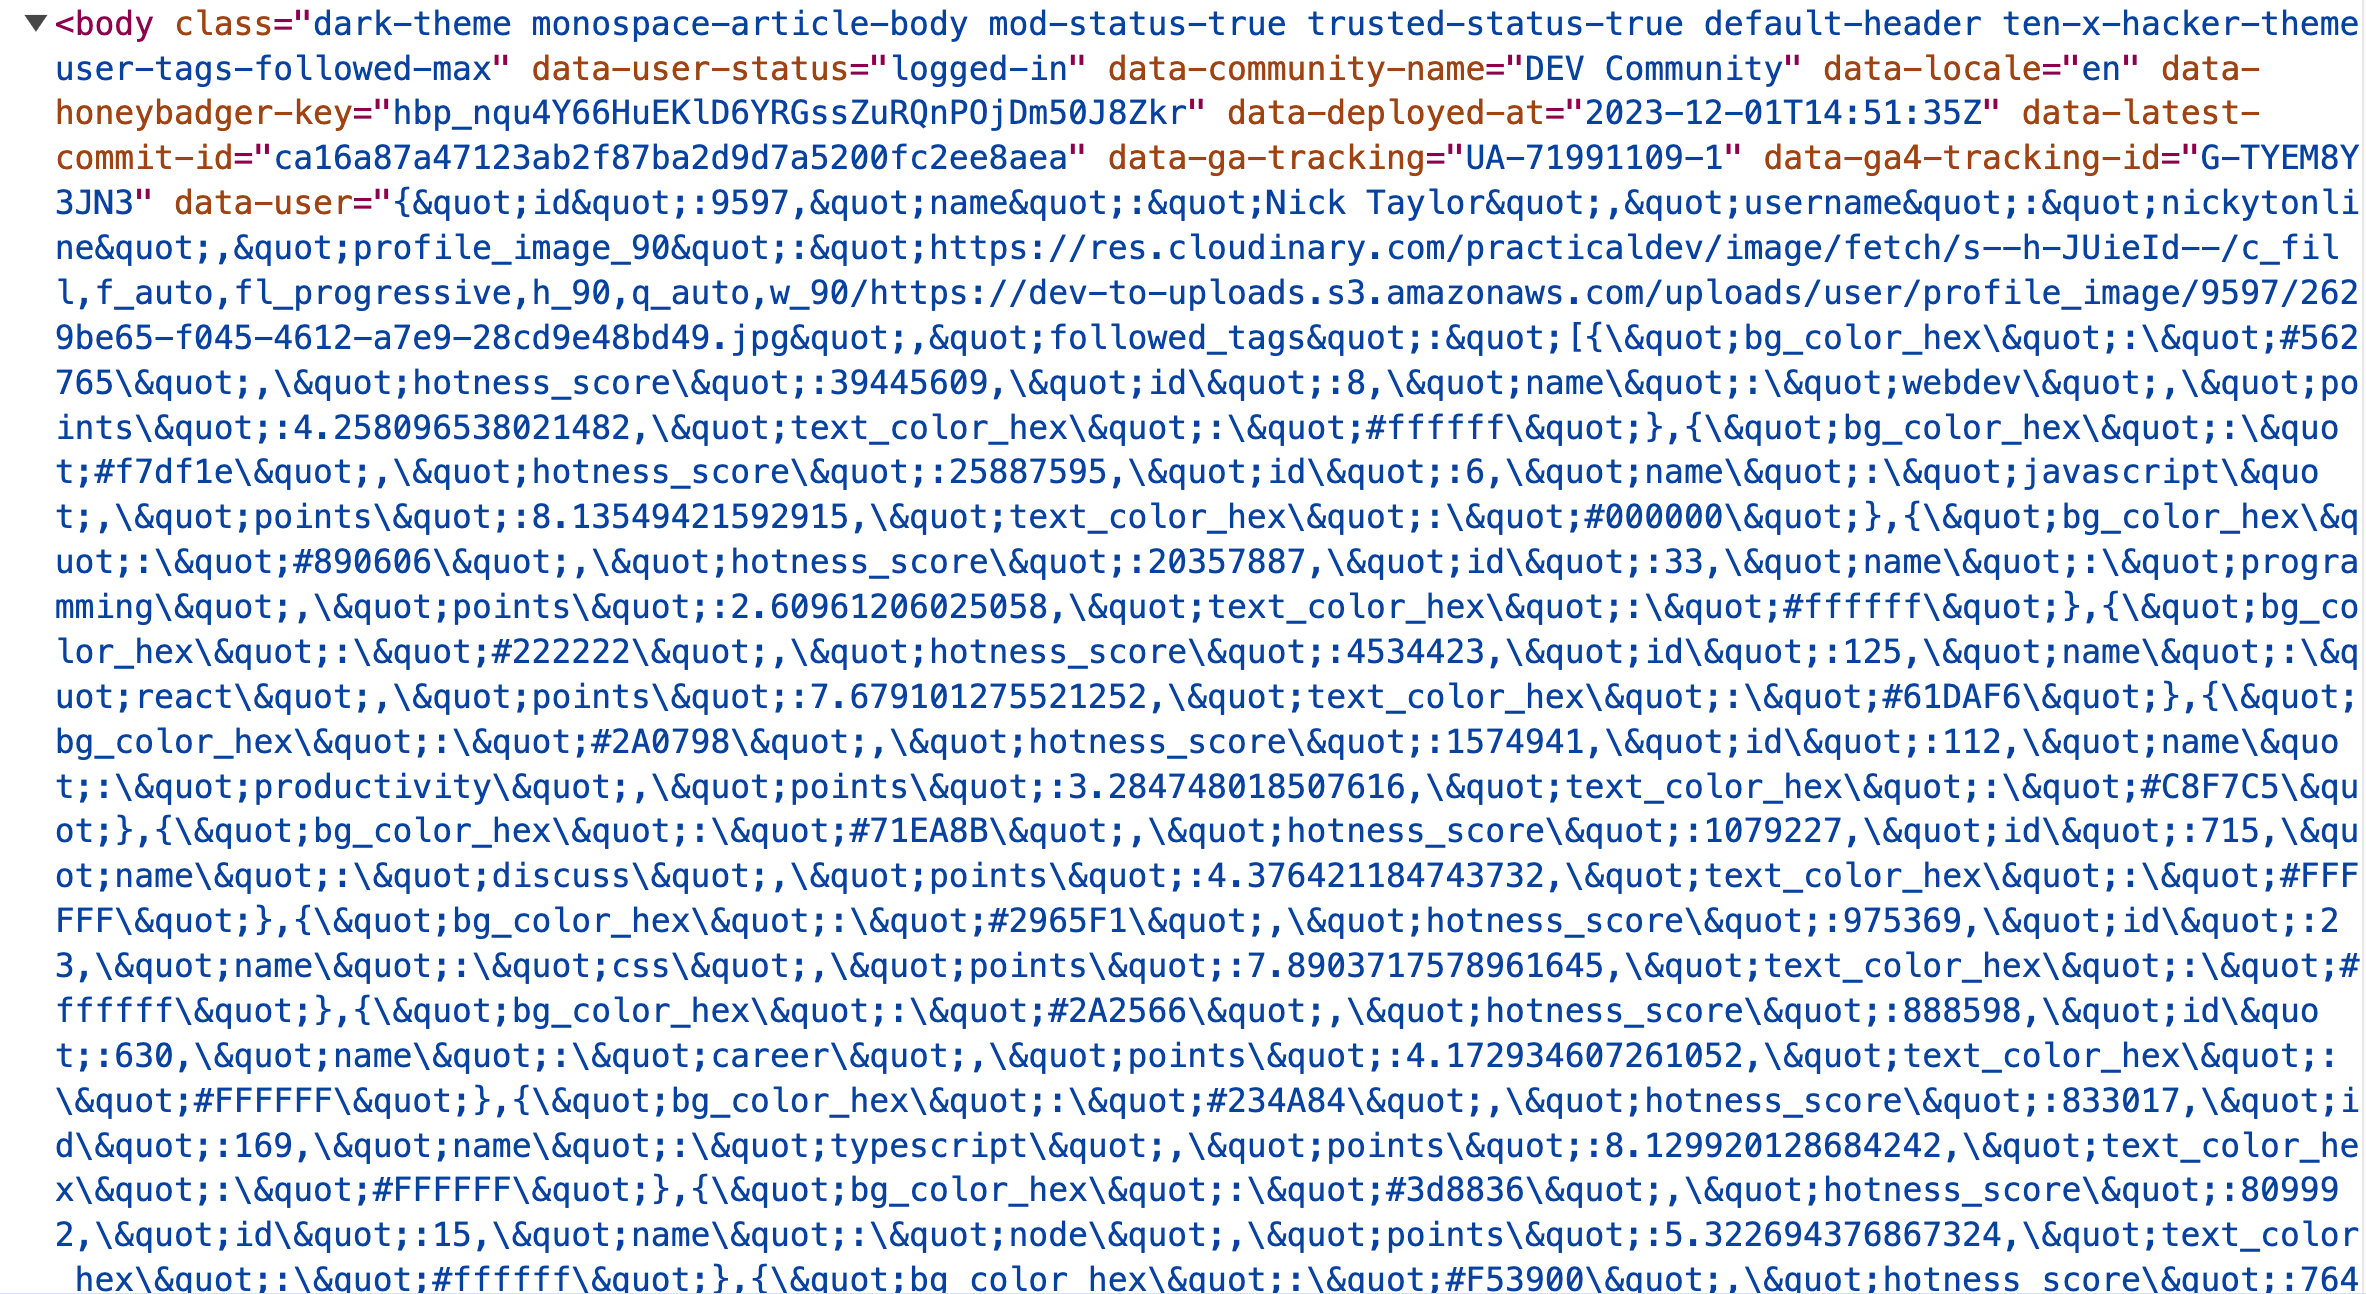
State management libraries are definitely useful in certain contexts, but sometimes leveraging what the platform gives you, like data attributes, can be beneficial for your use case.
<p data-bye="That's all folks">Later</p>
My friend Brittney Postma (@brittneypostma) who is a huge Svelte fan, wanted to add Svelte to the list of available interests from our explore page.
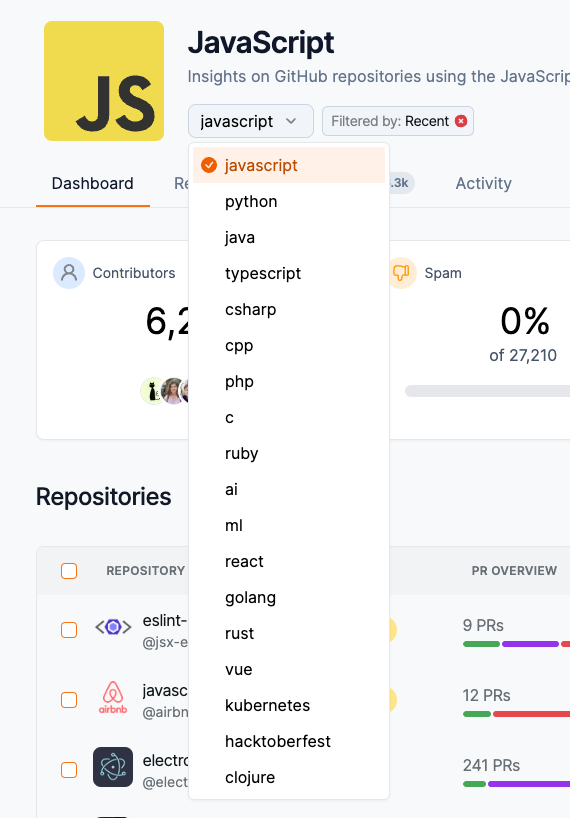
She made some changes which worked while running the dev server, but TypeScript was complaining, causing the build to fail.
4:49:27 PM: ./lib/utils/recommendations.ts:3:7
4:49:27 PM: Type error: Property "svelte" is missing in type "{ react: string[]; javascript:
stringIl; python: string|]; ml: string|]; ai: stringI]; rust: string[l; ruby: string[]; c:
stringIl; cpp: string|]; csharp: string|]; php: string|]; java: string[]; typescript: string|];
golang: string||; vue: string||; kubernetes: string|]; hacktoberfest: string|]; clojure:
stringIl; }" but required in type "Record<"ruby" | "javascript" | "python" | "java" ||
"typescript" | "csharp" | "cpp" | "php" | "c" | "ai" | "ml" | "react" | "golang" | "rust" |
"svelte" | "vue" | "kubernetes" | "hacktoberfest" | "clojure", string[]>".
4:49:27 PM: 1 | import { interestsType } from "./getInterestOptions";
4:49:27 PM: 2
4:49:27 PM: > 3 | const recommendations: Record‹interestsType, string[]> = {
4:49:27 PM: ^
4:49:27 PM: 4 | react: ["Skyscanner/backpack"],
4:49:27 PM: 5 | javascript: ["EddieHubCommunity/LinkFree"],
4:49:27 PM: python: ["randovania/randovania"],
4:49:28 PM: Failed during stage "building site": Build script returned non-zero exit code: 2
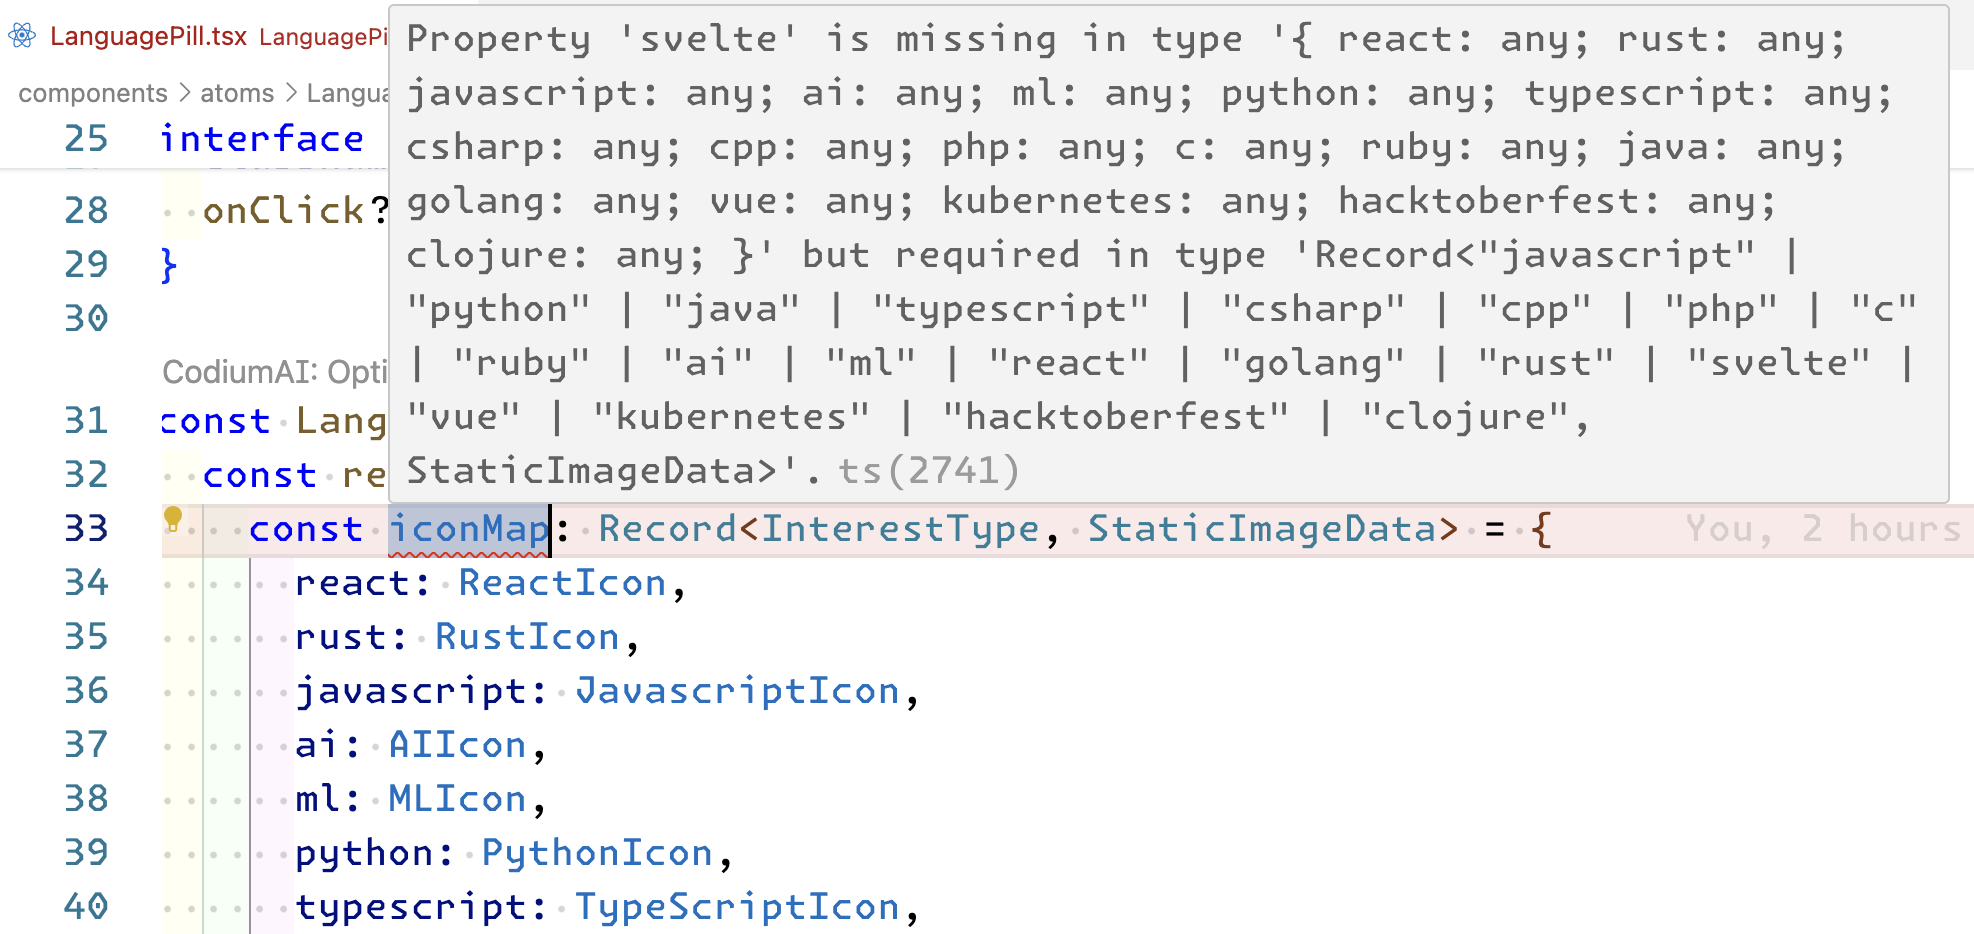
I mentioned adding 'svelte' to the topic prop's union type in the LanguagePillProps interface in our LanguagePill component should resolve the issue. Narrator, it did.
Having to add 'svelte' to the topic props type resolved the issue, but it was extra work. Typically, you want to infer types as much as possible.
Just a note. This is not criticizing Brittney’s pull request (PR). This post is about a potential refactoring I noticed while reviewing her PR which could improve the types' maintenance in the project.
You might already be inferring types without realizing it. Here are some examples of types being inferred.
let counter = 0
counter gets inferred as type number. You could write this as let counter: number = 0, but the explicit type is unnecessary.
Let's look at an example of an array
let lotteryNumbers = [1, 34, 65, 43, 89, 56]
lotteryNumbers gets inferred as Array<number>. Again, you could explicitly type it.
// Array<number> or the shorter syntax, number[]
let lotteryNumbers: Array<number> = [1, 34, 65, 43, 89, 56]
But once again, it's unnecessary. Take it for a spin in the TypeScript playground to see for yourself.
Let’s look at a React example, since plenty of folks are using React. It’s pretty common to use useState in React. If we have a counter that resides in useState, it’ll get set up something like this.
const [counter, setCounter] = useState<number>(0);
Once again, though, we don’t need to add an explicit type. Let TypeScript infer the type. useState is a generic function, so the type looks like this useState<T>(initialValue: T)
Since our initial value was 0, T is of type number, so useState in the context of TypeScript can infer that useState is useState<number>.
I discussed the types refactor on my live stream for anyone interested in a highlight from that stream.
And here's the PR I put up.
The https://github.com/open-sauced/app/pull/2192 repository on GitHubI did some other refactoring in the pull request, but the big chunk of it was this diff.
interface LanguagePillProps {
-  topic:
-    | "react"
-    | "javascript"
-    | "python"
-    | "ML"
-    | "AI"
-    | "rust"
-    | "ruby"
-    | "c"
-    | "cpp"
-    | "csharp"
-    | "php"
-    | "java"
-    | "typescript"
-    | "golang"
-    | "vue"
-    | "Kubernetes"
-    | "hacktoberfest"
-    | "clojure"
+  topic: InterestType
  classNames?: string;
  onClick?: () => void;
}
InterestType is a type inferred from the interests array (see getInterestOptions.ts).
const interests = [
  "javascript",
  "python",
  "java",
  "typescript",
  "csharp",
  "cpp",
  "php",
  "c",
  "ruby",
  "ai",
  "ml",
  "react",
  "golang",
  "rust",
  "svelte",
  "vue",
  "kubernetes",
  "hacktoberfest",
  "clojure",
] as const;
export type InterestType = (typeof interests)[number];
Aside from the type being inferred, the type is now data-driven. If we want to add a new language to the interests array, all places where the InterestType are used now have that new language available. If there is some code that requires all the values in that union type to be used, TypeScript will complain.
In fact, a new issue was opened today because an SVG for Svelte was missing in another part of the application.
The https://github.com/open-sauced/app/issues/2195 repository on GitHubIf the InterestType has been used everywhere, that error would have been caught by TypeScript, just like in the screenshot above.
Let’s look at another React example.
const [name, setName] = useState();
We’re on the infer types hype and set up a new piece of state in our React application. We’re going to have a name that can get updated. Somewhere in the application, we call setName(someNameVariable) and all of a sudden, TypeScript is like nope! What happened? The type that gets inferred for
const [name, setName] = useState();
is undefined, so we can’t set a name to a string type. This is where an explicit type is practical.
const [name, setName] = useState<string | undefined>();
If the string | undefined, I recommend reading about union types in TypeScript.
For return types in functions, there are definitely two camps. Some think that return types should always be explicitly typed even if they can be inferred, and others not so much. I tend to lean towards inference for function return types, but agree with Matt Pocock's take that if you have branching in your function, e.g. if/else, switch, an explicit return type is preferred. More on that in Matt's video.
As mentioned, inferred types are the way to go for most cases, but Kyle Shevlin (@kyleshevlin) messaged me after this blog post went out with another use case to explicitly type the return type.
If a function returns a tuple, you need to explicitly type the return type. Otherwise, the inferred return type will be an array whose items have the union type of all the array items returned.

You can see this in action in a TypeScript playground I made.
Types are great, and so is TypeScript, but that doesn't mean you need to type everything. Whenever possible, lean on type inference, and explicitly type when necessary.
]]>
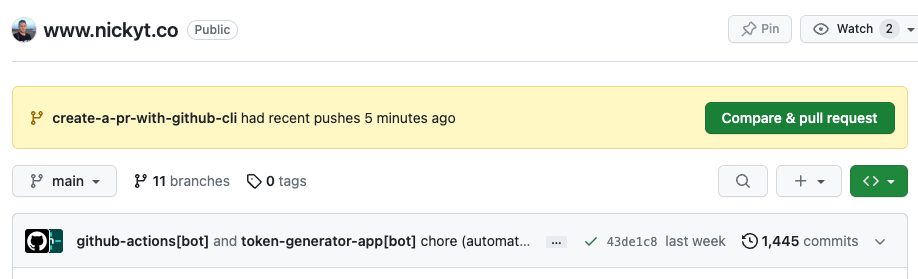
The day my brain exploded was when I discovered (spoilers) that you could create a pull request using the GitHub CLI.
Let's get started!
Head on over to the installation docs to get the GitHub CLI set up. There are installers for Linux, Windows, and macOS.
You're up and running but if you try to run any commands, you're going to be prompted to log in, so let's do that first.
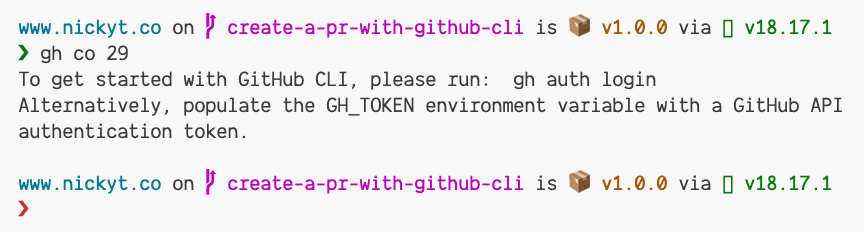
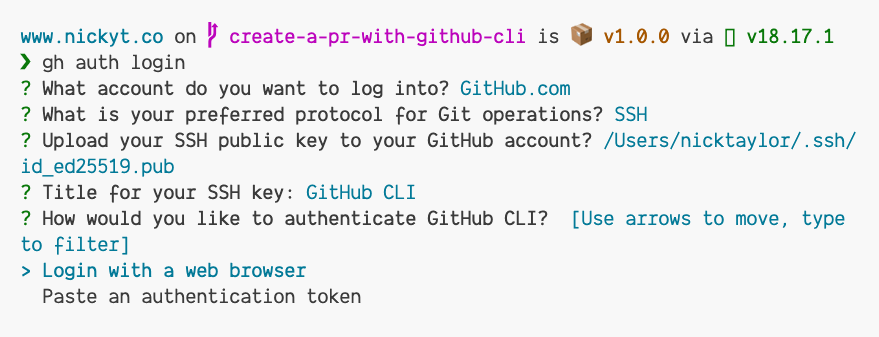
To log in to GitHub via the GitHub CLI, run gh auth login.
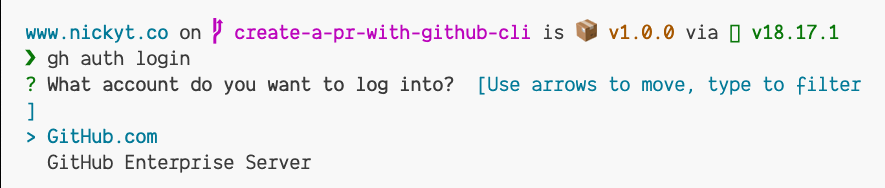
You'll be given two options for logging in. GitHub.com or GitHub Enterprise Server. In most cases, unless your company uses GitHub Enterprise Server, you'll select the default, GitHub.com.
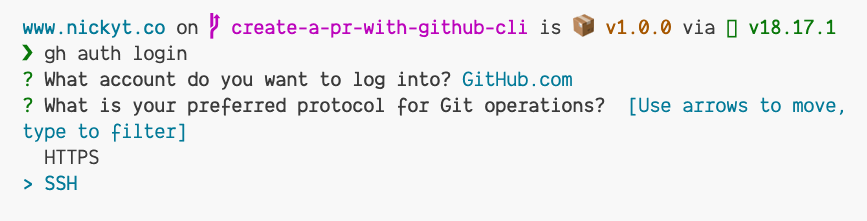
Next, you'll be asked which protocol to log in with. The default is HTTPS, but I recommend SSH. To learn more about configuring GitHub with SSH, see Connecting to GitHub with SSH.
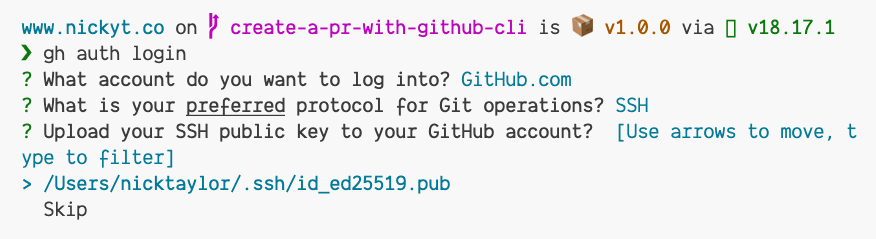
Next, it will ask you to publish your public key to GitHub. This is safe to do and you can proceed.
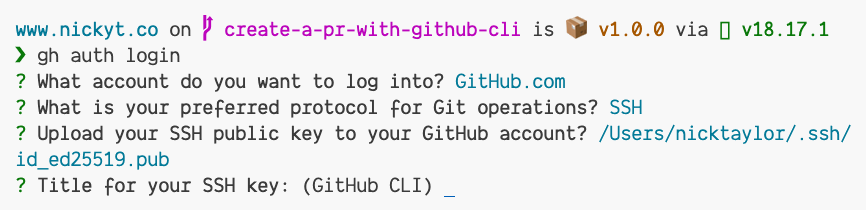
It will prompt for a title for the key. Using the default value of "GitHub CLI" is fine.
If you choose HTTPS, you'll be asked to authenticate Git with your GitHub credentials.

Press ENTER to continue.
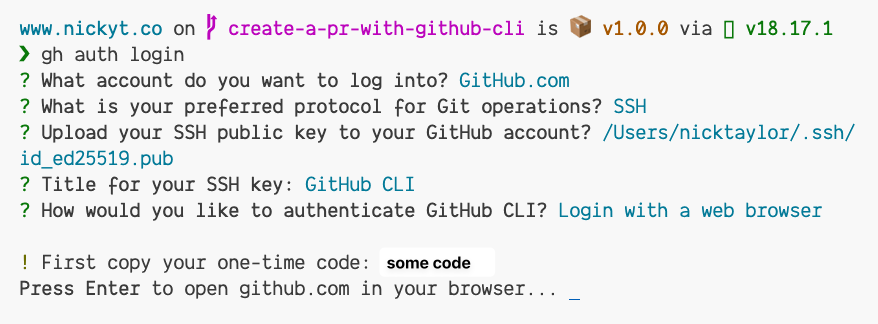
Next, you'll be prompted to log in via the browser or a token. To be honest, I've never used a token at this step. I always log in via the browser. If you have a token, go for it.
You'll be given a code in the CLI that you need to copy (changed to some code in my screenshot) and then press ENTER to log in via the browser.
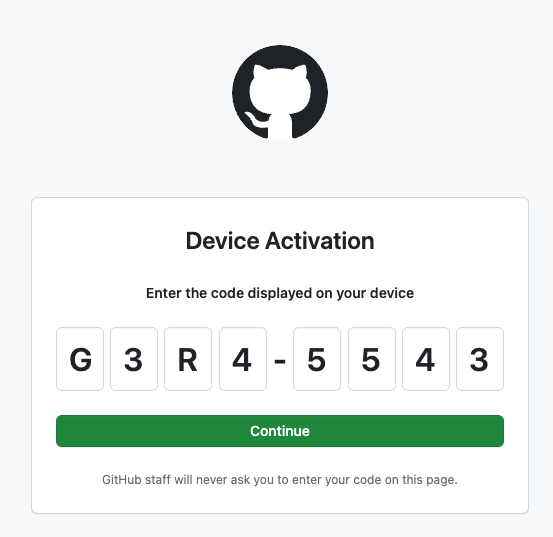
Paste or type in the code and press the Continue button.
Next, you'll be asked to Authorize GitHub. Click the Authorize GitHub button.
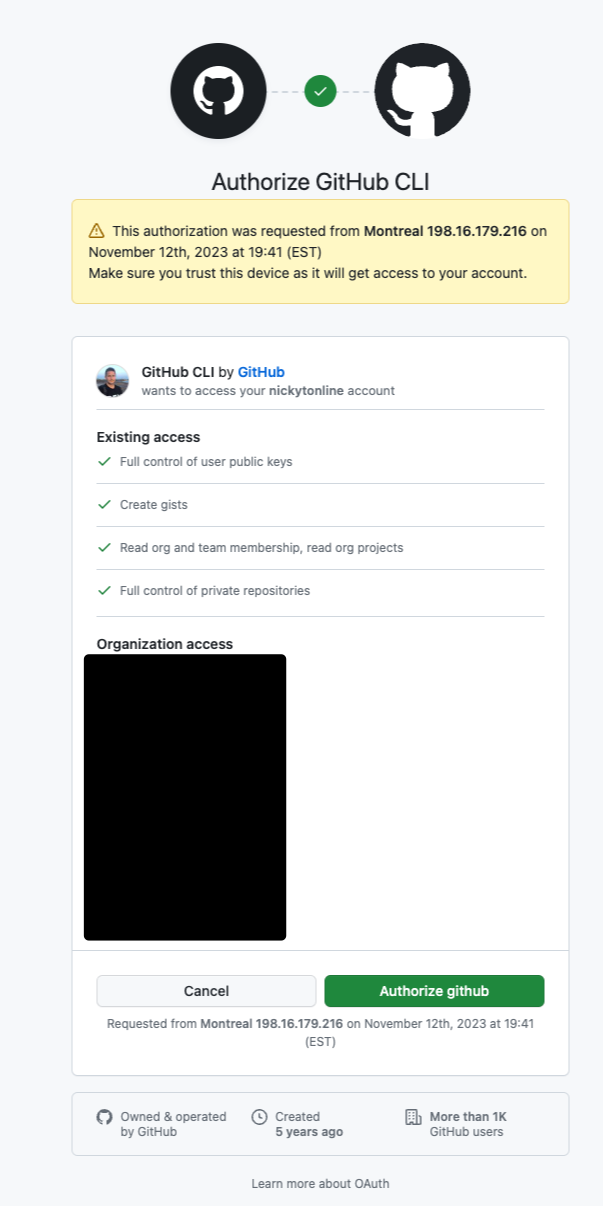
At this point, depending on how you have the security of your account set up, you may be asked to log in via the GitHub mobile app.
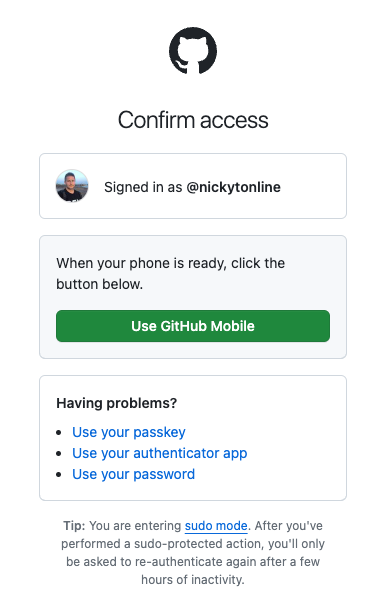
Log in via the GitHub mobile app or other multifactor authentication methods you have set up.
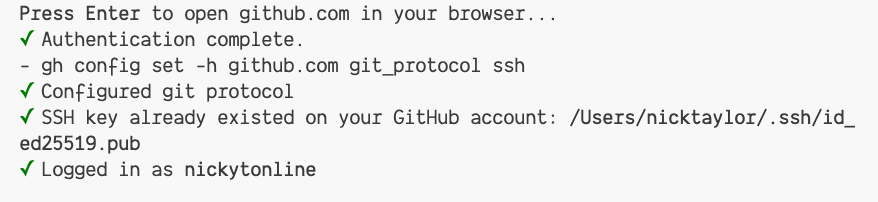
At this point, you should be all set up.
And if you go back to the command line, you should see something similar to this.
Let's walk through a couple of commands I use every day, and then we'll check out some other useful ones that I use less frequently.
As a maintainer of a project, you will definitely be reviewing PRs (for external contributors or team members). Before we had the GitHub CLI, I always had to Google how to get someone's PR on my local machine with Git. I forgot all the time, so, at one point, I made a Git alias for it. The command looks like this, git fetch origin pull/pr_number/head:name_of_branch. So if I was going to review pull request 1234, the command would look something like this, git fetch origin pull/1234/head:pr-1234. You can call the branch whatever you want. I used to name it pr- with the number of the PR.
None of that is necessary these days. With the GitHub CLI, all you need to do is cd into the project directory in your terminal and then run gh co pr-number, e.g. gh co 2062
Here it is in action for a recent pull request I reviewed for the OpenSauced app repository.
Before the GitHub CLI, I used to push my branch to GitHub, and then I would go to the repository's page on GitHub.com and create a pull request from there.
Although that works, when I discovered that the GitHub CLI could do this, I was blown away. All you need to do is run gh pr create from the command line, assuming you're currently on the branch of the repo you want to associate with the pull request. You can provide additional arguments, e.g. gh pr create --draft or the shorter version gh pr create -d, but typically, when I'm creating a PR, I go through the steps in the CLI and continue the final step in the browser. It's a preference, so do what works best for you.
Here's me creating a new test PR.
In the past, I always used to create a new repository from GitHub.com.
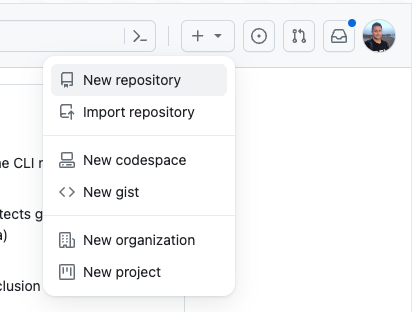
I'm sure there is a way to create a repository on GitHub from the command line, but I never bothered to learn it, and now I don't really need to thanks to the GitHub CLI.
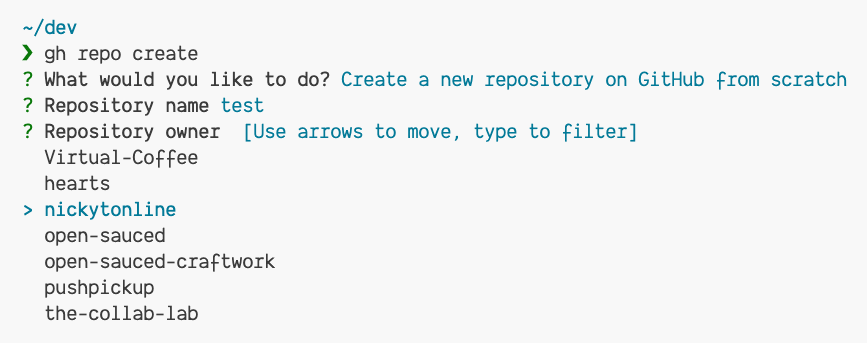
To create a repository from scratch, run gh repo create from the command line.
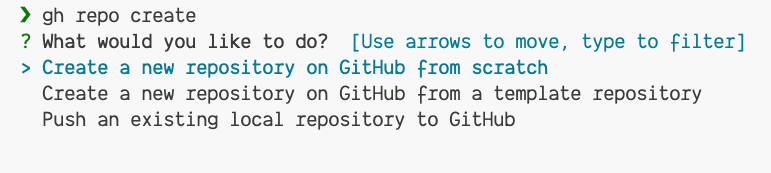
Select Create a new repository on GitHub from scratch and press the ENTER key.
Next, you'll be prompted to name the repository, e.g. test.

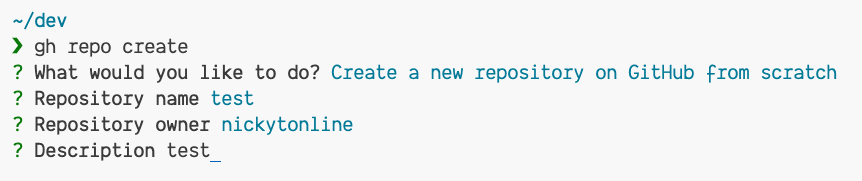
Next, choose the repository owner. If you're a part of one or more GitHub organizations, they will appear in the list. For our example, I will go with my own account, nickytonline as the repository owner.
Add a description for the repository, e.g. test or leave it blank. It's not required.
Next, set the visibility of the repository. It can be public (default), private, or internal.

Since this is a test repository, I'm going to set it to private.
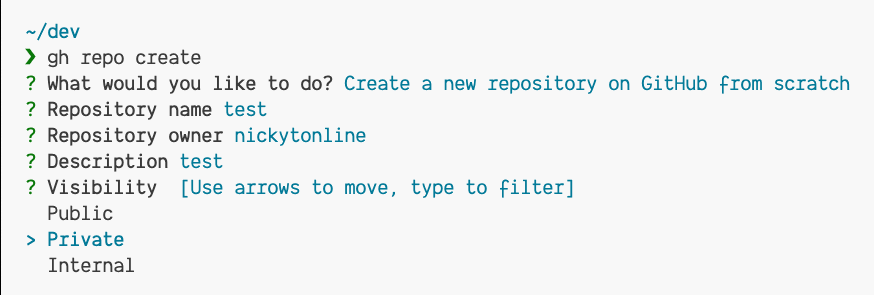
Next, you'll be asked to create a README file. Type y and press the ENTER key.
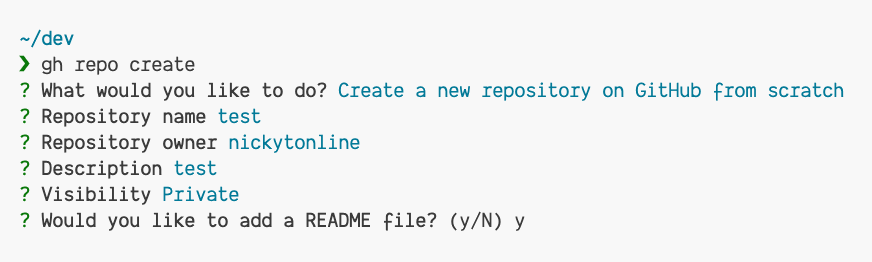
You'll be prompted to add a gitignore file. Type y and press the ENTER key.
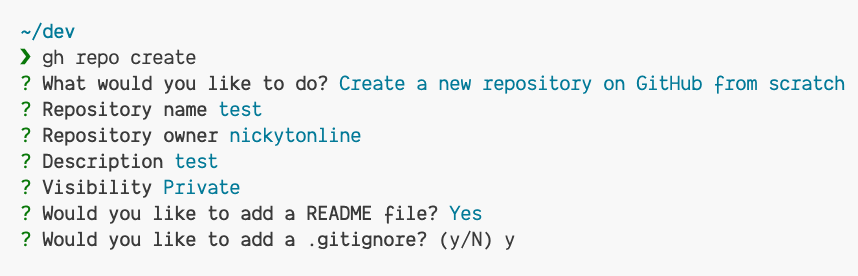
Next, choose the language that will best reflect the contents of the gitignore file. I do a lot of JavaScript, Node.js and TypeScript, so I'm going to choose Node.
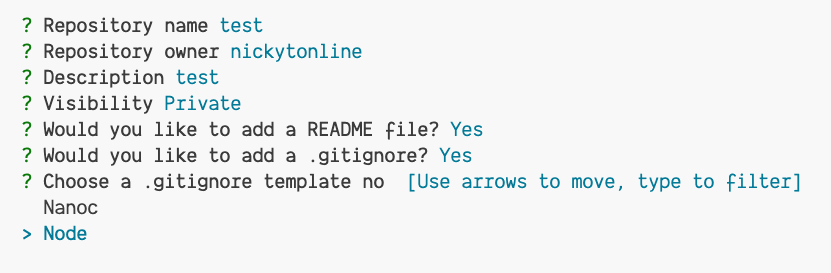
You'll be asked to add a license. Type y and press the ENTER key.
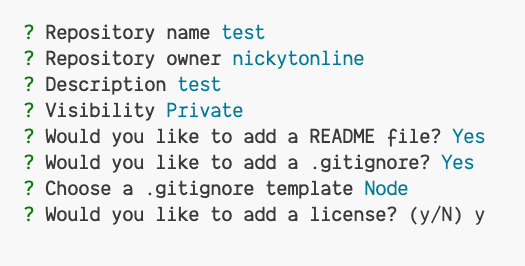
Choose the license that makes the most sense for the project you're creating. For the purposes of this blog post, I'll choose the MIT license.
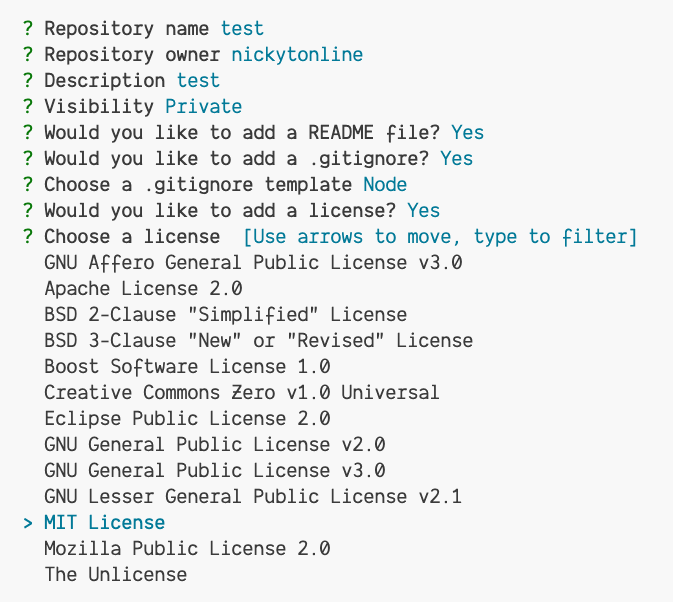
A quick check will ask if you want to create the repository on GitHub. Type y and press the ENTER key to proceed.
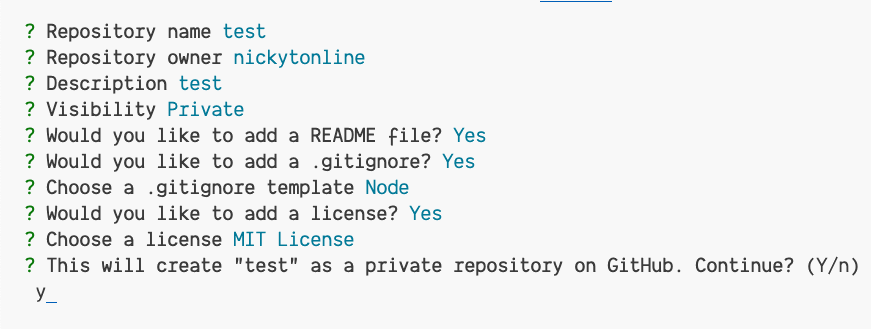
Next, you'll be asked if you want to clone the repository locally.
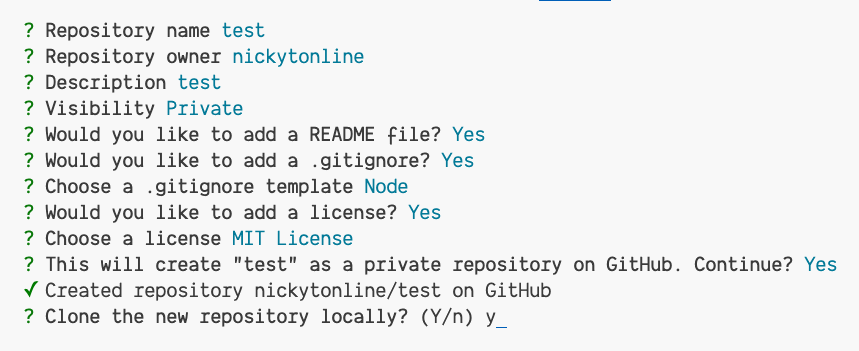
Type y and press the ENTER key to proceed.
The new repository is on GitHub.com now and has been cloned on your machine.
To push an existing local repository to GitHub, run gh repo create from the command line.
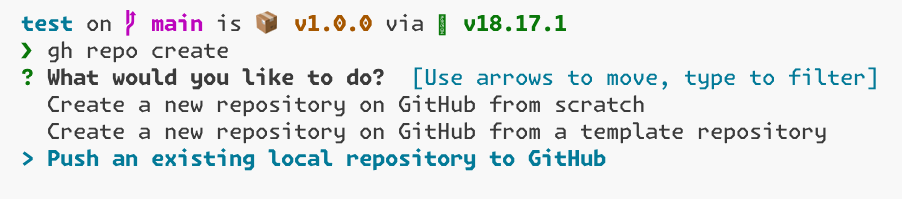
You'll be prompted for the path to the local repository. It defaults to ., the current directory. If, for some reason, you ran the command outside your local git repository folder, specify the folder to your repository.

Next, you'll be asked to name the repository. By default, it will use the name of the folder the local repository resides in, e.g. test. Change it if it makes sense to.

Next up, you're prompted to select a repository owner. By default, it's your user, e.g. nickytonlin, but you can select any organizations you're a part of as well.
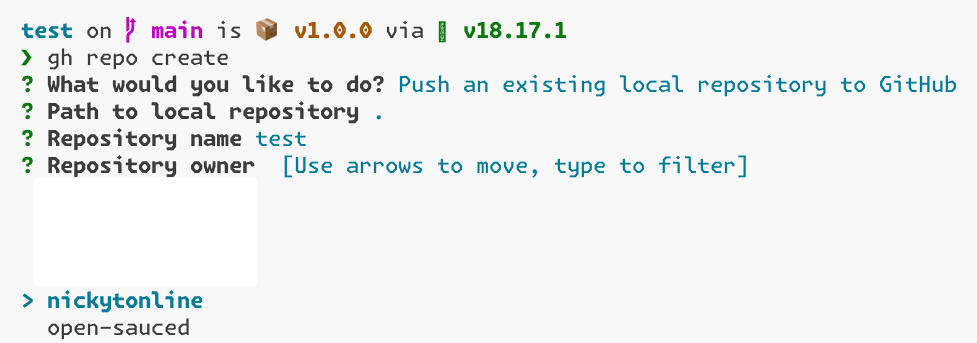
Next, you'll be asked to add a description. You can add one or leave it blank. It's up to you.
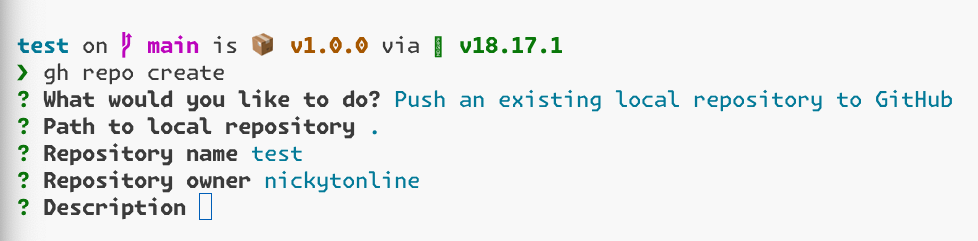
Next, you'll be asked to set the visibility of the repository. It can be public (default), private, or internal.
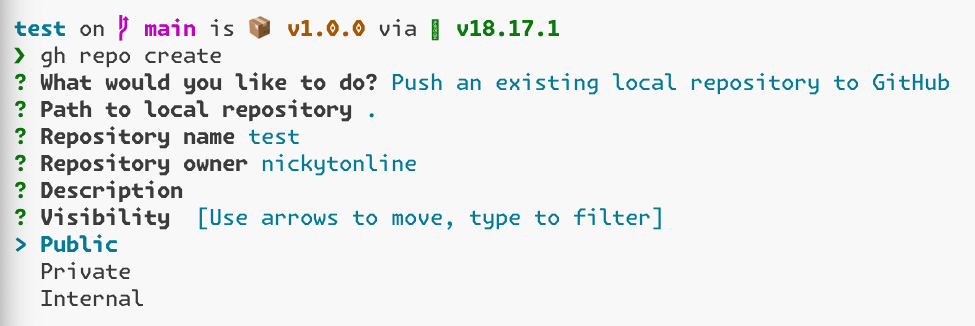
Next, you'll be asked if you want to set a remote. Press enter to say yes (the default)

You'll be asked what the new remote should be called. Press the ENTER to accept the default name of origin. The GitHub CLI notifies you that the remote has been added, e.g. git@github.com:nickytonline/test.git
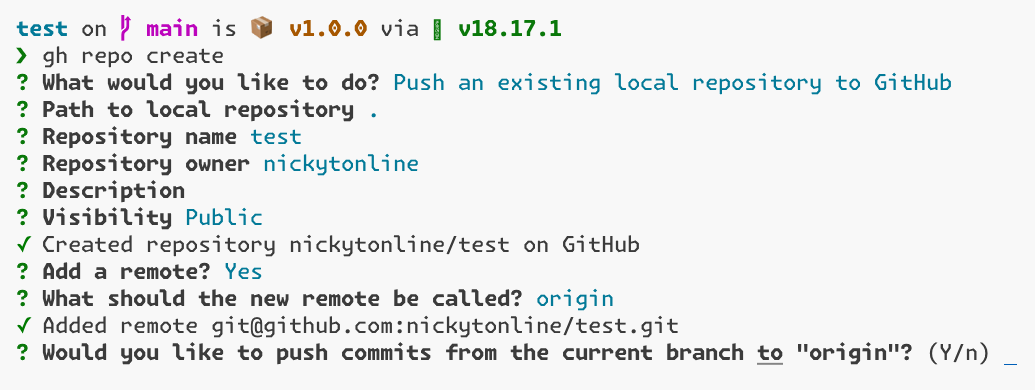
And finally, you'll be asked if you want to push the commits from the current branch to the origin remote. Press the ENTER key to push the commits, and you're done!
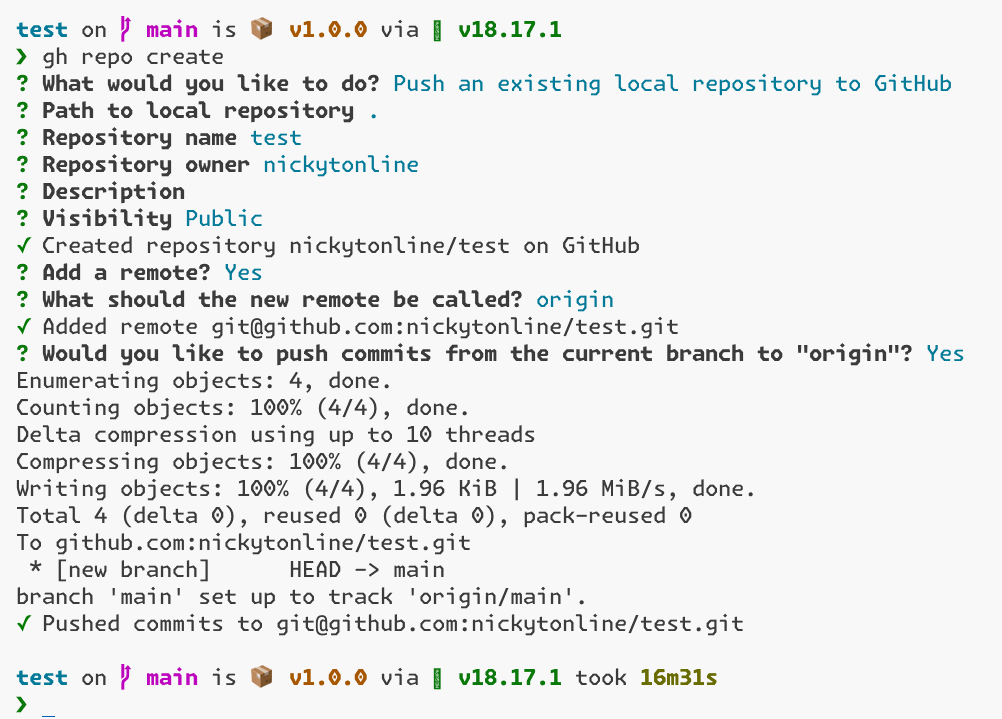
For myself, the GitHub CLI has become a game changer in my day-to-day workflow. I literally use it every day, well, work days. 😎
From creating a new repository, to pulling down a pull request (PR) to creating a PR and more, the GitHub CLI has become indispensable to me.
There is a whole other set of commands available in the GitHub CLI that I encourage you to check out and that, to be honest, even I should explore further.
I realize not everyone is comfortable with the command line, but I think that if you give the GitHub CLI a chance, you may grow to love it. As always, though, use the tools that make you the most productive.
Stay saucy peeps!
If you would like to know more about my work in open source, follow me on OpenSauced.
]]>The nice thing about baking in accessibility wins into components is that it improves the accessibility of the application everywhere the component is used within the app.
The TLDR; is I added two mandatory props to our <ToggleSwitch /> component to enforce a label for the component. However, the challenge was that one of them had to be required, but not both.
The component before the change had a bunch of props, but there was no label associated with the toggle button which the <ToggleComponent /> component generated.
interface ToggleSwitchProps {
  name: string;
  checked: boolean;
  handleToggle: () => void;
  size?: "sm" | "lg" | "base";
  classNames?: string;
}
Typically, a button will have text associated to it, but in this case, there was no text for the button which was causing the accessibility issue. When no text is present, you have a few options.
sr-only to move the text off the screen for sighted users, but since it's still visible in the document object model (DOM), assistive technologies can pick it up.Note: Tailwind is pretty popular these days, so if you go with this option, you can use the sr-only CSS class that they provide out of the box.
<button aria-label="Page Visibility" type="button" role="switch" aria-checked="false" data-state="unchecked" value="on" id="isPublic" aria-labelledby="make-public-explainer" class="flex rounded-2xl p-[2px] transition overflow-hidden bg-light-slate-8 w-10 h-5">
    <span data-state="unchecked" class="bg-white block rounded-2xl  h-full w-1/2"></span>
</button>
This will be used when the toggle button is announced for assistive technologies.
<span id="make-public-explainer">Make this list publicly visible</span>

<!-- more markup... -->

<button type="button" role="switch" aria-checked="false" data-state="unchecked" value="on" id="isPublic" aria-labelledby="make-public-explainer" class="flex rounded-2xl p-[2px] transition overflow-hidden bg-light-slate-8 w-10 h-5">
    <span data-state="unchecked" class="bg-white block rounded-2xl  h-full w-1/2"></span>
</button>
This will be used when the toggle button is announced for assistive technologies as well. The main difference is the text contents of the element with the id make-public-container will be used instead.
In our case, I opted for the aria attributes represented by the ariaLabel and ariaLabelledBy props in the component.
If you want to get to the solution right away, take a peek at these lines of code in the PR.
A discriminated union type in TypeScript is a union type where one or more types differ on a particular property, e.g. type.
So in our case, maybe a labelType where the values could be aria-label and aria-labelledby. Although this would work, it meant adding two props to set a label. One for the labelType, and another being the label. And to be honest, this didn't make sense for a couple of reasons. In the case of aria-labelledby, the label would be an ID for an element in the Document Object Model (DOM) vs. an actual label. Renaming this to labelOrId seemed clunky.
ariaLabel or ariaLabelledBy PropsThis is really what I wanted. The component takes either the ariaLabel prop or the ariaLabelledBy prop.
I tried to keep things verbose to test the waters.
type ToggleSwitchProps =
  | {
      name: string;
      checked: boolean;
      handleToggle: () => void;
      size?: "sm" | "lg" | "base";
      classNames?: string;
      ariaLabel: string;
    }
  | {
      name: string;
      checked: boolean;
      handleToggle: () => void;
      size?: "sm" | "lg" | "base";
      classNames?: string;
      ariaLabelledBy: string;
    };
In my head, this looked good. Narrator: "It was not". From a quick glance, this might look good, but what this translates into is ariaLabel and ariaLabelledBy being both optional.
Take a peek at the TypeScript Playground example demonstrating this.
Since this didn't work, I didn't bother refactoring, but it can be shortened to this.
type ToggleSwitchProps = {
  name: string;
  checked: boolean;
  handleToggle: () => void;
  size?: "sm" | "lg" | "base";
  classNames?: string;
} & ({ ariaLabel: string } | { ariaLabelledBy: string });
never TypeI'm aware of the never type, but to the best of my knowledge, I've never used it explicitly. It's always been an inferred type for me, e.g. an error being thrown.
By assigning the never type to the prop that should not be included in each type of the union, I was able to enforce the exclusivity of the props. This meant that the component could only have either the ariaLabelledBy prop or the ariaLabel prop, but not both.
type ToggleSwitchProps = {
  name: string;
  checked: boolean;
  handleToggle: () => void;
  size?: "sm" | "lg" | "base";
  classNames?: string;
} & ({ ariaLabel: string; ariaLabelledBy?: never } | { ariaLabelledBy: string; ariaLabel?: never });
And boom! I now had what I wanted. Check out the TypeScript Playground example to see it in action.
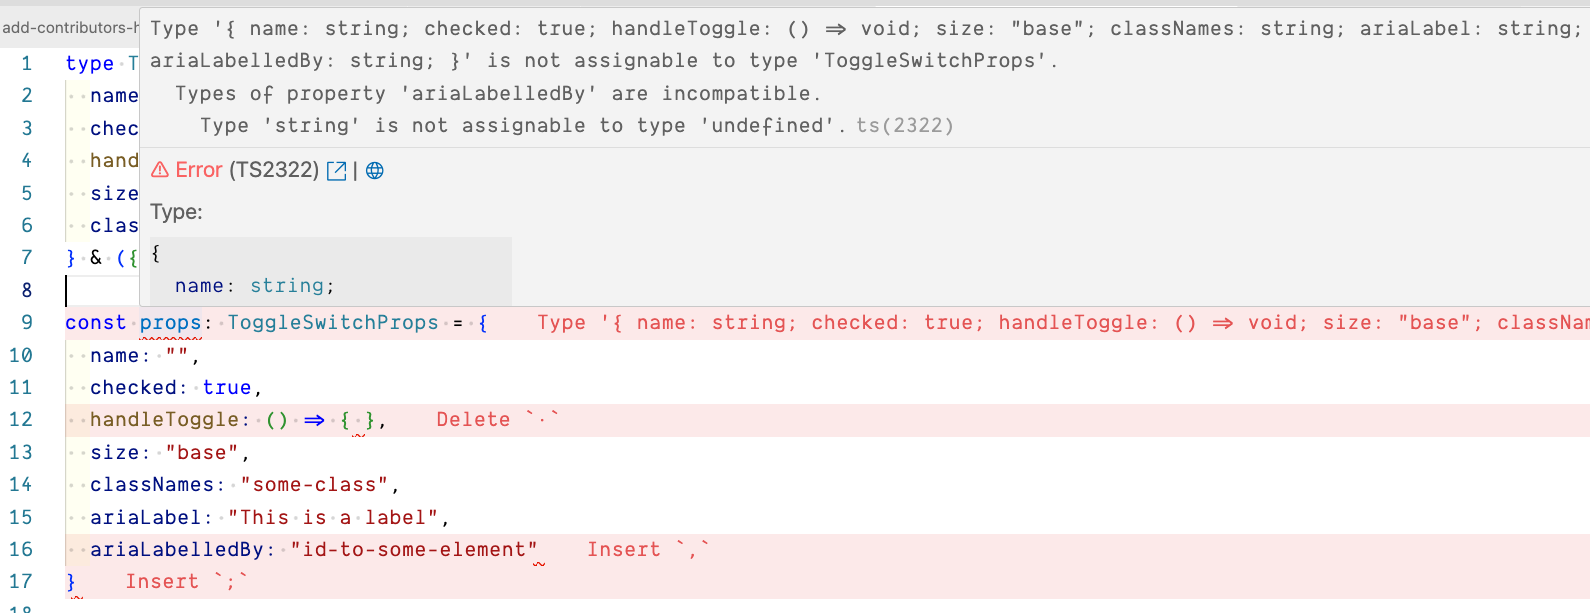
The use of the never type solved the prop exclusivity issue and had a positive impact on the component’s accessibility. Now, the component requires a label, ensured by either the ariaLabel prop or the areaLabelledBy prop, enforcing accessibility.
Never say never. 😜
Photo by Randy Rizo on Unsplash
]]>If you host your code on GitHub, besides scripts to automate certain actions, you can also leverage the huge ecosystem of GitHub Actions.
Let’s look at some practical examples of GitHub actions helping maintainers.
If someone opens an issue on your repository, you could respond with a personal message saying thank you, but those keystrokes are probably better suited for other things. Automate a message reply instead, thanking the community member for creating the issue and mentioning you will look into it. An automated message to the issue opener is friendly, even if it’s automated.
A great GitHub action for this is Peter Evans’ Create or Update Comment action.
It’s used in the app repository for OpenSauced. Here’s how we have it configured.
When a new issue is opened, an issue responds with the following:
My coworker bdougie (@bdougieyo) created the take Github action. It allows external contributors to self-assign issues by typing .take into a comment of an issue. This removes the burden of a bit of back and forth between contributors and maintainers.
Of course, we don’t want external contributors self-assigning any issue they want. The take action also has the concept of blocking labels. For example, if an issue has a 👀 needs triage label, we can add this label to a list of blocking labels.
Another action that came onto my radar a couple of days ago was thanks to styfle. Although I haven’t used it yet, nissuer looks like a great utility belt GitHub action for maintainers. The Next.js repository uses it, so I'm sure it brings lots of value to a maintainer.
I love this note they added in the README.
NOTE: Developers are coming to your project with all sorts of backgrounds/skill levels or understanding of the open-source world. Show empathy while using this action. 💚 We recommend adding comments that not only dismiss unhelpful issues/comments, but educate the user on how to be more helpful in the future.
Don’t see a GitHub action for what you need? Create your own. You can even build your own by composing it from existing GitHub actions. Here's an example of a bespoke workflow I use for pulling in my latest video content from YouTube to my blog.
I'm using some GitHub Actions, a custom script that leverages the GitHub CLI and magic.
name: Get latest videos
on:
  schedule:
    # Everyday at midnight UTC
    - cron: '0 0 * * *'
  workflow_dispatch:

jobs:
  update_profile_data:
    name: Get latest videos
    runs-on: ubuntu-latest
    steps:
      - uses: actions/checkout@v2
      - uses: actions/setup-node@v3
        with:
          node-version: 18
      - name: Get latest videos
        run: |
          npm install
          node bin/udpdateStreamingPage.js
      - name: Setup git config
        run: |
          git config user.name 'token-generator-app[bot]'
          git config user.email '82042599+token-generator-app[bot]@users.noreply.github.com'
      - name: PR for Videos
        env:
          GITHUB_TOKEN: ${{ secrets.GITHUB_TOKEN }}
        run: |
          ./bin/pr-videos.sh
You can see the results on the streaming page of my site.
The post is a bit out of date, but I discuss more in depth the automations for my website in
These are just examples of tasks you can automate, and if you’re using GitHub, there is a huge ecosystem of GitHub actions to help with your automation goals.
What are some GitHub actions that you’ve leveraged in your projects? Share them in the comments.
Stay saucy peeps!
If you would like to know more about my work in open source, follow me on OpenSauced.
]]>
Venue: Hack for LA
Summary: Nick Taylor discusses his journey in open source, including his experiences at dev.to, Netlify, and now OpenSauced. Nick shares insights on how to get the most out of open source as a contributor and maintainer.Links:
]]>I've always been a fan of open source and have had the privilege to be paid to work in open source since January 2020 (I used to work at DEV!). I've been a fan of all the stuff Brian Douglas (@bdougieyo) did at GitHub and what he and the team have been doing at OpenSauced.
With that, I'm super pumped to say that I’ve joined OpenSauced!
I completed my first week, hitting the ground running. I've already had some work merged and even wrote my first blog post for them!
I love all that we're doing at OpenSauced, and I'm super excited about all the work we're shipping. I'm also a fan of our highlights feature. Here's one of mine.
If you're interested, you can give me a follow on OpenSauced.
Looking to learn more about open source? Come join our community and give us a follow on DEV!

Stay saucy friends! 🍕
]]>I decided to write a post about the CODEOWNERS file after reading this comment from one of our awesome Octerns, Divyansh (@diivi), in a pull request (PR) where I added the file.
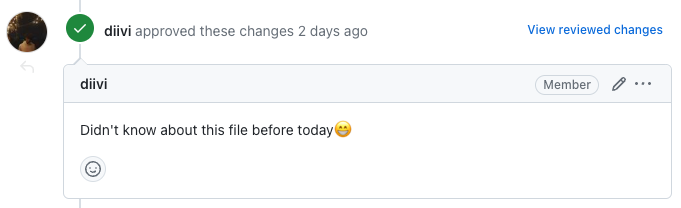
A CODEOWNERS file in GitHub is a special file used to specify who reviews and maintains specific files or directories in a repository. It helps with identifying code ownership and who should be notified when pull requests are made to those repositories.
For example, in this particular CODEOWNERS file there is the @open-sauced/engineering team.
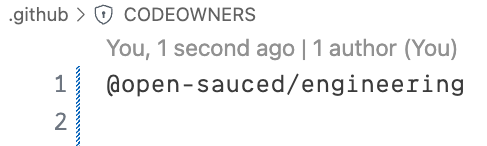
When someone creates a PR for that repository, that team is automatically added as a reviewer.
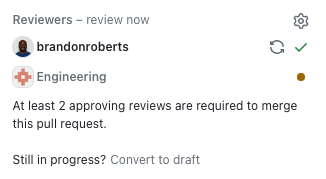
This is really handy because you don’t need to go and manually add reviewers, and when it’s a PR from an external contributor, they can’t add reviewers so this is super useful for them and can avoid comments like, “Can someone review my PR?”
Another nice feature of the CODEOWNERS file is that it can be used as part of branch protection.
To enable this, go to the Protect matching branches section of a branch protection rule, and ensure the Require review from Code Owners option is checked.
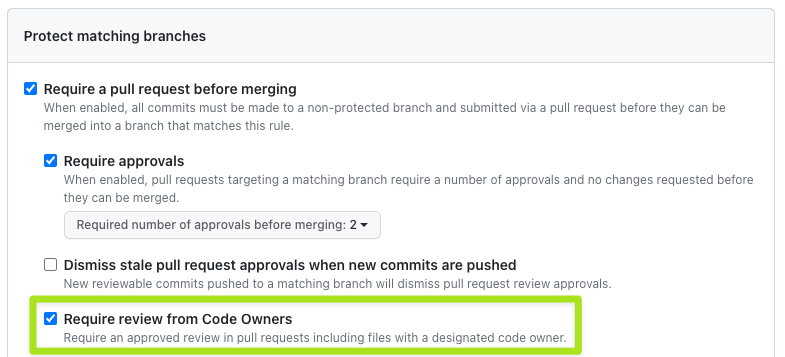
One other thing to note is if you have permanent branches aside from main, like beta, dev, or whatever your team calls it, they can have different individuals and teams in those branches CODEOWNERS file.
The CODEOWNERS file is a special file that can reside in the root directory, in the .github directory or the docs directory (if you have one).
The .github folder might not exist in your project if you haven’t added other GitHub automated processes like GitHub Actions, pull request templates, or issue templates.
Also note, GitHub looks for the first CODEOWNERS file it finds, searching first in the root directory, then the .github directory, and finally, the docs directory (if it exists).
You can add individual GitHub users, a team, or a combination of them to a CODEOWNERS file.
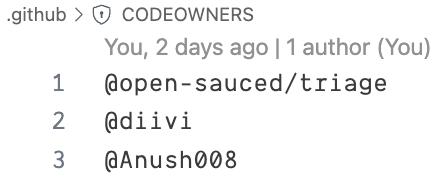
A nice feature of adding or making changes to a CODEOWNERS file in a pull request is that GitHub validates it, letting you know if you are adding a non-existent user or team.
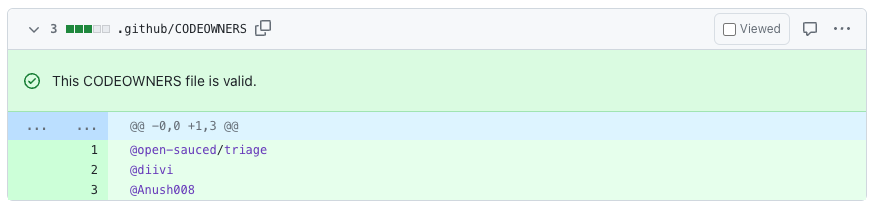
If you don’t already have a CODEOWNERS file file in your repository, I encourage you to add one. Let us know if you have any questions about this or other maintainer-related issues.
Stay saucy peeps!
If you would like to know more about my work in open source, follow me on OpenSauced.
]]>Firefox supports browser extensions like Chromium-based browsers (Chrome, Arc, Brave, Edge etc.). Sometimes they’re referred to as add-ons in Firefox land.
This post assumes that you are debugging a browser extension you are building, i.e. have the source code for and can build it locally.
It’s also assumed that the Firefox add-on has been built, i.e. generated the files, including a manifest for the add-on to work.
The following instructions work for Firefox and Firefox Deveoper Edition.
Open the browser DevTools and click on the three dots button, then select settings.
Scroll down to the Advanced Settings section and ensure Enable browser chrome and add-on debugging toolboxes is checked.
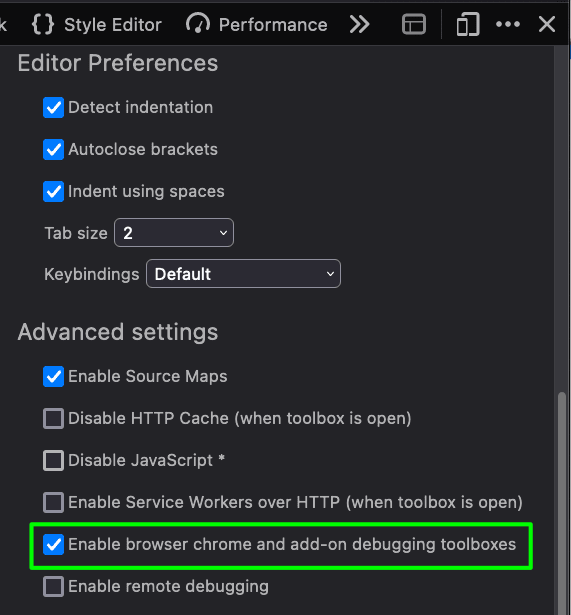
Load the add-on by clicking on the puzzle icon in the top right of Firefox or via the application menu, Tools -> Add-ons and Themes
Click on the cog icon to open the menu and select Debug Add-ons
Ensure you built the extension with the changes in my branch by running npm run build
Click on the Load Temporary Add-on... button
Select the manifest file of the add-on from the OS file menu and click the Open button.
The extension is now ready for use.
Navigate to a page where you’re using your extension.
If you want to debug or inspect the extension, click the Inspect button from the Temporary Extensions section where the extension was just loaded.
You now have access to all the same browser dev tools you’re used to for debugging a web site, i.e. Inspect Element, CSS styles inspector, JavaScript debugger, etc.
And that’s it!
Photo by Birger Strahl on Unsplash
]]>I'm generally active. I work out Monday, Wednesday, and Friday, along with a long daily walk, and do other seasonal activities.

If you don't get up to much and are curious about a fitness regime, you may want to come to hang out with Anna Nettles and me tomorrow. Even if you're already pretty active, you may also enjoy it.
I'm super excited to do a live stream with her where she will put me through a fantastic workout. Anna is a certified personal trainer, so I know I'll be in good hands. Come work out with us if you're up for it from the comfort of your home or wherever you're tuning in.
Aside from pumping some iron, she'll answer personal fitness questions while I'm sweating away, and we will also discuss her journey into tech.
Anna is a career transitioner who landed her first job in tech recently! It's a tough job market out there right now, especially for early career devs, so I'm excited to hear about Anna's job search and what she did to land her first gig.
It should be fun, and you all get to see me ugly sweat on Twitch, lol.
Come hang with us tomorrow, Wednesday, August 9th, at 5 pm UTC!
Update August 9, 2023: Here's some highlights from the stream!
P.S.: Yes I tagged this post with #healthydebate (channeling my inner dad jokes)
P.P.S.: I'd love to hear what you get up to to stay active! Drop a comment with what you get up to!
Photo by Heidi Erickson on Unsplash
]]>Venue: Applitools & Netlify Present FRONT-END
Venue: The Collab Lab: Career Lab
Summary: In this session, Nick Taylor and EJ Mason run a mock interview where EJ is the interviewer, and Nick is the interviewee. They go over Nick's frontend take-home assignment, and EJ also asks Nick questions about frontend about accessibility, JavaScript, HTML, CSS, and React. ]]>Venue: Node Congress
Summary: Fresh is a web framework based on Web standards built to run on the edge anywhere you can run Deno. Fresh takes inspiration from existing frameworks to provide features like file-based routing, Islands architecture, server-side rendering and Typescript. Another compelling reason to consider Fresh is that there is no build step.Links:
]]>🙌 @nickytonline and I are going to pair on writing custom @geteslint rules!
— Josh Goldberg 🦩🍍✨ (@JoshuaKGoldberg) March 31, 2023
This is very nifty stuff. ESLint rules can catch subtle bugs before you run code. Writing custom app/team-specific ones can help your dev out like you wouldn't believe.
✨ https://t.co/SWu8frc2Us ✨ pic.twitter.com/V4eVP0gJbO
Josh is a maintainer of the typescript-eslint project, so he knows a thing or two about ESLint. 😎
The https://github.com/typescript-eslint/typescript-eslint repository on GitHubWhat are some things that you'd like to know more about in regard to ESLint for JavaScript or TypeScript?
Drop your questions here and start the discussion and/or join us on Josh's Twitch stream this Tuesday, April 4th at 6:30 pm UTC (2:30 pm Eastern)!
]]>Venue: The Collab Lab Tech Talks
Summary: This talk provides an introduction to the Cypress end-to-end (E2E) testing framework. We cover the benefits of E2E testing and then do a short demo using a Collab Lab cohort's project.Links:
]]>I speak to a lot of folks breaking into tech. Many of these folks have a portfolio website, as it's a requirement to land a role, especially that first one.
Some things have probably been repeated, but they need repeating. You have to stand out in a sea of people who all want the same thing as you.
Say you're in a boot camp. You all typically do the same projects aside from your keystone project, but this can even apply to your keystone project.
Go that extra mile. Automate the deployment. There are great platforms that simplify this task, like Netlify (disclaimer I work there 😎). You can set it up to deploy on pushing code to your repository and get a deploy preview if you have pull requests etc.
Consider accessibility (a11y). You don't need to be an accessibility expert, but you can get many a11y wins from just a bit of reading. I have a great list of a11y resources in my Frontend Developer Resources 2022 article.
Consider adding some testing to the projects. That could be unit tests, component tests using something like Testing Library, Storybook, or Cypress Component Testing. Or even end-to-end (E2E) testing using something like Cypress or Playwright. Btw, I'm giving a talk for The Collab Lab this week on E2E testing with Cypress for anyone interested.
Automate something aside from the deployment. Use something like GitHub Actions. There are lots of pre-built actions at your disposal, but creating your own for a task could be fun and make you stand out.
Get feedback from great welcoming communities. I've named some of my favourite ones to be a part of in this post:
All the above is excellent advice you may have heard or heard parts of. Still, the one big thing that I never hear about and see consistently, is the lack of a custom domain for a portfolio site.
Instead of having your portfolio site at e.g. https://my-awesome-portfilio.netlify.app, have something like https://janesmith.dev.
It looks more professional and shows that you know a bit about DNS as you need to set it up to point to where your site is hosted. And they're not that expensive typically. 5-10$ USD can usually land you a decent domain name.
There are many services out there that allow you to purchase a custom domain, but one that I've been delighted with is Namecheap. The prices are super reasonable, and I've never had any issues.
Hope these points help you out! Until the next one!
]]>We work in tech, so many communities we're a part of definitely lean into that, but there's more to life than tech.
I'm active on Twitter and Mastodon, but if you want to connect on more than a Tweet or toot level, these are the places you can find me.
I first joined Virtual Coffee sometime in April 2020.
It's my favourite community. It was created by one of my now good friends, Bekah Hawrot Weigel (@bekahhw).
It's weird. Before the pandemic, I had no Internet friends, just good old irl friends. The pandemic changed that for me.
I'm always in the community Slack, but you can usually find me at the Thursday Zoom call and occasionally the Tuesday one too.
The community has exploded in popularity. Given that it's all run by volunteers, we've had to slow down new members to offer an excellent experience for everyone. Having said that, if you are interested, I have some invites. If you're interested in joining the community, please reply in the comments with a short message on why you'd like to join.
I was mainly a lurker here initially, but I am more active in the OpenSauced community now. What brought me here was Brian Douglas, a.k.a. @bdougieyo. Brian used to work at GitHub and is a big proponent of open source, as am I. I like what the community and he are doing around building a new product, OpenSauced.
It's now a business, but this community is more than a business. It's a great place to dive into open source with supportive people like @brandontroberts. I've contributed a bit to the project and plan to contribute more.
If you're interested in getting into open source, look as far as OpenSauced.
The Lunch Dev community, started by Chan (@chantastic), is one of my new favourite communities. I've been a lurker here for a while, but I've slowly become active.
Chan is good people, and I love their energy.
If you're interested in this community, here's Chan talking about Lunch Dev on a live stream we did together last year.
DEV has been great to me. I used to work there, met many great people, and learnt a lot about building community.
Working in open source and being able to interact with the developer community is one of my favourite things to do.
Aside from interacting with folks on the site, this is also what started my live-streaming journey.
Found the Tweet where I got the first people to pair with me on a live stream back in 2020. How time flies.https://t.co/cEXDHs46kn
— Nick Taylor (@nickytonline) February 19, 2023
Lots of good times meeting tonnes of folks from the community.
A big shoutout to Christina Gorton for being my weekly partner in crime on the DEV Twitch stream!
Yes, I'm plugging my own community. Not because it's necessarily the best community out there, but because I'm enjoying building out this community.
It's still early days, but I'm learning more about Discord. Looking at you Discord bots! After shutting down the VSCodeTips community, I decided to embark on this community as it ties to another implicit community of mine, my Twitch and YouTube channels.
If you're looking for another friendly nook on the Internet, come say hey in our community.
Join the iamdeveloper.com community
Community fatigue is real. I'm in more Discord and Slack communities than mentioned above, but I'm less active or barely active in them. Some are for conferences or projects I've been involved in, but honestly, there are only so many hours in the day.
I mention this in case you feel pressured to participate in many communities. It's OK to be a lurker or to interact infrequently.
Building a community is hard, and I'm still gaining experience. Still, I look to what Bekah has done with Virtual Coffee and the work-related communities she's built for inspiration.
She recently started a series about community on her YouTube channel that I strongly encourage you to check out.
Photo by John Cameron on Unsplash
]]>The BenQ ScreenBar Halo Monitor Light light comes in an aesthetically pleasing matte grey box.

The presentation of the light when you open the box is really well done. It's not Apple-level, but still pretty on point. I like the bit of fun they have on the open lid where it says, "Hello! This is Halo!"
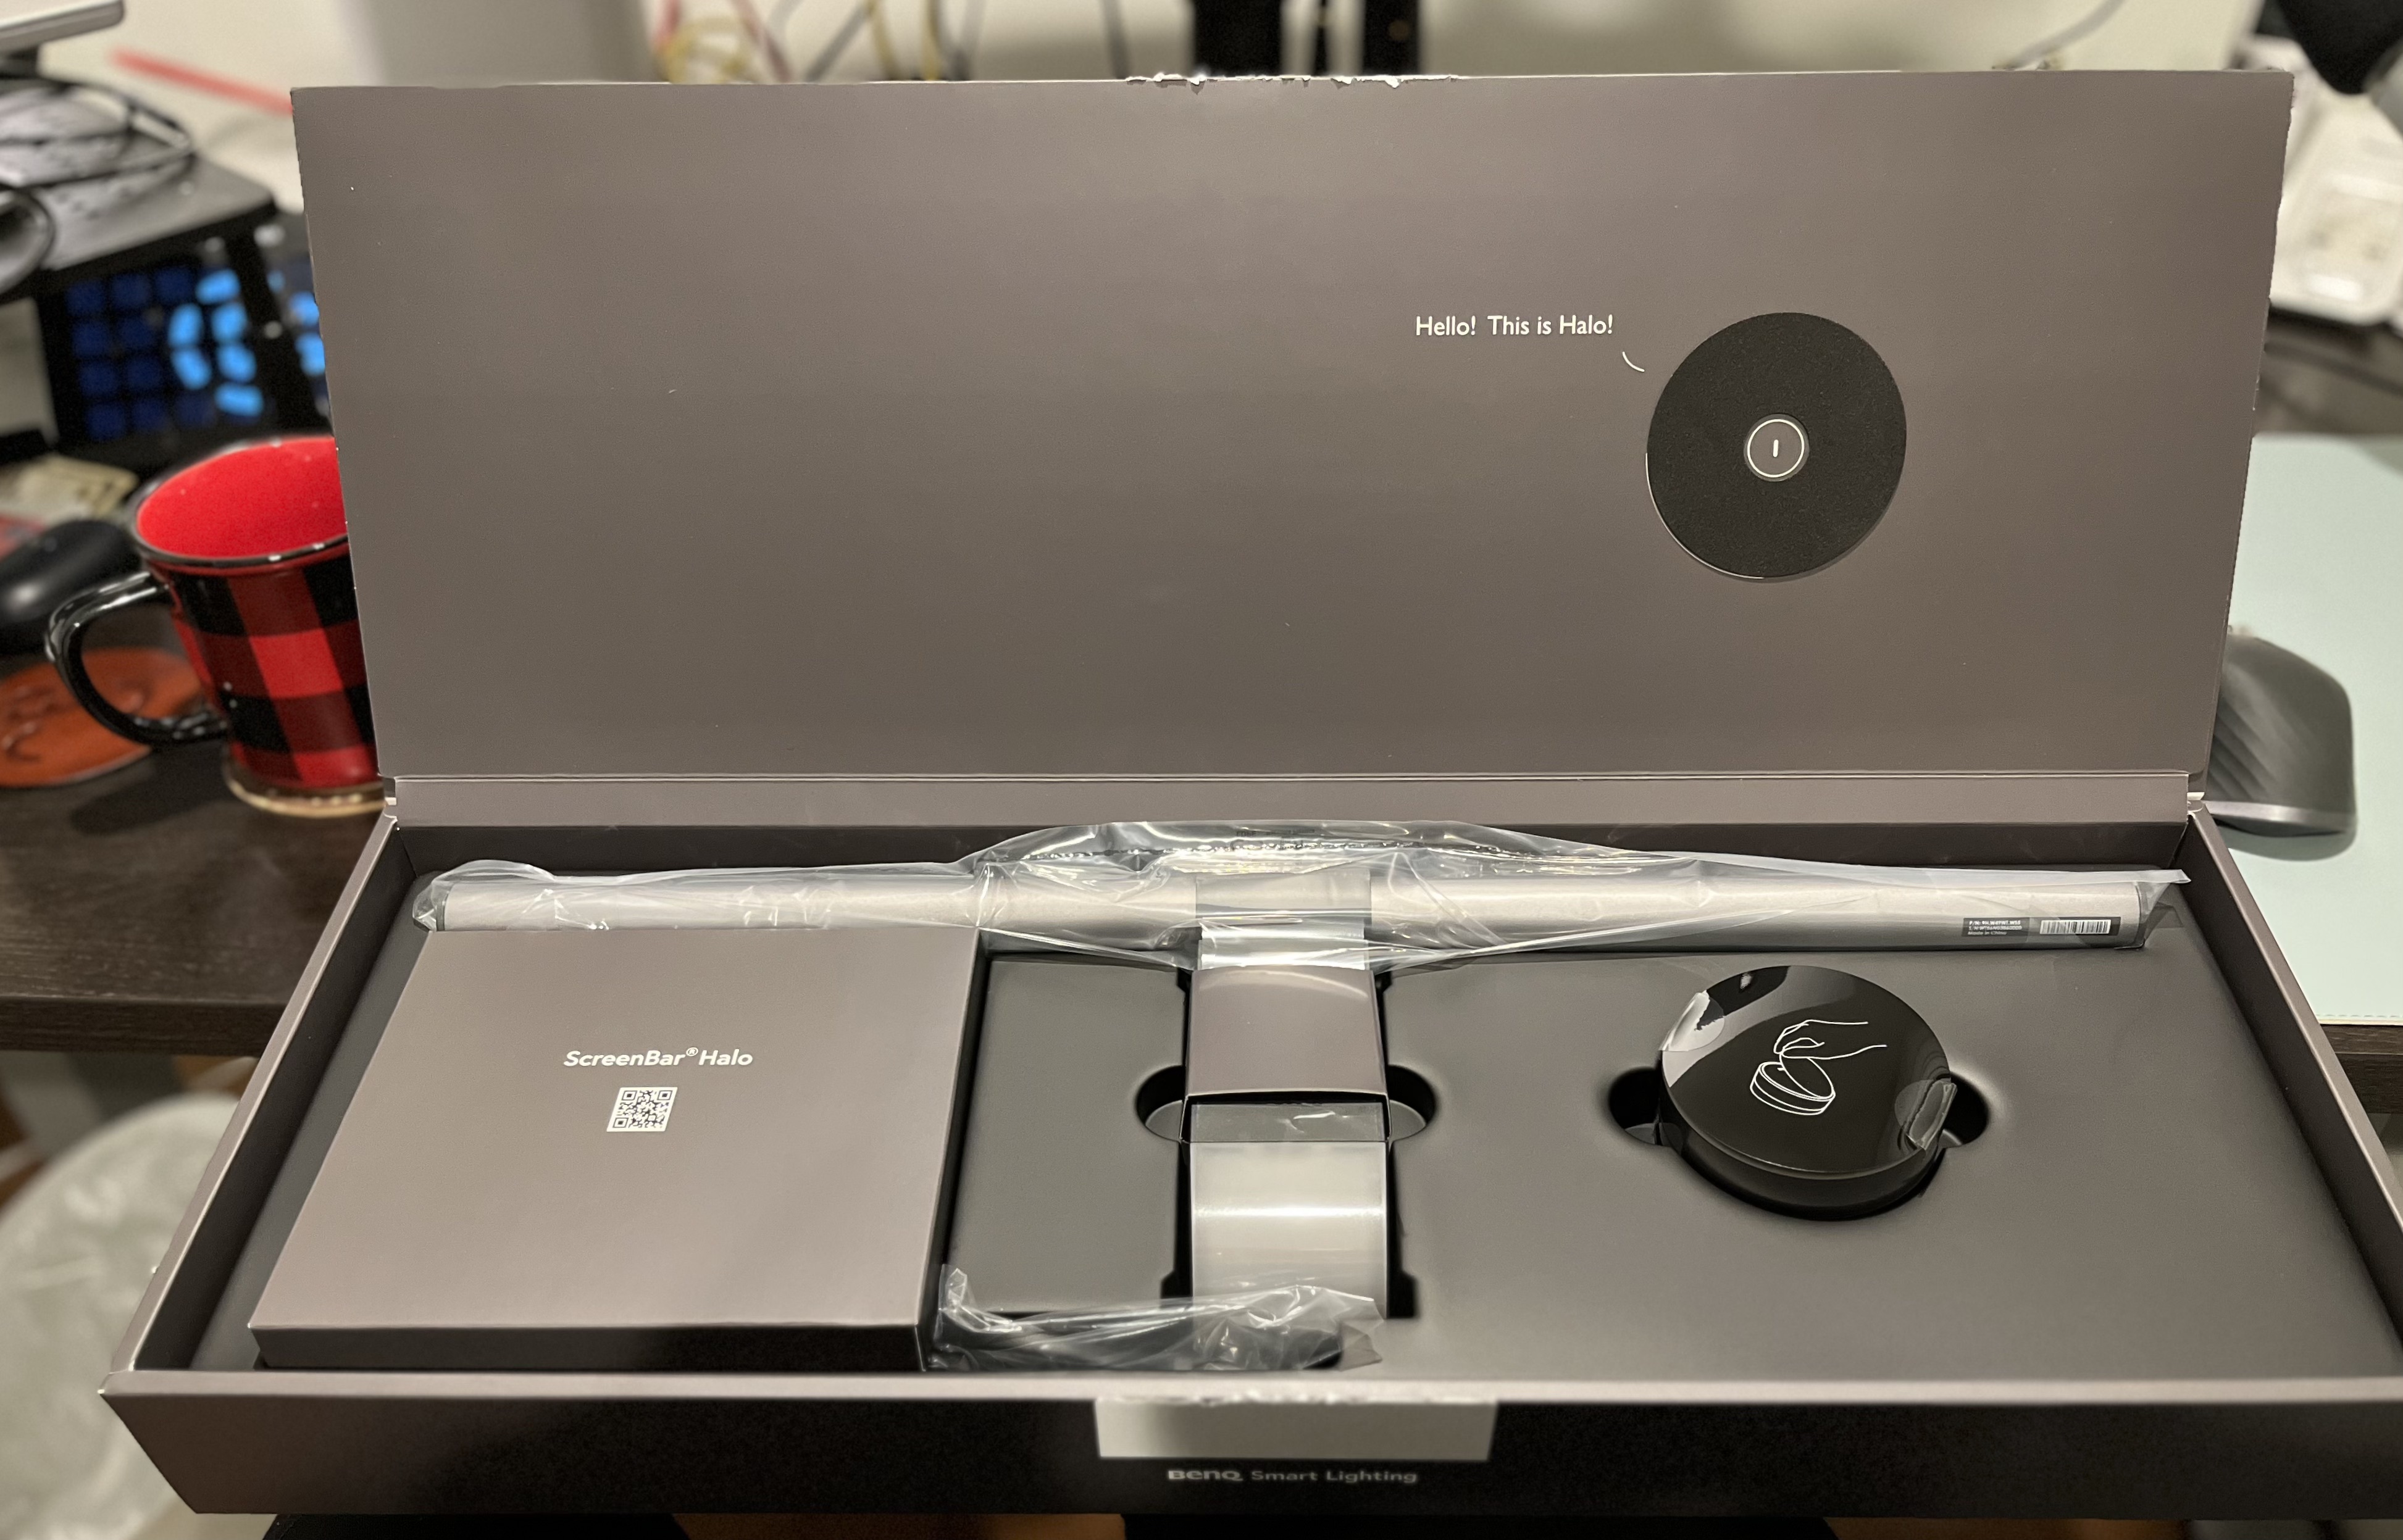
Everything was packaged well, but removing the plastic wrapping around the light was tricky. I used scissors to cut the tape, but I was still worried about damaging the lamp. It could be easier if the plastic covering each part of the light bar could slide off.
When I first connected the light, I plugged it into the built-in USB hub (USB 3.0) in the back of my monitor. It would flash periodically. After reading a little bit, I realized it wasn't providing enough power to the light. It requires 5V / 1.3A to work. I tried the same thing in my mini USB hub for my laptop. No luck again. I could get it powered up by plugging it into my Mac with a USB-C adapter. It wasn't enjoyable to have it plugged directly into my computer, though, as it protruded pretty far out because of the USB-C adapter. Ultimately, I ended up connecting it to my router's USB port on my desk. Another option could have been to use an iPhone plug, but the router's USB port is working fine.
The remote takes 3 AAA batteries. Thankfully they were included with the product. I always wonder why so many products don't have batteries. The bottom of the remote was easy to open and close to insert the batteries.
For some context, I'm in an office that is 8 x 10 feet (2.44 x meters 3 m) with white walls and a window above my desk that is 2 x 4 feet (0.61 x 1.22 meters)
Turning the front light on gave me enough light to see everything in front of my monitor, but I also preferred it with the rear light on.
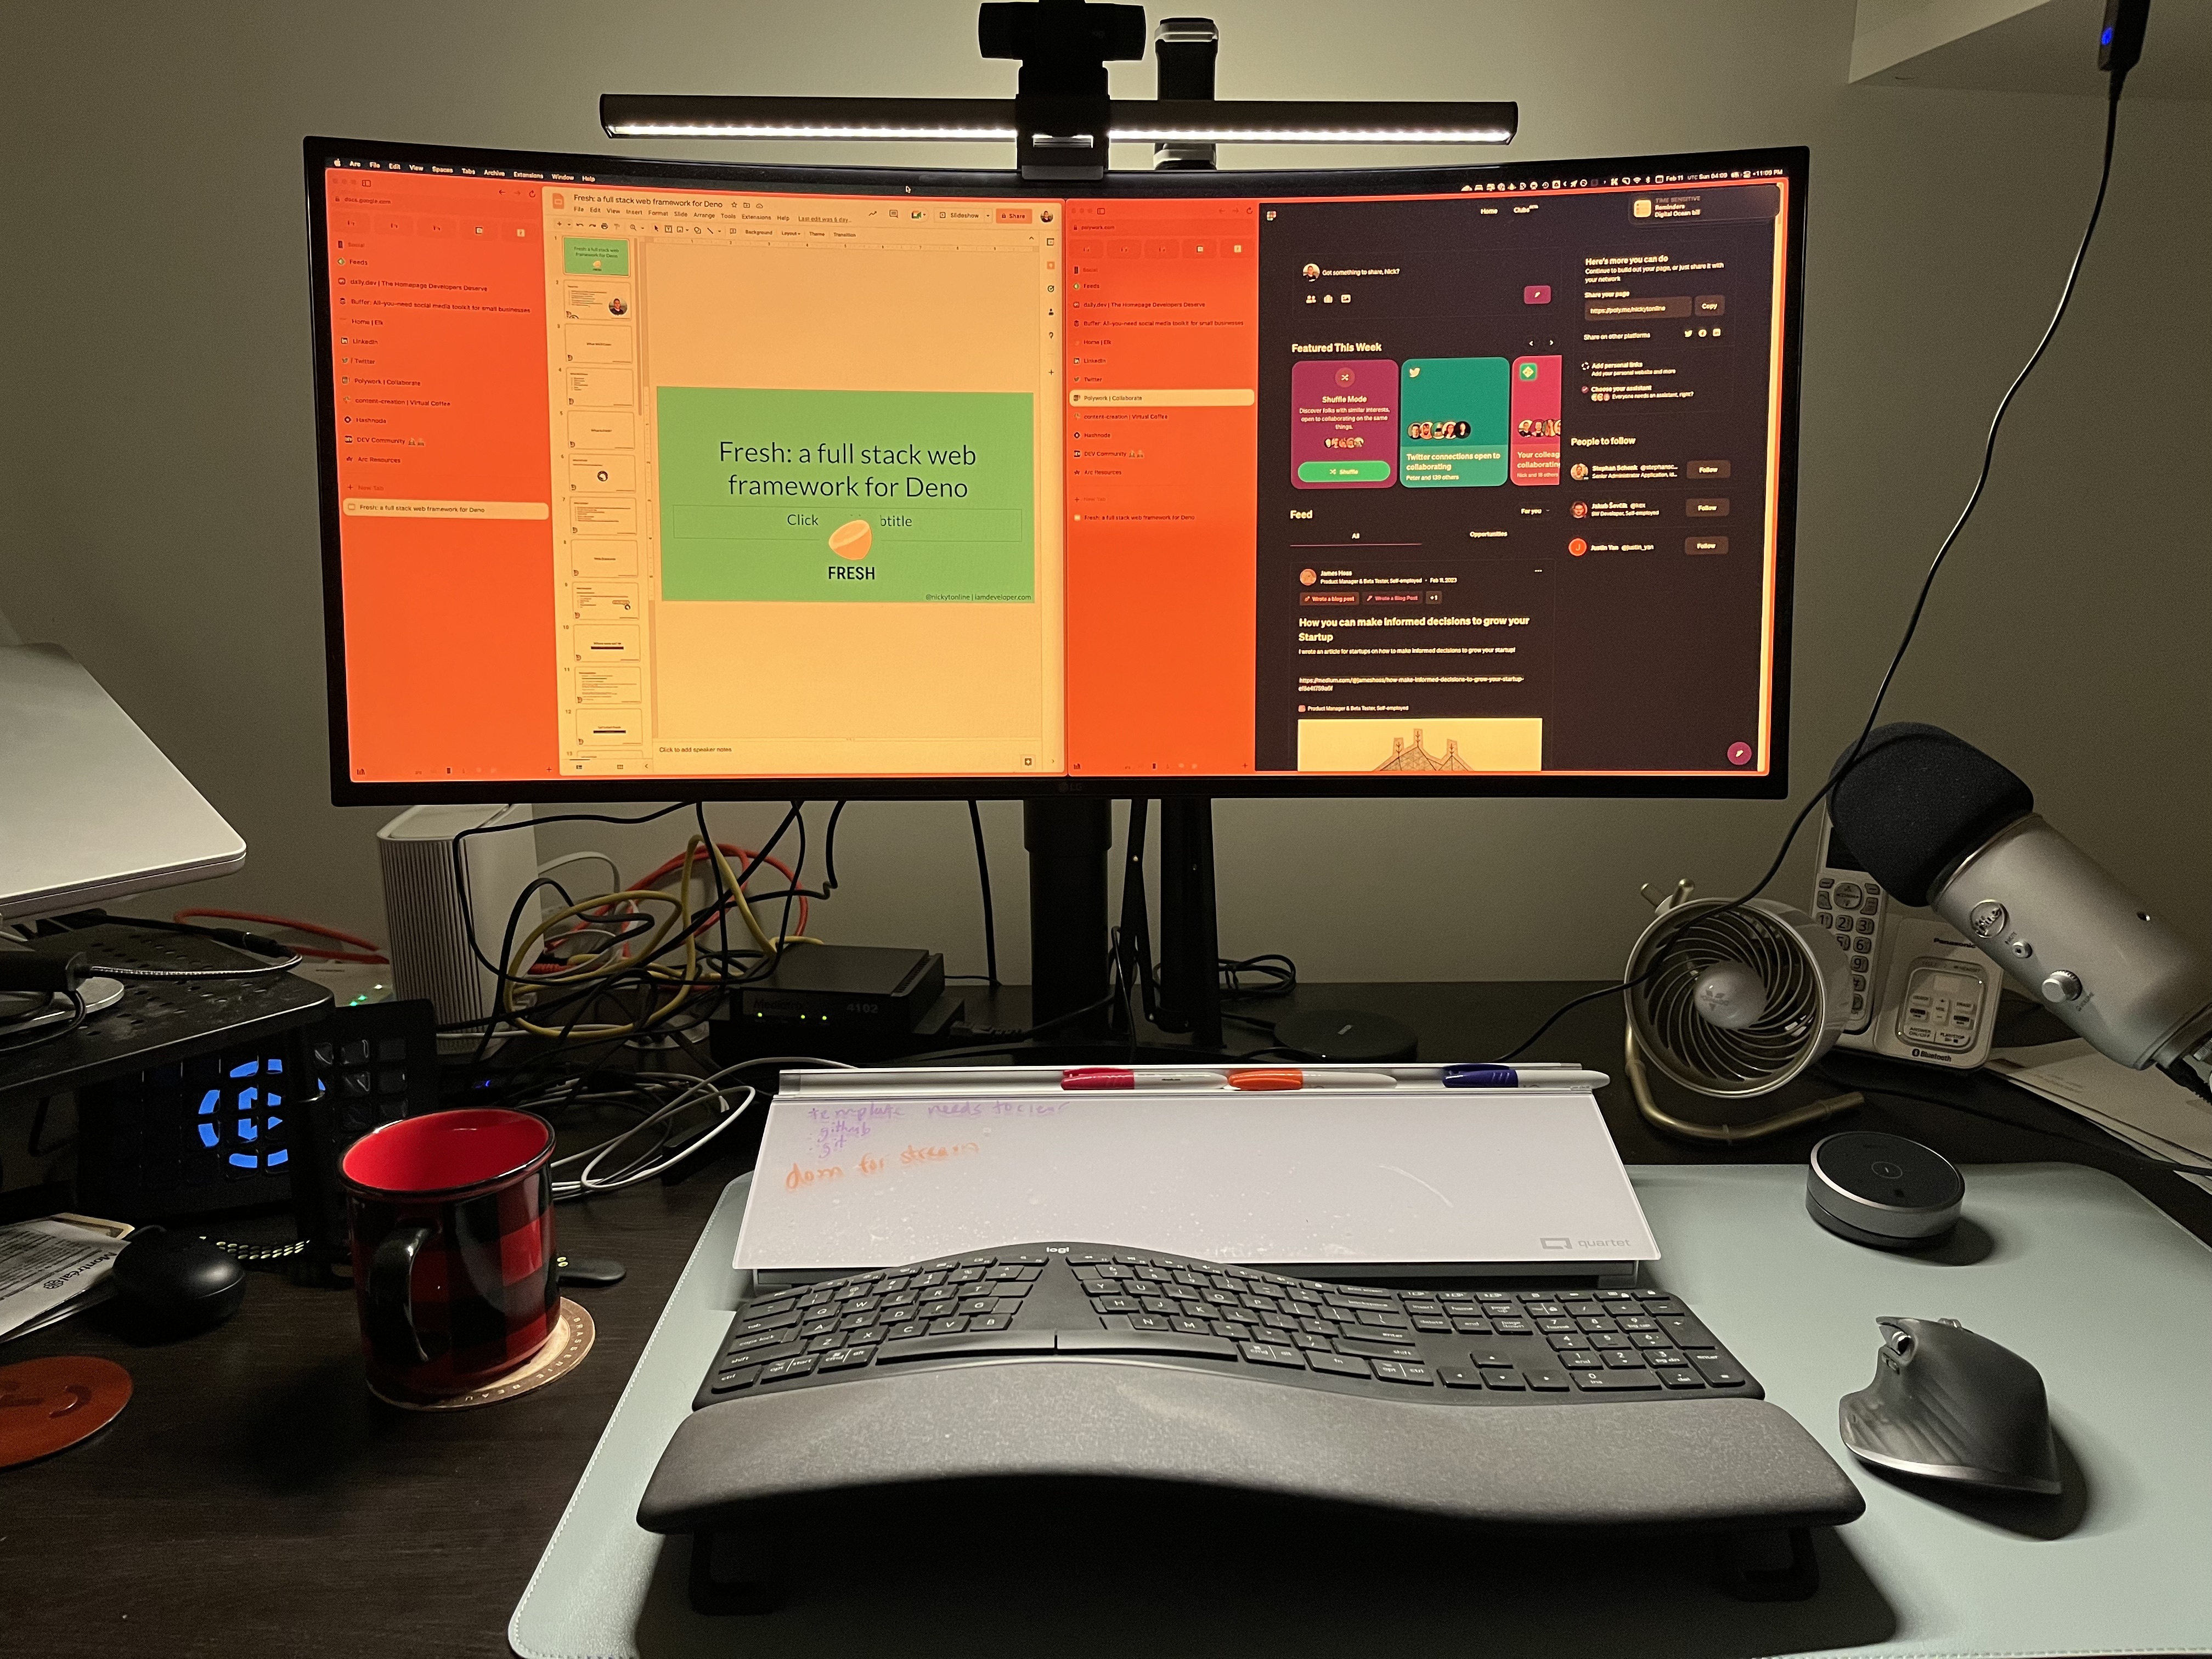
In the evenings, I prefer less light, so I tried it with just the backlight, and surprisingly, I had a perfect amount of light to work in the evenings.
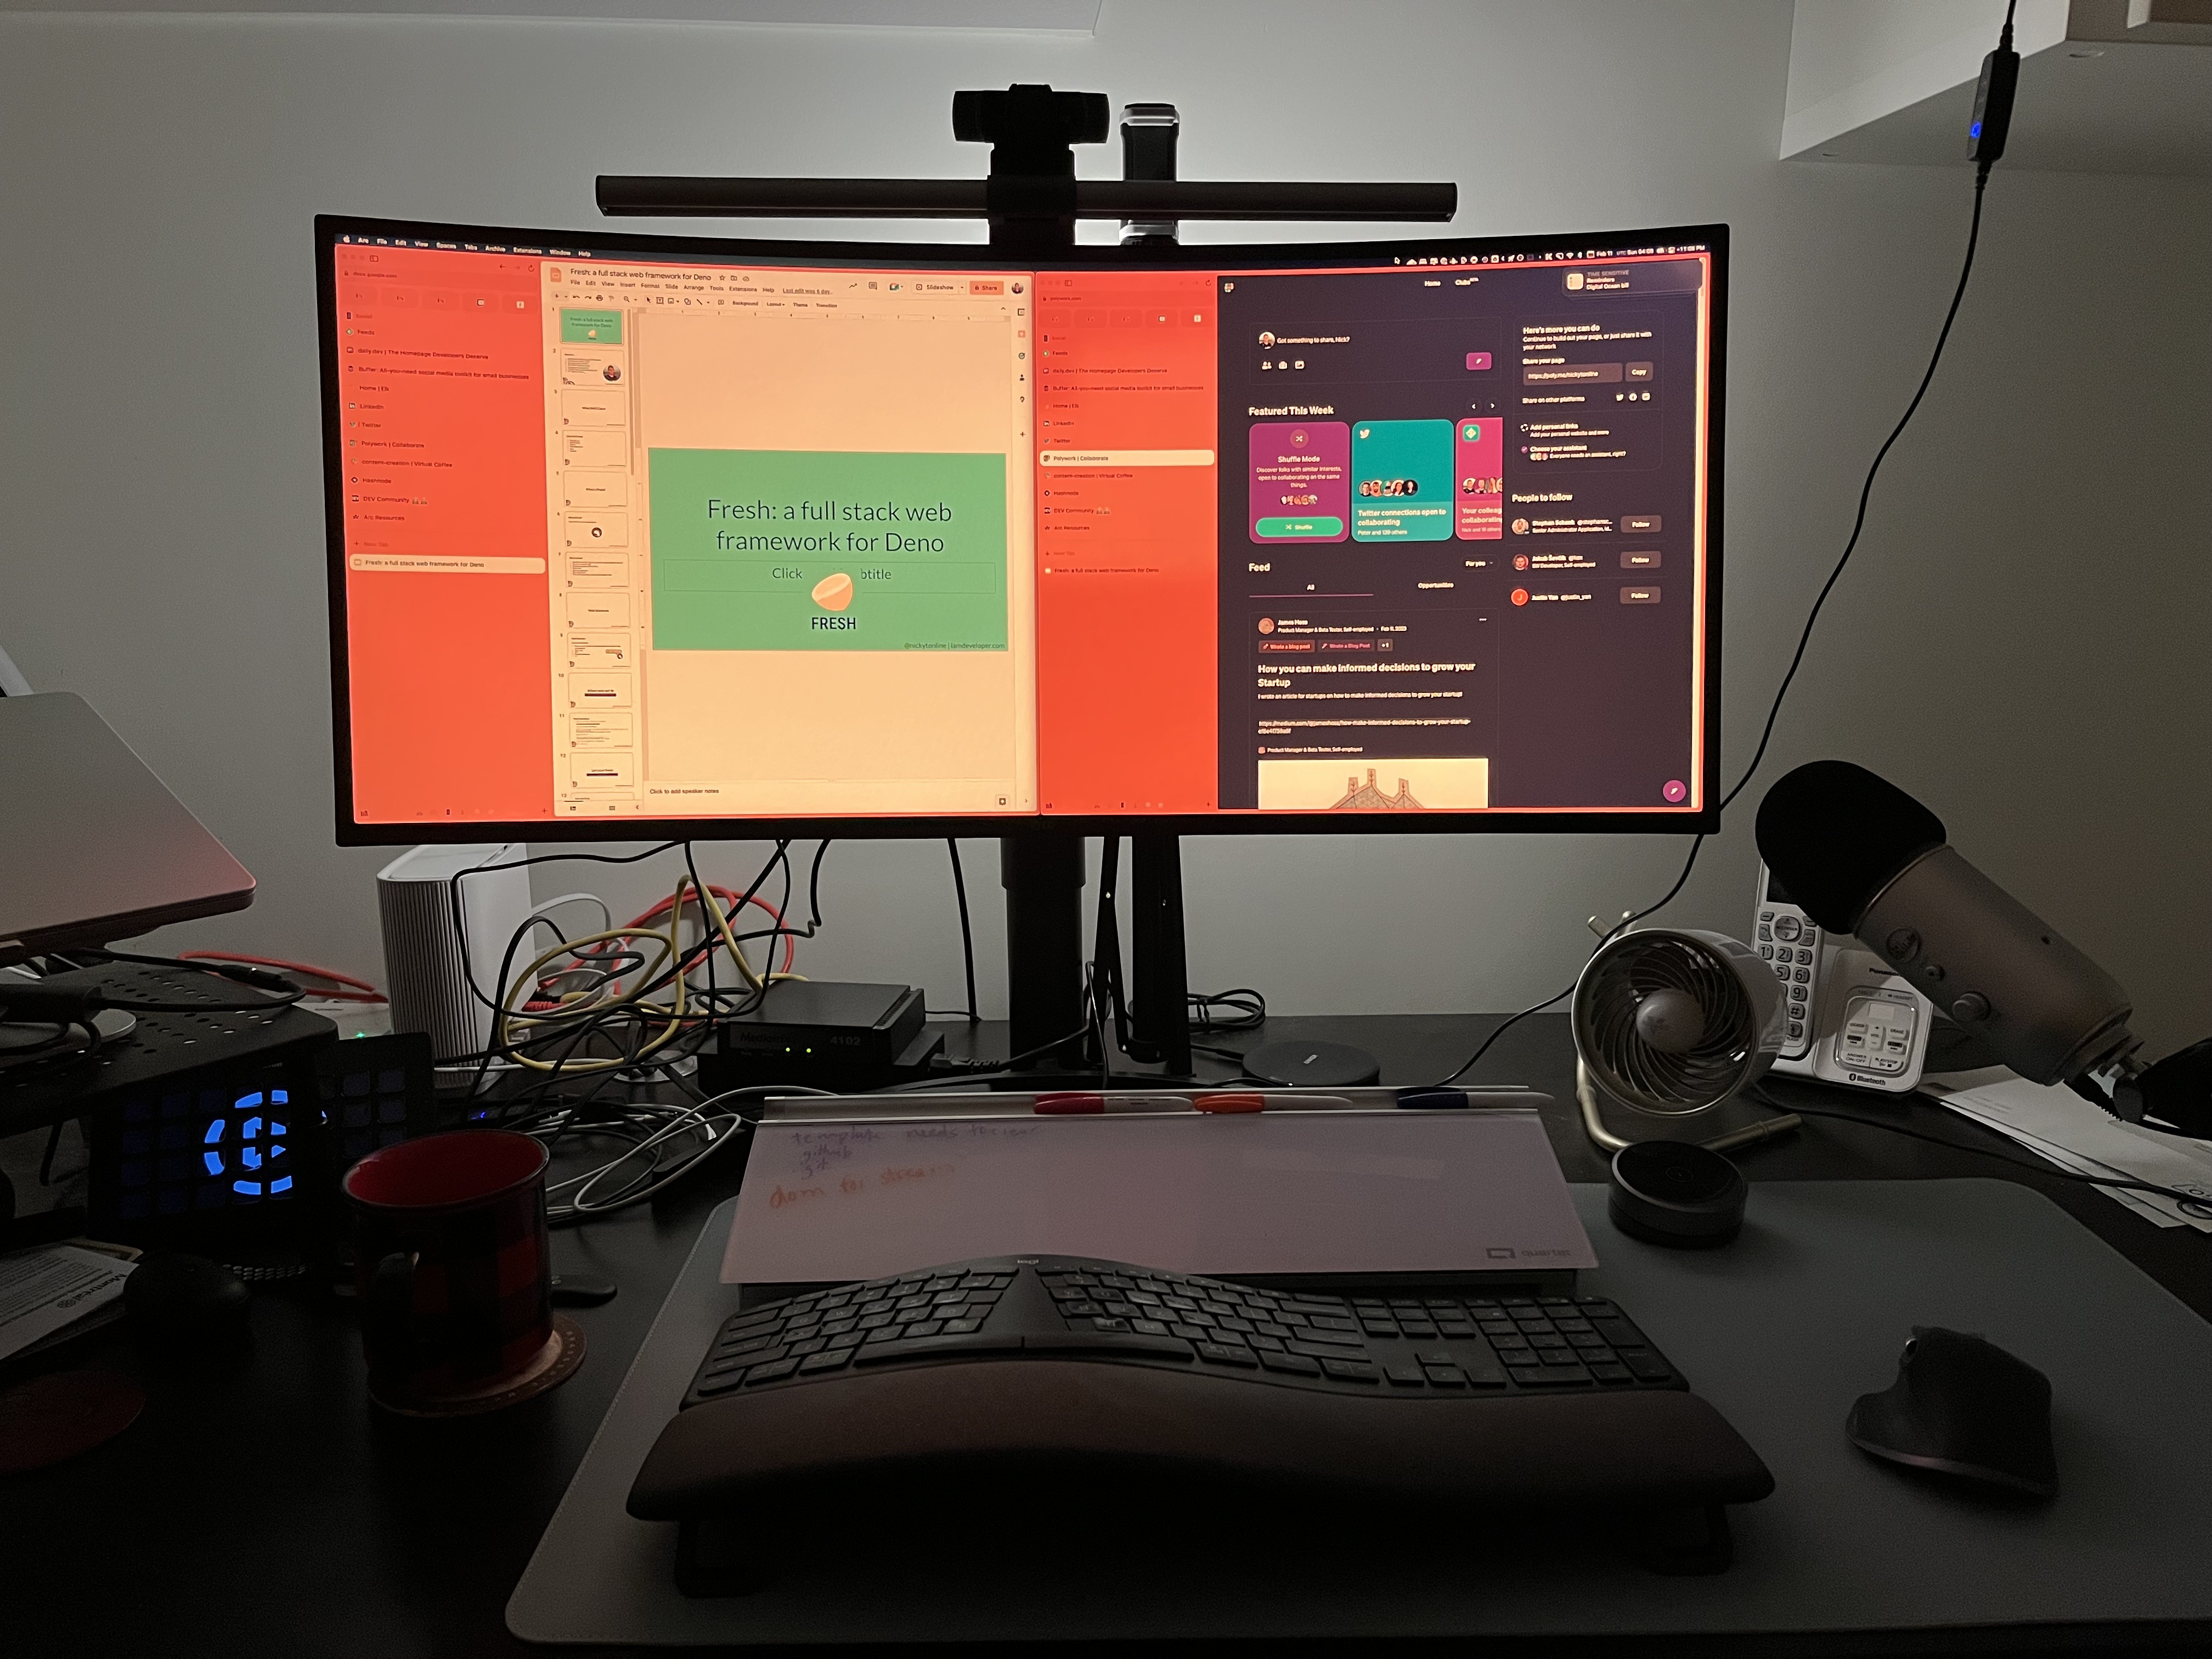
The remote sits nicely on my desk, arm's length away. It looks really nice just sitting on the desk.
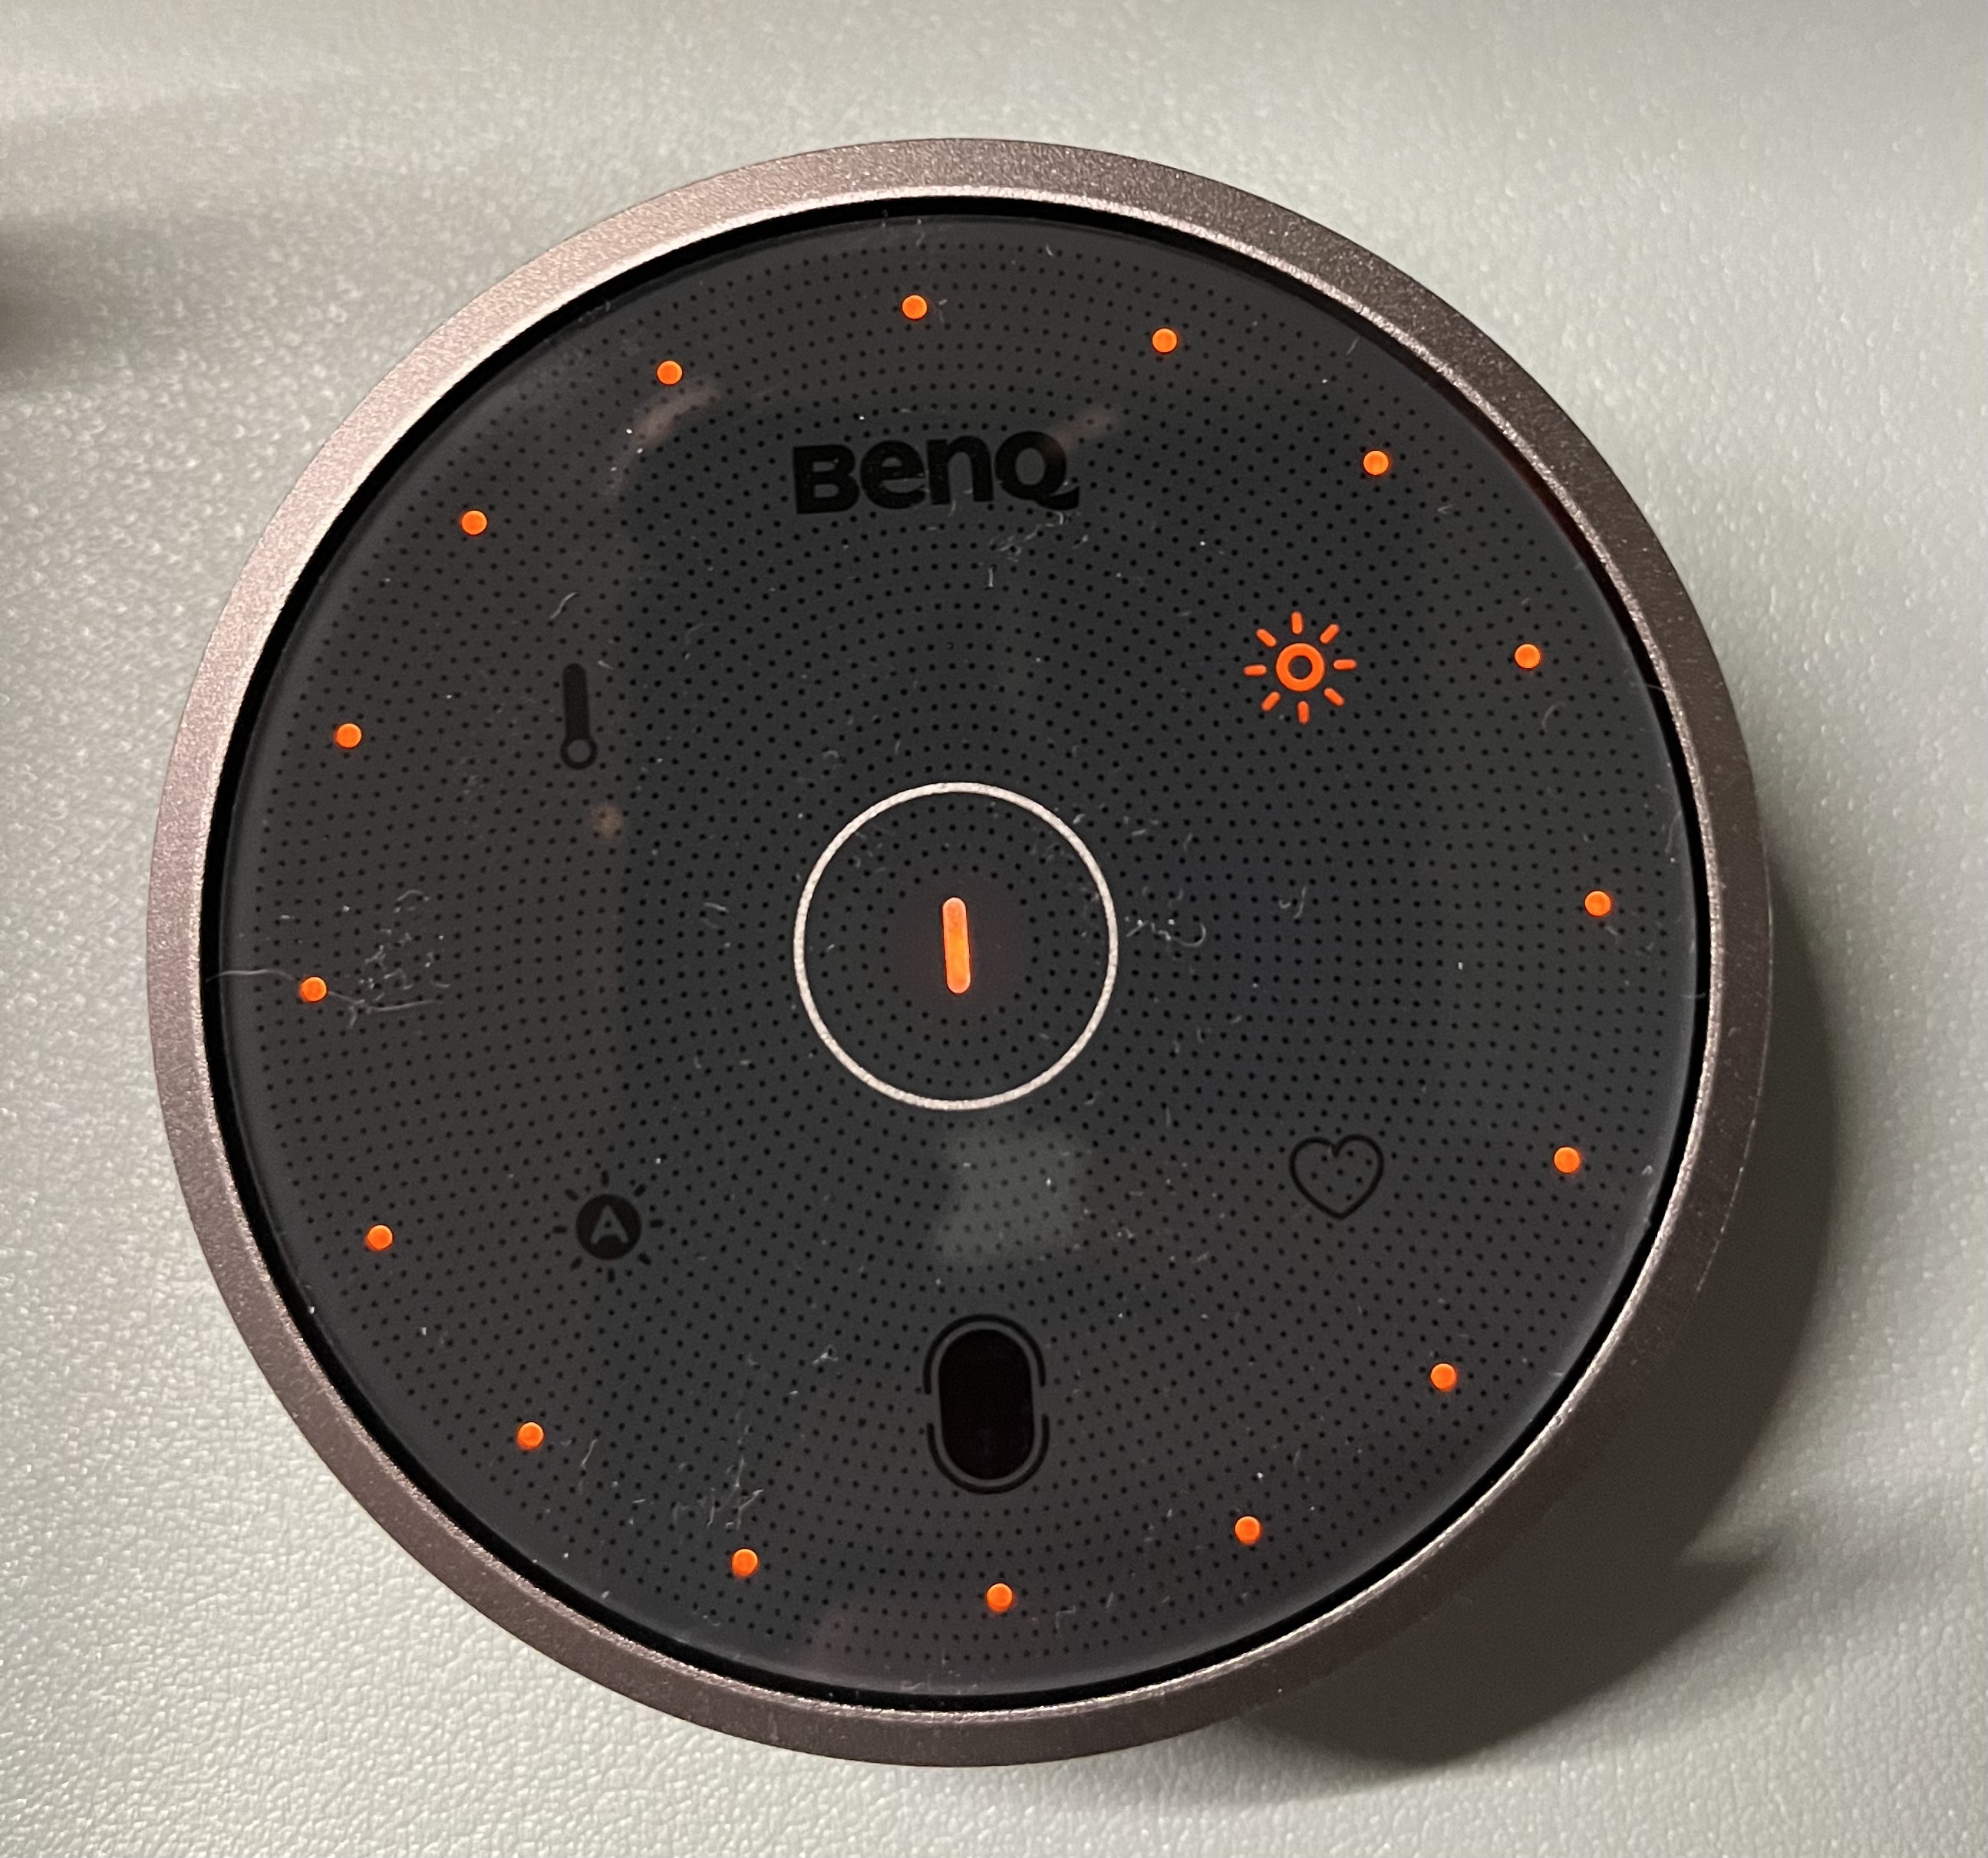
In the photo, you'll notice it's very reflective. I can see the back of my phone on it that took the picture. It also surfaces smudges and fingerprints. This doesn't bother me, but maybe some folks would constantly be wiping it down.
I like that it turns on when you hover your hand over it as you see in the photo. The one thing I found confusing, though, is not all the buttons on the remote light up, so I had to look closely or turn on my office lighting to see what all the buttons were. An improvement could be to have them all light up and have some indicators to suggest if that feature is on.
I've been using the automatic feature that adjusts the light throughout the day, so I'm not tweaking things with the remote.
I have yet to speak to the battery life of the remote, as I've only been using this for a few days.
I checked their site when BenQ contacted me about trying out the light. I realized just sending me the light wouldn't work because I have a webcam that I mount in the middle on top of my monitor. I discovered they had a webcam accessory, so I asked if they could send that along with the light.
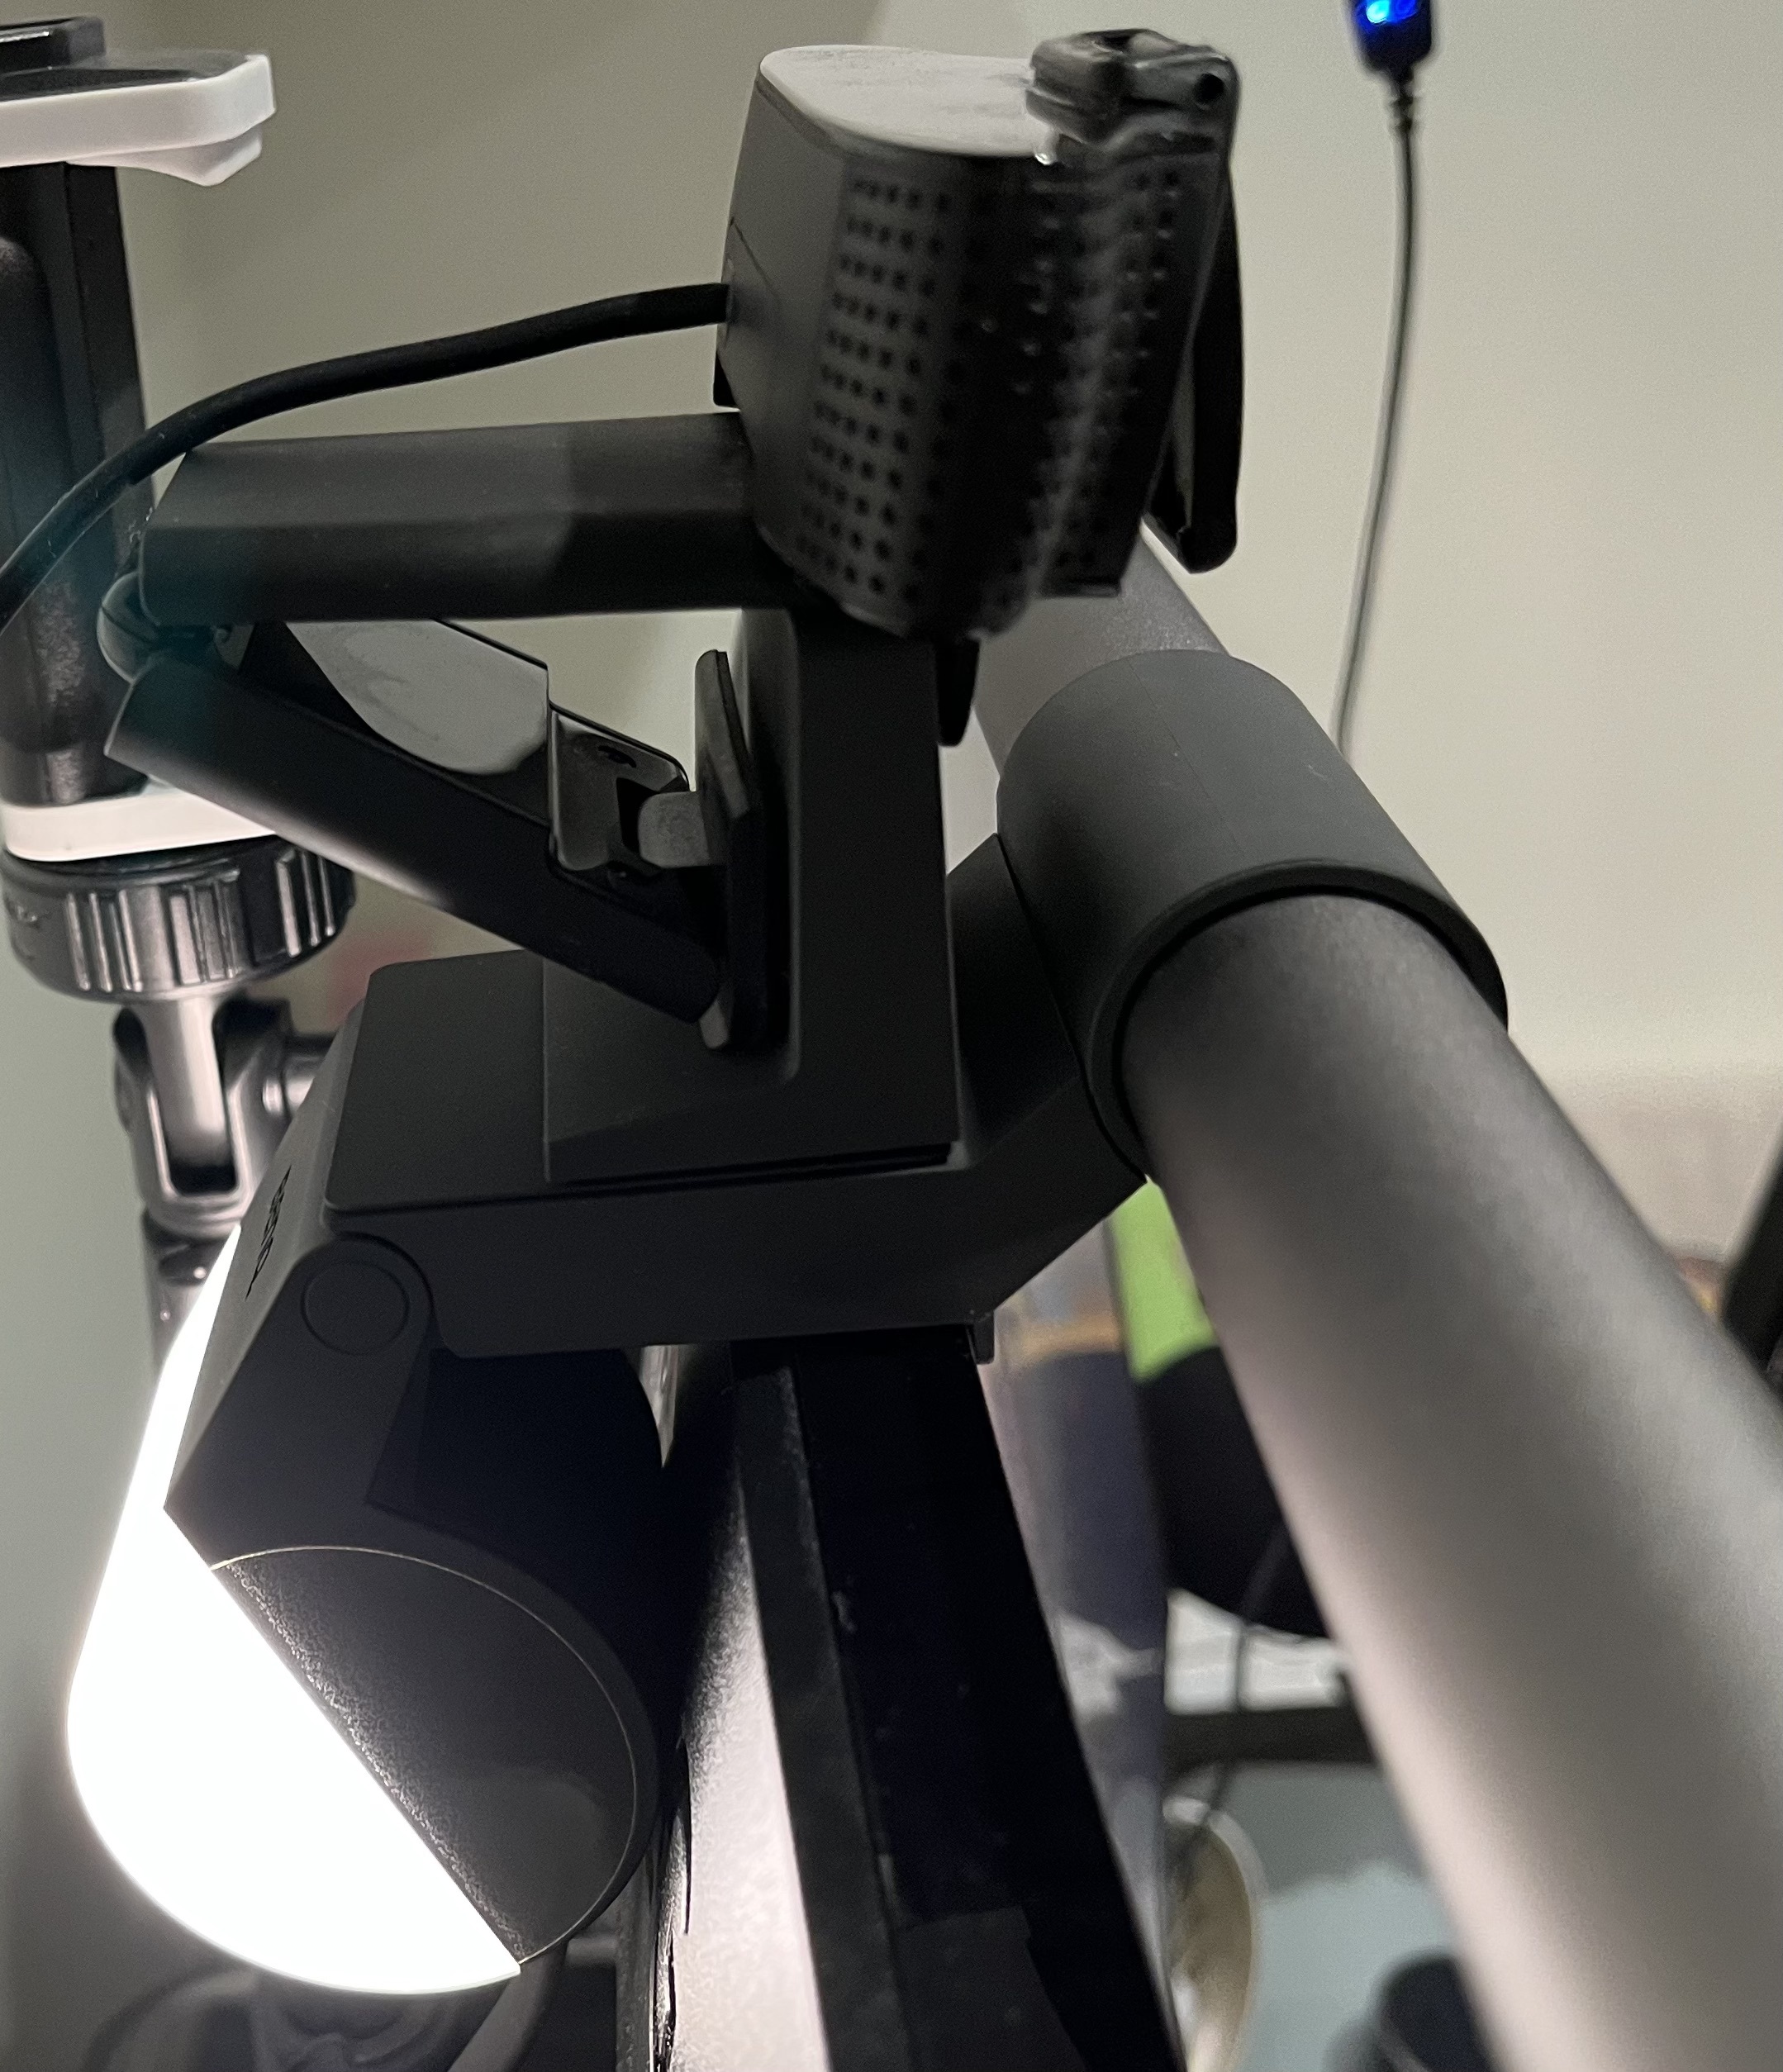
The webcam accessory is L shaped and comes with a magnet that you stick on top of the Halo. This was quick to set up and works well. Since the camera is a little higher because of the light, I had to change the angle of the camera slightly.
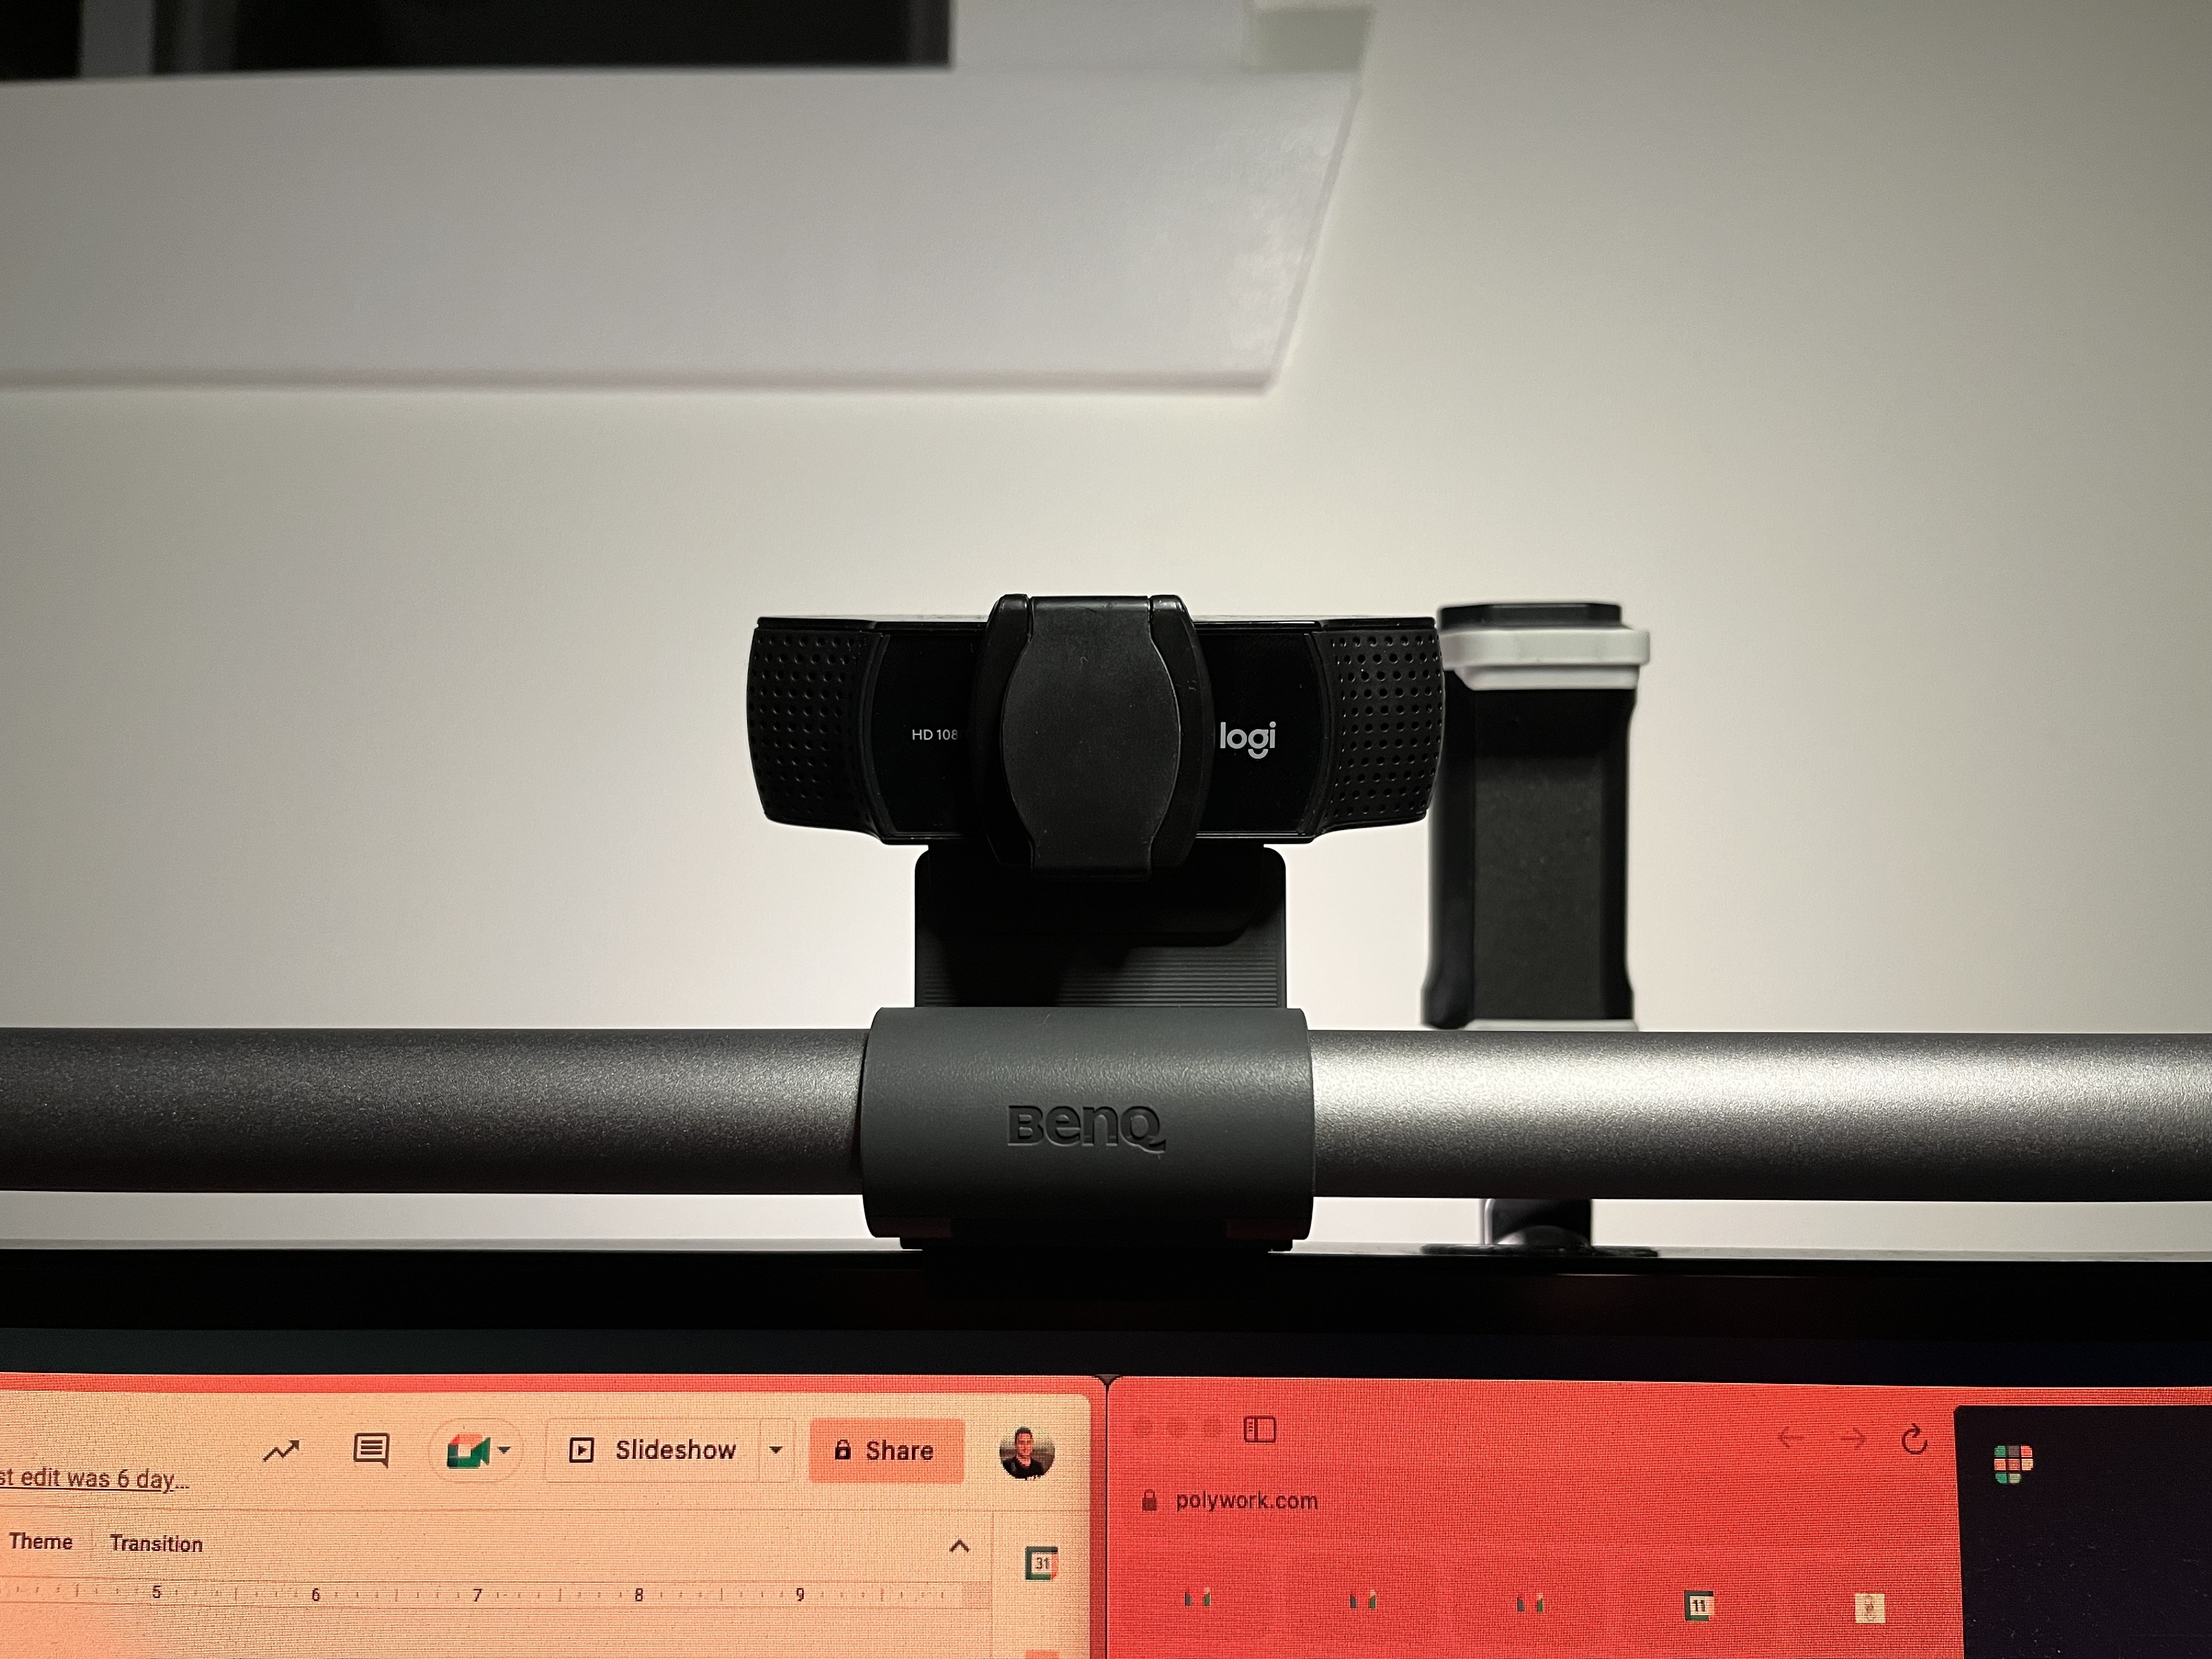
If you have a webcam set up like me, you need the webcam accessory.
Googling the price at the time this review was written, the BenQ ScreenBar Halo Monitor Light is going for 180$ USD (140$ £) on Amazon. I've only bought IKEA desk lamps or some inexpensive ring lights for live streaming in my office, so I'm not sure if that price is high for desk lighting. Having bought lighting for other parts of my house, though, it doesn't sound that expensive.
Despite the issues I ran into with removing the packaging, which was not a dealbreaker at all, I'm impressed with this light, aside from the little annoyances I mentioned about the remote. The light is also pleasing to the eye.
As mentioned, I use the rear light only in the evenings, and it provides me with enough light to work. Again, if you have a webcam set up as I do, the webcam accessory is a must.
Again BenQ sent me this light, but after reviewing it, I would shell out the cash for it.
]]>After almost two and a half years at Forem, the software that powers dev.to, I decided to move on to new challenges.
My first day at Netlify was April 4th, and it's been fun and challenging ever since!
Big news!
— Nick Taylor (@nickytonline) April 4, 2022
Today is my first day at @Netlify! I’m joining the ecosystem team!
Let’s go! 🎉 pic.twitter.com/T7XGgsglCI
It's not why I joined Netlify, but I won't lie; having an offsite in Hawaii was pretty sweet!

I got to meet all my co-workers and enjoy some downtime. I was floating in the Pacific with my entire team at one point. I highly recommend meetings in the ocean.
Unfortunately, like many tech companies, even Netlify was not immune to layoffs. 16% of the company was laid off. I made the cut, but it's a weird feeling making the cut. I'm still happy to be working at Netlify, and life goes on, but it's been weird getting back to whatever "normal" is. Having said that, I'm still super excited about the stuff we're working on.
I gave a bunch of talks this year and was even on a panel!
Tools for web developers: Live coding and debugging
Virtual Coffee Lunch & Learn: Asking Coding Questions
Automate syndication and ownership of your content with Eleventy
Expert Panel: Trending Tools and Frameworks – What's Hype and What's Not
Fresh: A New Full Stack Web Framework for Deno
If you want the slide decks and additional info or want to check out previous talks, head on over to my Talks page.
I did my last stream for dev.to, and then around the end of April, I started putting some love into my own Twitch stream. Although I loved doing the dev.to Twitch stream with my co-worker Christina; I had neglected my own channel for about two years. 😬
I re-kickstarted my own stream and was happy with how it turned out. From a numbers perspective, even though I don't care as much about this as my lizard brain does, I went from about 100 followers to what I currently have, 425 followers. Thanks to everyone who thought my airtime was worth the watch, and a big thanks to my subscribers.
And lastly, a big thank you to all the guests! 👇🏻
If you want to check out all the streaming I do, check out my streaming page.
All streams end up on my YouTube channel, so you know the drill. Hit that subscribe button. 😎 Check out great content like this interview with Deno core member Luca Casonato, walking me through Fresh, a new full-stack web framework for Deno.
Aside from streaming on my own Twitch channel, I was also a guest on a few streams. Thanks for having me Deepgram, Jenn Junod, and Anthony Campolo!
Need help or inspiration for the #Deepgram x #DEVCommunity hackathon? We'll see you on the @DeepgramDevs live hackathon office hours! Today (March 25) @ 5:30 PM UTC on Twitch.
— DEV Community 👩💻👨💻 (@ThePracticalDev) March 25, 2022
📺: @sandra_rodgers_, @BekahHW, @nickytonlinehttps://t.co/caO8oZ5zMs
Yoooo!
— ✨Jenn Junod✨ (@JennJunod) November 22, 2022
You ready?!
✨ 1-hour countdown✨@nickytonline will be joining us to talk about dev tools!
Let's do this 🤩
📌https://t.co/xdEL9lYiXN
🗓️ 9am PST | 12pm EST | 6pm CET pic.twitter.com/2CutpQnFHo
In one hour we'll be going live with @nickytonline to learn all about server side rendering with @astrodotbuild!https://t.co/SV0JiCxHa6 pic.twitter.com/elKpHXBCS0
— ☃️ Anthony (ajcwebdev.x) ❄️ (@ajcwebdev) October 24, 2022
I listen to Twitter Spaces somewhat frequently and sometimes I'm also a speaker. I can't remember all the Twitter Spaces I spoke at, but here's a couple I spoke on:
Frontend Fun: JS Frameworks and Deployment Platforms
— Lucia Cerchie 🦎 (@CerchieLucia) August 24, 2022
Hacktoberfest Getting Started Q & A
We're so pumped about Hacktoberfest, we have Twitter Spaces coming at you every Wednesday for the next three weeks! We start tomorrow at 8a PT with @nickytonline, @KirkCodes, and @BekahHW chatting about Getting Started and answering your questions. https://t.co/gs0wOTFHVK pic.twitter.com/OJ3ZOJ2Xou
— Deepgram (@DeepgramAI) October 4, 2022
There's a bunch more on my Polywork if you want to check them out over there.
I dipped my toes into the world of podcasting. I started repurposing content from my streams in audio format.
The podcast is still pretty new, but I've had a lot of fun pulling out what I think are great conversations from my Twitch stream and putting them in podcast format. Here's the latest episode with chantastic. Loved this conversation with Chan!
I was also a podcast guest on a couple of podcasts. Thanks again for having me Eddie and Candost!
I haven't blogged a ton this year, but I still got some posts out, including one about automating my blogging workflow, which I'll discuss in the next section.
Thanks for the thank you email and gift @ThePracticalDev! Honoured to be a top author and moderator! 😎 pic.twitter.com/eIoCmE0Yvy
— Nick Taylor (@nickytonline) December 9, 2022
I also was one of the top authors for dev.to for 2022! The post I wrote about frontend developer resources was the number two post for the whole year! 🤯
I put more time into automating some of the things I do in content creation. Regarding blogging, I blog on dev. A GitHub action runs nightly to pull in my dev.to posts into my blog. I got this set up just before starting at Netlify. Still, I recently improved it, so now it generates pull requests (PR) automatically with deploy previews. If all the checks pass, it merges automatically. Before that, I was merging the code directly to my main branch for my blog, so I could only see if something broke if I went to my Netlify dashboard. I'm really happy with this flow now.
Aside from that, I automated pulling in guest information for my Twitch stream. Before that, I was manually adding the info before every stream.
We talked about this when you were on my stream @jamesqquick, but I finally got around to automating guest info with Airtable and @Netlify Edge functions. I should have a post up this week sometime, but for now, here's the PR. https://t.co/qcKFbpIyvQ
— Nick Taylor (@nickytonline) November 6, 2022
There have been some Tweaks, but here's the initial PR that made it happen.
The https://github.com/nickytonline/iamdeveloper_dot_live/pull/3 repository on GitHubThere's still more to do, but I'm really happy with this setup at the moment.
I started a community over a year ago for VS Code, as I'm a fan. Ultimately, I needed more time to grow the community, which I didn't have, so I decided to shut down the community.
Thanks to everyone that joined!
Although the VSCodeTips community didn't pan out in the end, I put my energy into a Discord community as it relates more to things I do weekly, like streaming. If you're interested in joining the community, head to discord.iamdeveloper.com.
Although I've been a lot busier this year with the new job, I still volunteer at Virtual Coffee. It's my favourite community. As always, thanks to Bekah for starting this community, and to all the volunteers that make it happen.
I've been helping at The Collab Lab since December 2021, but it was mainly in Slack, supporting people. This summer, though, I got to mentor my first cohort. It was a lot of fun, and I'm super proud of what my team accomplished.
And that's a wrap! I'm looking forward to enjoying the rest of my vacation and coming back recharged for 2023!
Photo by Choong Deng Xiang on Unsplash
]]>Venue: ChicagoJS
Summary: Fresh is a web framework based on Web standards built to run on the edge anywhere you can run Deno. Fresh takes inspiration from existing frameworks to provide features like file-based routing, Islands architecture, server-side rendering and Typescript. Another compelling reason to consider Fresh is that there is no build step.Links:
]]>Just tootin' as https://t.co/2MPwOPw7wZ thanks to @nolanlawson and #mastodon. Check out https://t.co/iwbmZfzJ8n
— Nick Taylor (@nickytonline) April 7, 2017
I tooted a bit then came back to Twitter, but this time, it feels like a mass exodus, at least for folks in tech.
The user experience is definitely different from Twitter, but even with its clunkiness, I have started to enjoy it.
Although I'll be tooting, for the most part, I've realized that some folks use Twitter as the main point of contact with me, so I'll still be checking DMs over there and still Tweeting (just not as much as tootin'). I'll probably also be more active on LinkedIn too.
Another exciting development is some ex-Twitter employees have started their own Mastodon instance, macaw.social. Thanks for linking it to me Arthur Melo!
Some resources you may find handy if you're new to Mastodon:
If you're on Mastodon, feel free to drop your handles in the comments so others can give you a follow over there. You can find me at @nickytonline@toot.cafe.
What are your thoughts on Mastodon and are you considering, if you haven’t already, moving over there?
I'll end with this.
Don’t feel under pressure to leave Twitter if it still brings you benefit. As soon as it becomes clear that it doesn’t, feel confident that you can leave Twitter and it’ll be fine.
– Andy Bell from his post Free of the bird
Photo by redcharlie on Unsplash
]]>
I was able to pull down all my subscribers, as you can export them.
That is important, but I also wanted all my past newsletter issues. Revue has an API, so I wrote a Deno script to save them.
This works great, but I was like, let's make this easier for folks who want to grab their newsletters and not have to worry about coding all this. So I wrote a small app to do it.
It uses a Netlify function written in TypeScript to grab the newsletter issues and good old HTML with some inlined style and inlined JavaScript.
I actually made it a site now if you want to be lazy. https://t.co/wUI7NJD84A https://t.co/1Ty6zSiR0Z
— Nick Taylor (he/him) (@nickytonline) November 13, 2022
Here's the source code if you're interested. It's all open source, MIT licensed.
The https://github.com/nickytonline/get-revue-newsletters repository on GitHubIf you have a Revue newsletter, try it out at revue.iamdeveloper.com. All you need to do is get a Revue API key. To get one, go to https://www.getrevue.co/app/integrations and request one. It should be at the bottom of the page. It takes around 24 hours to get your API key.
]]>Got my newsletter issues imported into @revue. I had to see what the import looked like for Substack so that I could import the issues from a currently unsupported platform. All done.
— Nick Taylor (he/him) (@nickytonline) October 14, 2021
Now I just need to get my Revue account approved. Come by and say hi! https://t.co/W1VJEiQWXq
Using Revue has helped increase my readership, but unfortunately it looks they are phasing it out at the end of the year, so I started exporting my subscribers yesterday.
I'm moving my newsletter off of Revue as I don't feel confident the feature will remain on Twitter. So I've decided to go back to @buttondown. I'm in the middle of getting subscribers back on over there.
— Nick Taylor (he/him) (@nickytonline) November 9, 2022
If you're interested in subscribing head on over to https://t.co/u8MGHaPWjw
I decided to go back to buttondown.email which is what I was using before I was trying out Substack, then Revue.
If you're currently using Revue, I advise to do the same. If you do, where do you plan to move your newsletter to? If you're not sure where, there are a bunch of great suggestions in this thread.
I’m wondering what they’ll do with Revue newsletters. Should I be exporting my subscriber list ASAP? Maybe I should go back to Substack or Buttondown. I know some others use the Hashnode newsletter feature.
— Nick Taylor (he/him) (@nickytonline) November 6, 2022
What are you all using for your newsletter?
Photo by Mathyas Kurmann on Unsplash
]]>
This post builds off of that. I recently improved how I automate content updates for my blog. This is a recap in case you haven't read my post above.
I use dev.to as a headless CMS via the dev.to API. I run that in a nightly GitHub action that pulls the latest content, and if anything has changed, I merge those changes to the main branch. I also update my streaming page on my website with my latest videos from YouTube using the YouTube API.
This has been working fine, but it has some shortcomings:
Pushing straight to the main branch without a pull request (PR), there are no deploy previews on Netlify.
Branch protection was pretty loose
If there are issues building the site, I'll only know about it when it fails to build for production.
So I decided to automate creating pull requests (PR) for content updates and auto-merge them as long as all my checks pass.
The https://github.com/nickytonline/iamdeveloper.com/pull/61 repository on GitHubHaving a PR brings all the things that were lacking:
Now there are deploy previews on Netlify
Branch protection is more rigid. I require checks to pass as well as a pull request.
If a build fails, I'll see it happen for a deploy preview instead of a build for production.
To be able to auto-merge a branch, you need to modify some settings in your repository. Navigate to, e.g. https://github.com/nickytonline/iamdeveloper.com/settings, scroll to the bottom of the general settings and ensure that Allow auto-merge is checked.

Optionally, what I did was auto-delete branches. If you want to do the same, ensure that Automatically delete head branches is checked.

This is not required for what I'm demonstrating, but I and many others in the industry highly recommend enabling branch protection in general for a repository.
For the auto-merge PR use case, we'll add the following branch protection for the main branch:
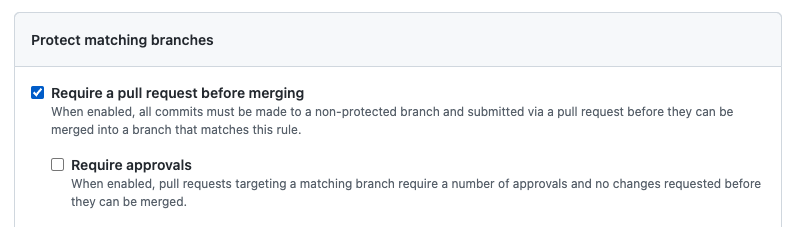
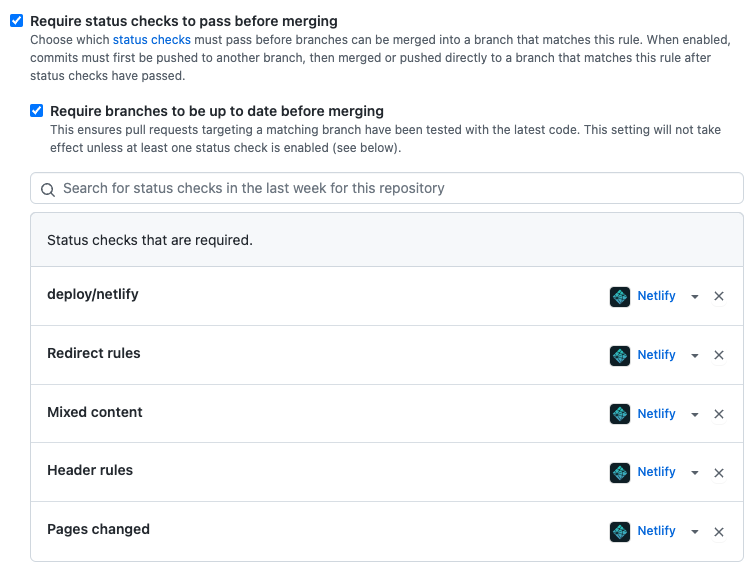
I already had a GitHub action in place to update content. They run once a day. For example, here is how the update blog posts action looks like
name: Get latest blog posts
on:
  schedule:
    # Everyday at midnight UTC
    - cron: '0 0 * * *'
  workflow_dispatch:

jobs:
  update_profile_data:
    name: Get latest blog posts
    runs-on: ubuntu-latest
    steps:
      - uses: actions/checkout@v2
      - uses: actions/setup-node@v3
        with:
          node-version: 16.17.1
      - name: Get blog posts
        env:
          DEV_API_KEY: ${{ secrets.DEV_API_KEY }}
        run: |
          npm install
          node --experimental-fetch bin/generateDevToPosts.js
          node bin/generateHashnodeUrlMapping.js
      - name: Commit changes
        id: commit
        env:
          GITHUB_TOKEN: ${{ secrets.GITHUB_TOKEN }}
        run: |
          git config user.name "GitHub Actions Bot"
          git config user.email "<>"
          git pull origin main
          git add .
          if [[ -n "$(git status --porcelain)" ]]; then
            git commit -m "chore (automated): update blog posts"
            git push origin main
          fi
The main things happening here are I'm getting the latest code from the main branch, and then I run
npm install
node --experimental-fetch bin/generateDevToPosts.js
node bin/generateHashnodeUrlMapping.js
If you're wondering why I'm using --experimental-fetch, it's because I'm using native fetch in Node.js 16.
The scripts above generate changes if any. If there are changes, they're committed and merged into the main branch.
git config user.name "GitHub Actions Bot"
git config user.email "<>"
git pull origin main
git add .
if [[ -n "$(git status --porcelain)" ]]; then
  git commit -m "chore (automated): update blog posts"
  git push origin main
fi
To use a PR instead, I went with the following, in this case, for updating blog posts.
PR_TITLE="chore (automated): update blog posts"
BRANCH_NAME="chore_automated_update_blog_posts_$(date +%s)"

git branch $BRANCH_NAME
git switch $BRANCH_NAME

# There are potentially multiple files if the blog post has images.
git add .

# See if we have any changes. We should.
if [[ -n "$(git status --porcelain)" ]]; then
  echo "Creating PR \"$PR_TITLE\" for branch $BRANCH_NAME"
  git commit -m "$PR_TITLE"
  git push origin $BRANCH_NAME
  gh pr create --title "$PR_TITLE" --body "This is an automated PR to update blog posts"
  gh pr merge --auto --delete-branch --squash "$BRANCH_NAME"
else
  # Shouldn't end up here, but log that there was nothing to sync
  echo "Looks like there was nothing to update."
fi
So like before, the GitHub action has already gotten the latest code from the main branch, and we've run our Node.js scripts to get the latest blog posts.
Instead of committing straight to the main branch, we now create a PR via the GitHub CLI.
gh pr create --title "$PR_TITLE" --body "This is an automated PR to update blog posts"
Once the pull request is created, the following GitHub CLI command sets up the PR to auto-merge if all the checks pass.
gh pr merge --auto --delete-branch --squash "$BRANCH_NAME"
After publishing this post, I ran the GitHub action, and this is the PR it generated and auto-merged.
The https://github.com/nickytonline/iamdeveloper.com/pull/64 repository on GitHubAnd that's it. I love automated work, and GitHub Actions and the GitHub CLI facilitate this.
Photo by Richy Great on Unsplash
]]>Here's the TL;DR
The Collab Lab increases access to web development jobs for early-career developers and, in particular, people in under-represented groups in tech by providing experiential skills training in software team collaboration and career management.
I sat down with Stacie Taylor to dive deeper into all things Collab Lab.
The third episode of Nick's Cuts with @the_real_stacie has dropped! We talk about @_collab_lab, career advice, Stacie's origin story, all the things! Thanks for the great conversation Stacie! pic.twitter.com/Nug4e47X3q
— Nick Taylor (@nickytonline) October 25, 2022
transcription from the podcast short:
The collab lab really gives you that kinda experience so that you can talk about, you know, when an interviewer is like, Tell us about a time you had to give somebody feedback.
You're like, Yeah, I was working on a team of developers, and here's a very realistic time when that happens. So it's kind of like giving your first job in a very safe, comfortable space so that you can take those insights into the job search and really impress people.
– Stacie Taylor, Engineering Team Lead at Zapier, Co-founder & mentor at The Collab Lab
We also discussed her origin story and we even talked about career advice. Thanks for the great conversation Stacie!
Here's the full podcast episode. Now go listen to it on that walk or run. 😎
Photo by John Schnobrich on Unsplash
]]>Here's the transcript from a highlight from the Twitch stream that I think sums up what Mitosis is really well. If you want to check out the full video, I've added it to the end of this post.
Nick Taylor:
So we're gonna talk about Mitosis and like the tagline on the stream here is building framework agnostic components with Mitosis. So can you kind of maybe unwrap that for everybody, uh, who might not be familiar with the project?
Sami Jaber:
For sure. So, We have web frameworks, right? We have a lot of them today. The vast majority of people know React. That's why I was like going over my background. That's what I started with. Most people today be like what frameworks do you know, you know, React, but there's like a dozen or something and there's the numbers keep, keeps on growing. For good reason. Every framework is like coming up with its own trade offs and solutions to different complicated problems.
But one thing that keeps on coming up over and over is for certain people the need to be able to make the right the same frame component for every single framework. And that's not everybody's use case. If you are, like, when I worked for four years at On Splash, we just had like one web application and that's, a lot of people just have one web application and so in that case it. I don't need to have a component work in multiple frameworks. I'm just building the one app.
But for a lot of other people, other frontend engineers, they're building UI design libraries. They're like at part of like a big company. That company has 10, 20, 30 web apps brand by different teams. And those teams shows different web frameworks, but then they're like, hey, we wanna have a unified design. Which makes total sense. And so now there's like a team or some number of people you're like, This is what our button's gonna look like everywhere. Well, like, how do you make that happen?
And so the number one suggestion that most people would give after hearing this would be like, use Web Components. That's kind of like the de facto. Like, that's kind of like the, the communities like, standard solution or like, that's what we're trying to do is like, that's like the standard way of trying to solve this problem of interoperable Web Components. But Web Components is not really, it's, it's not a framework. It's more of like a combination of technologies that are built on top of browsers.
And so, I mean, we're already like trying to like dive deep, but for reasons that can like, I dunno if you wanna dive into those reasons, like now or later, but essentially we tried that at Builder. We tried to solve our need for multiple, like framework agnostic components using, Web Components and that didn't quite cut it for our needs. Especially because we wanted, out of the box support for SSR (server-side rendering) for every single output. We wanted it to feel as close, like not feel as close as well, to feel like a native component in that framework every time.
So we have a React user using a React SDK we want that, that SDK to feel literally like a React component, like no other additional steps. No other like, stuff to finagle and like set up instructions like, Hey, you know, to set it up, you're gonna have to do this and this and that. And we also had things like our SDKs really needed to be very capable and be able to use all of the features of those frameworks.
So I kind of like skipped that part. That's one of the main reasons we use Mitosis is to build our SDKs, which we have like, one, one for React. That was written by hand, but then we're like, Okay, that's like not gonna, we're not gonna be able to do that over and over. So how are we gonna do the Vue SDK, the Vue SDK, the SolidJS SDK, the Svelte SDK, the Qwik SDK. I don't know if there's another one that I forgot to list, but that's already a lot of them. So, yeah, so Web Components was not really an approach that we were able to use, given that we wanted our components to be able to call our users' components and vice versa, just like a lot of very intricate functionality was needed.
And so we started playing with this idea of, well, could you, write a component once and have it be a Vue component, like a real dot Vue component, and then a React dot JSX component, and then a dot Svelte component.Like could you actually achieve that somehow?
And we think we have, and that's what Mitosis is.
Full video
Photo by National Cancer Institute on Unsplash
]]>I've started a podcast that is essentially great convos from my Twitch streams, but it may end up being more than that. You can find Nick's Cuts at https://t.co/ZeO0sRmubP. Here's a taste of the first episode with @bdougieYO chatting about OSS and @saucedopen. pic.twitter.com/s3Irs2Ssky
— Nick Taylor (@nickytonline) October 13, 2022
So what is it all about?
A podcast that is mainly tech related. It's conversations I've had on my Twitch stream, livecoding.ca, with awesome people and maybe some other things.
That's the TL; DR. It's not exactly the Swyx Mixtape format from Shawn Wang, @swyx, but I did take inspiration from it.
Another reason I started the podcast is to continue my content creation journey. I work full-time as an engineer, so my time for content creation is limited to some degree. I stream during my lunch hour and do editing in the evenings when I have time.
Aside from saving me time from creating new content, repurposing content allows me to expand the reach of some of my content. For example, some friends can't always catch my Twitch streams.
Instant subscribe!
— dan ott (@danieltott) October 13, 2022
I love this idea so much - I miss a lot of my friends' streams and never remember to go back and rewatch - not a problem with pods! https://t.co/yUewjGp8qf
I also put time into editing my transcripts because even the transcripts can become content. For example, I used the transcript from a highlight from one stream as a blog post.
I'm still no pro at content creation, but folks in the space do like the concept of repurposing content.
This is a great idea. Love repurposing content.
— bdougie on the internet (@bdougieYO) October 13, 2022
I even came across a post about this topic from my co-worker Jason Lengstorf, a little while back titled Turn 1 piece of dev content into 10+ — use the buffalo stick.
If you're a content creator, I'm curious about what your thoughts are on this or what other strategies you have for content creation.
]]>It was a great conversation. I decided to create a separate video clip for the conversation about open source.
Here is the transcript.
Nick Taylor:
you've been working in open source for a while. I found it really interesting that you went from, what I can only assume was a great job. You were at a ed tech company, right?
It was, Was that it? The name's escaping me.
Josh Goldberg:
Yeah. Codecademy.
It was a great job. Highly recommend Codecademy as a, as a product and a place. Lovely people there.
Nick Taylor:
So you were having fun there. You were enjoying it. You were still contributing in open source, but, I'm curious. What the decision to go full or why did you decide to go kind of all in on working full time on open source?
Because I'm sure there's a ton of people curious about this.
Josh Goldberg:
A lot of people who themselves are thinking about it, but it's a scary jump. It took me a while to get there. I'd say working at a company is a good thing for most people. You want to have that support of people around you, a team, a manager, a mentor, mentors, plural.
If you can. But I really like open source software. I like doing things that benefit everyone. Like when I work on TypeScript or TypeScript ESLint, I benefit everyone who uses those tools. Like if I spend 10 hours, let's say, on some bug fixes and a feature in TypeScript. I have just saved the world's un unknowable, but large amounts of time, like I've sped up the rate of human development.
Like, that's cool. I say these things which make myself sound so much cooler than I really am, but it makes me feel good. And when you're at a, when you're a company, even if you have a lot of, thank you, even if you had a lot of time in your day to day to work on open source, it's still for the company.
Why would they hire you to do things that don't benefit them? Yeah. So you don't have as much time or control over your open source stuff. And I just, I just want to do this all the time. So I'm now one of those people very, small but hopefully growing group of people who work on open source full-time.
And instead of a job with health insurance and 401K and all this, I ask for money on the internet. So this is my first shameless plug of the stream. You told me I could. So I will.
A quick pause in the transcript to mention that the shameless plug was Josh’s GitHub sponsors page that he put in the Twitch stream chat. If you’re interested in sponsoring Josh, head on over there. Alright, back to the transcript!
Nick Taylor:
Yeah. Shamelessly plug. Yeah, I dropped your GitHub there, so folks can check that out.
Josh Goldberg:
Thank you. Yeah, the more money people give me, the more I'm able to work on open source that makes your life better. So thanks. But this exposes something real bad, which is that as an industry, we, we don't know how to make people like me work. Like the, the situation I described of, I work in open source tooling that benefits everyone, and somehow I get money.
Like that's not figured out yet. We have ad hoc things like get hub sponsors Open Collective before that Patreon. But like there's no strong incentive for most companies to give to open source other than developers are yelling at finance that someone should do it. And it's like vaguely good for marketing and recruiting.
So I wish we had like, like a, like a B Corp style, like you should do this, or we all feel bad about you and don't join. But that's not really standard.
Nick Taylor:
Yeah, it's definitely interesting cuz like I'm working at Open Source at Netlify right now. I worked, when I was at dev.to, I was working at open Source and that was my job, so getting paid at like that, those are, that's, it's a really compelling reason why I.
Took those jobs too. I'm a big fan of open source and like, you know, just like you said, being able to get paid to work in open source is amazing. So like I happen to find places that did it, but it, there's. You know, then there's, there's kind of like three scenarios. You know, There's like somebody like me who might be working at a place that does open source.
There's people that do it in their free time, and then there's people like yourself who are looking to get sponsored, and it's, you're totally right. It's like, how do you formalize that? Because like, you know, it's weird too because like large companies, you know, like Babel for example, which has had so many hours put into it, I know Henry Zoo gets compensated now through a, I dunno if it's GitHub sponsors or Patreon, and I, I don't know if the other contributors do as well, but you know, that came out of like, I don't know if he went the same route as you or I can't remember the, the story there, but you know.
It's kind of amazing that like most of the planet runs on open source like Linux, and like all these like big companies and maybe Linux people are definitely putting money into it, I guess. But like, you know, I would think, all the places that have been using, you know, like Babel, Webpack, all that stuff, why aren't people or companies, you know, putting money into that, and it's, I don't know how to, I don't have an answer or anything, but it, it is just kind of weird, like, cuz like myself, I do sponsor people, but there's only so much I can do, you know. Like, I mean, I, I need to use money for other stuff too. And it's like, it's not like I'm about to sponsor 200 people.
I, I definitely see the aspect where like, you know, the micro payments could definitely, stack up for sure. Like if a thousand people started paying five bucks a month, you know, that's definitely changes the game. But, why aren't companies like monthly, you know, just donating.
I find it kind of weird is all.
Josh Goldberg:
Individuals donating is like yelling at people to use either no straw or paper straws, like, yes, you are doing a good thing, but the real issue is systemically, the capitalist society we in has not adjusted to, to do public goods and services and similar like open source.
That's my rant for the morning.
What are your thoughts on funding in OSS?
Photo by Shahadat Rahman on Unsplash
]]>
Whether you are new to Hacktoberfest or a seasoned veteran, welcome!
If you're new to Hacktoberfest or open source, don't fret! The community is here to support you! Worried about that first pull request (PR)? I was, too, when I first started contributing to open source. Turns out my first PR wasn't that great, but that's OK!
Hacktoberfest is coming up! If you're new to open source, it can be stressful. Your first PR might not be amazing, and that's OK.
— Nick Taylor (@nickytonline) September 23, 2022
Here's my first not so amamzing PR, https://t.co/v8Jy2z1dyR. #Hacktoberfest2022
Whether you're new or not, I have you covered. I gave a talk in 2020 for Digital Ocean that is for maintainers and contributors, including first-time contributors.
I talk about conventional comments in that talk. If you're curious, I also gave a lightning talk about them.
My Virtual Coffee community also did a great Preptember stream that you should check out!
@eddiejaoude ran a great Twitter Space today with folks contributing lots of great tips for open source and Hacktoberfest. Check it out!
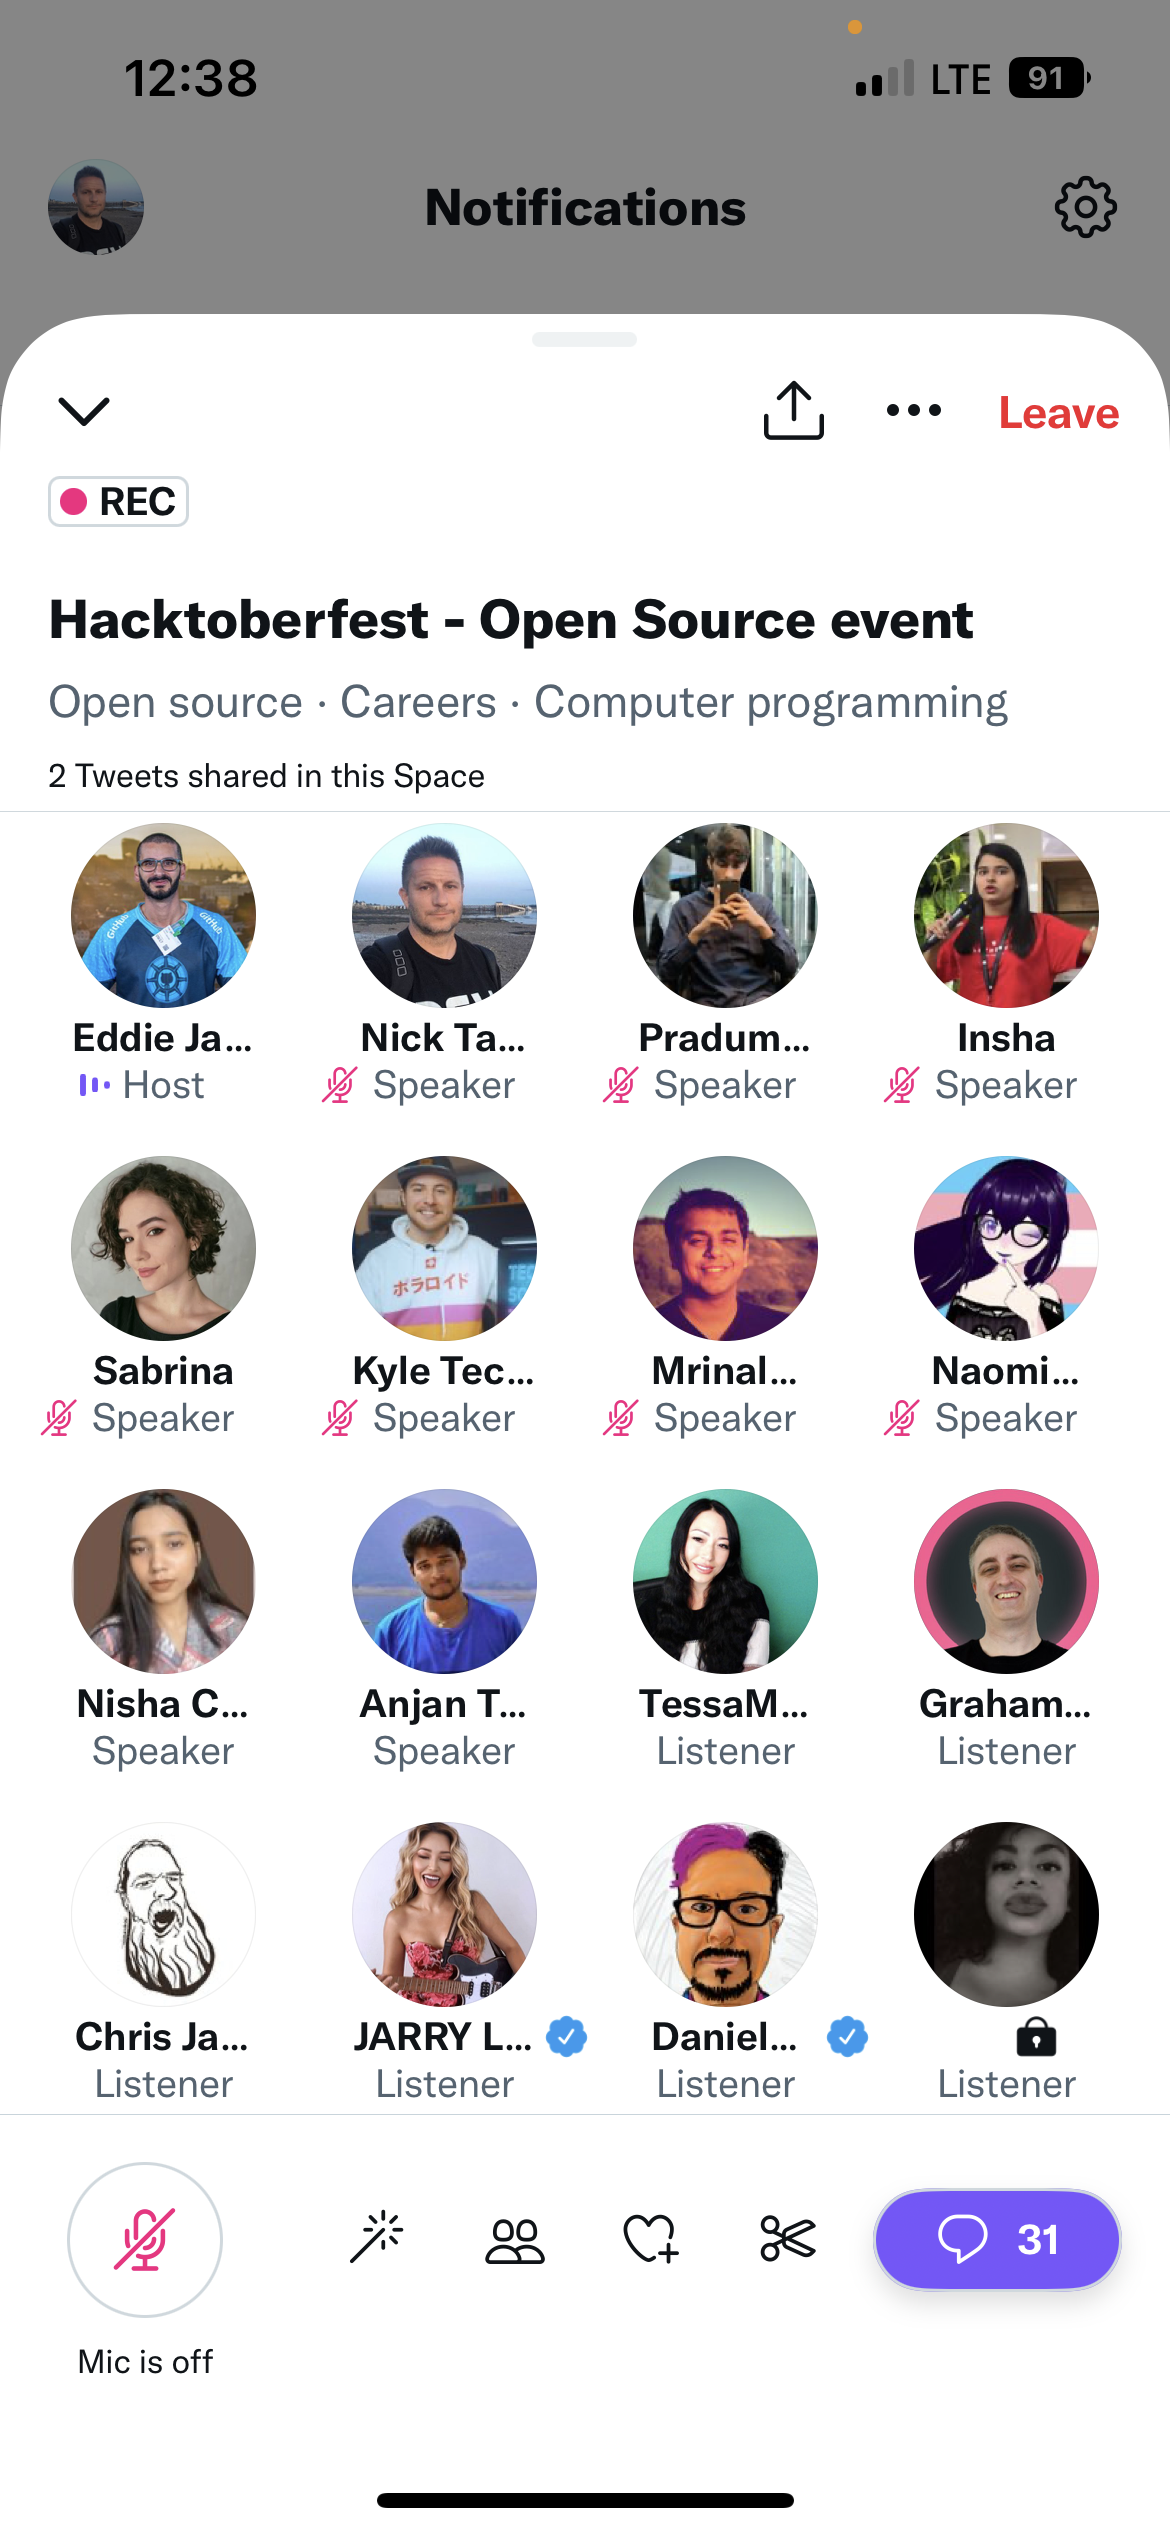
Remember to be kind to maintainers and fellow contributors. Now go have fun and contribute!
Photo by Markus Spiske on Unsplash
]]>There's a feature on Forem instances including @ThePracticalDev called series. It's powerful for surfacing your content. Thought I'd give it a share in case you weren't aware of it. Click on the cog icon in the editor to create/pick a series. Now go out and make your own! 😎 pic.twitter.com/O8cjbqaqMJ
— Nick Taylor (@nickytonline) March 6, 2022
A perfect example of this is my VS Code Tips series.
This week’s post came out
and as expected, folks were liking previous posts from the series.
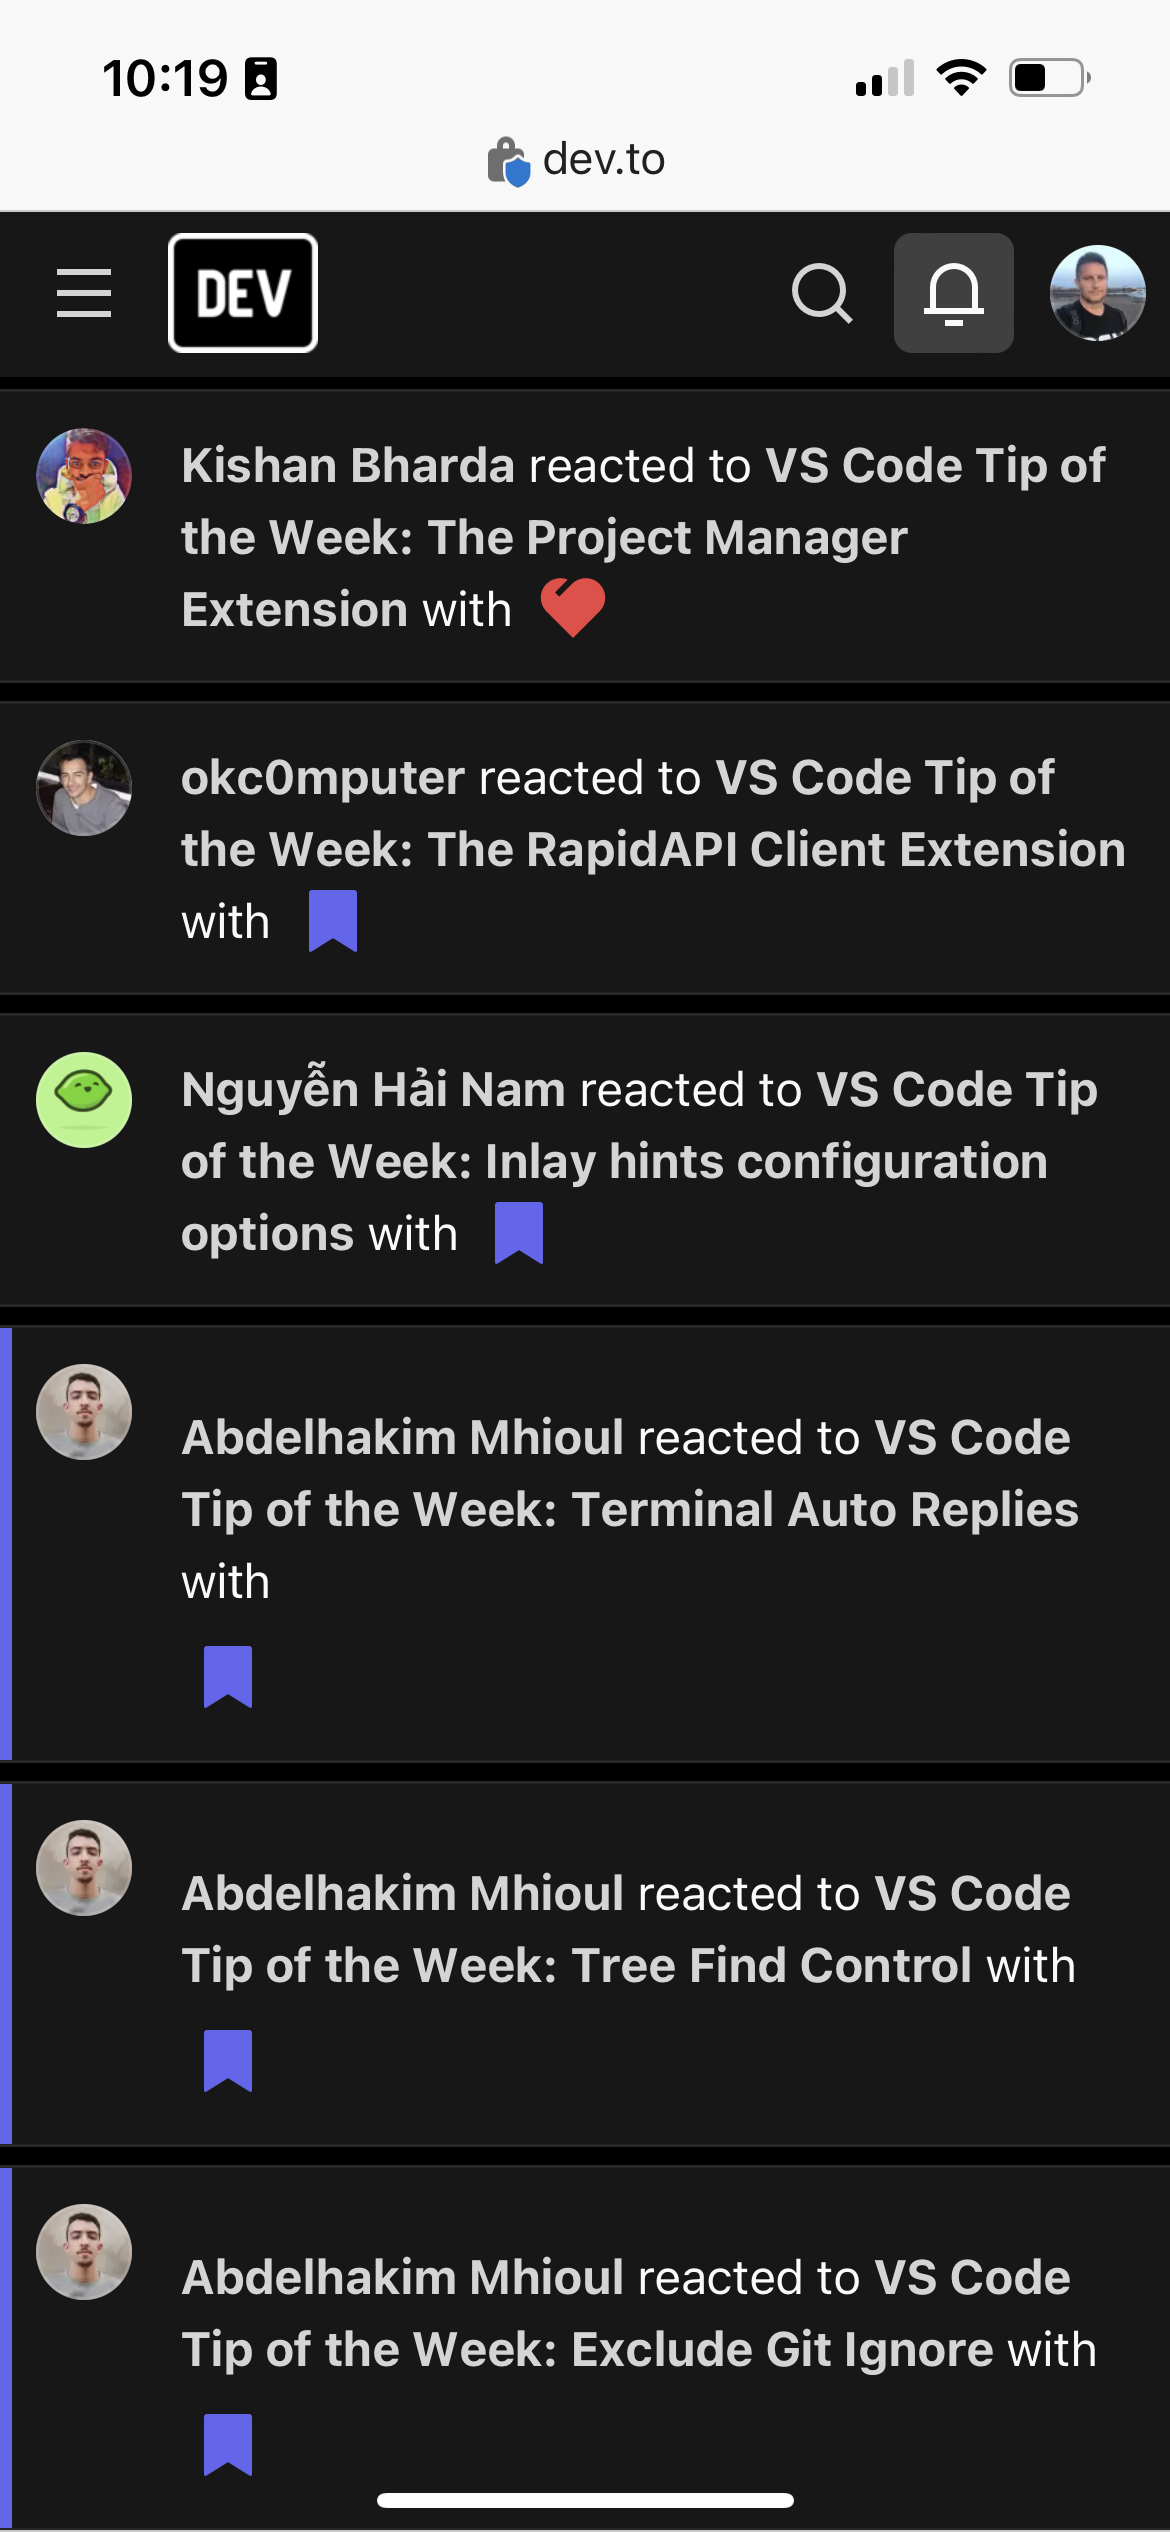
If you haven’t already, try out the series feature!

Happy writing peeps!
]]>A quick Google of "rust hot reloading" introduced me to the rust crate, cargo-watch. I installed it as per their instructions cargo install cargo-watch.
From there, I went into a rust project I'm working on and ran the following from the project's root from the command line, cargo watch -x 'run'.
And that was it! I was able to start up my program, and with every change, it reran automatically!
[Finished running. Exit status: 101]
[Running 'cargo run']
   Compiling rusty v0.1.0
    Finished dev [unoptimized + debuginfo] target(s) in 0.12s
     Running `target/debug/rusty`
["tobey maguire", "andrew garfield", "tom holland"]
[Finished running. Exit status: 0]
[Running 'cargo run']
   Compiling rusty v0.1.0
    Finished dev [unoptimized + debuginfo] target(s) in 0.13s
     Running `target/debug/rusty`
["tobey maguire", "andrew garfield", "tom holland", ""]
[Finished running. Exit status: 0]
[Running 'cargo run']
   Compiling rusty v0.1.0
    Finished dev [unoptimized + debuginfo] target(s) in 0.12s
     Running `target/debug/rusty`
["tobey maguire", "andrew garfield", "tom holland", "pete davidson"]
[Finished running. Exit status: 0]
🦀
Photo by Mackenzie Cruz on Unsplash
]]>And like there's a whole, like knowing where to start is always the challenge, which is why I'm building things like Open Sauced to make it easier, to find that introduction. What I'm doing so far, what's what's out there at Open Sauced is like just the first step. – Brian Douglas
Thanks again for hanging bdougie!
Check out the video but if you'd prefer to read or have your browser dictate it to you or some other assistive technology, I've also included the transcript below.
Nick Taylor: Hey folks, we are back at livecoding.ca. I'm your host, Nick Taylor. And today I'm hanging out with Brian Douglas, a.k.a. BDougie. I personally, I can't call you Brian. I feel like I, sound like I'd be like a parent of yours or something. So like, and I don't feel cool saying Brian, so I, gotta stick with BDougie.
So just letting that out right now.
Brian Douglas: Excellent.
Nick Taylor: Cool, cool. I think a lot of people probably know who you are, but for folks that might not know, you just kind of give us the TLDR of who BDougie is and feel free to shamelessly plug anything at the same time. Yeah. Yeah.
Brian Douglas: So yeah, Brian Douglas is my given name, but yeah, I go by BDougie because there's a lot of Bryans that were born in the eighties, at least in the us for sure.
So much easier default to that. I've been doing a lot of stuff in the last couple years, most recently worked at GitHub leading, developer advocacy there. Getting people to use GitHub Actions, GitHub pages like all the GitHub features. I did actually spend some time at your current employer, at Netlify and did some, developer experience there as well.
But today I'm working on this little project called Open Sauced, opensauced.pizza is the URL, and, just trying to get people to contribute to open source, but also get more insights on what's happening just in the space in general.
Nick Taylor: Oh, cool. Cool. Yeah, you've been working a lot in the open source space.
We'll definitely get to, to Open Sauced in a bit. The project itself is, is trying to help with part of an issue that I think you've noticed in open source. And I've noticed this too. I remember when I first started out in open source, I was 100% intimidated and I'd already been doing development for quite a while at this point.
But like, I was not proficient in git. I was working in Microsoft technologies at the time. So , my previous source control experience was visual source safe, which is garbage Subversion, which is pretty decent. And then Team Foundation Server, which, I think Microsoft might still be using, but I, I know a lot of the projects are on git now.
So like, honestly, just the whole git aspect alone was already intimidating for me. And then, you know, the, the usual putting yourself out there, you know, it's like the first time I was kind of publicly putting code that I'd be sharing with like the air quotes, the world .
Brian Douglas: Yeah.
Nick Taylor: So kind of all that together made it pretty intimidating for me. Is that kind of how you felt when you contributed or what you've seen with folks?
Brian Douglas: I mean, yeah, it's, it's a common, like the imposter syndrome. I was just chatting with Anthony Mays, who, who does a lot of good work at, down there in Compton teaching, underrepresented folks, how to interview, get jobs at Google.
We had this conversation about imposter syndrome and sometimes you have to lead into it and you have to like,
Nick Taylor: mm-hmm
Brian Douglas: you got a program scared. My introduction to open source was one. Yes. I use open source technology source forge back in the day to copy and paste, to run random servers.
My first contribution happened was by accident actually was trying to build a server to auto invite people to Slack, cuz back in the day, Slack, you couldn't, it was all teams based. So you had to like have someone's email to then invite them to Slack. I mean great technology. It just like was a little, it was limiting, especially what people try to use Slack for, which is broader communities use Discord.
Discord's a better place for this today. So I had a node server that was running that people would submit on a type form, their email. They go to Typeform. Like why do you wanna join the group? Send our their email. And then we would auto invite them at the end of the Typeform into Slack. And to run that I had to run a node server in the background and it, it had this open source package, which was called Slack invite.
And, some guy had, he had created it for, I think it was actually for, it was, it was built on top of socket.io and it was built as like a prototype for the socket.io community, as like an example. So it was like a one and done, someone wrote a bunch of just like maybe 10 lines of Node code and like this left it on GitHub and I found it and I was like, oh, this solved my problem.
Okay. But yeah, the challenge back in 2015, 2014, no, this is 2013. There was like a split in the Node.js community where it was like io.js.
Nick Taylor: Oh yeah.
Brian Douglas: And then had Node.js.
Nick Taylor: I remember that.
Brian Douglas: Kind of very similar to what's happening, like Deno, not a very similar split, but people just had different direction of where , Node.js was going so.
Long story short, I reached out, I was like, Hey, I don't know how to use this because I don't know what io.js is. I don't know how to run Node on the server. I was more of a jQuery person and, went on their GitHub profile on the package that was on GitHub, went on their profiles, found their email, emailed them, was like, Hey, I don't know what to do.
And then responded back to me and I got unblocked. And that was like, sort of an eye-opening experience where these people who were writing all this code on the internet were leveraging like almost every company leverages open source. You could reach out to them directly. And, it just unlocked a whole level of my career that I didn't know was possible.
Nick Taylor: Yeah, for sure. I 100% agree with that. I there's a couple things. Kind of supercharged my career. I made a shift to, I was always a big fan of JavaScript. So I made a conscious effort in 2016 to focus on front end. But I mean, that still means you're doing Node and stuff too. And open source, was huge for me too.
You know, I started off shaky. I'll drop a link to my first PR for folks if they wanna laugh at me a bit. It might be obvious, but like, you were saying, stuff runs on open source, like the entire front end tool chain for building anything is pretty much, I would say it's entirely open source.
I can't think of anything proprietary in there. Like you think a Babel, even TypeScript, rust is a open source. Well, it's a language, but I mean, like all that code's available to you, you know, there's and like pretty much, I mean, all the front end frameworks are open source and it's like, I don't know.
It's it's just like. You literally have access to all the code. I remember when talking to folks sometimes, you know, it's like, if you run into a bug, like people sometimes just go like, oh, that's node modules, but it's like, you can actually go in node modules. You can debug that. You can look at the code, you could tweak it if you wanted to like add a console log or something.
I had an issue with Webpack at one point, cuz I always seem to be the person that gets to do the Webpack configuration on every place I work at. I was like, okay, something's messed up. And, I stepped through the code in the node module and , I figured out the issue was something in the config I had set incorrectly.
But just the, after reading the documentation, I was still confused. So like, by being able to just go into that code, I was able to fix my problem. So I think that's pretty powerful because, at least, for front end code, you know, like all Node or JavaScript, it's textual. It's not like it's some binary format that you're trying to decompile.
I, I love that. Open source as well. I think like you're saying too, just people reaching out to you, you know, like you asked for help and they, they responded, you know, like that's, that's pretty huge.
Brian Douglas: Yeah.
Nick Taylor: You know, and that's happened to me a few times as well. When I worked at dev.to, which I wouldn't have gotten that job, had I not been contributing into open source, which is another thing, but we used Preact over there and I just Tweeted out something like, I wasn't asking for help.
I just said, Hey, I'm I was just saying, I'm stuck on this thing. And I dropped a link to like my PR and Jason Miller, who's the creator of Preact he actually responded in my PR is like, oh, try this, try that. You know? And I mean, since then we, we follow each other, I, you know, good old Canadian connection, I guess.
But, but I was just like, that's pretty awesome. Like, he was super busy at Google he's building Preact and he took time out of his day just to say like, Hey, you know, Try this, you know, and I found that super powerful.
Brian Douglas: What's wild about, cause I remember when Preact first came out and like I reached out to Jason about like some Netlify stuff and
Nick Taylor: Yeah.
Brian Douglas: The thing that like, what's really crazy about this and like there's two different paths you could take as well.
There's are quite a few different paths you could take as an engineer. But one path is like, go apply to a bunch of jobs. Like build up your resume, work at Google work at places that you can have like a not turn in your belt. There's like another path that a lot of people just don't go down, which is imagine if like you wanted to join the NBA and before joining the NBA.
Nick Taylor: Yeah.
Brian Douglas: Like the summer before, or maybe before draft day, it's like, Hey, LeBron's doing pickup games at the, the basketball court down here, down the street. You have a chance to go play pickup games with LeBron. Like, are you gonna do it? Yeah, of course. You're gonna do it.
Nick Taylor: Yeah. Yeah, for sure.
Brian Douglas: And, but with like open source people, it's the same thing.
Like Jason Miller has an open source project. He has multiple ones. He has tons of stuff. A lot of micro frameworks, a lot of small libraries that just need some extra touching and clean up. And, you can literally go spar with Jason, open up a PR and get him to review your code. And now you're getting from a Google engineer.
You're getting code reviewed by a Google engineer. If it gets merged, that's a not turn your belt that you can go put on your cover letter, your resume, but it's like a path taken less often. And it's definitely a privilege path because like a lot of open source happens on weekends and, at nights, but like the past four years, the past six years, all my open sources been done during the day.
And I've made a point. To like carve out that time at work, which I know is another privileged place to be in that I've been at jobs that allow this, but mm-hmm, like we, if you're choosing to go interview for Google or, or, or Meta or Facebook, like you could also choose to say, you know what, Friday afternoons I'm doing open source, everything else done, let me do open source.
Cause like you could have that opportunity to like go do the PRs at places that you can gain that skill. And like there's a whole, like knowing where to start is always the challenge, which is why I'm building
Nick Taylor: yeah.
Brian Douglas: Things like Open Sauced to make it easier, to find that introduction. What I'm doing so far, what's what's out there at Open Sauced is like just the first step.
It's like the beach head. We wanna do so much more to make it easier to make contributions to open source and make it easier for companies to get involved in open source and, and hire from open source. That's the roadmap for, Open Sauced? There's a lot of stuff I can't get into yet, but some exciting stuff for the next couple months.
Nick Taylor: Okay. That's cool. Yeah. I was gonna kind of ask what the scope of Open Sauced is, cuz , like I was telling you before the stream briefly. I've been mainly a lurker in the Discord. I've been meaning to contribute, but I have been busy. I just like what you're doing with the project, you know, I like when I worked at dev.to and even at Netlify now, I really like interacting with the developer community and you know, I'm working on open source now, too.
It's just this great space to just help people and, contribute to what I think sounds like a pretty meaningful project, you know? I can switch this over to pairing view and I can just give everybody a sneak peek of Open Sauced here.
I don't know if you wanna maybe just talk through the site a bit, you know, like just, I I've been on it a bit, like I guess when you come here, what should folks be looking for? Or, what's the best? I mean, I guess the start now button is probably the best place to go, but
Brian Douglas: Yeah, the start now button's like the, that's the introduction to what the flagship product of Open Sauced is.
It's the product I've been working for the past six years. It's essentially a CRM tool for contributing to open source. You can go to the onboarding, we authorize with GitHub. And what we do in the background is we actually generate a repo for you on GitHub.
We've been doing all the work on our new product. And we're gonna actually go back and, polish this product. So it all makes sense. But for now this is what I've built through the past six years.
Nick Taylor: Okay.
Brian Douglas: What this is doing in the background, it's connecting to your GitHub. We're only asking to create one repo and this repo is gonna be your database and the database for you to track repositories, to contribute to.
And that's always been, the goal for Open Sauced is find projects. We'll give you notifications on, if you wanna contribute to Next.js, which is gonna be a heavy lift than a smaller project, but if some people wanna start there, and then from there you can essentially connect the Next.js, look at good first issues filter down.
So that's the plan there. We do have a whole nother project. You don't have to finish the office onboarding, but if you go to explore projects, we had this project called hot.opensauced.Pizza.
Nick Taylor: Okay.
Brian Douglas: This is like the discovery engine for, I don't know where to start it.
It became like a little side project while I was building, Open Sauced and, the side project being, I, I just wanna recommend projects for people to go work on and,
Nick Taylor: Okay.
Brian Douglas: That's what we're doing here. And we're embedding this into the place that you were just in. I got down this, this path in December.
We built this project using Astro in two weeks. I basically got, this scoped out at the time, had the API, cuz we've been working with GitHub data and stuff like that for quite a few years. So we had the API, we have an idea of how to recommend projects. So I pitched it to the community and said, Hey, let's build this thing.
I got on the plane to go to Florida for Christmas. Cuz that's where my family's from. By the time I touched down, we had like the, beginnings of the UI ready to go.
Nick Taylor: Okay.
Brian Douglas: And so this project became bigger than what it was really meant to be, which is more of like a test. Now it's, it's, it's hung around.
I think it's probably cuz of name, hot.opensauced.pizza. It's too good.
Nick Taylor: Yeah, yeah, yeah. No, it is. It's pretty good.
Brian Douglas: And then this is like the place and the once you signed in, in the bottom, right. You could actually submit repos. So at the plan here is like what I've been coining Product Hunt for open source.
You could hunt projects. So there is some UI that we're actually, if you jump into the GitHub repository, so all this is open source. So if you scroll to the bottom
Nick Taylor: yep.
Brian Douglas: There's a actually in, you're in the repos there. It should be hot. Yep.
Nick Taylor: Okay.
Brian Douglas: And, what's cool about this. We're using Netlify.
So you could actually go into the PRs and check out the deploy previews.
Nick Taylor: Okay. I hear Netlify is not too bad.
Brian Douglas: Yeah, not too bad. So like in the, this little draft PR this click on that deploy preview, it's obviously a draft, so still work in progress.
Nick Taylor: Yep.
Brian Douglas: And then you'll see that we're gonna be starting to organize it a little bit differently. So if you scroll down again, still work in progress. So like the color and the UI is not there yet. But we'll start recommending repos based on week. So the hope is that we'll start sending out a weekly newsletter of some of the hot repos for people to check out.
That's where we're heading towards. Still have a bit of work in there. Okay. We've got milestones and issues open for people to contribute to no pressure. Like we do have folks who have been regular contributors who are still working on this. All you ever do is to sign up and like, we'll send you a ping when we're ready to start taking submissions.
Nick Taylor: Yeah, no, this is cool. I've been on GitHub. There's the GitHub Explorer page. I've talked about this before, I gave a talk about open source a few years ago for Hacktoberfest and it's curated in the sense, like you can say like, go find it by language and I think popular, but this is more curated, which, I kind of like, you know, and it's, like, yeah.
Oh, you like JavaScript. Here's some like recommended repos. We think you you'd enjoy and stuff. So I think that's pretty cool.
Brian Douglas: Yeah. It's so as a GitHub employee, former get home employee at this point. Actually I guess, I guess I should speak it as, I'm, still a GitHub employee.
Cause I'm on sabbatical, but what I'm getting at is that the explore page is something that, it is definitely a lot of more automation, a lot more machine learning that happens over there. It's a project that I think will probably get some love hopefully in the near future. But in the time being , I think the human element of if you like a project, if you star a project and I star project the way that
Nick Taylor: yeah.
Brian Douglas: Like there's no secret, the secret sauce algorithm is like literally laid out in the issue. So anybody can go in the issue.
Nick Taylor: Yeah. Yeah.
Brian Douglas: You can see how it works. But if we both like the same repo contribute to same repo, it gets bumped up to the top. Okay. So between user submissions and what folks have been starring and liking, we can now recommend.
Projects to contribute to projects that are up and coming projects have good onboarding experiences. Like all that stuff we can recommend because not every open source project is like welcoming contributors, which is fine. I don't think you need to open source your code and take in contribution. So like Angular is a popular project that does take contribution, but like the majority of it is from Google employees.
I wouldn't recommend you go contribute there, but perhaps there's another library in that ecosystem you can contribute to. And that's what we wanna help surface, grow open source contributions in place that need contributions and not just trying to put a notch, like as much as I would love everybody to contribute, to React, React, doesn't need more contribution.
They've got a fulltime team, they've got consistent contributers. What I would love to do is, build a platform where people can scale up into contribute to React. So you start with like maybe React Query or React Tables or some other React library, and that you get some sort of context of like, where are the missing parts in the React ecosystem?
And then now if you need to go contribute to React itself, you've got so much more context and more at bats.
Nick Taylor: Yeah, for sure. And, I know like in the earlier days for React, it was a lot easier to contribute to as well. I know things are a little more complex now with like concurrency and all that.
Brian Douglas: I actually have a contribution to React Native, just gonna mention that.
Nick Taylor: Kind of getting back to contributing, people always think code code code, but it's not always code. I was working at this FinTech startup in 2016 and , we were using Electron for these FinTech apps and I was trying to do something in Electron and I was reading through the documentation and then I realized, I figured out what the problem was and it was the documentation was right. So I made a small contribution to Electron and, you know, some people might say, oh yeah, whatever, that's not code, but I'm pretty sure I unblocked several other people that probably would've ran into the same issue.
So, and I, I almost think, I mean, obviously you need code for a project to exist, but great documentation is I think a huge distinguisher and I can't say it guarantees a project will succeed, but if you have really great docs, I think there's definitely higher chances. You'll get contributors and it will gain traction.
Brian Douglas: And like, I I'll even like give you one up your, your even opportunity to your documentation, which I think one of the best first contributions is like a blog post and actually was talking to Ben from form about this couple years ago where like,
Nick Taylor: Okay.
Brian Douglas: One thing that we wanna build inside of the platform is like being able to submit contributions that are outside of GitHub.
So imagine like you decided I wanna use Preact, but I wanna use Preact with Vite maybe, and maybe that's like a unsolved solution. Maybe someone's never even tried this. How can we create a blog post or an onboarding path to show people how to use through a library? And then eventually what happens is that maintainer now can bring the docs in from existing articles and then even like, bring on those, those folks to help write the docs.
And so, like, you don't actually have to make a contribution on GitHub. Like there's a, there's a whole focus. And then the homepage of Open Sauced is like, We wanna be more than the green squares. We don't need to open issues and make PRs. But if you just became a spokesperson of the project by just like talking about it publicly or showing how you unblocked yourself, a lot of times people are just like, they go through cuz engineers, like we gotta solve a problem quickly.
We gotta sprint to sort of get through. If you're running through all state management libraries and JavaScript and you try six of 'em in one week, and then you're like, oh, you know what? This one sucked. I'm never gonna touch it ever again. Cause I had bad experience. What would be great is , put a pin in that, like, let's go open up issue and say how much it sucked and then, or maybe it'll be a little more positive than say how much it sucked .
Basically unblock the next person as you mentioned with the documentation, like someone's gonna get in that same sort of path and be like, oh man, I tried using it for this. I spent probably two days trying to make it work, decided to finally punt and leave. One of the biggest thing I do is like, I open the issue saying how it didn't work for me and explain it.
Nick Taylor: Okay.
Brian Douglas: And then just walk away, like , I'm not really in the position to be able to contribute to that problem or, improve that problem, but at least I can contribute by opening the issue.
Nick Taylor: Yeah, no, no, no. For sure. For sure. I'm just dropping a blog post I wrote a while ago about another project where the documentation needed fixing and, same thing, cuz, I was going through the thing over and over. And then like after 30 minutes, I figured out what the issue was like TLDR. They had published this npm package and then at some point they changed the package to a scoped package. So like the @ whatever, and the documentation hadn't been updated. So like, I didn't clue in until I finally, I dunno something triggered that I go, oh yeah, that's called that now.
So that's why
Brian Douglas: Yeah. And it's something that's like obvious to the person who wrote the code. It's like, oh yeah, look, if you went to npm, you'd figure this out. But, there's so many other folks who probably got to that point and we're just like, I don't get why this is working. Let me go to the next package.
Nick Taylor: Yeah, no, for sure. And I like what you're saying too about kind of championing projects. The clearest example I can think of at the moment is someone we both know, Anthony Campolo. I can't remember how he started contributing to Redwood. I think he was just doing a demos of it or, he was writing articles.
I can't remember what he was doing, but he's on the core team now. And he's just been like, he's a big fan of it and he's been championing it and you know. He initially wasn't actually contributing to the project. So it's like you were saying, just getting back to your other point.
Brian Douglas: His contribution was legitimately talking about a project that was, the maintainers were too busy working on the code to even come up for air, to write blog, post and Tweet and talk about it.
And then he filled in a need. And now he has some of the heaviest hitters in the industry supporting his career and promoting him yeah. In spaces that they couldn't. Literally the guy who created Redwood originally was the guy who co-founded GitHub and,
Nick Taylor: Yeah, exactly. Yeah.
Brian Douglas: When I talk about like being able to pick up games with LeBron, like that's the level of access and privilege, you can get with open source, but the challenge is like not, everybody's like up to speed to go like, go toe to toe with LeBron. So like mm-hmm, take a step lower go, like do pick up games at you local college, like,
Nick Taylor: yeah.
Brian Douglas: Hopefully the analogy's not lost anybody who doesn't fall basketball, but what I'm getting at is like, there's so much opportunity and a lot of it is like free mentorship.
So like in, in Open Sauced, we had poked it at the, repo, but like we just merged in two PRs before this call. What we have is a lot of automation and actually MTFoley who you've paired with, previously they contributed to Open Sauced. He helped build an idea I had, which is like every time Hacktoberfest comes up, I want to be able to have compliance on PRs that get open.
So if someone opens up a PR with no issue attached, I wanna basically like gently nudge them and say, Hey, thanks for the PR, but this one's outta scope. Could you open an issue? And then we could discuss if we need this and if this is even in the right direction, cause a lot of times people contribute and they introduce like new libraries or new dark patterns into the app.
And then they disappear and like, I, I can't find them. I couldn't even get them
Nick Taylor: yeah.
Brian Douglas: On Twitter or anything. So my whole thing is like, if you haven't read the contributing guide, if you haven't really shown up in our Discord, if we don't know who you are.
Nick Taylor: Yeah.
Brian Douglas: Chances are we can't really merge this thing cuz like there's, there's no context for this work, so thanks.
But no thanks. But we need, I wanted to be nice about it. So rather this close it being. Yeah. Please get out of here instead. It's like, Hey. The GitHub action that runs compliance on all PRs said that she didn't do a thing. Did you wanna address that? If it sits for like a couple weeks, we'll just go ahead and close it silently.
If they address it, they're like, oh, cool. Join, join the fold. Join our community.
Nick Taylor: I love that. And that's one of the well, automating things is, is super powerful for sure. Like, I love GitHub actions. But this is something that's really great about your particular project, because you know, it's one thing for somebody to say.
You know, like, Hey, I fixed a button or I, you know, I did some of the layout changes, but there's also the opportunity to be like, I can work on the continuous integration, continuous deployment pipeline. I can start automating. There's all facets of, you know, software development that you can kind of dip your toes in.
And that's, you know, and especially if you're starting off in the industry, you know, it's one thing to say, I created a portfolio project, but if you can say, yeah, I created it, but I also deployed it and I automated this, you know, like that, that already is game changing in my eyes at least.
Brian Douglas: It's amazing how people just don't take that next step, which I, I get it, like, you're, you're doing a tutorial.
You went and explored like, oh, I'm gonna build out this whole dashboard for, you know, managing Tweets or whatever it is, like their side project. But a lot of folks like the bare minimum that I usually, when I mentor bootcamp, students is like open PRs on your own projects. Cause if you're just shipping directly to main, it just shows me that it cool.
You're doing a little cool side project, but you're not taking it seriously enough. And if you're not taking it seriously enough, can I take you on board to the work here? Chances are like, yes, you'll probably need the whole white board and everything like that. Figure out they great engineer.
But if I'm looking at somebody who scoped that entire project has a build system deploying this to AWS or whatever, versus somebody who just like spins up a bunch of side projects like, oh, you know what, actually, I wanna talk to this, this build system person and get more context on that. Cuz like that's the person is gonna go take their lunch break or not even a lunch break.
Just take a couple hours at the end of the day to go and improve our build system or improve the developer experience for the rest of the team.
Nick Taylor: Yeah, I know for sure. And automating things is so huge. Like you're saying what Matt Foley did there with the compliance for Hacktoberfest, that's huge, and these are like, some of these are such easy wins, like creating issue templates, PR templates, you know, cuz then, you remove that human aspect of awkwardness where you're like, Hey, by the way, you forgot to do this.
You know, if it's all automated and there's like a checklist, then you can just kind of say, oh, can you just fill out the full PR template or the full issue template? And then we can look at it. Cuz I know I I've seen it in the past before to like, you know, people put a ton of time into a PR, but there's no issue.
And then you're kind of like, uh, I can't really do this.
Brian Douglas: Yeah. But even even worse. So like there's no description. Like actually I was looking at a title in Open Sauced. Sometimes Todd will be like remove move lines of code mm-hmm . And , my, my question to them is like, what lines of code?
What is deleted? Why is this? Or improved feature. Yeah. And, and I get English is as a second is not as first language for a lot of folks. So like I'm patient and I can like walk through. Okay. Hey, I added your title for you. Just wanted to let you know. This one's a little more descriptive in the future, you know, just consider
Nick Taylor: yeah.
Brian Douglas: Describing what you did in more detail, or leverage to the description box to provide more context. And one thing about issue templates, the PR template we have, we actually stole from early Forem, the Forem repo.
Nick Taylor: Okay. Yeah.
Brian Douglas: There's a lot of like cool nuance in the form repo about like, identifying description and like what feature you're touching and screenshots.
So that template actually, I stole from that project a long time ago. It's, it's molded into what we have today, but
Nick Taylor: No that's cool.
Brian Douglas: Open source for the win.
Nick Taylor: Yeah, no for sure. And speaking of the Forem template, so for, if you don't know what that is, if you've ever been at dev dot two, it's running off of open source software called Forem.
My old coworker from there, Vaidehi Joshi, she's over at Vimeo now I think. But, she made what I thought was a really amazing contribution to the PR template. So we'd have the usual stuff, like here's a description, you know, what's this fixing, whatever closes this issue. And then we always, we had a section like, you know, tests and you'd just say like NA or just you would merge it.
And then, yeah, just small changes to wording made people pause when they were gonna go merge or, put up a PR without tests. So like there was three check boxes. There was yes. Which was pretty self-explanatory, there was, because cuz a lot of people contribute to the project outside of the core team.
There was , I need help, which was a, a great addition cuz I don't know how to do these tests maybe. And then
Brian Douglas: yeah,
Nick Taylor: I love the, no one because the, no it said no and this is why and you had to put a reason why you weren't writing tests. So like if, if it was just like, yeah, I just wanna merge this and then you, at least for me, whenever I got to that question, I was like, yeah, you know what?
I'm gonna put some tests in you know?
Brian Douglas: Yeah. Yeah. And that's, that's the part we did steal that part too as well. We had the same three checkboxes.
Nick Taylor: They're they're really great. So, I know Vaidehi doesn't listen to Twitch, but , anyways shout out to Vaidehi. Yeah, yeah, exactly.
Getting back to Open Sauced, you're building out a team right now is so there's, I'm assuming there's some kind of core team right now, which you're leading. I can make some guesses to some of the folks that are probably on the core team, just cuz I see them in a Discord pretty active like, like Ted and maybe Matt too, but like, like how big is the team right now?
Brian Douglas: Yeah, so we, the open source, we've got an open source side and we've got like a commercial side. We're working on a commercial product at the moment. So currently Chad Stewart, who's been helping out, he runs tech hiring on Twitter. He came on board and helped us out pretty early part-time and just recently is coming on full time.
Ted is also gonna be helping us out full time hopefully soon. We're still sort of, figuring out this sort of bandwidth and, skill there. He's been helping out a ton in like the things like the API and also the developer experience. So all our automation, for, release built, like release deploys and stuff like that.
That's all mostly Ted. Actually probably at this point, it's all Ted cuz all my stuff has been removed by his work. And then we do have, a designer as well.
Nick Taylor: Okay.
Brian Douglas: Who's working on helping out with the commercial product. So Eric's been in the hot open source. Repo folks have seen him. He's just mainly working in Figma.
And then you'd mentioned Matt. Matt's, he took a full time job in January, so he's been mostly doing that. Okay. So he hasn't done as much contribution, which is totally fine.
Nick Taylor: Yeah.
Brian Douglas: But he is, he is on part of our commit squad. So, we have like a, a level in the open source side, we have a level of involvement.
So obviously Discord, you can jump in, say hello, we have a triage team. And these are folks who can review PRs and open issues, close issues, label stuff. We have a handful of, folks from the all in open source program who are helping us this summer as part of the triage. So shout the both Chris's and Joseph, and then we have a few other triage team members as well.
And the evolution is like, as part of triage, we can evolve you into starting to make, write some code. Cause I think with open source, it's a little daunting when you first need to, like you wanna make a contribution, but you're like, I don't know how to write code in this project. So instead of trying to write code, why not watch people write code, review their code and then get the comfort up.
To like, oh, you know, I've seen this problem multiple times. I've reviewed this problem multiple times. Maybe next time I go jump in and write the code.
Nick Taylor: I was trying to, switching screens there because I'm trying to find the Discord. I thought there was the link on the Twitter, but, I'm gonna ask, Ted in the chat, if you can drop it.
Brian Douglas: It's in the, the, the footer of all the sites.
Nick Taylor: Cool. So there dropped that, folks wanna join that Discord? I mean, totally 100%. Okay. Being a lurker first, if you wanna be, I think I've, I've been located there forever.
Brian Douglas: We have the cool GitHub projects, which is, sort of the precursor, the hot Open Sauced dot pizza, where we just share projects that are cool and get up or trending.
And then we also have, like, you could share your content. So I know you've shared some of your streams, links there. Yeah. And encourage for folks to just do, like share your blog posts and stuff like that. Celebrate the stuff that you've been winning on. Cuz like what we wanna do is just everyone who wants to be involved in open source broadly just to come in and hang out.
No pressure on trying to contribute or anything like that. We do have a separate contributor channel to talk about contributing to the project, but all the other channels are just hanging out and sometimes we do discussion actually. We'll do it this Friday, but every Friday we be, before I go live on stream, we do a Discord chat.
Nick Taylor: Okay.
Brian Douglas: And talk about open. It's awesome.
Nick Taylor: Okay.
Brian Douglas: And hang out.
Nick Taylor: Nice. Nice. I, I gotta get on some of those. I definitely wanna contribute to the project at some point. I just been a, I, I only started working at Netlify April 4th, so I I've been kind of a little busy, but, it's definitely on my to-do list to, to get something in there.
Brian Douglas: Yeah, no pressure. We're trying to, do a better job now I'm working on this full time is scope, the work that way, things are approachable for anybody to jump in and jump out.
Nick Taylor: Okay. And I know we talked about this briefly before, and I don't know how much you want to go into it right now, cuz we're talking about people getting into open source.
You have a lot of really great first issues. I think you were mentioning.
Brian Douglas: We could comb through those. I would love to promote those. If anybody wants to jump on them. They're kind of like, it it's, they're basically like hot pizza slices. Like they do go pretty fast.
Nick Taylor: Okay.
Brian Douglas: So I did open up in preparation for this chat, open up some good first issues, for folks to take a look at.
Nick Taylor: Gonna drop a link to the good first issues just in the chat there.
Brian Douglas: Appreciate that. There's a lot of, small UI bugs and the hot Open Sauced dot pizza that's currently, our focus right now is hot, Open Sauced, dot pizza.
It's where a lot of the sort of traction and interest of like finding open source projects we'll start. But then there's like an issue where we need to link it back to app that Open Sauced dot pizza. So that's a good first issue. It's just add a link to the H one. And like I come with the I'm of the opinion that good first issue should have a solution in it.
I try not to label good first issues unless the solution is like written out, like just laid out plainly for folks. Cause like the goal for like adding a link to H one is something I could have did this morning. I could have did, like, while we were talking, I could have just did that.
The challenge is like, people need the breadcrumbs. So if I see something that's like trivial to do, I'll also have a good first issue tag on it. And then it entices people to come through and say, you know what, I wanna try this. So like George, who just grabbed the, it looks like the, actually the one, I just mentioned the link, he just assign himself to that.
So we actually, we have a mechanism in the GitHub action that basically assign yourself to issues. Cuz one of the limitations in GitHub is if you're not part of the org, you can't assign yourself to an issue unless you're on a team.
The action itself will assign you. If you just write the word dot take and,
Nick Taylor: oh, nice.
Brian Douglas: It's it's been a per a beautiful, like a perfect Easter egg for people who say, Hey, I wanna work on this. When you say, read the contributing guidelines and then it'll tell you how to assign yourself.
So we force people to go read the contribution guidelines, to go find that one part that says dot take in it. And then now I could confirm, you actually went to the docs and now you know how to contribute, but also you've assigned yourself. I don't know if you've you've chatted with Rizèl before she works at GitHub as well.
We've been working on that one GitHub action. It's been our sort of example, action to talk about.
Nick Taylor: Okay, cool.
Brian Douglas: I wanna be able to run a script to basically unassign people after a month if they're assigned to an issue, but there's no movement and it's more of like, if it's up for grabs, I wanna make sure, somebody else can grab it. If somebody gets busy, people get busy. There's another contributor we had earlier this year who helped a lot on the project he was interviewing for jobs. The benefit of that is his contributions are live in production. Okay. On a product that has currently 300 active users per week.
So not crazy numbers, but it's a decent number to put on your resume. Anybody looking for a job, I'm happy to hit me up in the DMs. I can coach you on how to contribute. Like I'll probably push you to Discord eventually, in a public channel.
Nick Taylor: Okay.
Brian Douglas: But like, I truly believe that open source could be the, the decision maker for some people trying to get their first job.
Second job. If you can show that you can work with a team, you can work in a framework, you can work in a system. It's a better showing of than I have a bunch of, I dunno, calculator apps that I built, when I was in boot camp. .
Nick Taylor: Yeah, no for sure. And we, you touched on it, but like the whole collaboration aspect of it, you know, like you're working asynchronously.
I mean, you, even if you're chatting in Discord, but, in the issues and in the, pull requests, that's where you have the conversations, you try and give as much context as possible. And people like, it's all publicly available. I'm saying the obvious, but like people can see this and go like, oh, I really loved the way, you know, Brian did that particular PR description and there was some screenshot and then, oh, there's a loom video, like, wow.
You know, and like, or, filled out the issue really well. And, and just seeing how you interact with other people, because, there is also like, a sometimes shitty side in open source where there's just people who just feel privileged, like your project sucks. It doesn't do what I wanna do or whatever, you know, and, and those are, and I honestly, I'm still kind of like, it blows my mind, like how, how are you even writing this it's public, if you're a dev developer?
If I see that I like, I would never wanna work with you, you know? Like,
Brian Douglas: Yeah.
Nick Taylor: Just, just that alone, you know? So it's, it's pretty mind boggling sometimes.
Brian Douglas: Open Sauced is not immune to any of that, because when I first opened up Open Sauced to have users and like invite people to also use the thing I've been using for like, at that point 3 years prior.
I had a bunch of people. I'm not sure where they came from. I think I got it mentioned somewhere and a bunch of people are like, Hey, cool idea. I wanna use. And then the went to use it. Like we had a very huge problem where when you authenticate with, GitHub on the Open Sauced.
Nick Taylor: Okay.
Brian Douglas: We asked for all orgs, all repositories, all data around GitHub.
To be honest, that was the only way you could do GitHub OAuth apps back in 2017. We now have switched to a GitHub app where we can only ask for only the one repo we create for you, but
Nick Taylor: Okay.
Brian Douglas: We had like probably three people come through and one person who I distinctly remember who opened the issue and complained on how bad that sucked.
And why would you make this product? I'm never using this thing, you should change this. And I'm like, oh, cool. We actually have it open PR. We're actually trying to solve this problem right now. There's a whole discussion. You're more than welcome to help contribute to that conversation there.
Obviously they didn't. But I did have some other folks who were way more helpful, including GitHub employees who got us unblocked on that, to be able to make this thing that it wasn't asking for all your GitHub data.
Nick Taylor: Yeah, no, it makes me think of like, you know, I'm always pretty polite in, in responding to people cuz you know, it's just a good thing to do.
I just can't picture myself saying, Hey you asshole, why do you, you know, like it's not, so it's just not something I would do like in that context, at least, you know, but like, I remember whenever people complain about things, it's like, okay, well looking forward to your pull request and then like dead silence, always, you know?
Just kind of makes me chuckle, you know, anyways, just little funny side note.
Brian Douglas: Honestly, the feedback is welcomed. There's definitely an approach. You can, you can provide feedback in a way that's actually heard.
Nick Taylor: Oh yeah.
Brian Douglas: I listen to all of it. I've got tough skin, you know, being underrepresented in the industry.
Like I've definitely seen stuff, so I I'm happy to like, you know, take the harsh feedback, take the critical feedback in a DM and public, whatever. But also I realize that is deterrent for a lot of folks. So like if you open a PR and you get some harsh, critical feedback, it might actually rub you the wrong way and be like, you know what?
This is not for me. Let me retire from open source for good. And that's what we don't want. So I usually try to like, if there is some sort of feedback, that's a little harsh or critical, I do like mention that in the DM. We've definitely had that in Open Sauced. The goal is really, we wanna make it easier for more people to have a pathway into like the next contribution.
A lot of times it is gonna be messy, but as we learn, we'll have frameworks that will hopefully engage folks and get them onboarded. So like the compliance action or the release pipeline that we have built. The other thing is like when you're first contribution, if you have an issue or whatnot, we have a welcome join us in Discord automation, welcome message.
And like all that stuff is built in so that we can just funnel people into a place and then funnel 'em back into open source. The goal is not to keep you contribute to Open Sauced forever. The goal is to go get you to other projects so we can set up a good system in situation for you to learn.
At least you'll have more confidence in going to another project and knowing, you know, what I've saw, how Open Sauced can do with templates. I'm gonna introduce their template in this project. Doesn't doesn't have one existing.
Nick Taylor: I love that idea of the, the welcome, as soon as you open up an issue or whatever, it's, you know, and even when people know these things are automated, it's still nice, you know, like a triage message, thanks for submitting your issue.
I know at Forem, we used to say like, we'll get back to you in like three days or whatever, and it, you know, it's a nice little touch I find, and the more you can automate the better for sure. We haven't really talked about it, but I, I know a bit about it, but what, what's the tech stack for Open Sauced at the moment?
Brian Douglas: Yeah, so the, the repo that we're in right now, this is a react and Vite app. So I did mention, we used Astro earlier, this year. As we scoped out the product, we were just moving faster than Astro development and we had to make a decision that either we contribute upstream or we just use the same framework we use in the other app.
So React and Vite was an opportunity that we switched into. We do are, are using Tailwind as well as a lot of CSS. And that was intentional.
Nick Taylor: Okay.
Brian Douglas: This might change in a year or two, but at the moment, Tailwind is a sort of centralized framework around CSS decisions that as we take contributions from other places, we don't have to rewrite CSS libraries and, functions and stuff like that.
So Tailwind just makes it, it makes it less that we don't have to just have discussions about CSS over and over again. Cause the challenge of doing an open source project has a front end co associated to it. Everyone, has an opinion. So we, we just wanted to get that opinion outta the way. So yeah, React, Vite , TypeScript is another decision we've made in the project.
And it's been helpful. It can be challenging for folks who have not touched TypeScript, but what I've seen so far is that just a little bit of nudge to documentation. People are actually leveraging this to learn TypeScript as well, which has been fun to see as well.
Nick Taylor: I'm a big fan of TypeScript.
I've been doing it for a while now. The things that gives you out of the box are great. Like, especially if like you start building out a team, if you have stuff in place, it just makes it a lot easier to discover things. And like, I assume most of the people that are working on the project are probably in VS Code.
So that's got TypeScript baked in. So which always kind makes me chuckle. Cuz anytime somebody tells me they don't like TypeScript I'm like, well actually all that Intellisense and refactoring you got in VS Code that's that's TypeScript.
Brian Douglas: It's interesting how VS Code has a handle on the developer market. It's fascinating. And I'm all for it because I've also jumped in the TypeScript as well and also jumped in the VS Code in the last couple years. I was a VIM user.
Nick Taylor: Okay.
Brian Douglas: I did not create a start, a new machine without changing, like converting my dot files over to, to run VIM. I'm surprised on how much VIM I don't do now, which is kind of crazy.
Nick Taylor: Yeah. I never really got into VIM. I mean, I, I know the basics, even though people always joke about exiting, it's really not that complicated, but I know the basics, like moving around, up and down, deleting a line and stuff, but I know there's like, I worked with people that are like super proficient in it and, and they're more productive that way.
Maybe one day I'll pick it up if I need to. For now I've been pretty happy with like my shortcuts and VS Code and I mean, that's pretty much what I'm in most of the time.
Brian Douglas: Yeah. VIM is my, go-to for merge conflicts. I, I could do I'm a lot faster in deleting lines and changing things and doing some hot swapping and stuff like that.
So I haven't quite got there in VS Code as of yet.
Nick Taylor: So yeah, so you got those good first issues going on. You've got Discord going on. The other thing that I wanted to mention, cuz like, I've been a fan of this cuz you've got a YouTube channel. You've been interviewing people in the space and , I think there's only three episodes that dropped so far.
Brian Douglas: We've got five at this point.
Nick Taylor: I must have missed one or two. First off. It's just like, you definitely have a really good setup. So the production quality it's it's really great.
But it's the interviews I saw were with Fred Schott from Astro. You had, what's his name from fig?
Brian Douglas: The CTO? Yeah.
Nick Taylor: And, the last one was with, the readme.so, her name's escaping me.
Brian Douglas: Katherine.
Nick Taylor: Oh yeah. Katherine. Who's working at, GitHub now.
I definitely encourage folks to check out the channel. I mean, one cuz uh, you know, just subscribe, but the interviews are really great. You know, they're all, I'm assuming they're all gonna revolve around open source, the interviews?
Brian Douglas: Coming from DevRel, there's a, there's a plan.
It all makes sense. We want to, first have conversations about open source and, getting insights from open source and how to maintain projects. We we've sort of taken a scale back on trying to onboard people into open source, cuz the, the challenge is if you don't have any place to put people, then you're just bringing people in open source with just a bunch of chaos.
So we've been partnering with companies to companies that represent some of these interviews as well. To showcase our new product and our new product that we're gonna hopefully ship in the next couple months. It's an insights platform. Where you can get insights on all open source projects.
So this will eventually embed itself into our existing products.
Nick Taylor: Okay.
Brian Douglas: But what we wanna do is like, be able to say, okay, if I go into Next.js, who's contributing are these Next.js, are these Vercel employees? Are these outside contributors? How do I know if I even have stand the chance?
And then if that's the case, how do we recommend other places for folks to go contribute to? And by having insights on what were contributions that happening, we can make those recommendations through, currently just sort of manual labor and, and data mining, but eventually machine learning will make recommendations.
And then now when you go to a company like a Vercel, or if you go to Netlify, you can now say, how good are we doing an open source? Are we actually mm-hmm driving engagement or let's say you're a staff engineer there. You're like, Hey, we should actually hire more people to work alongside of me. Where do we go?
Let's go to the open source repos. One of our authentication libraries that we're leveraging is GoTrue, which has been maintained by Netlify for years. Like if someone wants to come join Netlify to work on that, the first place, you're gonna go is like, go to GoTrue. Find out who's been contributing.
Who's been consistent. There's so much we we're gonna be doing just around that one. That one idea. But we have a whole roadmap, I'm looking forward to sharing, hopefully in the next like month or so.
Nick Taylor: That's really cool. Cause I wasn't really sure what the, I don't wanna say master plan is, but like, like obviously, like one of the big things is obviously, like you said, getting people in an open source, but, it's cool that you're productizing something.
I can't remember if that's a word or not, but I just used it.
Brian Douglas: I think it works.
Nick Taylor: I'm curious cuz there's some similar tools in that space, but I, I feel like you're, you're slightly different than some of those tools potentially. I know when I worked at Forem, my old colleague, Christina Gordon, she was running community and then eventually DevRel there she was using, I think orbit model is that it? is it orbit or orbit, orbit.love or whatever.
Brian Douglas: Orbit.love. Yeah.
Nick Taylor: So is it similar, like what? And I'm not saying this to throw anybody under the bus. I'm just genuinely curious.
Brian Douglas: No, it's a good question. I think orbit has a great product. So like if you manage a DevRel team or a community, definitely take a look at orbit because you can now understand who's Tweeting.
Orbit has like the orbit model is like a basically circles on like how close people are to like your core influencer group your core, basically your core MVP, of users. Okay. So orbit does have a GitHub integration and orbit's GitHub integration does focus on things like stars and, comments and et cetera.
I don't know if it's been announced, but it's been in beta for discussions as well. Which is a great product. We're actually currently just focusing on code. Uh, so like we wanna see where contributions in code, are happening. And the reason for that is no one's doing that well. Like there's a lot of productivity, tooling apps, that are not like orbit that are like, we don't have to name 'em, but basically the productivity tooling they're really focused on big brother and trying to tell you like, Hey, how many PRs did you ship this week?
Why did you only ship three outta five? You could have been mentoring a junior engineer for the whole week and only shipped one PR.
Nick Taylor: Okay.
Brian Douglas: But that doesn't really, when you're just looking at just numbers for the sake of numbers, it looks, yeah, it looks awful. Especially in the, the world that we live in with layoffs.
If you spent your entire time mentoring juniors, does a junior get laid off or do you get laid off because you spent way more time working with them? So what we wanna do is what I believe is open source is more community focused, where everybody gets a piece of the pie. Yes. There are gonna be some heavy hitters and people who know most of the code, but like you could identify who has most of the information and how you could spread that well, so.
Identify things like bus factor. If somebody does all the work in the last release, that person probably should have wrote some documentation or talked to somebody else. Cause otherwise you're gonna be always relying that same engineer every time a release happens. And so yeah, if that time over time release have to release, we're gonna be able to identify those different points of failure, which is the opposite of what most tools work.
If this person doing all 10 PRs every week, that's encouraged in these other tools. So we wanna do the opposite. Encourage spreading the wealth.
Nick Taylor: Okay. Yeah. Gotcha. You definitely you definitely don't wanna silo knowledge that's for sure. You know, like when whoever's been doing their releases, there's always that horrible example of gets hit by a bus, but like, you know yeah.
You, you know, so, okay. So that's no, that's, that's interesting to know. So if anything, well, one, this tool can stand on its own and if anything, it might compliment or, you know, I guess it depends what the metrics you're looking for too, like you were saying. That's, that's super exciting though and you're saying you're hoping or release that. What was it in a couple months you said, or a month or?
Brian Douglas: Yeah, in a couple weeks. So I've been actually reaching out some DMs. What we're calling is the Open Sauced insiders program. Like there's no public announcement or anything like that, but I'm just reaching out to friends to say, Hey, we're gonna have a product that's gonna ship.
As an alpha would love to get people to use it. Give us feedback before we go broader launch in September.
Nick Taylor: Yeah.
Brian Douglas: So if anybody's interested, hit me up with a DM. If you work at open source, if you have a project at your company, yeah. Just let me know and then I can, get you eyes into it. And then we can get some feedback.
I feel like it's a very ambitious product, and something that no one's ever done yet. Like maybe GitHub's got close, but I think that, based on my purview, I think we're gonna change the way people look into open source moving forward.
Nick Taylor: That's super cool. I'll definitely talk to some folks at work about it.
And, I know like, I mean, cuz Netlify is a big fan of open source and, I can even think of like, Ryan Carniato who built SolidJS. I feel like that is probably a really good candidate too.
Brian Douglas: He'd be a perfect candidate. Happy to take an intro. I could probably list a whole bunch of people that you work with that I'd be like, hey intro, please.
Nick Taylor: In terms of Open Sauced, is there other stuff in the community, that stuff's going on or it's, it's, it's pretty much like everything's going on in the Discord. You got the YouTube for some of the interviews and stuff.
Brian Douglas: We've also been doing Twitter spaces. Doing a ton, but yeah. Chad and I, Chad is the other engineer who's been helping out. We've been doing Twitter spaces. This is about scaling engineering teams and it's like this week, we're gonna have a Twitter space on mentorship.
We haven't done a great job of promoting these upfront. So if you see the live it's there, but currently on the YouTube channel, if you scroll the youtube.com/OpenSauced and scrolled to the bottom, you could see our last conversation, which was a Twitter space. We talked about, how FAANG is ruining open source.
We don't really have a title for these conversations, but, yeah, if you scroll all the way to the bottom,
Nick Taylor: I must be logged in as my work account, cuz it says I'm not subscribed, awkward.
Brian Douglas: Yeah. So that first one on the left, we had a conversation around how, it was an interesting conversation.
It was based on a newsletter that Gergely he's like a former Uber manager. It's like actually I think you jumped in there. You might be on the recording. it's a shout out. YouTube famous.
Nick Taylor: Yeah, yeah, yeah, yeah, exactly. Yeah. It's kind of funny cuz like speaking of community and stuff, like I've known Chad for a few years, actually I met him through my Virtual Coffee.
It's a big world, but it's a small world at the same time. Cuz like, and that's another thing like, uh, speaking of just open source. I would never have met Chad if I hadn't joined a community, like he's in Jamaica, I'm in Montreal. Definitely the pandemic has accelerated a lot of stuff in terms of people just, you know, just wanting to meet other people too online.
But, I think that's one of the things that are huge. When I worked at dev two, well, even at Netlify there's people all over the planet that I work with. I think that's super cool. You know, and, and this, this goes out to the reach, like you were saying too, you know, it gives you that superpower too, where like, you, you could work on some amazing project that, if you're just in your own town, you would never be working on this, you know?
I think that's another thing that's kind of big for me in terms of open source and it really does open a lot of doors. And like I say this as a white guy in tech, so I know I have a lot of privilege, so, I definitely gotta say that, but, you know, if you can do it, like you said, cause I know everybody's situation's different, but if you can contribute, it's like 100% game changer.
And I didn't realize that Chad was actually working with Open Sauced now, I've listened to some of the Twitter spaces, but I thought it was just, both of you just kind of boosting the tech is hiring. So, that's cool to know that he's actually part of the project now, too.
Brian Douglas: That definitely still is the goal. Like we definitely boost at that tech is hiring and what Chad's doing. We didn't really know what this was gonna be. So we actually did a couple of them that we didn't record. Like they just left Twitter spaces recently. But the idea is sort of like we figured it out as we go along, like I've always wanted to do like live stream Twitter spaces, to like YouTube and to other platforms.
So what we're using right now is we're using ping, to capture Chad's video. And then I basically use OBS to do, some, when he grabbed the picture of my phone to basically have the Twitter space.
Nick Taylor: Oh, okay. Okay.
Brian Douglas: It's like light editing. It's live to tape. Well, not even live to tape, it's recorded to tape and then we upload to YouTube.
But eventually we'll get to the point where we could stream that up on YouTube as well. And it's like my DevRel wheels always turning of like, how can I reuse this content? Or how can I reuse this platform for sharing about open source? The gimmick that we have in those spaces is that we're gonna talk about scaling engineering and like growing as a junior engineer and stuff like that with the eventual context at open source is go try contributing somewhere else and learn stuff outside the job, to then eventually bring that back to the job.
Nick Taylor: Yeah. And that's such a great point because like, I can't remember if I said it during the stream or before we got on the stream, but most of my career was in the .NET ecosystem.
I was doing C# ASP.NET, and then I made a, a full pivot to all things JavaScript. Cause I was a big fan of it. I was working in C# and .NET and I was doing some JavaScript, but it was like full stacky. React was fairly new at the time.
And I was like, I wanna learn react. So I started doing this in open source on my own time. So I started off with, this was like, early late 2015, early 2016. So for folks who might not know what Redux is, Redux is a state management library. It was created by Dan Abramov. And, I think as well by, Andrew, what's his last name? It's escaping me.
The point is, uh, there was these free egghead videos for Redux from Dan. I watched that whole thing learned Redux and I had started contributing to these are less popular these days, but there used to be React boiler plates.
Brian Douglas: Yeah.
Nick Taylor: I think you've mentioned in one of your Twitter spaces, but like Max Stoiber had the React boiler plate, which was like the defacto.
And I ended up contributing to another one. It was a Redux React one by Cory House. It was called React Slingshot and. That's how I started learning React. And eventually I became a maintainer as well because he, after I think I had like 13 PRs at that point. And one, one thing if you do end up doing a project is if you wanna not burn out is just ask people that are contributing or seem to at least enjoy your project.
Just throw the bone out there and say, Hey, would you wanna become a maintainer? And it doesn't mean you gotta be doing it 24 7, but there was like three of us at that point. And that helped the project scale, you know, in terms of triaging issues and stuff too. And I learnt React and all those things led to me being able to get a job in React because I did it on my own time, but you know, it was like real world projects.
So that, that was huge.
Brian Douglas: I think one person had, I think it was, Anthony had dropped in the chat, like create T3 app or something like that. It's a,
Nick Taylor: oh yeah. From, what's his name?
Brian Douglas: Why am I blanking his name? The ping founder. Theo.
They're still coming out like that. Everybody's having like grow, like, I think what's beautiful about open source and like, even these tools is that people have their opinions, they share their opinions, people go hop onto those and it helps unblock so much more work, which is why we do Tailwind.
That's something that I don't wanna have a discussion about every single time we open a PR is like how to do CSS.
Nick Taylor: Yeah.
Brian Douglas: To be quite Frank, I was never a fan of Tailwind, but the popularity forced me into a position where, I don't wanna build my own CSS framework.
Let's use Tailwind.
Nick Taylor: Yeah, exactly. And, and like building out a whole design system and component library, it's a huge endeavor as well. So like leverage what you got there. Are you using Tailwind with a particular component library? Like, Chakra UI or something or?
Brian Douglas: So we're currently building our own component library.
We have leveraged. So in hot open source we do have headless UI, which I think did come out of the Tailwind group. We also use Radix, cuz it's unstyled components on the web. But we have it really like we're building everything, at least building the, the different Interac, like components themselves from the, the ground up.
Nick Taylor: Yeah.
Brian Douglas: Currently our, our new design system's not really public yet cuz we're working on this one product, this insights product, privately for now. But we're hopefully, you know, open everything up in the next couple months. And then everyone will have eyes into the design system, the new product and everything like that.
So, we're, we're getting there. It's just, I've had like one of the, probably since joining Netlify, I've had the ability to start new decisions and a new framework and with the new team. Cuz I, I don't know if I mentioned I was employee number three at Netlify. So I was the first person to write JavaScript, Matt wrote JavaScript, but I was the first person to do it full time.
So converted the Angular app into a React app. So all the dashboard app that Netlify.com. Initially, it was all me. We did three more people after that. But it's like a fun time to also be right now for Open Sauced. Cuz we intentionally built, we started with a new repo cuz I made a lot of decisions in the last five years, five, six years that we don't have to bring along for the ride.
So we're the starting from fresh and we'll introduce all the new stuff, as we make all decisions around the framework and everything like that.
Nick Taylor: Okay. Okay. Yeah. Yeah. And I was gonna say as a good choice, picking Radix. There's like, Radix, I know when I was at Forem, we started using some components from ReachUI, which is from the folks that do Remix run and just for folks in the crowd, it's a good idea to grab something like Radix or ReachUI because they have all the accessibility built in, or at least pretty much
Brian Douglas: Yeah.
Nick Taylor: The main things that you don't have to worry about. And that's huge. Cuz if you're building out components, this is not something you wanna have to worry about all the time.
I mean, you still gotta, there's still a accessibility testing aspect of things for sure. But it's nice having all that accessibility, goodness, baked into those things. So. Definitely a good choice.
Brian Douglas: Yeah. I, I've definitely been to a place early React days, like 2015 and having no accessibility like inferred or anything in the components.
And it's like one of those things that everybody was just kind of like, ah, whatever. And then there was a huge push for accessibility to be first and foremost, and like the stuff we're building to not have to make those decisions or figure out like, you know, if I hit tab on my dropdown, is that gonna work?
Like a lot of stuff. I love this picking off the shelf for, and the beauty of that, I know we chose it because it was so minimal. It was a light framework, that we're not introducing a bunch of hefty stuff. I actually, one of my first, coworkers, when I, my first dev job he had built.
Nick Taylor: Yeah.
Brian Douglas: He had rebuilt like, he called it, X Select or something like that.
Anyway, he built like this library and originally jQuery, that had like every single front end library, he would rebuild it, like and react in angular. Okay. To do dropdowns because dropdowns were a real challenge for front end. Yeah. For front end depths. And, the reason he did that, cuz his mom was blind. So his mom was blind for his entire life.
And he saw firsthand, his mom tried to use screen readers on the web and he would always test with the screen reader, like if you could use the site. So it became like his mission to like, like when I worked on him, he was like 19 years old. He was running accessibility at visa for visa check art, but like 21, cause he just made it his thing and it was all on the back of open source.
He made it his thing to always make sure that dropdowns were accessible.
Nick Taylor: And to your point too, what you're saying, working on accessibility now is popular. And that's a good thing. And like, that's also just another space.
Like if you're looking to get in the front end space, if you put some focus on that, that'll help you stand out too, because you know, building out things is one thing. But if you're making accessible stuff and these are things that you'll be asked about in, more senior roles for sure.
But even in the starter roles, they won't grind you as much, but they'll definitely be asking about stuff. Like, are you using semantic markup? Why are you using a label? You know, stuff like that.
And, you're obviously making your, your application or your site available to more people too, which is a good thing. Even if you, for some reason you hated accessibility, if you've got an e-commerce site, it just means you're getting more customers, even if you don't like that.
Brian Douglas: So, yeah, this is true. I think if you take anything away from, from this conversation, like getting into open source, it could be challenging and daunting, and even with scaling your engineering career. But I think if you niche down, like you're always out of a bootcamp, you're always given sort of the general.
Approached like, yeah, learn everything and then just be good at everything. When you interview, you can answer questions, but pretty quickly, if you wanna get to a senior level, you gotta niche down and like focus on accessibility or CSS or animations or whatever it is, like niche down into something you can be an expert at.
And then once you've been an expert at that move to the next thing, so then move to the next thing.
Nick Taylor: Yeah.
Brian Douglas: And eventually you start really gaining skills. And like, going back to my original mention is like, and when contribute to open source, like bring in those skills are, come without the skills and say, you know what?
Open source has like no animations when, when you click on this thing, like, it'd be great. Just tell that story. Let me introduce an animation. On whatever this random thing, and it'd be cool. You could be the animation guru within the project.
The same way Matt was our actions guru for quite a bit of time, which is funny, cuz I was the actions guru cuz I, I worked at GitHub.
Nick Taylor: Yeah.
Brian Douglas: And I could do all the actions, but then I was just like, got to the point where I couldn't build another action. Cuz then that was more open source to contribute or to maintain
Nick Taylor: mm-hmm
Brian Douglas: and at the time Matt was looking to break in the industry, get a dev job.
Yeah. And I was like, Hey, solve this problem for me. I'll provide this thing like to like crazy. And I was able to promote his action on stage at get up universe and then shortly after that's awesome. He was able to start to interviewing at jobs.
Nick Taylor: No, that's super cool. And this is a tangent, but I remember I've heard you talk about this before.
I think you talked about it on the Shop Talk podcast with Rizèl but you you've mentioned it elsewhere too. Like. It's not so much to do with open source, but like you work in DevRel you know, in terms of people building in public or putting out content there, you saw there was a hole where like GitHub actions was something new from GitHub.
Nobody was really talking about it so much or writing content for it. And you just kind of grabbed that bull by the horns and, and you just were like GitHub actions, everything. And, basically you became the GitHub actions person, at least from the outside, I would say, you know, so that's a little side note for folks. Like if you're, if you plan on doing any kind of content creation.
We're, we're getting close to time. I just had a couple, I guess this is kind of more, a open ended question. It's still early days for Open Sauced. So like you said, there's, there's still a lot of room for folks to make an impact. Like you said, if somebody just wants to come in and I wanna be this person.
What are, holes isn't the word. What's some stuff you wanna do that you haven't had a chance to maybe like, yes, you're gonna be productizing it. But like, you know, just like I said, it's, open-ended like, what's some stuff you wanna do, but you just haven't had time to yet maybe, or we don't, there's not enough folks on the team yet.
Brian Douglas: Yeah. I mean, there's one thing that it was a discussion last year, maybe a year or two years ago. What I always wanted do is like, make a, a streamline approach to like opening discussions in the product.
Nick Taylor: Okay.
Brian Douglas: You know how like Intercom yeah. In the bottom, right? Of most apps you can like chat with a, a live person.
I've always wanted to open source a tool to basically. You chat on the site and be like, I don't know how to use this product. That question goes into a discussion that response or a Discord channel, that response ends up going into, back to the, the UI, because once you type in Discord or a discussion, it goes back.
That's something that I would love to solve that problem. It's really outta scope of what we're working on right now. But if anybody's ever seen a solution like that or wants to like pair on that for like, you know, a day, I would just love to just have a chat about that problem.
Other stuff that's maybe on the roadmap for Open Sauced. We honestly just need feedback, a lot of folks log in Open Sauced, they get underwhelmed with the fact this there's not a lot of features there.
Nick Taylor: Mm-hmm.
Brian Douglas: I think opening up discussions to say, you know, what'd be cool. Is this feature or, you know, it'd be cool. Is that feature. So I'll probably end up probably trying to source that feedback pretty heavily from folks, everybody I run into. We do have like an infrastructure thing that we're gonna be building out. We currently have the API to open sauced dot pizza, that is almost live.
But at this point we're gonna be like, well, the way we're doing this, the hot Open Sauced of pizzas, we actually index a bunch of repos using GitHub actions. That index gets put into a relational database. And then that relation database is gonna recommend repos for people to contribute to and stuff like that.
Nick Taylor: Okay.
Brian Douglas: So as we index repo's like, now it's that point at infrastructure problem. And my skillset and infrastructure stops where vortex or Ted who's in the chat where he begins. But we're always, always happy to like, to learn from other folks who have solved problems, similar problems and stuff like that.
The majority of what we're doing is open source. Pretty soon everything will be open sourced. Happy to just have a conversation chat. I, I have like a very open calendar that people would just drop time on. So ask me, and I'll give you my calendar link and, always happy to chat with folks who are interested in talking about this stuff.
Nick Taylor: Cool. Cool, cool. No, that's awesome. Well the project looks amazing and like I said, I've been a lurker. I'm gonna go through the whole onboarding cuz I've never done it. I'll try and, uh, provide some constructive feedback there.
I'm just gonna add it to my to-do that I need to contribute to the project. So if I put it somewhere, I'll do it.
Brian Douglas: And after this, I can give you a demo of our, our future product for the, that we're making for the insiders. So if you wanna,
Nick Taylor: Okay.
Brian Douglas: Anybody here you're open, hit me up.
You wanna join the iron insiders? Always we ask is this respond to of my message of like feedback that would be super helpful. And then we're basically build the future of Open Sauced. We'll unveil it pretty soon.
Nick Taylor: Okay, cool.
Brian Douglas: Everything will make sense soon.
Nick Taylor: Yeah, no, for sure. Yeah, that would be awesome. I'm gonna drop some links to all the places that folks can find you at. So definitely if you're not given BDougie a follow on Twitter yet, do that hit 'em up on Twitch too, YouTube. And, I haven't checked out your own site yet, but I dropped that too.
Brian Douglas: I redirect it to the Polywork now, cuz that's where I just drop all information.
Nick Taylor: I still blog, but I I've been dropping, I always post like, like whenever I do my streams, I do a highlight over there and stuff.
It's a great way to just put all your work out there. I find with, anyways, that's a little tangent shout out to Polywork. I'm actually wearing their t-shirt at the moment.
Brian Douglas: Could I mention real quick? We're like four stars away from a hundred stars on hot.opensauced.pizza.
So if anybody okay. Wants to star that repo, we'll hit three digits pretty soon.
Nick Taylor: Okay, cool. Cool. I'm definitely down to see that insiders if you want, whether that's after this or another day I'm I'm game for whenever. Thanks again for hopping on, I know you got a lot going on, but the project looks super exciting.
Good luck on the productization launch. Aside from that, next week folks, I'm gonna be hanging out with my coworker, Brittany Postma she's gonna be teaching me some spelt. I haven't done any of that. And speaking of Rizèl, I'm gonna be hanging out with her in a couple weeks, and I think we're doing something with GitHub actions, Copilot and Twitter, some kind of mashup.
I can't remember exactly what we're doing yet, but, I'm pretty stoked for that too. Cool. All right, well, we'll see you all next week folks. And thanks again. BDougie.
Brian Douglas: Yeah, pleasure.
]]>Fresh runs on Deno, a modern runtime for JavaScript and TypeScript. Luca gives a great explainer about what Deno is. Check out the video but if you'd prefer to read or have your browser dictate it to you or some other assistive technology, I've also included the transcript below.
Nick Taylor: Speaking of Deno. Yeah, we act, I work in Netlify and we use it for our Edge offering. So, uh, if folks are kind of wondering if it's production ready, I would definitely say yes.
Um, so, uh, we're definitely gonna talk about Fresh, which is a new web framework, but I kind of want to touch on Deno a bit first because I'm, I'm somewhat familiar with it, but I know Deno might be something that's new to a lot of folks. So I guess, I guess high level, like what is Deno?
Luca Casonato: Yeah. So Deno's original pitch is that Ryan, the person who originally created Node, um, went like 10 years later or eight years later.
So look back at Node and tried to reflect on everything that went wrong with Node and tried to fix everything that was wrong with Node. What came outta that is Deno and Deno tries to be like a JavaScript runtime, but also a TypeScript runtime, because that's very popular at this point, have TypeScript built in, it's much more fully integrated, like batteries included like other modern languages, like Rust and Go where they have like formatters and linters and testing frameworks, benchmarking, dependency management, all that built in, into the mm-hmm like as one integrated system.
And we try to be really modern with the JavaScript that we use. Um, so we try to really make full use of ES6 and all of the cool stuff we've gotten from that Promises, async iterators, web APIs like readable stream writeable stream. And we try to just stick really closely to the browser.
So like have fetch for HTTP server rather than having custom APIs. And, we have module resolution works the same way that it does in the browser. So we like import stuff from URLs and you can use import maps, just like in browsers to, to re map specifiers stuff like that. Okay.
Nick Taylor: Cool. Cool. Yeah. Yeah, no, it's, uh, it, I find the project pretty interesting, cuz like, uh, I, I dropped a link to that.
Talk about, uh, 10 things I regret about Node.js and I, I can't remember when Ryan started working on it, I think it was like three, maybe four years ago. Uh, I'm not positive, but
Luca Casonato: I think may 20 on May 23rd. It was four years ago. So it's been like four and a bit years now.
Okay. Yeah. Quite a while.
Nick Taylor: Yeah. No and yeah, no, I remember, uh, I found the talk really interesting cuz like he was critical of a lot of things of Node, but I think he, if anybody is allowed to be critical about, it's probably the creator of it. Um, yeah. And um, yeah, no. I I'm a big fan of TypeScript. So I found it interesting that he decided to go with TypeScript.
And I know just, just from what I had read, like a few years ago, it was initially, uh, coded in Go, I believe. And then, I'm not sure when, but there was a, a pivot to go to Rust, I believe, but I, I don't know what I mean I know Rust is a very great language. So do you know what the reason for the pivot was?
Luca Casonato: Yeah. I do. Go is a garbage collected, memory managed language like JavaScript or C# where the runtime itself can do things like garbage collection. It can do cycle detection, it can do, reference handling of, of objects. You don't need to manually manage memory pointers, stuff like that.
And if you're trying to build a like V8 JavaScript, is also very, very, memory managed language, right. And V8 the engine that we use to run JavaScript, the same one that's used in Chrome, has a very advanced garbage collector and Go has a very advanced garbage collector. And if you have two of these very advanced garbage collectors in the same binary, and they're trying to like in the same process in the same thread, and they're continuously fighting with each other, when they're trying to garbage collect, they have like two separate heap pools.
It becomes like a nightmare pretty quickly. So what you, you really don't want to have your host language for your JavaScript, runtime, be garbage, collected language, and Rust at that point. And I think it still is, is by far the best, manually memory managing like the, the best language to manually where you can do manual manual memory management.
Like it's safe. Yeah , it's really fast.
Nick Taylor: Okay. Yeah, no, there's a lot of stuff. Uh, I'm still pretty new to Rust, but I, I I'd been learning a bit of it last. Uh, last year, last fall. And, uh, I definitely there's some con well, I definitely love the pattern matching in it, but I, I definitely there's some concepts like, you know, borrowing and all that.
It's, it's an interesting, it's it takes a second to get your head wrapped around it, but it's kinda neat how only one thing can ever own the data, which in theory, and I imagine in practice too means you can never have any kind of, uh, data collisions or issues with concurrency or at least that's, that's like the big thing, isn't it?
Luca Casonato: Yeah. So the, the core principle of Rust is that you can never have two references. To the same bit of mutable data or, sorry. No, you can never have two mutable reference to the same bit of data. Like you can have multiple references to the same data, if you all can only read from the data, that's fine. But yeah, if you want to modify the data, you have to be, you have to have like single ownership over that data at that point in time when you're trying to mutate it, which allows you to make sure that when you're mutating this data, other like threads, for example, can't be in the middle of reading that data.
It can't break them because you're outta sync from them. So that's, and the entire borrow checker and rests memory ownership model is built around the concept that you can only ever have a single mutable reference, to some bit of data. And it like takes a while to wrap your head around.
But like once you do, it's, it's very empowering because it allows you to. To, to build like really fast software, and really safe software, with very little effort. Well I say very little effort, very little effort compared to something like C++, right. Where you have to continuously keep your mind in this space
like, is this safe? Um, where do like, do I need to move this point or, like crazy stuff that you don't need to deal with and rest, cause the compiler will just error, if you do something wrong.
Nick Taylor: Yeah, I know for sure. And, and I know even like the, the Chrome team has started to build out parts of the V8 engine with it, because, because of like, as far as I know, the majority of it's written in C++, and there's like, mm-hmm,
I don't know how many bugs, but there's definitely bugs related to memory management. And they've been slowly plugging in Rust there as well to, uh, to help, um, uh, kind of squash some of those bugs. Um, and it definitely makes sense what you're saying about the garbage collection, because, I used to do C# quite a bit, and it, and it's nice when you don't have to worry about, you know, allocating and deallocating memory, but I can definitely, there is a hit to having the garbage collector, you know, at some point, you know, not that your program seizes up, but there's, there's at one point, you know, like somebody's gotta take out the trash, you know, and, and I, and it definitely makes sense what you're saying.
If the two languages are garbage collected, then I could see that being an issue. Yeah.
Luca Casonato: Like they're, they're continually fighting with each other, like they're not coordinating on when. Gonna do these pauses to do garbage collection. So like they might happen half a second apart from each other, which that's probably fine, but like, they might also just happen right after each other.
Then you have like a lockup of 200 milliseconds in your program where they're both doing garbage collection.
Nick Taylor: And I guess, I guess another reason I could think of why, the move to Rust might have happened too, is a web assembly. I imagine as well? Cuz like, uh, like I know web assembly started off with Rust.
I mean, you can do other things now. Like there's like .NET projects, like Blazor where you can write C# to compile, to, to WASM and stuff. But, but all the stuff I saw initially, and, and it has been a lot of stuff has just been in Rust for WASM. So I imagine that pair is nicely given that Deno's a JavaScript runtime, serving stuff on the Edge and you know, so it seems like it would pair well.
Luca Casonato: I think we like originally when the switch was made, this was not really something we considered at all, but over time, this is really like proven to be insanely useful. Like a lot of our internal infrastructure that's built it's for native code in, in the binary, in the CLI binary. We also have WASM builds for it that you can just run on the Edge.
Okay. Um, in WASM containers.
Nick Taylor: That's pretty cool. Yeah. Yeah. Okay. Nice. And then, uh, so, and then, yeah, we we'll definitely get to Fresh, uh, shortly, but, uh, and obviously. Uh, TypeScript's seem to make sense because, well, one it's definitely a rising in popularity. It's it's, uh, people might not realize this, but TypeScript's been around since 2012, like cuz I, I started using TypeScript.
I used to work in a Microsoft shop, so, uh, I was using it back in 2015 when it it's definitely changed a lot. It's definitely way better now. But, but um, you know, I guess if you've never worked with a typed language, it, it, I, I know it, it trips people up sometimes cuz you know, like when you're writing stuff in JavaScript, you can coerce things or you can just be like, yeah.
Okay. I know it's not exactly the same thing, but I can add this property later or whatever, but uh, it's kind of nice that it adds that to the language natively. Uh, I find cuz cuz you do get those, those type checkings in place, but uh, but you can also write plain JavaScript as well. Right? In, in Deno.
Luca Casonato: Yeah.
TypeScript's completely opt in. Um, we do recommend you use it because it's just, it's a much better experience really. Um, like the learning curve from switching from JavaScript to TypeScript is much lower than, I don't know, switching from JavaScript to rest, for example, right?
Nick Taylor: Yeah. Yeah. For sure.
Luca Casonato: And the amount of benefit it provides, like even if it didn't do type checking, even just for like editor completions is just so phenomenal.
It's just worth it. Just alone for editor completions.
]]>
These are paid and free resources, but I think they're all great. Remember that your work probably has an educational stipend, so leverage that if you can.
I'll update these resources as I find new ones.
Want to learn TypeScript for free?
— Matt Pocock (@mattpocockuk) September 5, 2022
Here’s every piece of free content I’ve put out over the past 6 months, in order from beginner to wizard-level.
Mega-🧵
So first off, why does this matter? For folks who cannot view images, alternate text can describe what the picture is. Providing alt text is also great for SEO, if that's your jam.
As someone familiar with browser extensions (I used to work on a password manager browser extension), I created a browser extension to avoid making this mistake again. I call it a11y-twitter.
The https://github.com/nickytonline/a11y-twitter repository on GitHubThe extension doesn't do much, but it does one thing well. It checks if you've added alt text before Tweeting. In its current form, I decided to not bug the user too much, so it only prompts you to add alt text once during a Tweet. That may change in the future, but for now, I thought this made sense as it makes folks aware of alt text, but does not nag them.
When you create a browser extension, you hijack a page to some degree. Content scripts (JavaScript) and additional CSS can alter the look and interactivity of the page you're on. If you've ever used a password manager, that's what's happening. They inject images and JavaScript to the page to allow you to access your credentials.
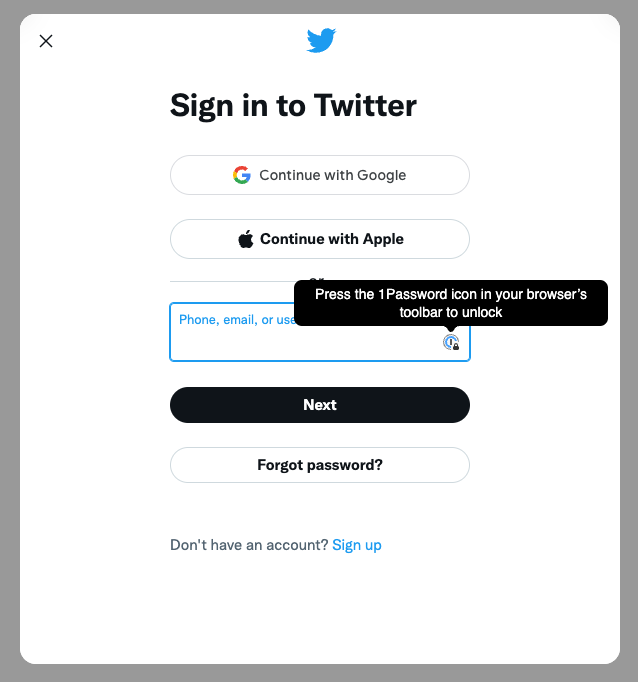
In the case of the a11y-twitter extension, finding the correct elements to perform the check for missing alt text proved interesting. Twitter for the web is built with React, uses some form of CSS in JS library, and has no ID attributes to select the elements. CSS classes would make sense in terms of a selector. Still, since the CSS classes are autogenerated from the CSS in JS library, that's impossible.
I'm not positive, but at Twitter they are most likely using Cypress for End to End (E2E) Testing as some elements on the page have data-testid attributes. And that's how I find the Tweet button.
!['tweetButtonInline', 'tweetButton'].includes(
  potentialTweetButton.dataset.testid,
)
data-testid attributes are for testing only, but I highly doubt they'll be removed because the E2E tests have the same problem I have. How to find the Tweet button? Once found, I check if it's disabled. If it's disabled, it means the person hasn't typed anything to Tweet out. If they have, though, that's when I check for alt text.
if (tweetButton && tweetButton.ariaDisabled !== 'true') {
  a11yCheck(event);
}
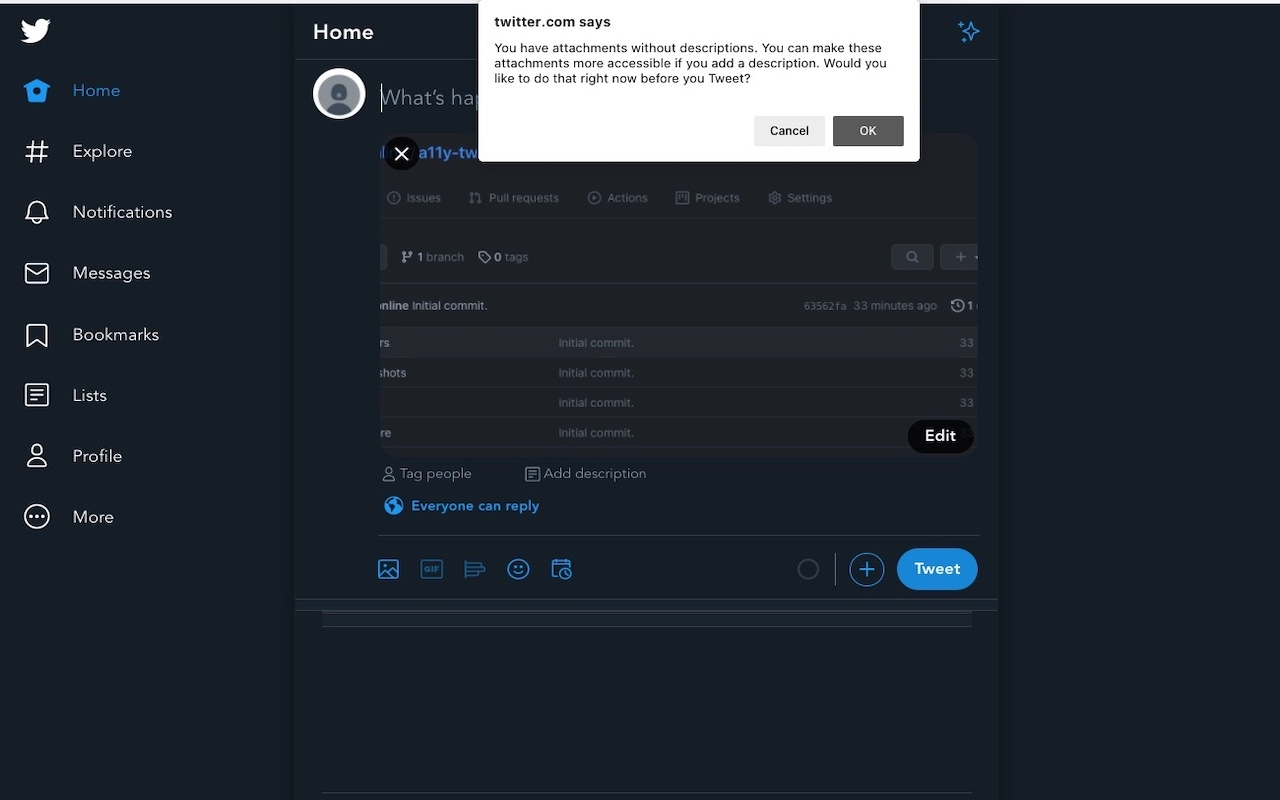
And that's pretty much it!
As of the date this blog post was initially published, this is the entire magic sauce to make this all happen.
// TODO: This would need to support other languages than English.
const ADD_DESCRIPTIONS_MESSAGE =
  'You have attachments without descriptions. You can make these attachments more accessible if you add a description. Would you like to do that right now before you Tweet?';
const ADD_DESCRIPTION_LABEL = 'Add description';
const ADD_DESCRIPTIONS_LABEL = 'Add descriptions';
let askedOnce = false;

function a11yCheck(event) {
  // For v1, don't badger folks every time for the current Tweet.
  // v2 can have an option for this.
  if (askedOnce) {
    // Resetting for the next Tweet.
    askedOnce = false;
    return;
  }

  // Check to see if there is at least one missing description for an attachment.
  const attachments = document.querySelector('[data-testid="attachments"]');

  // Need to check for one or more descriptions.
  attachments.querySelectorAll('[role="link"][aria-label="Add description"]');
  const mediaAltTextLinks = attachments
    ? attachments.querySelectorAll(
        `[role="link"][aria-label="${ADD_DESCRIPTION_LABEL}"], [role="link"][aria-label="${ADD_DESCRIPTIONS_LABEL}"]`,
      )
    : [];

  const [missingAltTextLink] = [...mediaAltTextLinks].filter((link) => {
    const linkTextElement = link.querySelector('[data-testid="altTextLabel"]');

    // Need to check for one or more descriptions.
    return (
      linkTextElement.innerText === ADD_DESCRIPTION_LABEL ||
      linkTextElement.innerText === ADD_DESCRIPTIONS_LABEL
    );
  });

  if (!missingAltTextLink) {
    // Resetting for the next Tweet.
    askedOnce = false;
    return;
  }

  const shouldAddDescriptions = confirm(ADD_DESCRIPTIONS_MESSAGE);

  if (shouldAddDescriptions) {
    askedOnce = true;
    event.preventDefault();
    event.stopPropagation();
    missingAltTextLink.click();
  } else {
    askedOnce = false;
  }
}

function findTweetButton(element) {
  let potentialTweetButton = element;

  while (
    !['tweetButtonInline', 'tweetButton'].includes(
      potentialTweetButton.dataset.testid,
    )
  ) {
    if (potentialTweetButton === document.body) {
      potentialTweetButton = null;
      break;
    }

    potentialTweetButton = potentialTweetButton.parentElement;
  }

  return potentialTweetButton;
}

document.body.addEventListener('mousedown', (event) => {
  const { target } = event;
  const tweetButton = findTweetButton(target);

  if (tweetButton && tweetButton.ariaDisabled !== 'true') {
    a11yCheck(event);
  }
});
I may add more features to the extension in the future, but for now, it's serving its purpose for myself and other folks. Also, if you end up using it, consider starring it on GitHub! 😎
If you'd like to learn more about creating a browser extension, here are some handy resources:
P.S.: It'd be neat to create a Safari extension, but the process is a lot more painful, and I haven't had time to dedicate to this. If you're interested, though, pull requests are welcome!
]]>Venue: Applitools & Netlify Present FRONT-END
We went through the demo code all the way to building out an app with Express that allows you to submit a URL for transcription.
Here's the code for what we built out
The https://github.com/nickytonline/deepgram-speech-to-text-stream repository on GitHubCheck out their docs if you want to learn more about what Deepgram can do!
Also, be sure to check out Bekah's latest post!
Thanks for hanging Bekah!
]]>Venue: Virtual Coffee Lunch & Learn
Summary: One of the primary skills you'll need as a developer is asking good questions. We talk about the process of working through a problem and how to ask questions. Because when we ask good questions, we're growing as developers, respecting the time of others, and putting in the work we need to do.Links:
]]>Here’s the accompanying slide deck, iamdeveloper.com/11tyMeetupMay2022.
I wasn't able to go into as much detail as I would have liked to during the talk, so this blog post compliments the talk.
Here is my flow for writing blog posts. I create and publish them on dev.to (DEV) via the DEV editor. Every night at 8 pm Eastern, a GitHub action runs and updates my blog post markdown and associated assets. If there are changes, the main branch is updated and starts a deployment on Netlify.
Let's break down the whole flow.
I call the DEV API, which pulls in all my blog posts. At the time of writing, the function to do that looks like this. Feel free to peek at the complete source code.
/**
 * Retrieves the latest blog posts from dev.to.
 *
 * @returns {Promise<object[]>} A promise that resolves to an array of blog posts.
 */
async function getDevPosts() {
  const response = await fetch(DEV_TO_API_URL + '/articles/me/published?per_page=1000', {
    headers: {
      'api-key': DEV_API_KEY,
    },
  });
  const posts = await response.json();

  return posts.filter(isValidPost);
}
I filter out certain posts via the isValidPost(post) function. I filter out discussion posts, water cooler posts etc., as I enjoy having them on DEV, but not my blog.
The API does allow you to exclude tags instead of doing it once you’ve received all posts, but for some reason it doesn’t work and I have haven’t had time to investigate why.
DEV uses liquid tags for embedding content in blog posts. For those interested, here is the complete list of supported embeds via the DEV {% embed "url" %} liquid tag.
I'm using short codes in Eleventy which are the same syntax as liquid tags. In the past DEV had specific liquid tags for different embeds. For example, to embed a GitHub repository, you'd use the {% github "url" %} liquid tag. The liquid tag is still supported, but they now have a generic embed liquid tag, {% embed "url" %} which determines what type of embed based on the URL.
In my project, I have shortcodes for specific embeds, e.g. {% github "url" %}, {% twitter "url" %}, etc. I have older posts that use the old liquid tags of DEV, but newer posts use the {% embed "url" %} liquid tag. On my end I manipulate the markdown to convert e.g. {% embed "https://twitter.com/nickytonline/status/1521650477674471424" %} to {% twitter "https://twitter.com/nickytonline/status/1521650477674471424" %}
I don't support all embeds at the moment. For example, comment and tag embeds. I had DEV comment embeds at one point, but it proved troublesome for comment embeds with Tweets or any embed. I used so few of them in blog posts that I made it a rule to create a hyperlink to the comment instead. For the tag embed, I barely used it, so I made another rule to not reference a tag on DEV or, if I did, to create a hyperlink instead.
There are some other manipulations I do to the markdown that I'm probably forgetting. The markdown of a blog post from DEV is now in a state that Eleventy can consume.
On all my blog posts, you'll notice that they have a Boost on DEV link, and some also have a Boost on Hashnode link. I got this idea from Stephanie Eckles, giving credit where credit is due.

These links are generated in the markdown by the boostLink shortcode
/**
 * Generates markup for a boost on DEV button.
 *
 * @param {string} fileSlug A pages file slug.
 * @param {string} url A pages URL.
 *
 * @returns {string} Markup for a boost links on DEV and Hashnode.
 */
function boostLink(title, fileSlug, url) {
  if (!url.startsWith('/posts/')) {
    return '';
  }

  let hashnodeBoosterLink = '';
  const hashnodeUrl = hashnodeData[fileSlug];

  if (hashnodeUrl) {
    hashnodeBoosterLink =
      `<a href="${hashnodeUrl}" class="boost-link">Boost on Hashnode</a>` +
      hashnodeBoosterLink;
  }

  const intentToTweet = `<a class="boost-link" href="https://twitter.com/intent/tweet?text=${encodeURIComponent(
    `${title} by ${site.authorHandle} ${site.url}${url}`
  )}">Share on Twitter</a>`;

  return `<a href="https://dev.to/nickytonline/${fileSlug}" class="boost-link">Boost on DEV</a>${hashnodeBoosterLink}${intentToTweet}`;
}
Source code for the boostLink shortcode on GitHub.
One of the parameters is the blog post slug. When I pull in post from DEV, the same slug will be used for my blog post on my blog, so it's trivial generating a link back to DEV. For Hashnode, I currently import DEV posts using their DEV importer, so I need to alter some things like the slug, so that it's uniform with DEV and my blog.
I persist a list of blog post URLs from Hashnode by pulling in my Hashnode RSS feed because not all blog posts from my blog are on Hashnode. This is why only some posts have a Hashnode boost link.
Any images in blog posts not on my omission list are pulled down and committed to the repository. Currently, the only images I omit are from giphy.com. Everything else is my images or Unsplash images which I have attributed to the author as per the Unsplash guidelines.
Before downloading any images, I check if they already exist in the repository. If they don't, I download and save them.
/**
 * Saves a markdown image URL to a local file and returns the new image URL.
 * TODO: Fix mixing two concerns.
 * @param {string} markdownImageUrl
 *
 * @returns {string} Returns the new image URL.
 */
async function saveMarkdownImageUrl(markdownImageUrl = null) {
  let newMarkdownImageUrl = null;

  if (markdownImageUrl) {
    const imageUrl = new URL(markdownImageUrl);
    const imagefilename = imageUrl.pathname.replaceAll('/', '_');
    const localCoverImagePath = path.join(POSTS_IMAGES_DIRECTORY, imagefilename);

    newMarkdownImageUrl = generateNewImageUrl(imageUrl);

    if (!(await fileExists(localCoverImagePath))) {
      console.log(`Saving image ${imageUrl} to ${localCoverImagePath}`);
      await saveImageUrl(markdownImageUrl, localCoverImagePath);
    }
  }

  return newMarkdownImageUrl;
}
I link to DEV posts withing some of my DEV blog posts. These are persisted as well to my repostitory. They are stored in the embeddedPostsMarkup.json file I generate via the updateBlogPostEmbeds(embeds, filepaths) function.
async function updateBlogPostEmbeds(embeds, filePaths) {
  let blogPostEmbedsMarkup = {};

  for (const [url] of embeds) {
    // You can't use the dev.to API to grab an article by slug, so we need to use the URL instead
    // to fetch the markup of the article page to extract the article ID.
    // This is only an issue for article embeds.
    const response = await fetch(url);
    const html = await response.text();
    const match = html.match(/data-article-id="(?<blogPostId>.+?)"/);

    if (match) {
      const {blogPostId} = match.groups;
      const {
        body_html,
        body_markdown,
        comments_count,
        public_reactions_count,
        positive_reactions_count,
        ...data
      } = await getDevPost(blogPostId);

      blogPostEmbedsMarkup[url] = data;
    } else {
      throw new Error(`Could not find blog post at ${url}`);
    }
  }

  const data = JSON.stringify(blogPostEmbedsMarkup, null, 2);

  await fs.writeFile(filePaths, data, () =>
    console.log(`Saved image ${imageUrl} to ${imageFilePath}!`)
  );
}
Source for the updateBlogPostsEmbeds on GitHub.
With all the files committed to the repository, the deployment will kick off if any changes are committed.
All the source code is open source, so feel free to copy my workflow. 😎
The https://github.com/nickytonline/iamdeveloper.com repository on GitHubAs soon as anything is updated in the repository's main branch, a deployment to Netlify begins. This is where Eleventy gets to work.
Thanks to our caching efforts, all the markdown is in a state that Eleventy can now consume. I'm currently using the latest Canary version of Eleventy along with the backported experimental version of Node 16 in case your wondering why I run Eleventy using node directlty.
"production": "NODE_ENV=production node --experimental-fetch node_modules/.bin/eleventy"
For images in the repository associated with blog posts, it'd be good to clean up images that are no longer used once a month.
I haven't dug into this yet, but sometimes the GitHub action errors out. I'm not overly concerned at the moment as it generally passes. However, still, it'd be nice for it to recover or handle this error more gracefully.
Currently, I manually post blog posts to Hashnode via their import from DEV functionality, add the associated tags, set the canonical URL and save the post. It would be nice to post to them when a new post is created on my blog. They don't use liquid tags. They use another format like this %[some url], so I would need to handle that.
It'd be nice to support more embeds from DEV in my blog
Automatically posting my latest posts to social media would be nice, but I'm on the fence about this one. I enjoy writing these Tweets or short posts manually instead of having some generic Tweet or post on LinkedIn.
If you made it this far, you're awesome.
]]>Venue: Eleventy Meetup
Summary:I use dev.to as a headless CMS. We go through how I pull in my articles, transform and cache them, and how to sync links for Hashnode and dev.to with my own posts. We also touch on GitHub actions as well as deploying to Netlify.
Links:
]]>I'm on the ecosystem team working on frameworks in my new role at Netlify. Our job, at the moment, because I'm sure it will evolve, is to ensure whatever you deploy to Netlify deploys seamlessly. I'm not saying this to promote Netlify, although it is incredible. It's to express my excitement at this type of role.
I need to know/learn how all these frameworks work, which is exciting.
For example, if you weren't aware, Netlify released their Edge functions offering a couple of weeks ago. My coworker Salma has a great post about them.

My other awesome coworker Eduardo released a deep dive article about Netlify Edge functions if you want to check that out as well.
I bring this up because I get to continue to work in open source in my role at Netlify. For some background, Edge functions use the amazing Deno project, a modern open-source runtime for JavaScript and Typescript. We're big fans of OSS at Netlify. ♥️
The https://github.com/denoland repository on GitHubI was looking into an issue with Netlify Edge functions within the Remix framework.
The https://github.com/remix-run/remix repository on GitHubOne of the core team members had issues getting Edge functions to work with Remix. After some fun detective work, I figured out the issue. TLDR; a polyfill wasn't web standards compliant, so the bug only occurred when Edge functions were enabled because Deno is compliant. In contrast, regular serverless functions use the non-web standards compliant polyfill in Node.js land.
It's not fixed yet, at least when writing this post, but the Remix core team is working on it. It was tons of fun to figure things out publicly and share my findings, as this is open-source baby!
I'm stoked to continue exploring this role, working with the developer community, our customers, my coworkers, and open-source community!
Peace peeps!
Photo by Alex Kondratiev on Unsplash
]]>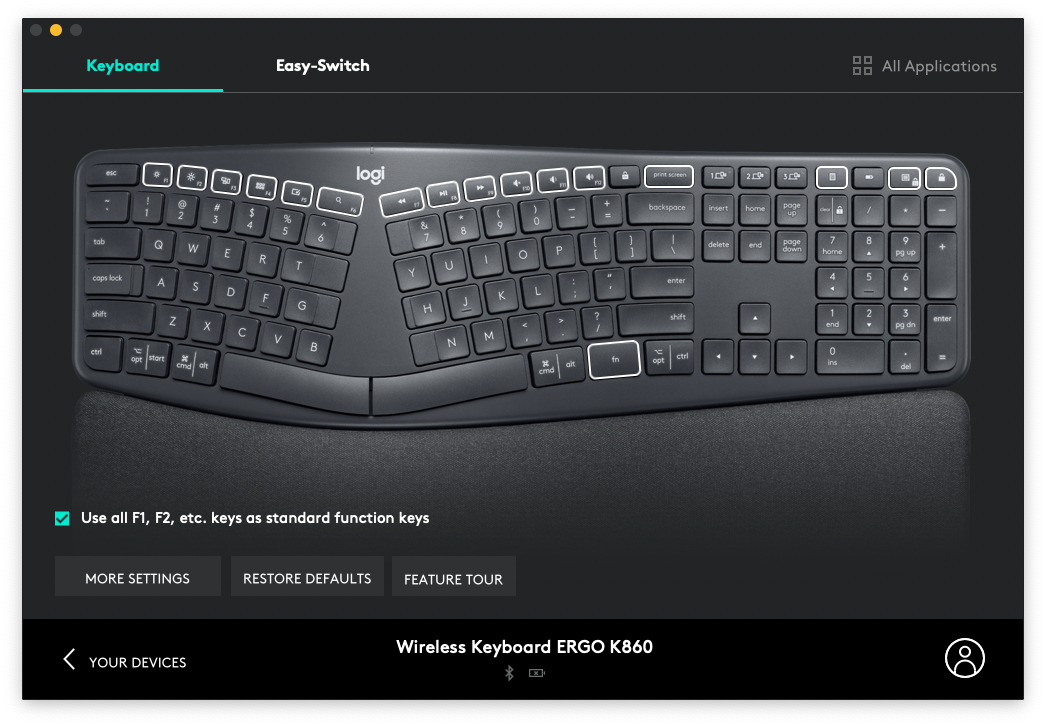
You can modify what some of the keys do, e.g. F1-F12 keys. You can change what they do so; for example, the F12 key can act like an F12 key, or it could be the volume up key (default). What's nice, though, is you can also choose to open an application.
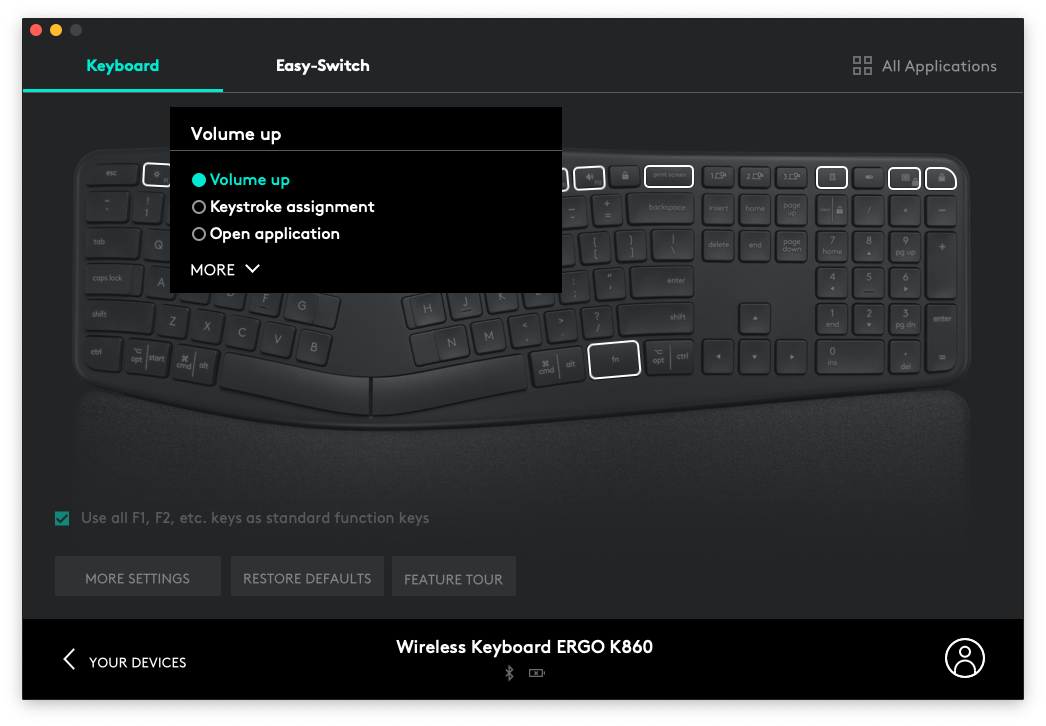
There are more options if you click on the More link.
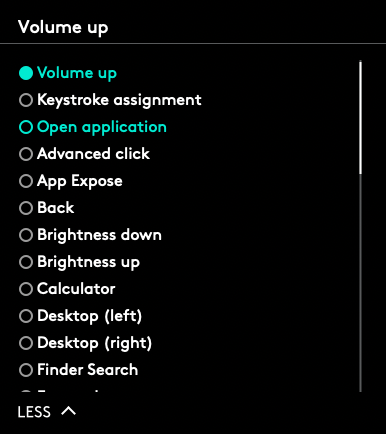
The keys are low profile but have a nice tactile feel to them. It's not a clickety-clack loud keyboard which I appreciate. They seem pretty durable; I've only had the keyboard for a couple of months, so time will tell.
The only thing that annoys me about the keyboard is the Print Screen key position. It's directly above the backspace. I'm constantly taking random screenshots of my desktop because of where it's located.
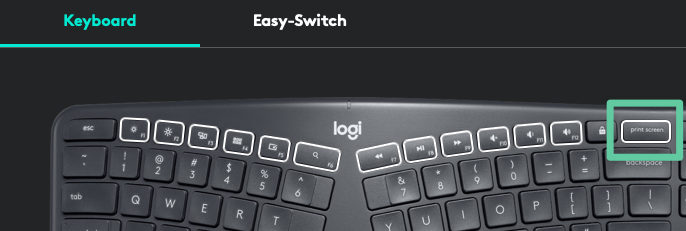
To avoid constantly print screening you can use the LogiOptions to remap this key. I decide to remap it to the backspace key as that's the only time I press the Print Screen key.
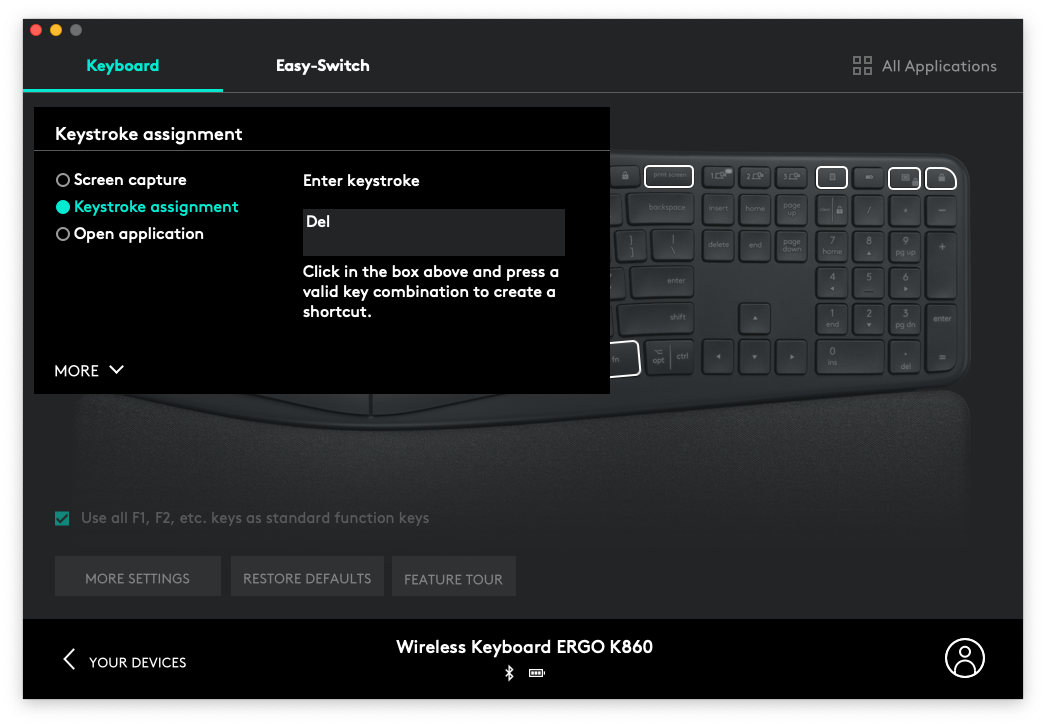
The software is a nice touch, but the big thing I love about this keyboard is it's so comfortable on my hands and wrists. Aside from Apple keyboards, I've always had little feet at the front to raise the keyboard, which adds strain to your wrists. This keyboard flips where the feet are, to the front, causing a downward slope which is more comfortable on the wrists. The foot placement, mini-split at the center of the keyboard, and convex shape make it much more comfortable. There's also an integrated cushioned wrist pad which adds to the comfort. It can't be removed to clean or replace, so that's a potential downside.
This is the first time I have a keyboard that can connect with a USB dongle or Bluetooth. I've had USB dongle or Bluetooth keyboards, but never the option for both. Since I've owned Macs, I had Apple keyboards, all Bluetooth before this keyboard. I thought I would have to use the USB dongle, so I was pleasantly surprised that it was Bluetooth.

Another cool thing about the Bluetooth support is you can pair the keyboard with up to three devices. This is not something I use often, but it was handy when moving from my old computer and my new work laptop.
If you're looking for a keyboard that stands out visually, this is not that, but it has a sleek dark grey look which definitely doesn't look terrible.
If you're looking for a comfortable keyboard that types well, check out the Logitech Wireless ERGO K860 keyboard.
]]>I got everything set up on my Mac over the past few weeks, but today I got a prompt about wanting to confirm the deletion of a file. I used the keyboard like I did on my previous Mac and realized it didn't work. I clearly had forgotten to adjust some settings on my new MacBook. Sure, I can use the mouse, but I had been so used to the keyboard for this.
All right, we need to head on over to our Keyboard settings.
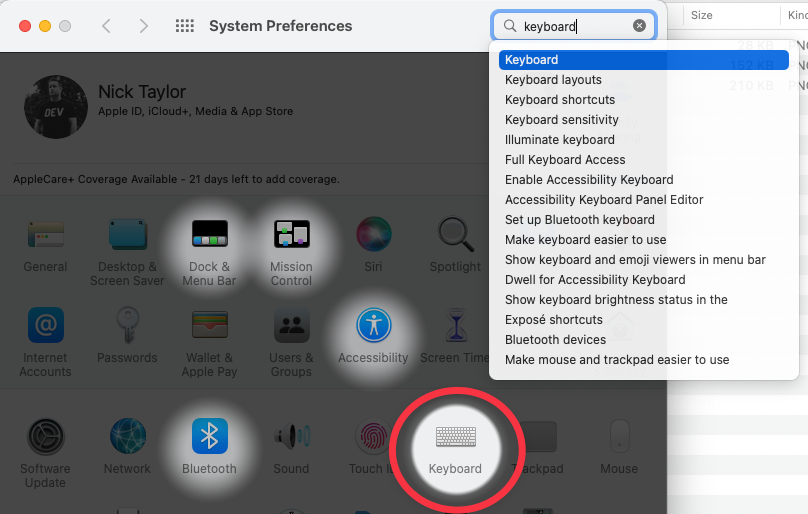
See that checkbox labelled Use keyboard navigation to move focus between controls? You're going to want to check that.
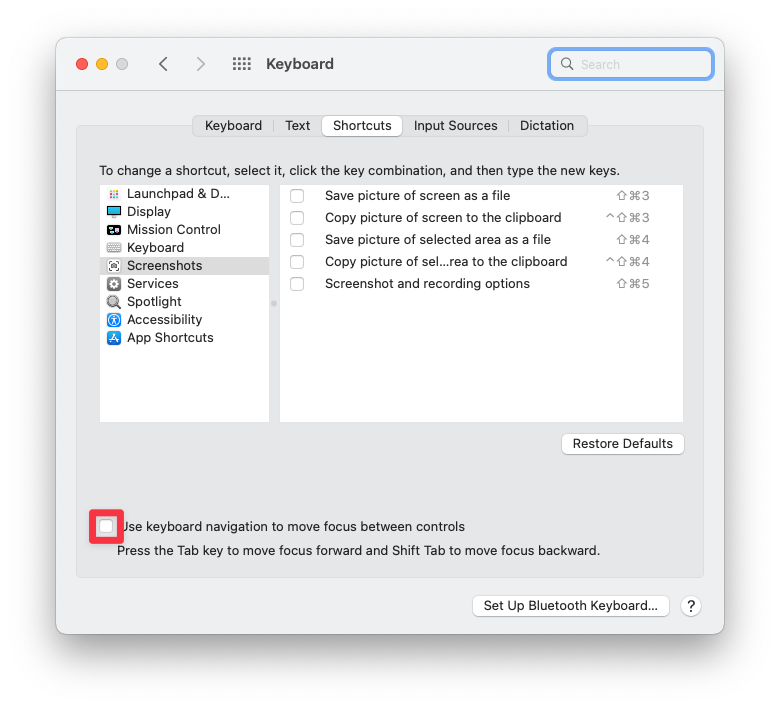
And you're done! Now you can use the keyboard for things like confirmation dialogs.
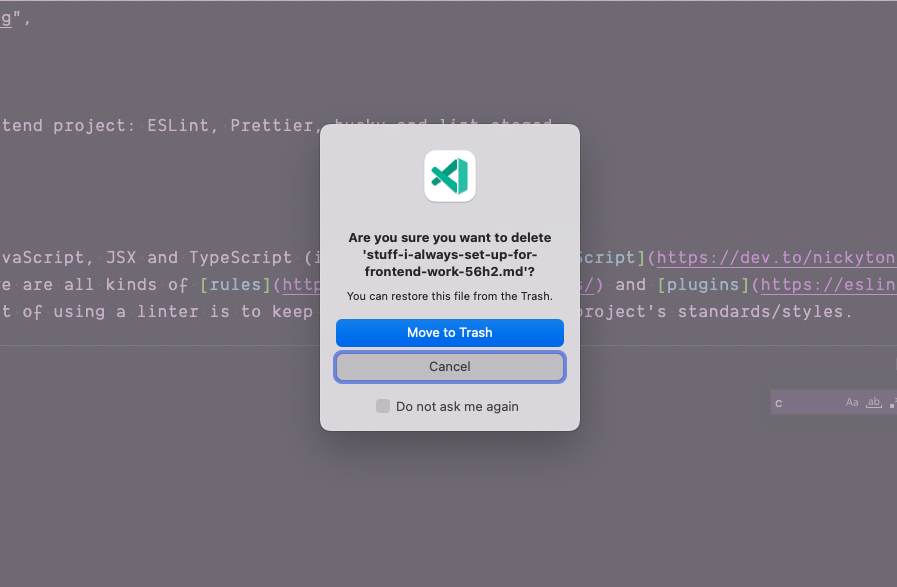
Photo by hannah joshua on Unsplash
]]>unknown and then casting to a known type when consumed was a good approach.
The solution is not that complicated. We need to get our hands a little dirty and dig into the TypeScript compiler options for our project.
By default, if you import JSON, TypeScript will mention that it can't import it with the following error message:
Cannot find module './data.json'. Consider using '--resolveJsonModule' to import module with '.json' extension.ts(2732)
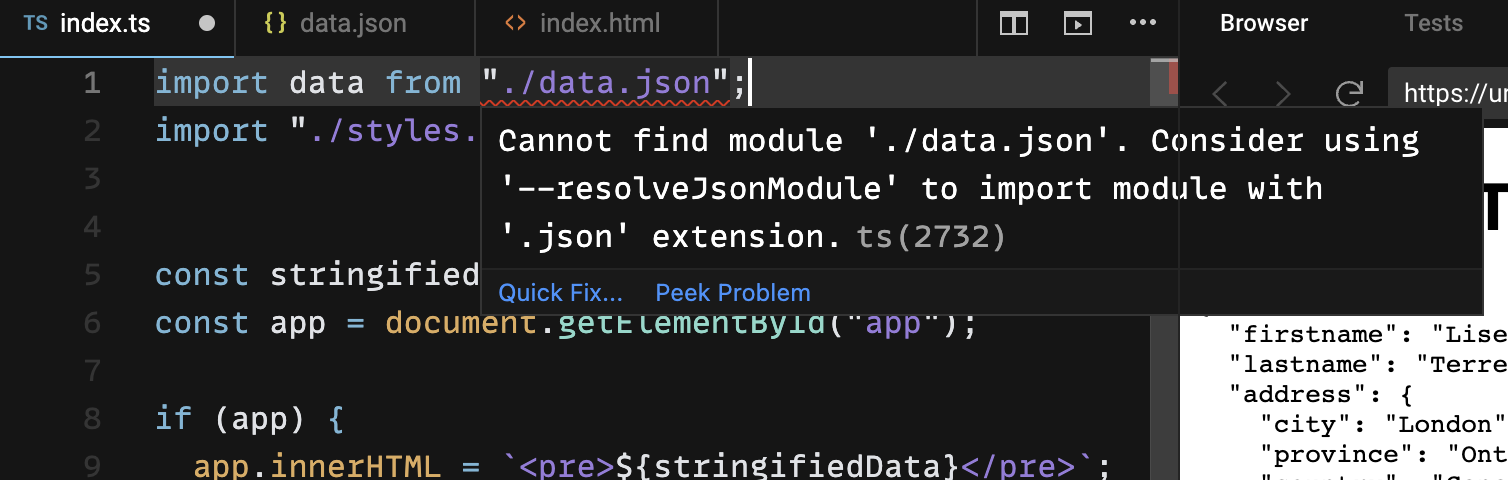
So TypeScript tells us what to do. Add the --resolveJsonModule flag. This is helpful if we're running the TypeScript CLI, but that is not what we're doing. What needs to be done is to add the resolveJsonModule key to the compiler options in the tsconfig.json file and set it to true.
{
  "compilerOptions": {
    "resolveJsonModule": true,
    // more awesome compiler options
  }
}
Once that's done, you'll notice that if you type data., we have fully typed JSON data.
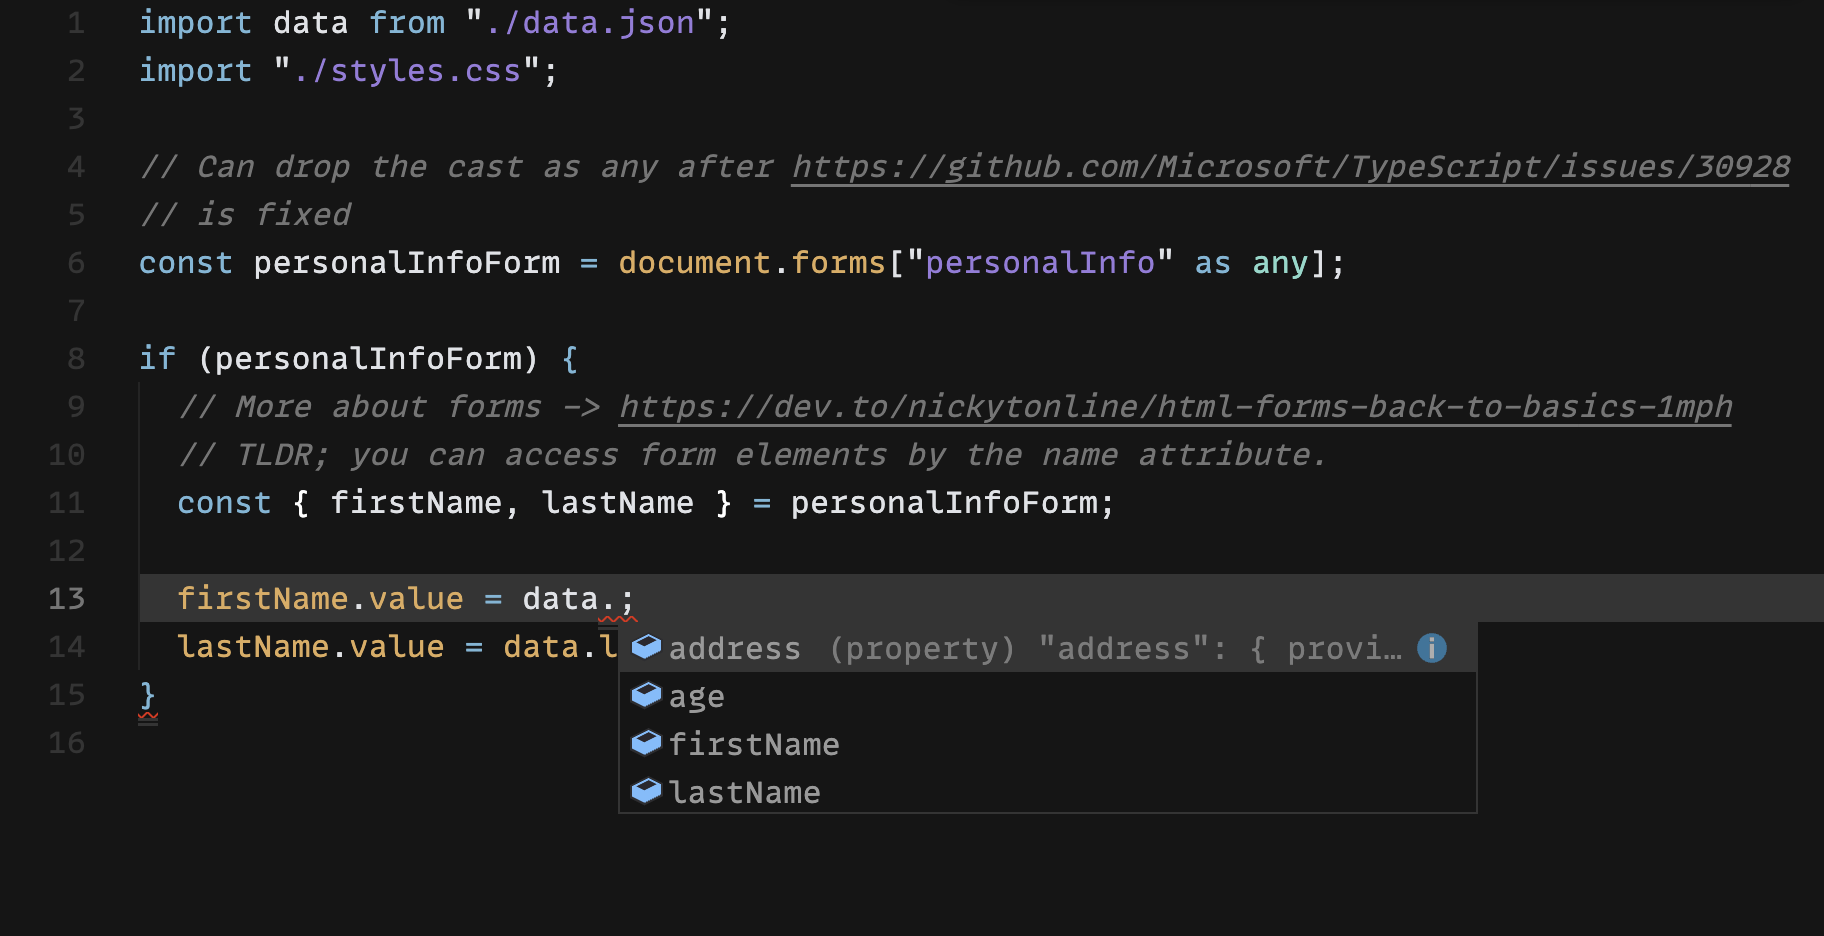
This is great for using data in a typed manner, but what if we needed the JSON type elsewhere in the project? We can create a type for it using typeof.
type PersonalInfo = typeof data;

You can play around with this CodeSandbox and have some fun seeing it all in action.
]]>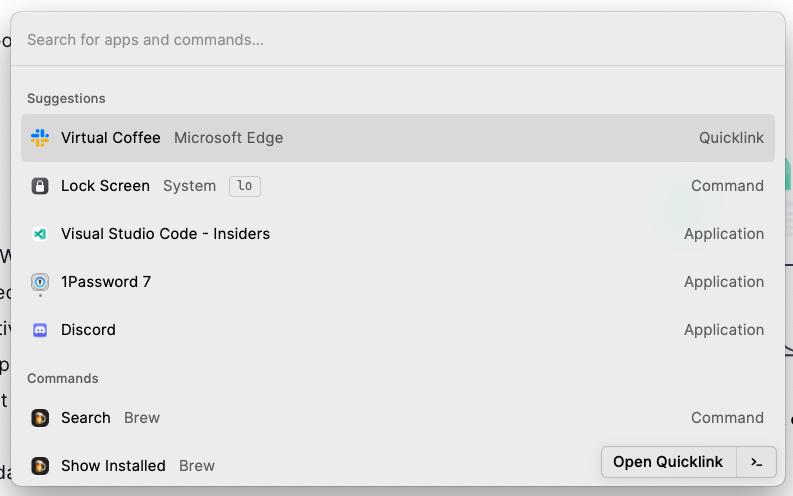
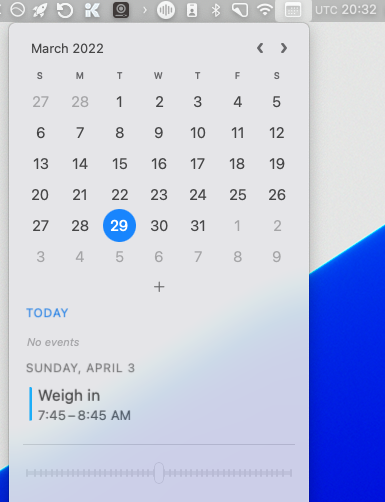
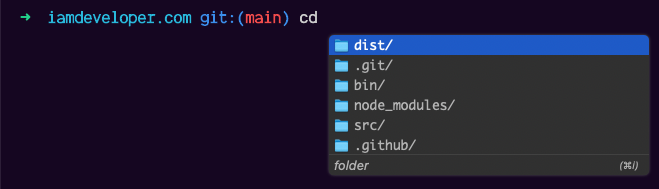
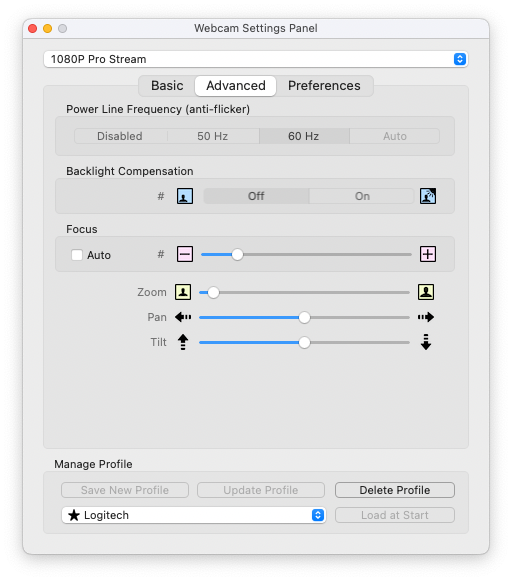
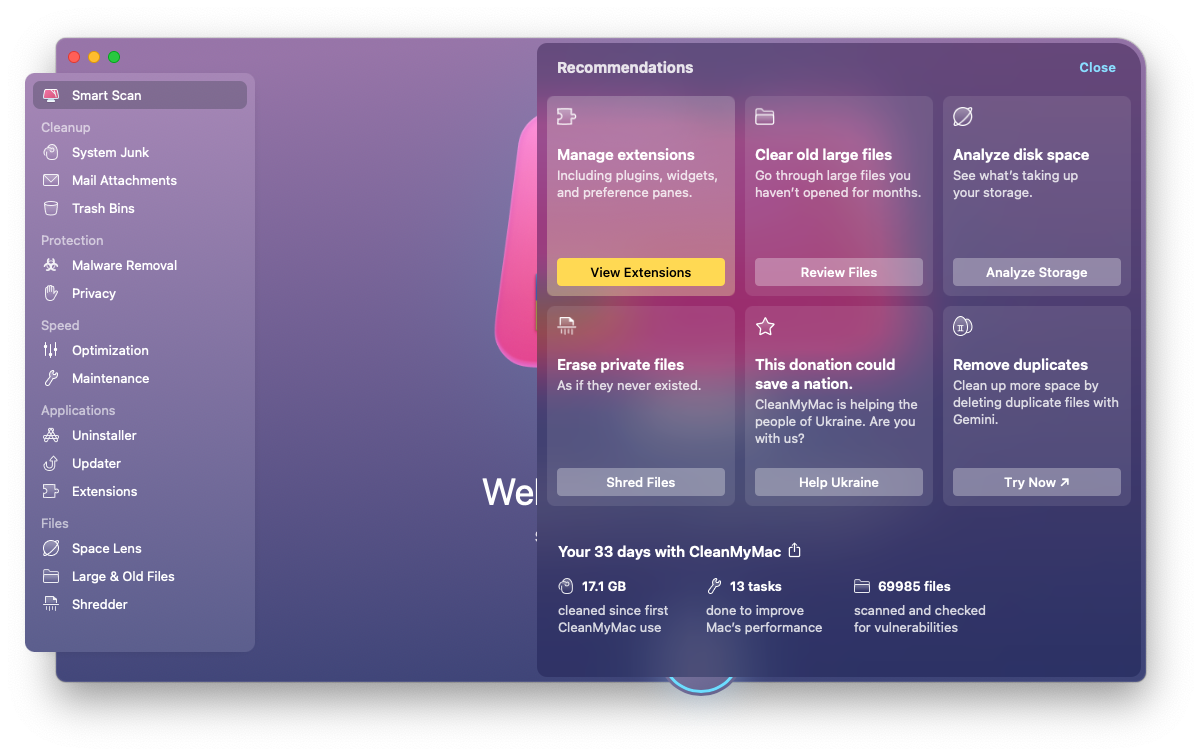
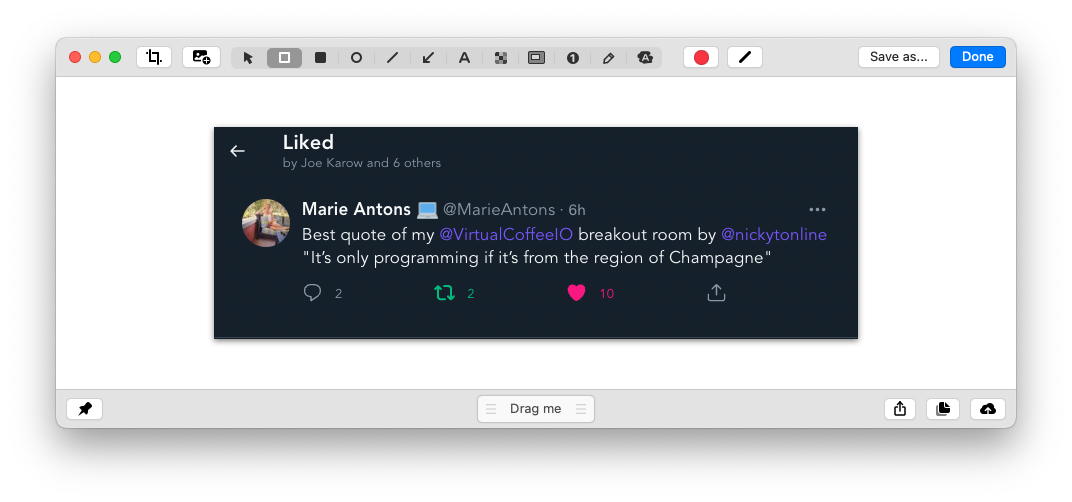
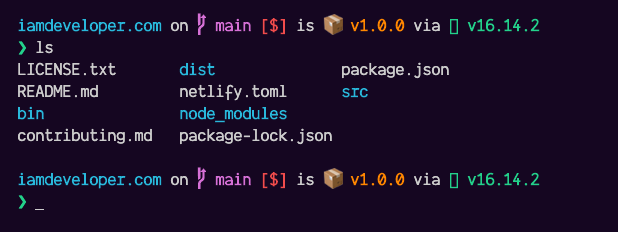
Check out my uses page if you want to see everything in my toolbox.
Photo by Dan-Cristian Pădureț on Unsplash
]]>OK, I'm lying, kind of. You can't use a hook directly in a class component, but you can use a hook in a wrapped function component with a render prop to achieve this.
Before going ahead with this, if you're able to convert your class component to a function component, prefer that. But if the component needs to remain a class component for whatever reason, this pattern works great. You will most likely encounter this scenario when working on a mature React codebase.
The beauty of this pattern is that you can build new components as function components using hooks. Class components that can't be upgraded for whatever reason benefit from the same functionality via a thin compatibility layer, the wrapper component.
Let's first create a hook.
import { useEffect, useState } from "react";

export function useDarkMode() {
  // Taken from https://usehooks.com/useDarkMode/

  // For this to persist, we'd use localStorage or some other kind
  // of way to persist between sessions.
  // see e.g. https://usehooks.com/useLocalStorage/
  const [enabledState, setEnabledState] = useState(false);
  const enabled = enabledState;

  useEffect(() => {
    const className = "dark-mode";
    const element = document.body;
    if (enabled) {
      element.classList.add(className);
    } else {
      element.classList.remove(className);
    }
  }, [enabled]);
  return [enabled, setEnabledState];
}
Now let's create a function component that has a render prop. Note that the prop does not literally need to be called render, but it tends to convey its purpose.
// I wouldn't normally call a component something like this.
// It's just to convey what it is doing for the purpose of the article
const UseDarkModeHookWrapperComponent = ({ render }) => {
  const [darkMode, setDarkMode] = useDarkMode(false);

  // Uses the render prop called render that will expose the value and
  // setter for the custom hook
  return render(darkMode, setDarkMode);
};
And now, let's use the wrapper component in a class component.
export default class App extends Component {
  render() {
    return (
      <UseDarkModeHookWrapperComponent
        render={(darkMode, setDarkMode) => {
          return (
            <div
              style={{
                display: "grid",
                gridTemplateColumns: "200px",
                gap: "2rem",
                maxWidth: "50%",
                placeItems: "center"
              }}
            >
              <ThemeToggler darkMode={darkMode} setDarkMode={setDarkMode} />
              hello
            </div>
          );
        }}
      />
    );
  }
}
And voilà! You're using your hook in a class component. Here's the complete application in action.
If you want to see a real-world example, look no further than the Forem codebase. Here's the useMediaQuery hook, and here's the wrapper component. If you want to see it in action, it's called in the ReadingList component.
Photo by Jamie Matociños on Unsplash
]]>Assuming you have Node.js installed on your machine, you can run npx gitignore your_language, e.g. npx gitignore node, and it will generate a gitignore file for you for the given language.
Here's a clip from my stream today showing it in action. Maybe you'll find it useful in your next project!
Photo by Gabriel Heinzer on Unsplash
]]>How did you influence the place where you worked? Stuff like big projects or processes that you put in place that helped the company.
I'm going to start with the most recent company that I worked at, Forem, the software that powers sites like dev.to where you might be reading this blog post.
I'm proud of all the work I did while at Forem, and I wanted to take note of it all while it's still fresh in my head.
My work focused mainly on the frontend, and I put pre-commit hooks that ran stuff like prettier, eslint and jest. It expanded to more than that, for example, running rubocop on Ruby files. Check out my post on pre-commit hooks if you're curious about all that.
Pre-commit hooks, linting, etc., were super important to me because I was the only frontend on the project for a long time. Hence, code maintenance was always on the brain and still is. 😎
We were running an older version of Preact. The older version was blocking us from using a lot of the functionality that was previously only available in React—hooks, fragments, context, componentDidCatch to name a few. Upgrading Preact wasn't a huge change, but the testing library we used for components in the project was. It worked with the older version of Preact and not the newer one.
Around this time, React Testing Library (Preact Testing Library in our case) had started gaining traction. It clicked with me how this library tested components. So, another significant change came with the migration to Preact X. You can read more about that in the referenced changelog post.
I mention this in the changelog post, but a big shoutout to my co-worker Ridhwana Khan (@ridhwana) for helping me migrate all the tests to preact-testing-library.
I'm not an accessibility expert, but I had the chance to work with Marcy Sutton while at Forem. She joined us for about six weeks in the fall of 2020. I learned a lot from her. It also invigorated me to advocate for accessibility as we built out the product. We were building welcoming, inclusive communities, so it would seem hypocritical not to take accessibility into account.
I spoke to our head of engineering at the time, Molly Struve, to advocate for accessibility and explained that we need to make this an organization-wide initiative. She was on board. 😎
Did it start slow? For sure, but it gained traction, and it has now become a part of our process when developing the product.
A big shoutout to Suzanne Aitchison (@s_aitchison), our accessibility expert who joined the team in 2021 and helped push this initiative even further. Is the work done? No, but the application is leaps and bounds more accessible than in the fall of 2020.
As the application grew more significant and feature-rich, it was super important to be able to feel good about what we shipped. I remember a period when things were breaking a little more frequently. Were we doing a terrible job? No, but that confidence was lacking when we sometimes shipped features/bug fixes. I advocated for E2E testing and got the green light.
It took about a month to get the CI/CD pipeline to run the tests and maybe another couple of weeks to tweak how we run them locally during development.
A big shoutout to my knowledgeable Rails co-workers Josh Puetz, Michael Kohl, Rhymes, and Mac Siri for helping find the best strategy for cleaning the database between test runs.
As a more senior person on the team, you have to help scale the team and impart knowledge. I consistently did Pairing regarding all things frontend and programming in general. And another great thing about mentoring? You learn too!
I'm adding a direct quote from Gracie Gregory, my old co-worker. Thanks for the kind words and for helping me round up my list. ♥️
You definitely forgot a big one on this list: POSITIVITY. I have consistently been so impressed with the way you lift others up, encourage everyone, and inject fun and humor into your interactions with everyone — both internally and in the wider community. More appreciated than you know!
I probably missed a few things, but these are the big lines. I'll probably add more to this as I enjoy my time off between roles.
The last thing I'll leave you with is to lift your teammates, listen to others, be kind, and have fun if you want to impact your organization.
Photo by Sonika Agarwal on Unsplash
]]>Venue: codementor
Summary: No matter how experienced you are as a developer, one thing that will give you superpowers throughout your career is knowing your tools. Whether it's shortcuts in your favorite editor, the right commands for git, or tools for debugging, they will give your early career a boost, and continue to help you grow and advance as a developer.Links:
]]>- gave 4 talks
— Nick Taylor (he/him) (@nickytonline) December 24, 2021
- trained consistently (3 HIIT sessions/week)
- big impacts at work: got E2E testing in place, resuscitated Gitpod in time for Hacktoberfest for Forem, mentored/paired
- streamed + live-coded a tonne on Twitch with amazing guests + community members
- explored web3
This reply to Nader Dabit's Tweet sums up a lot of my year, but let's break it down.
I gave four talks. Were these conference talks? Most were lunch and learns, but I also had a Hacktoberfest talk.
The first talk of the year was for The Collab Lab. I went over what Storybook is and how you can use it in your application. I even did a live coding session demonstrating its use in one of The Collab Lab cohort's projects.
Here's the accompanying slide deck and blog post for the talk.
The Collab Lab was looking for more mentors recently, so I offered to mentor. I'm looking forward to meeting my cohort in Q2! Let's go!
Just signed up to be a mentor. Let’s go!
— Nick Taylor (he/him) (@nickytonline) December 19, 2021
My second talk of the year was a lunch and learn for my favourite community, Virtual Coffee! It was all about debugging JavaScript. From console.log to debugger.
Here's the accompanying slide deck.
Next up was another lunch and learn for Virtual Coffee, "Getting Started with Streaming on Twitch". Many folks were interested in streaming and learning in public, so I shared what I had learnt after one year of streaming on Twitch.
Here's the accompanying slide deck and blog post for the talk. Check out the blog post, as there was stuff I didn't have time to mention or forgot.
My last talk of the year was for Hacktoberfest. The AppWrite team approached me to talk about open source, and I was happy to oblige.
I appear at this point in the video.
Here is the accompanying slide deck.
If you're interested in other talks I've given, you can check out my talks page.
I gave two workshops at CodeLand 2021! The first one was about contributing to open source with my awesome co-worker Arit Amana.
Super-excited for the Open Source Blastoff workshop @codelandconf tomorrow!! 💃🏾@nickytonline and I will demo how to start contributing to @forem using @gitpod 🎉
— 👩🏽💻 Arit Developer 👩🏽💻 (@aritdeveloper) September 22, 2021
Here’s a short video I made showing how to spin Forem up fast on GitPod;https://t.co/UPrATc13M8#WomenWhoCode pic.twitter.com/cV9VhbHRCA
The second workshop was on accessibility with my other awesome co-worker Suzanne Aitchison.
Super stoked to co-lead another @codelandconf workshop tomorrow, "Building the web for all: A primer on accessibility", with @s_aitchison.
— Nick Taylor (he/him) (@nickytonline) September 24, 2021
Let's go! #CodeLand2021 pic.twitter.com/FcBRySCON8
Folks paid for these workshops, so there is nothing I can share aside from some kind words from Jenny, one of the workshop attendees.
Super thankful for the opportunity to join @codelandconf workshop Open Source Blastoff. Big thanks to @aritdeveloper and @nickytonline for a fun and informative workshop!
— Jenny Nickell (@Jenny_nickell) September 23, 2021
It's funny how this section of my year in review is short, but nonetheless, I made some big impacts at work:
This year, I streamed a bunch with my co-worker Christina on the DEV Twitch stream, but I also got back into streaming more on my channel.
If you're interested in checking out the back catalogue of DEV Twitch streams, check out the DEV YouTube channel.
I also have my own YouTube channel, where some of my streams persist.
I won't link to all the projects I've done in this space (you can check out my GitHub profile, but I will link to one project since it's modestly popular. I created a web3 starter project template.
The https://github.com/nickytonline/web3-starter repository on GitHubIf you are interested in web3, definitely check out Buildspace and consider joining a DAO like Developer DAO.
I'm still exploring this controversial space, but all I can say for now is it's been fun exploring the tech and ideas.
2021 was the year of podcasts for me. Before 2021, I had never been a guest on a podcast.
Virtual Coffee is my favourite community, and I had the privilege of being the first guest on their podcast. It was awesome chilling with my friends Bekah and Dan. Check out season 1, episode 1 with me!
Later on in the year, I got to hang with my co-worker Ben Halpern, Jonathan Carter, principal program manager at Microsoft, and Cassidy Williams, Director of Developer Experience at Netlify.
We discussed Visual Studio Code and everything related to it on DEV Discuss, S6:E7 - VS Code and the Extended VS Code Universe - DEV Community.
In the fall, Candost Dagdeviren reached out to me on Polywork about being a guest on their podcast. It was a great discussion. Check out episode #25, Live Pair Programming, Open Source, and Building Communities with Nick Taylor.
And to round off the year of podcasts, I got to hang with my co-workers Ben Halpern and Arit Amana, along with Michael Boroff, mental health program manager at Crossover Health. We discussed imposter syndrome DEV Discuss episode S7:E7 - We Have Tools To Help You With Your Imposter Syndrome - DEV Community.
With Forem, you can now self-host your own community! I'd been running a Twitter handle called vscodetips for a few years now, so I took this opportunity to create vscodetips.com!
We're also on Product Hunt!
And we're live on Product Hunt!
— Nick Taylor (he/him) (@nickytonline) September 13, 2021
VSCodeTips Community: We're a community that shares tips & tricks for VS Code https://t.co/lJxkWl1gxQ by @nickytonline
Since gyms are closed, I built a garage gym. It's not huge, but it lets me put in the work.
I trained consistently this year, typically 3 one hour HIIT sessions/week. Not only did this keep me sane, it just all around made me feel better. Since I train at 7 am, it's also a great way to start the day feeling energized and having a clear head.
I'm still not where I want to be, but it feels great to be working out consistently again, as year one of the pandemic derailed my training. Also, after performing thousands of lunges this year and all kinds of single limb training, my body is snowboard-ready. 🏂🏻
I rebuilt my backyard rink. It's a little wider this year and twice as tall. I ran into issues mid-winter last year where the ice ended up being at the same height as the walls. I had to use scraps of wood; I had to make it taller along with snow and ice. It worked but making it twice as tall this year will avoid all that.
How it started
Start with an empty canvas pic.twitter.com/LwXsmfeZUt
— Nick Taylor (he/him) (@nickytonline) November 20, 2021
How it's going
Zamboni nights #backyardrinks pic.twitter.com/wJ46xnAcuC
— Nick Taylor (he/him) (@nickytonline) December 29, 2021
More 2021 highlights on Polywork!
Stay safe friends and see you in 2022!
Photo by Markus Winkler on Unsplash
]]>También puedes leer este artículo en español gracias a Chema Bescós!
This post is not a complete list, more a list of stuff I found compelling in 2021 that will keep you set in 2022 and build off of my previous list. You may see some repeats from my 2020 post here, but they're still super relevant.
Most resources are free, but some resources you need to pay. I also highly recommend an egghead.io subscription. I've been a happy subscriber for quite a while now.
If you have an educational stipend at work, use it. Also, many public libraries give you access for free to paid resources like LinkedIn Learning. Check out your local library before purchasing certain content. Also, just a massive shoutout to public libraries. 😎
I work with Preact daily, and I also work with React. There are other libraries and frameworks out there, but I will veer away from all that in this post. The browser extensions section is the only place where I'll mention frameworks and libraries.
This post is a work in progress, so expect this list to update throughout 2022.
Regardless of whether or not you start with a library or framework, at some point, as a frontend developer, you will need to understand JavaScript in more depth. Here are some excellent resources to get you there.
Introducing "Learning Patterns": https://t.co/qNsCE9tsIF - a free 435+ page book on JavaScript + React design & performance patterns from @lydiahallie and I. On the web, ePub & PDF. pic.twitter.com/LtX1cT5rHI
— Addy Osmani (@addyosmani) December 20, 2021
Tasks, microtasks, queues and schedules – A great post from Jake Archibald on some more advanced stuff
Lydia Hallie's JavaScript Visualized series on DEV – Lydia is great at explaining concepts through visualizations.
Just JavaScript – From Dan Abramaov and Maggie Appleton. Like the site says:
Discover and rebuild your JavaScript mental models.
TypeScript is getting more and more popular every year. Even if you're not a fan of it, it's good to be at least aware of it.
Update July 2022: I created a new post for TypeScript learning resources, so check that out too!
Let's skip the centring jokes in CSS. We're in the 2020s now, and this is something relatively easy to do nowadays. Dig in and level up on your CSS.
If you're doing web development long-term, you must become familiar with semantic markup. Pass on the order for <div /> soup.
Accessibility is super important and honestly, if you want to stand out as a frontend developer, levelling up here is a good move.

Animations are a great way of enhancing a user experience, but remember, don't add animations to your site for the sake of adding animations. Here's some great people's work to check out in this space.
Testing is a big topic, and I'll scratch the surface here, but knowing what to test is super important. At the end of the day, when you ship something, ask yourself, "Do I feel confident with shipping this?".
A lot of cool stuff is happening on The Edge. I haven't done much here, but looking to level up in 2022.
We all love tools. There's plenty to go around, but I'll touch on a few.
npx gitgnore node (It works for other languages as well, or if you omit the language, it will give you a list of all the supported gitignores)
These are some great reads.
I'm a big fan of Twitch. I stream on my own at livecoding.ca as well as on the DEV Twitch stream. Here are some great folks you should be watching for all things frontend.
I'm sure I've missed some stuff, but this is the initial brain dump. As mentioned initially, I will update this over the coming year.
If you liked this, consider subscribing to my newsletter!
]]>First, I read the title and description to see what this is all about. If there are issues or other PRs referenced, I check those out if I need more context. If there are user interface (UI) changes, I look for before and after screenshots. If there are no screenshots and UI changes are present, I ask the reviewer to include some. It makes it a lot easier to assess changes from a high-level glance.
Alright! Let's run the code to test this! Woah, not quite yet.
Next, I start skimming through all the changed files. If there are many changes to files, the PR review can become intimidating and unwieldy.
In general, PRs should be small for a couple of reasons:
Sometimes there is no choice but to have a significantly large PR. I've seen this mainly in UI work, but it applies to backend work as well, typically an all-or-nothing scenario.
If the above does not hold, these are the reasons I see why PRs get bloated:
Remember that an issue or feature does not need to map to one PR.
Finally, I look at some code! I search for issues that stand out to me without pulling down the PR and running the code on my local. I'm not talking about formatting/coding style issues because nowadays, many projects have toolings like linters or code formatters.
Things I look for:
In some cases, coding style might come up, for example, returning early when a condition fails in a function or method. If changes come up during a review that can be changed automatically, automate away! Do that in a separate PR, though. 😎
After the first sweep of the code, I send the PR back to the reviewee if I have change requests. Wait a second? Haven't you even run the code yet? As a reviewer, I have my work to do as well, so I'll hold off on taking the PR for a test drive.
After the initial review, I check the changes made and feedback. I may provide more feedback. Once no changes are left (for the time being), I pull down the code and run it locally. Depending on the project's setup, it might have preview deploys for PRs on a host like Netlify or Vercel or some containerized environment to test. Regardless, now is the time to verify the PR's intentions.
At this point, there will most likely be review feedback still, so I continue the cycle of reviewing the changes and ensuring the PR's intentions. Depending on the work, the review process can take some time; time zone differences can exacerbate the review time. It's critical to become great at async communication, especially now that a lot of the tech industry is moving/has moved to a remote culture.
Lastly, the tone of a review matters. I've grown accustomed to using a framework for commenting called Conventional Comments. If you're interested in learning more, I gave a lightning talk on Conventional Comments last year. Netlify created a similar system called Feedback Ladders. Check out Leslie's Tweet to read more on that.
Big fan!!
— Leslie Cohn🍦-Wein🍷 (@lesliecdubs) July 28, 2021
Not sure if https://t.co/7jJuXRoWfA existed in early 2019 or not, but if it did, I didn't know about it. So we came up with our own (very similar) approach which we shared publicly last year.https://t.co/fgrCS9yNw7
UPDATE APRIL 2022: I work at Netlify now, so I've started to use Feedback Ladders. So far I'm enjoying it.
I've been using Conventional Comments for the longest time but I started using Feedback Ladders at work today. 😎https://t.co/nqEy737Ayx
— Nick Taylor (@nickytonline) April 20, 2022
If you made it this far, your PR is approved! 😎
Thanks and until next time!
Photo by Markus Winkler on Unsplash
]]>So this past week I built out my second dApp with the current cohort in the Buildspace community. This time round, the project was to create an NFT based game. The goal was to make a game where you could attack a big boss via a transaction on the blockchain that would use a game smart contract.
So like the previous dApp, this required some knowledge of Solidity to build out our smart contact, Hardhat to help us develop our dApp with ETH, and some frontend skills (React and JavaScript).
The project provides a template for the frontend part, but once again I used my web3 starter project. The benefit of building out with the web3 starter is I'm improving the starter project. 😎
Like the first dApp I built, I made it my own. Here's some fun screenshots from the game I made.
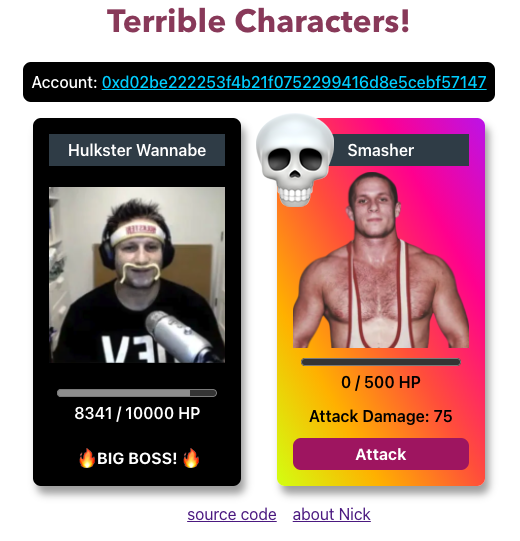
If you're interested in how it's all built, I've open sourced it. I’m sure there’s some refactoring to do, but I’m really happy hour it turned out.
The https://github.com/nickytonline/terrible-characters repository on GitHubIf you want to just check out the game, head on over to nftgame.iamdeveloper.com. Note that it's only on the Rinkeby test network so no real coin will be used.
Until next time!
]]>The project was building out a dapp that allows you to send messages and store them on the blockchain. Under the hood, it was Solidity for the smart contract, TypeScript, NEXT.js, Theme UI, good old semantic markup, and a splash of ARIA in the frontend. Shoutout to the <details /> element! Aside from that, some other web3 goodies like hardhat.
The buildspace projects have really straightforward instructions. I did go a bit rogue though. I recently created a web3 starter, and decided to use that as the base for my first foray into dapp development.
The https://github.com/nickytonline/web3-starter repository on GitHubI also decided to make the project my own and made some modifications. For one, I added another field for the message in the smart contract for storing a URL. I was doing this quickly, so just opted to use images from a funny site I love, http.cat.
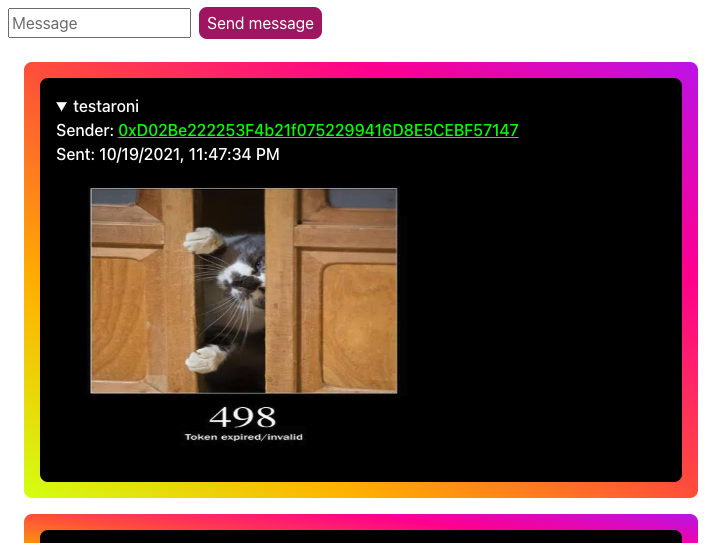
The code is still a bit scrappy as it really was a weekend project, but I'm still happy with how it turned out. I've made some tweaks since then, but there's still a bunch of refactoring to do. 😅
If you're into TypeScript, there's a couple examples of declaration merging like this one to get the <marquee /> element in JSX.
The dapp is live running the contract off the Rinkeby network. Feel free to check out the dapp's source code.
The https://github.com/nickytonline/picture-portal repository on GitHubAnd while you're here, check out the live dapp at pics.iamdeveloper.com!
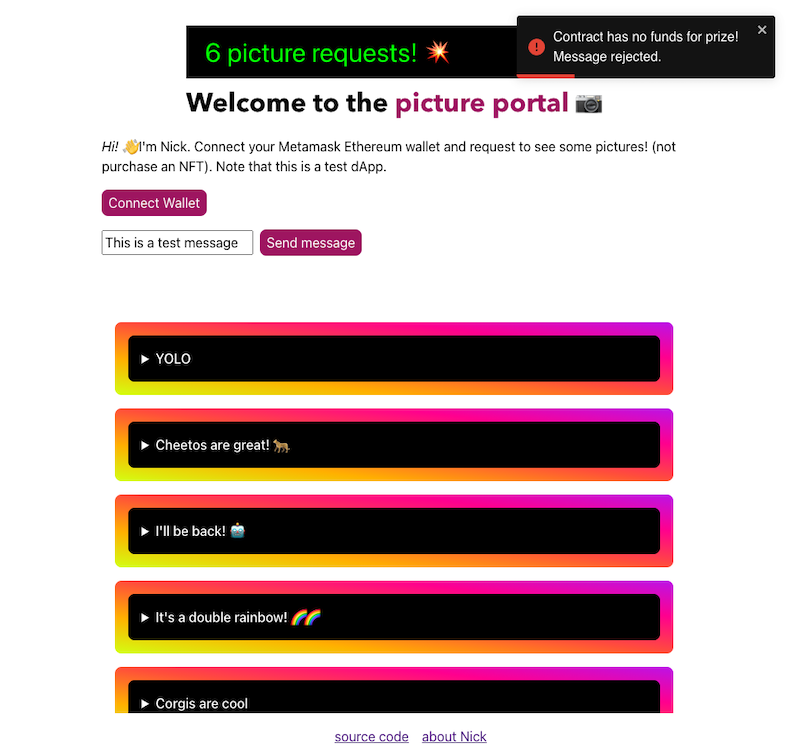
Venue: Virtual Coffee Lunch & Learn
Summary: We cover how to get set up and streaming with Twitch using OBS. We cover some basics like live captioning, creating scenes, changing scenes, and having some fun with browser sources to add some interactivity to your stream. If you've been on the fence about whether or not to start streaming, this one's for you!Links:
]]>Polywork is a new professional platform that has been getting a lot of attention lately. I can't remember exactly where I came across it initially on Twitter. I think Ali Spittel may have Tweeted about it.
I signed up for the waiting list, gave their Twitter account a follow, and one Sunday afternoon, the Twitter account tweeted out an invite code to bypass the waitlist. I was in! 😎
Hint: They give out invite codes pretty frequently or retweet folks who have invite codes to give, so I highly recommend following their Twitter account.
I secured my handle, nickytonline, because that's me everywhere on the Internet. I signed up in May, so I don't remember most of the onboarding process, but I remember choosing your assistant as part of the onboarding—a fun touch.
Note: If you've onboarded recently, let me know what aspects I've missed.
The first thing I enjoyed about Polywork was the minimal design (like Zen mode in your editor for all the devs out there).
I completed the intro section and added some initial badges to my profile. Badges in the context of Polywork are interests and skills you have. I work in open source, and I snowboard, so I added those badges to my profile.
Like other professional networks, you can add the positions you've held.

One exciting feature that rolled out after I had signed up was Highlights for starting and leaving positions generated automatically.
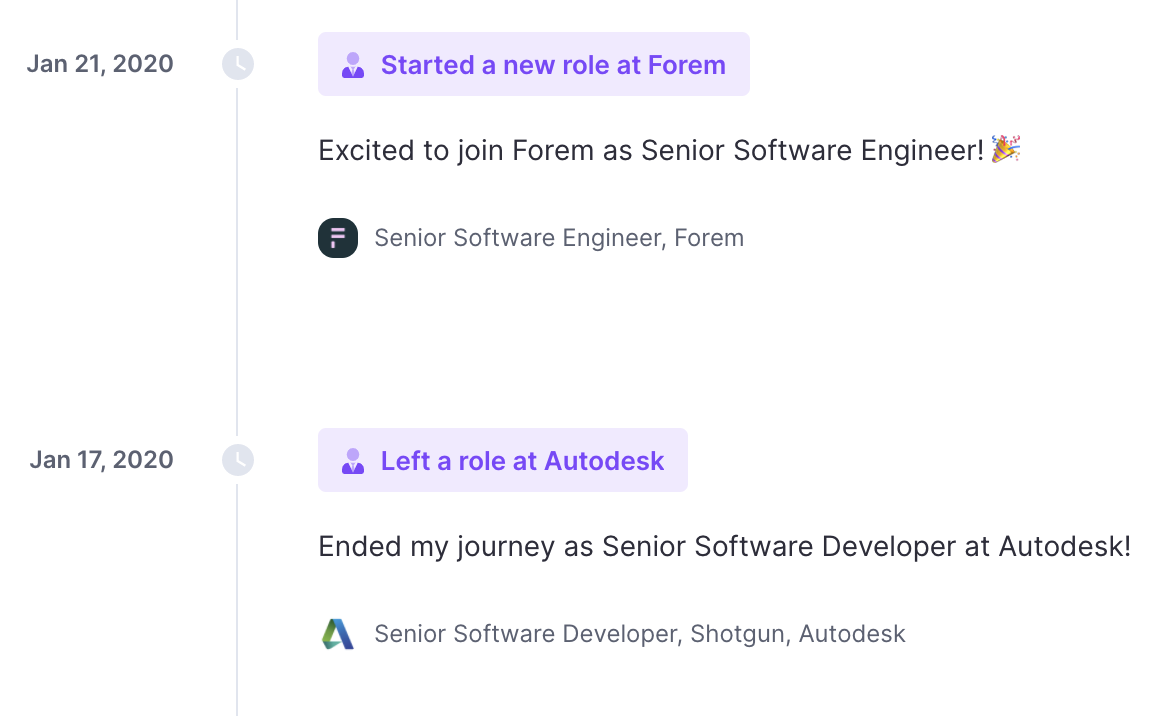
The main area of prominence on your profile page is the timeline.
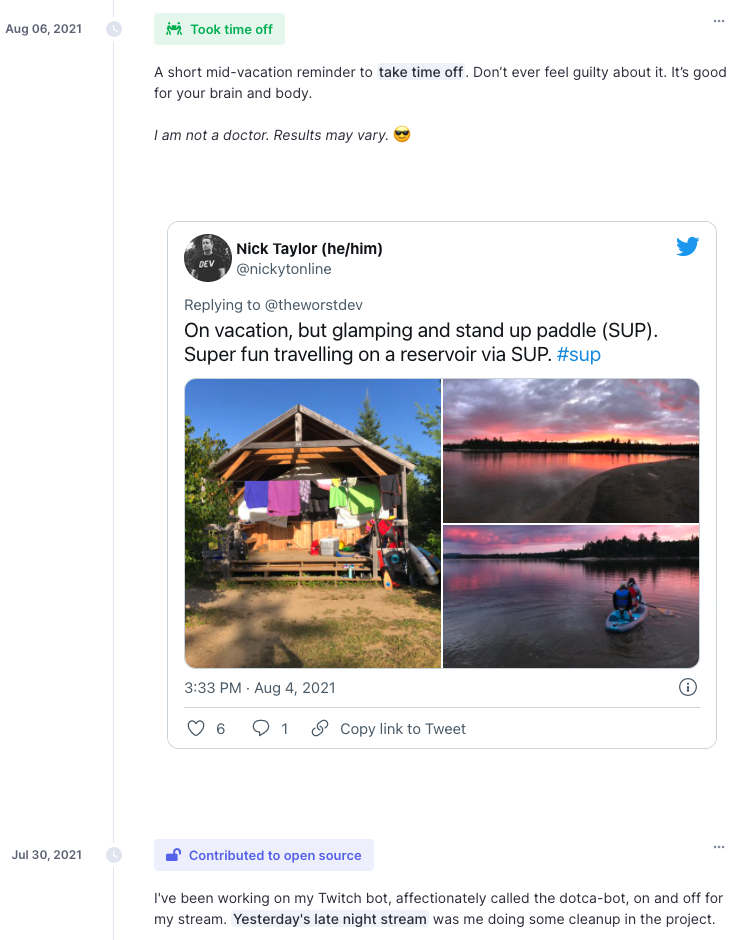
It's where you'll spend most of your time filling out your profile. It took me a while to add my work here, but mainly because I was backfilling many things I've done. Filling out the timeline was nostalgic, and I realized how much I've accomplished once I saw it all in chronological order.
To add to the timeline, click on the Highlight button at the top of your Polywork profile. It will open a modal where you can fill in the work or activity you want to record.
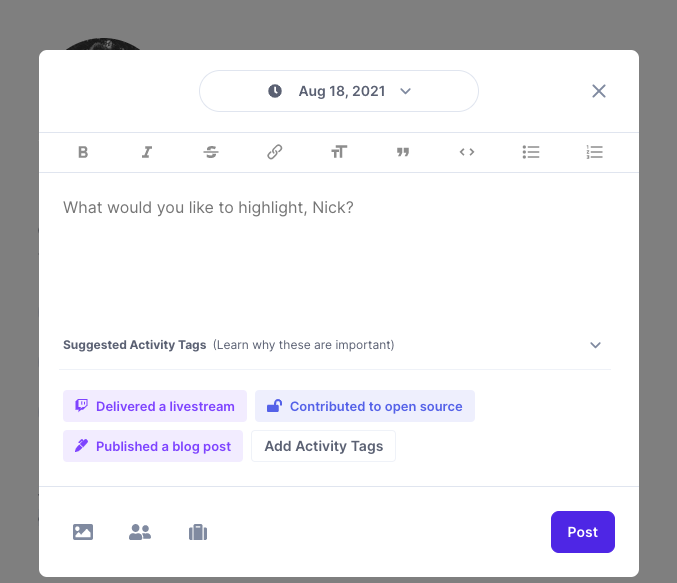
Aside from the content of the highlight, you can add one or more tags like Contributed to Open Source. Tags you've recently used are available to you right in the initial highlight editor view. If you want to add a new one, click on the Add Activity Tags button to search for tags.

If a tag does not exist, you can create it.

If you've collaborated on something, you can add collaborators to a highlight by clicking on the two-person icon at the bottom of the highlight editor.
You can add as many collaborators as you want. I'm sure there is a limit; I just haven't reached it yet. 😎
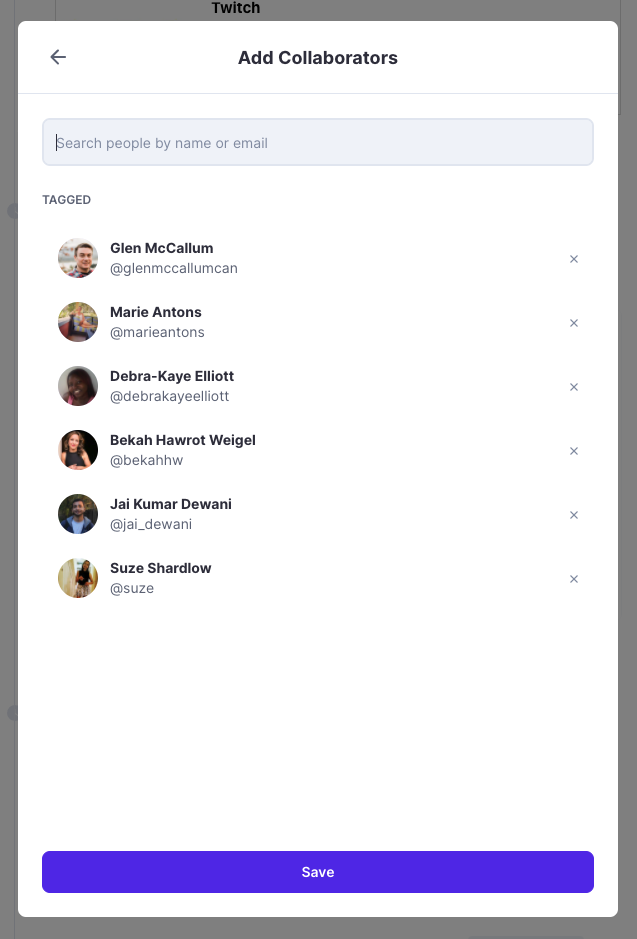
One thing to note about collaborators is they have to confirm they collaborated with you. It prevents people from being needlessly tagged on highlights and adds more authenticity to a piece of collaborative work.
At first glance, this looks like retweeting on Twitter, but it's a bit different. For one thing, you cannot repost anyone's highlight. As far as I'm aware, the only way you can repost is if someone collaborated with you. Once you confirm that you collaborated with someone, you will be able to repost their highlight.
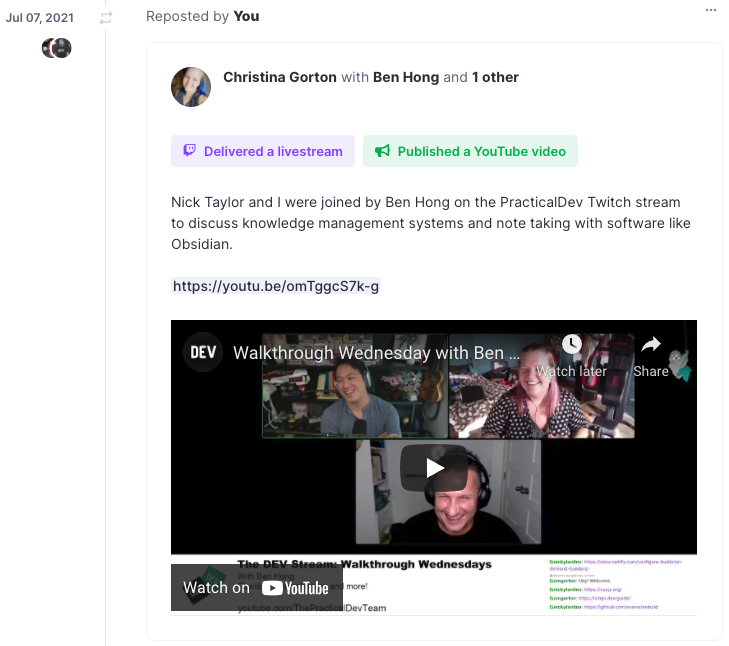
A newer feature that dropped recently is anyone, including yourself, can filter your timeline based on one or more badges you have associated with your profile.
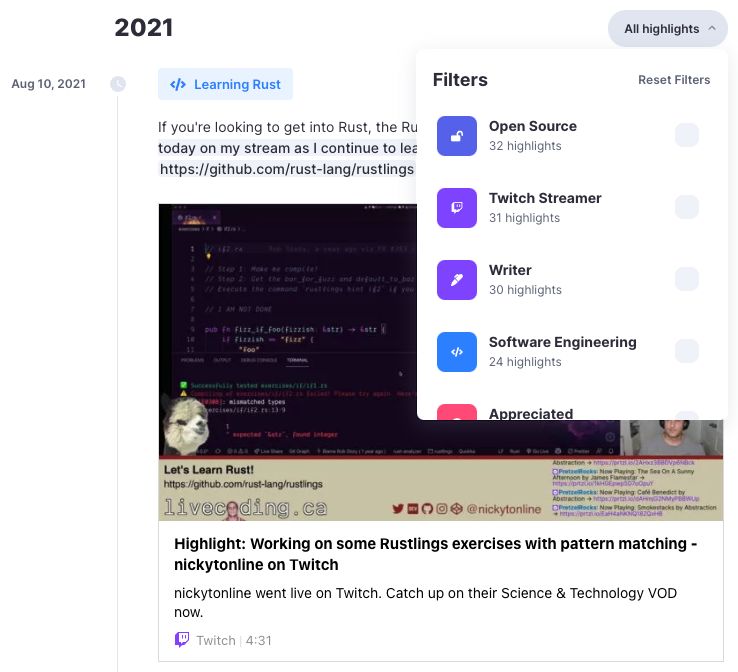
It is an excellent way for folks to surface certain kinds of work you've done. For example, here's my timeline filtered on the Twitch Streamer badge.
Note that it also filters reposts on your timeline associated with the badge you filtered on.
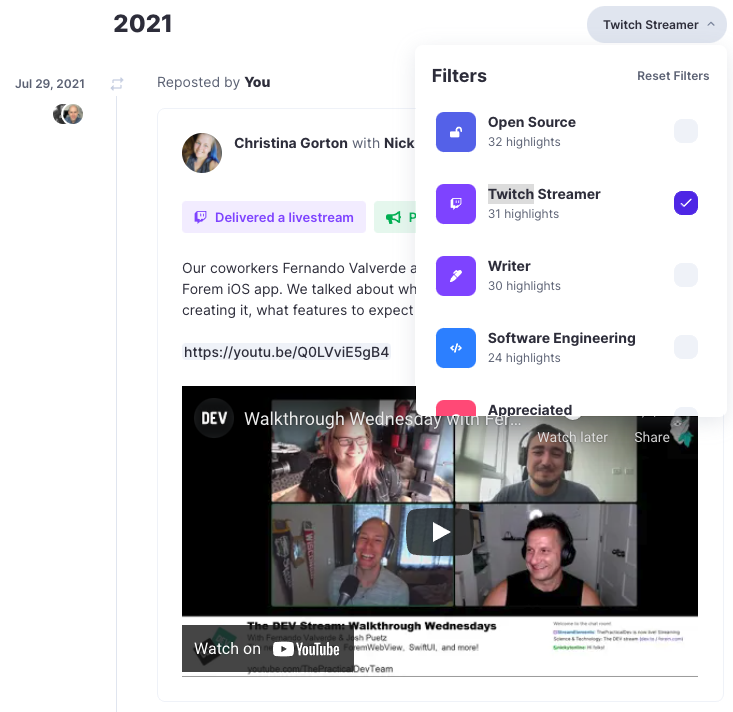
Another great feature about your profile is you can use a custom domain. Setting a custom domain is available from your profile settings.
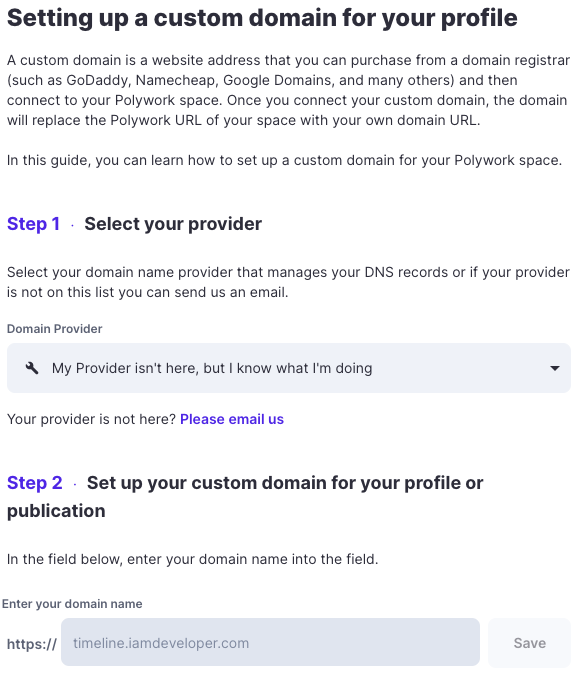
The steps are pretty straightforward. When I initially set things up, I ran into some issues, but improvements to using a custom domain rolled out the following week and then it was smooth sailing setting things up for timeline.iamdeveloper.com
Like other professional and social media applications, you can also contact someone on Polywork. To contact them, you need to specify a reason from the available options they've provided.
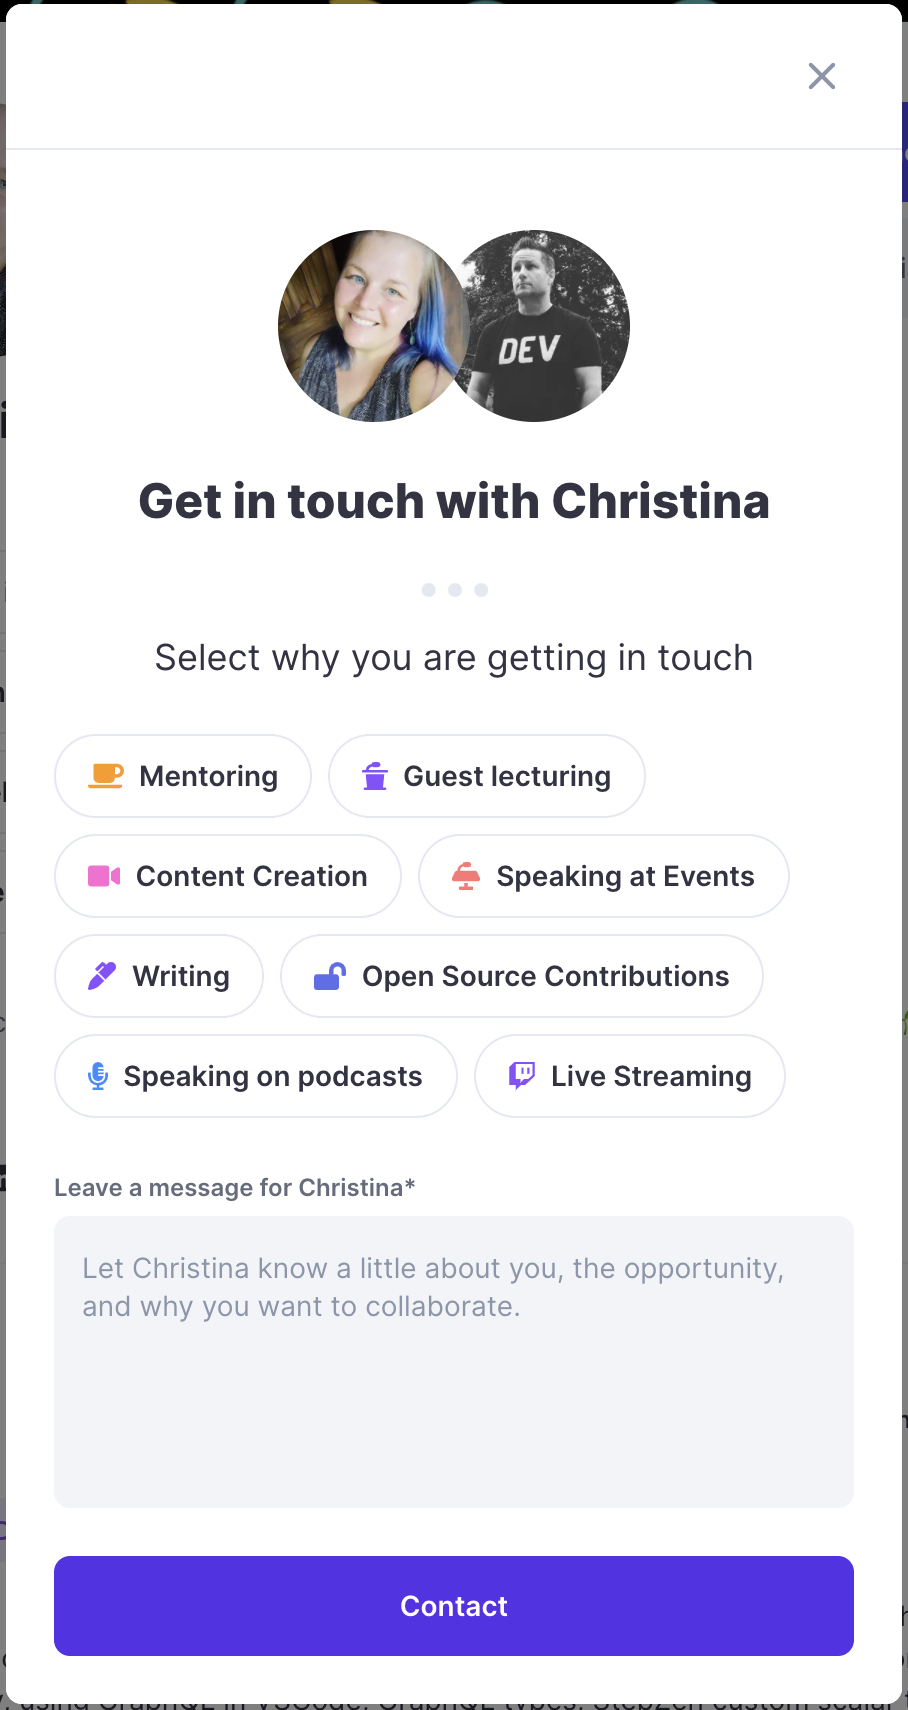
For example, my coworker Christina is open to being contacted about speaking at events. Will this stop useless messages like "hi"? Perhaps. If anything, it will give someone pause before contacting an individual on Polywork.
Think of the Mulitiverse (MV) as a one-stop shop for searching for members of Polywork and work-related highlights associated with badges.
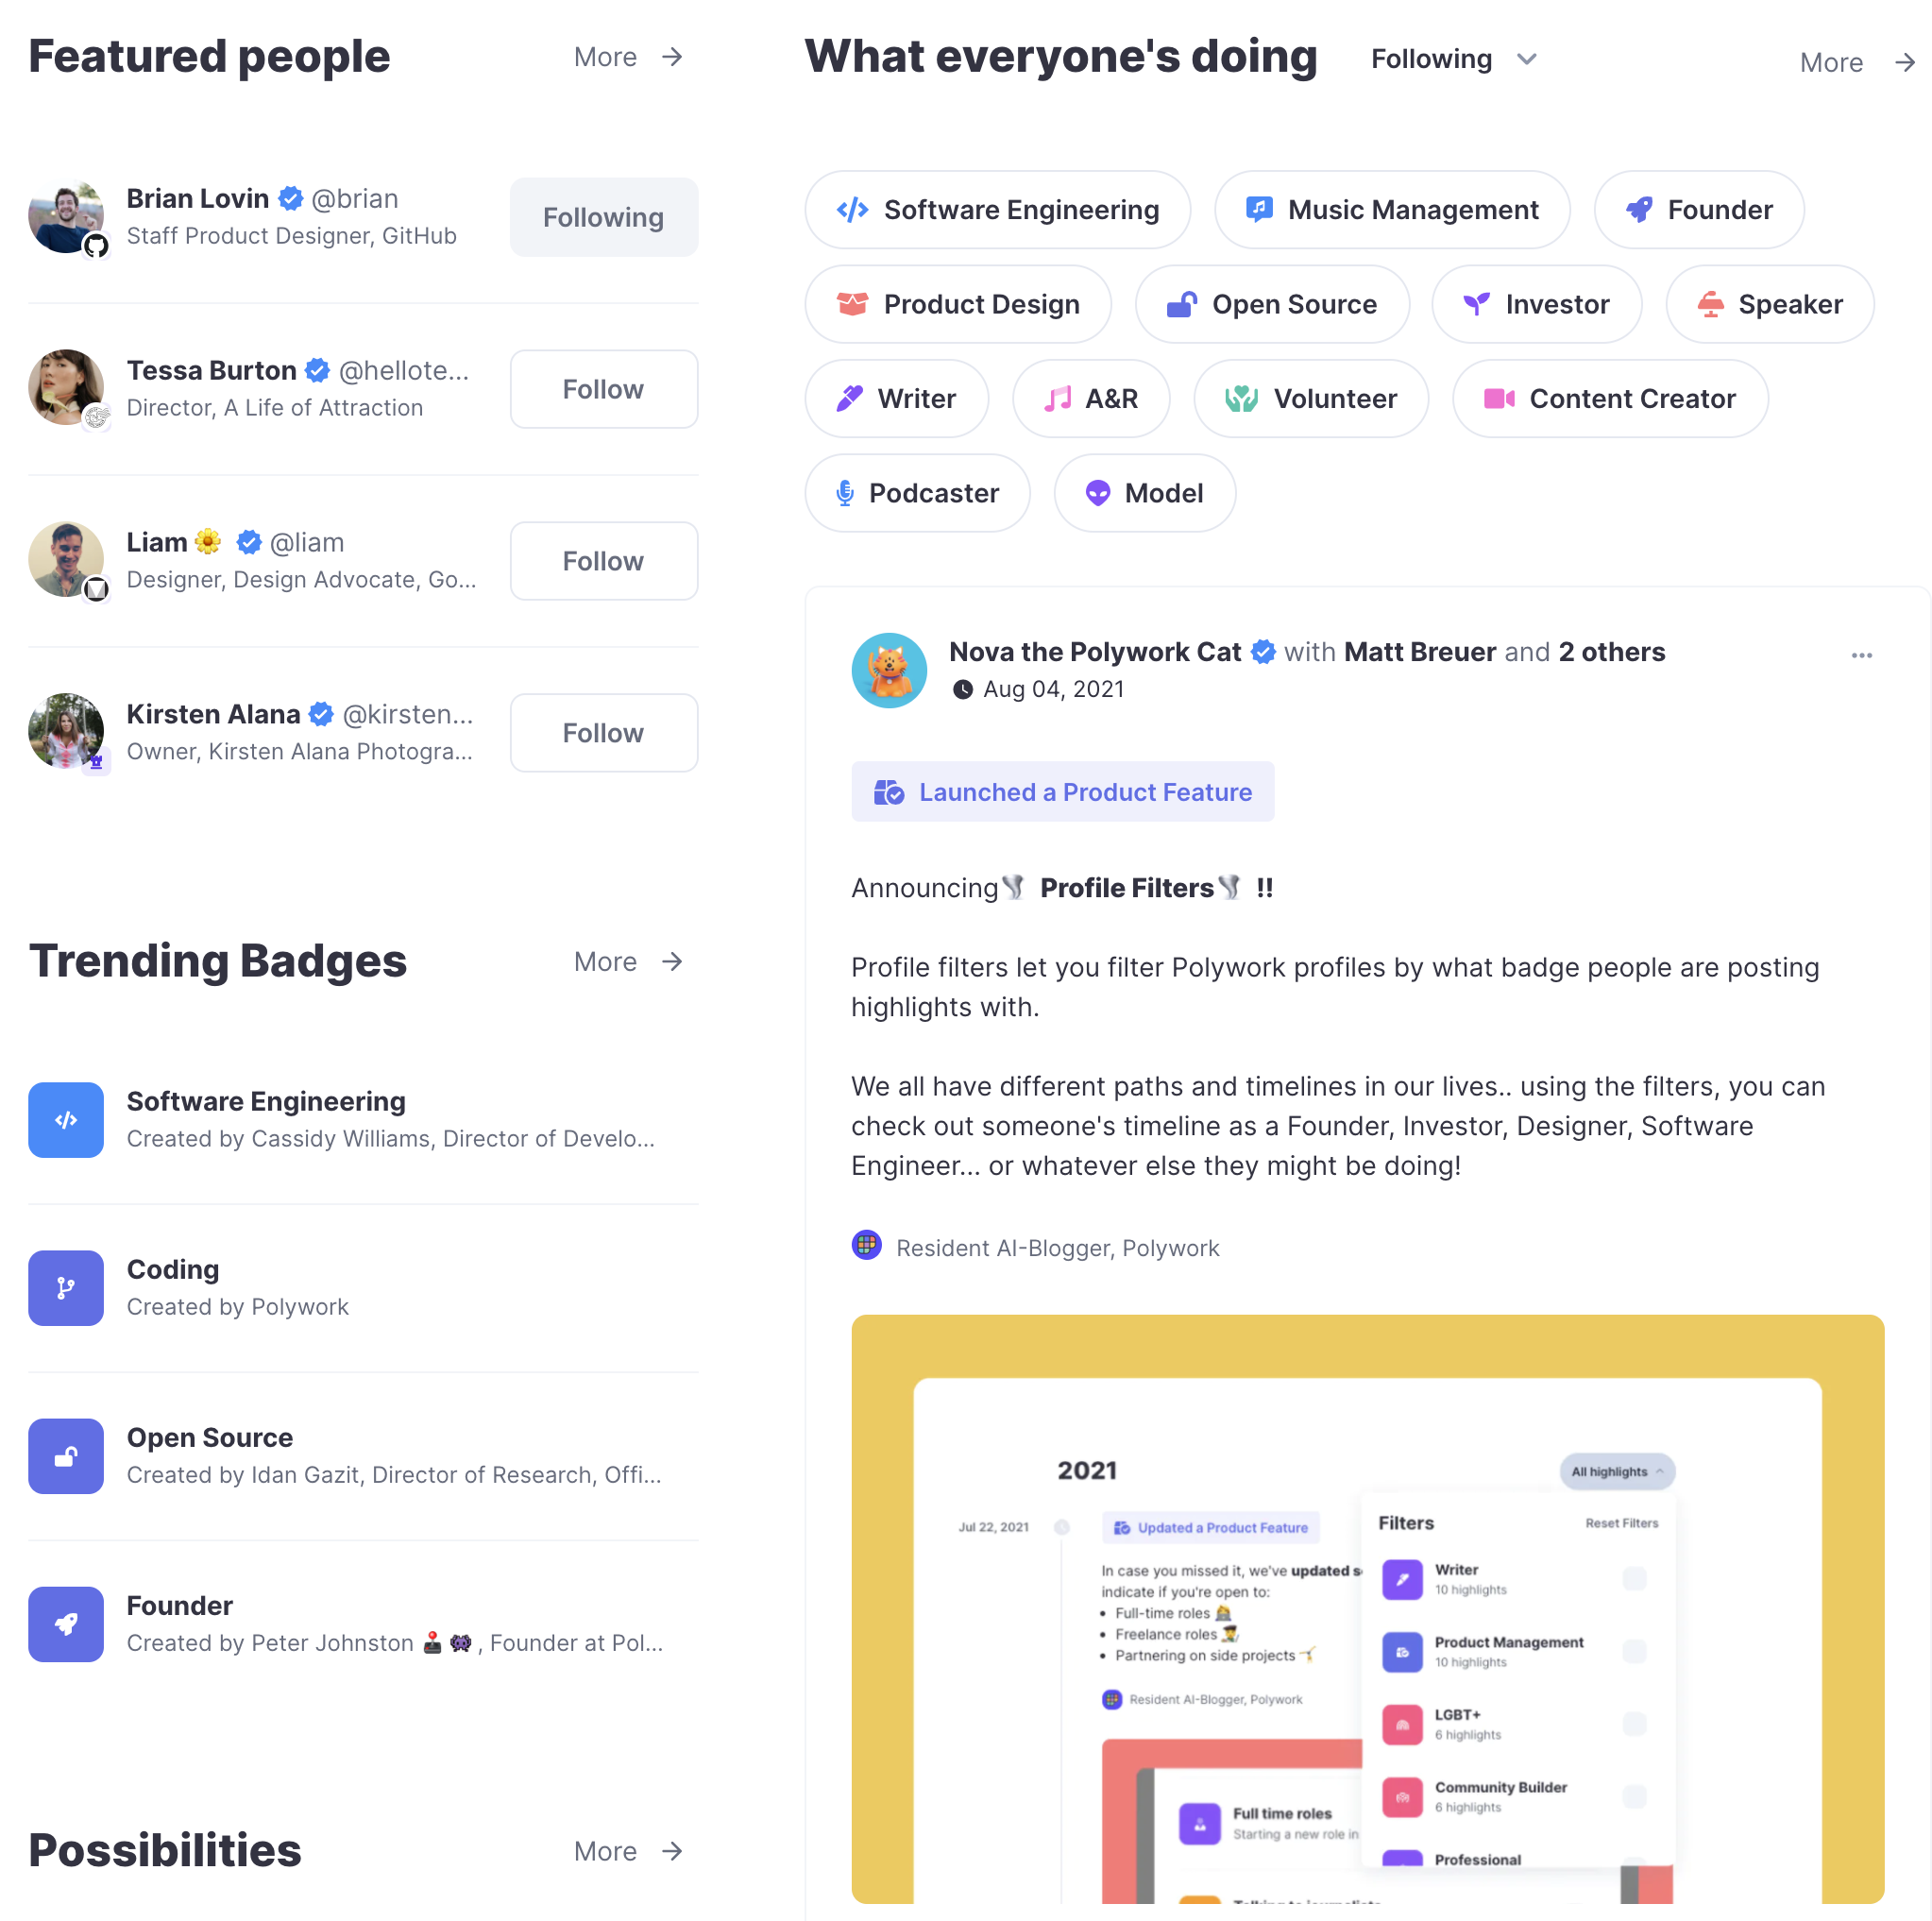
There are several sections in the MV: featured members, trending badges, folks who have recently joined, what's everyone doing, and possibilities.
As mentioned in the Contact Preferences section above, folks can be open to collaborating on specific topics, e.g. People available for live streaming. BTW, I am available for live streaming. 😎
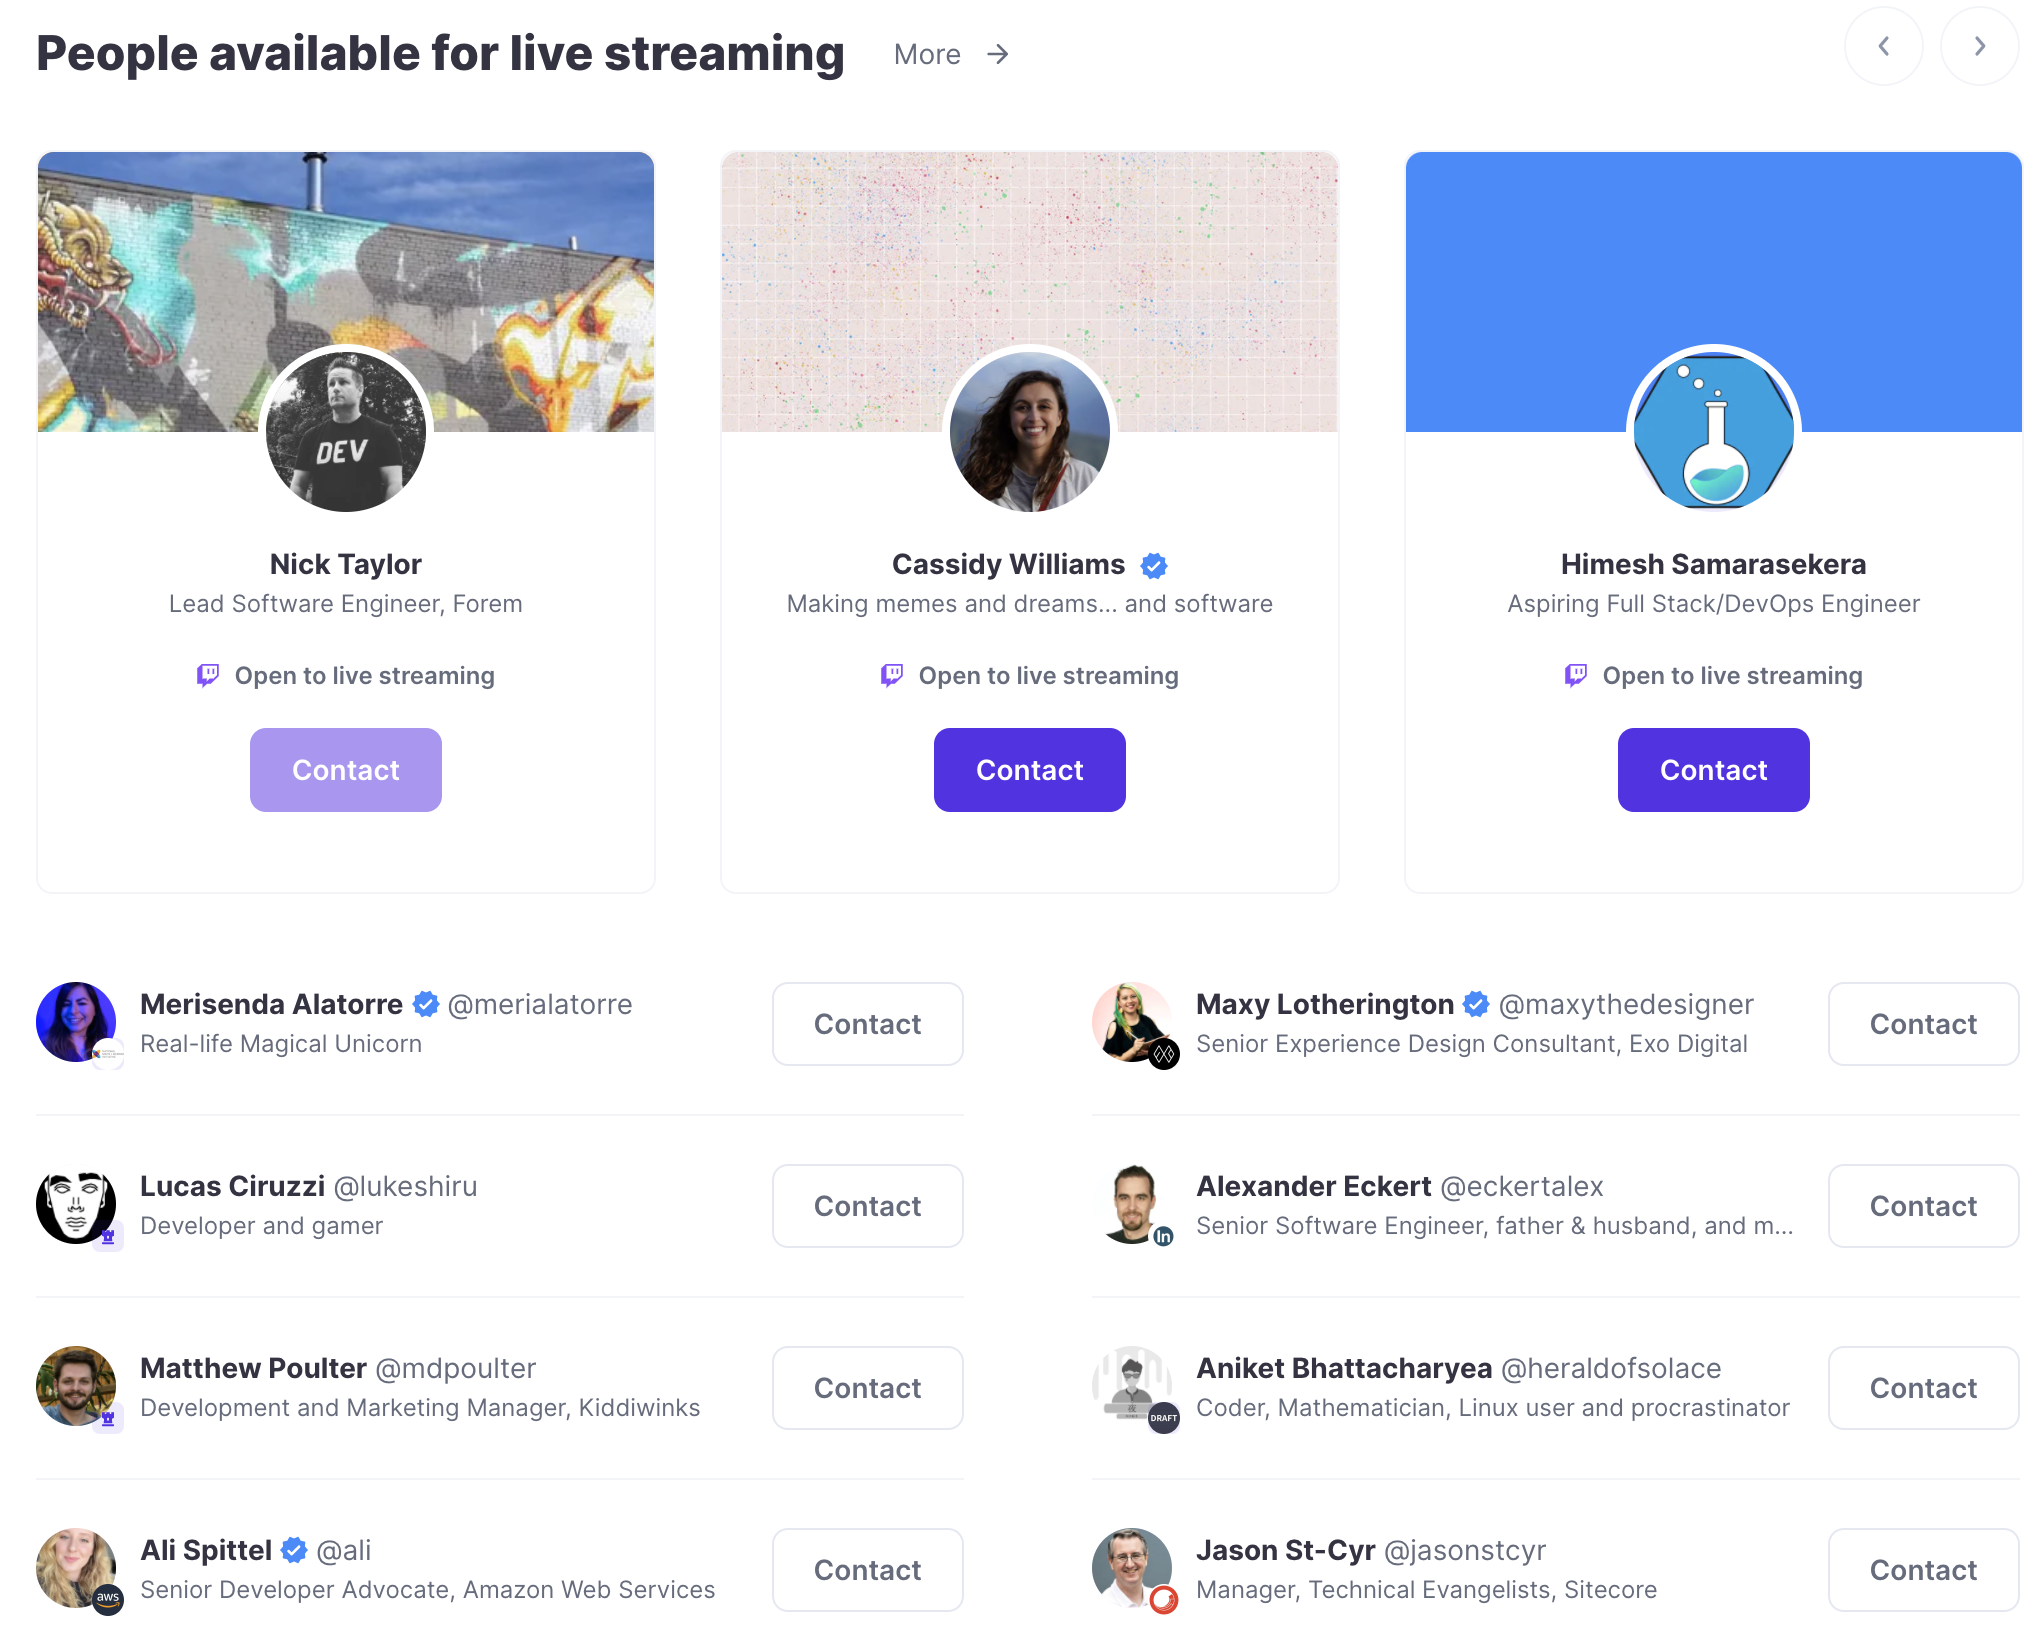
Instead of searching for someone then contacting them to see what they're available to collaborate on, Space Station groups folks by the topics they're open to collaborating on to make it easier for you to contact someone for a specific topic.
The Polywork team is constantly rolling out improvements. If you find a bug or have a suggestion for a feature or improvement, submit an issue. It is available from your profile menu.
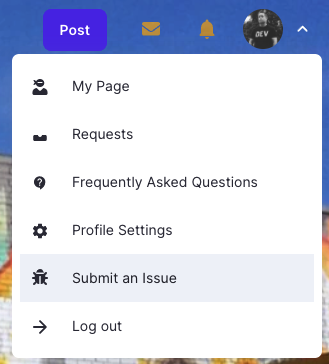
I've already submitted some suggestions and improvements myself.
Polywork makes so much sense to me for exhibiting my work. I work in and contribute to open source, I stream on Twitch, have given talks, been on podcasts, built a skating rink, all the things!
It's early days for Polywork, but the future is bright. If you're looking to showcase your work, consider Polywork. ✨ Once you get access, give me a follow at timeline.iamdeveloper.com.
I don't have an infinite supply, but if you need an invite code, yolo-2021 is good for 100 invites. 😎
]]>This is a work in progress post. I'm just putting out what I had in my slide deck here, but in a more readable format than the bullet points in the slide deck. Feedback is welcome.
The first thing to do is install OBS. It is the standard when it comes to streaming. There are tools built on top of it, but typically I recommend using bare-bones OBS or Streamlabs OBS (SLOBS) which is OBS with some plugins from Streamlabs.
The main reason to use OBS or SLOBS is more flexibility when streaming, and as far as I know, OBS is the only one that allows you to stream closed captioning.
For the remainder of the post, I will refer to just OBS instead of OBS/SLOBS.
I won't do a deep dive into all the things you can do with OBS, but know that you can create scenes with many sources. A scene can be for example a starting soon page, and when you're ready to start talking you transition to another scene, perhaps called chatting or coding view.
There are many sources you can add to a scene:
It's important to go over your setup before going live on a stream. You want to make sure audio is good, video etc. Here is a sample checklist that I created for the purpose of this post. It's a reduced version of my own checklist.
Here's some typical steps to take when going live on a stream.
Here are some streaming tips that I've found useful
Come by and say hi! We're hanging with @cassidoo on the @ThePracticalDev Twitch stream currently chatting about mechanical keyboards!https://t.co/z8E6kmqLsA #DEVCommunity
— Nick Taylor (he/him) (@nickytonline) June 16, 2021
If you missed the Twitch stream with @jlengstorf, check it out on @ThePracticalDev Youtube.
— Christina Gorton (@coffeecraftcode) April 21, 2021
We talked Jamstack, serverless, and @nickytonline and Jason used serverless functions on Netlify to quickly set up an API to grab DEV posts with the DEV API. 🥳https://t.co/pMnlitQt7N
It's only for environment files, but I use @John_Papa's Cloak extension, https://t.co/4JAGgb937j
— Nick Taylor (he/him) (@nickytonline) August 1, 2021
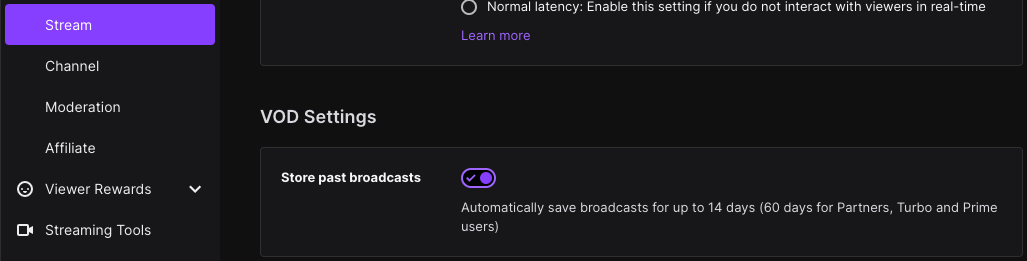
There is no native way for guests to join a stream in OBS, so a third party application is required. These are the common ones that are out there:
You should have one or more topics to discuss, but they do not need to be scripted. It should feel natural. I also tend to go on tangents sometimes. Maybe this is good, maybe it's bad. 🙃
Here's some not necessarily crucial stuff for your stream, but some nice additions to spice up your stream.

Below is a list of additional software that can help you out during a stream or post-stream.
Although not required when starting out with streaming, these are things you can add to your stream over time.
If your worries about equipment are preventing you from starting a YouTube channel, I started mine in Jan 2020 using my phone and the sun as lighting!! Don't let equipment stop you from creating. Get the fancy stuff later! 🥰 #youtuber #devcommunity #Growth pic.twitter.com/nQJfzo75EN
— Ania Kubów #JavaScriptGames (@ania_kubow) July 29, 2021
And last but not least, some shameless plugs!
Until next time folks!
]]>I decided to write this post after Ben Hong Tweeted out asking for good regex resources.
I've finally taken the plunge to gain better mastery of regex, but I'm a little surprised at the limited selection of learning resources available for it.
— Ben Hong (@bencodezen) July 17, 2021
Is this post going to make you a regex expert? No, but it will teach some of the pitfalls that developers succumb to when writing them.
The example code snippets shown in the post will be for regular expressions in JavaScript, but you should be able to use them in your language of choice or at least the concepts if the syntax is slightly different.
Know exactly what you're looking for. This may sound obvious on the surface, but it's not always the case. Let's say I want to find instances of three in a text file because we need to replace all instances of three with the number 3. You've done a bit of Googling and or checked out regex101.com. You're feeling pretty good so you write out this regular expression.
const reMatchThree = /three/g
Note: If you're new to regular expressions, everything between the starting / and the ending / is the regular expression. The g after the last / means global, as in find all instances.
You run the regular expression to match all instances of three so it can be replaced with 3. You look at what got replaced in the text and you're a little perplexed.
- There were three little pigs who lived in their own houses to stay safe from the big bad wolf who was thirty-three years old.
+ There were 3 little pigs who lived in their own houses to stay safe from the big bad wolf who was thirty-3 years old.
three got replaced by 3 everywhere in the file, but why was thirty-three replaced? You only wanted threes replaced. And here we have our first lesson. Be specific. We only want to match when it's only the word three. So we need to beef up this regex a little. We only want to find the three when it's the first word in a sentence, has white space before and after it or some punctuation before and/or after it, or if it's the last word in a sentence. With that criteria, the regex might look like this now.
const reMatchThree = /\b(three)\b/g
Note: Don't worry if you're not familiar with all the syntax. The \b character means a word boundary character.
When parts of a regex are contained by parentheses, it means a group, and what's in that group will return as a group as part of the match.
Greed is usually not a good thing and greed in regex is no exception. Let's say you're tasked with finding all the text snippets between double quotes. For the sake of this example, we are going to assume the happy path, i.e. no double quoted strings withing double quoted strings.
You set out to build your regex.
const reMatchBetweenDoubleQuotes = /"(.+)"/g
Remember that ( and ) represent a group. The . character means any character. Another special character is +. It means at least one character.
You're feeling good and you run this regex over the file you need to extract the texts from.
Hi there "this text is in double quotes". As well, "this text is in double quotes too".
The results come in and here are the texts that the regex matched for texts within double quotes:
this text is in double quotes". As well, "this text is in double quotes too
Wait a minute!? That's not what you were expecting. There are clearly two sets of text within double quotes, so what went wrong? Lesson number two. Don't be greedy.
If we look again at the regex you created, it contains .+ which means literally match any character as many times as possible, which is why we end up matching only this text is in double quotes". As well, "this text is in double quotes too because " is considered any character. You got greedy, or more specifically the regex did.
There are a couple of ways to approach this. We can use the non-greedy version of +, by replacing it with +?
const reMatchBetweenDoubleQuotes = /"(.+?)"/g
Which means find a ", start a capturing group then find as many characters as possible before you hit a "
Another approach, which I prefer, is the following:
const reMatchBetweenDoubleQuotes = /"([^"]+)"/g
Which means find a ", start a capturing group then find as many characters as possible that aren't " before you hit a ".
Note: We've introduced some more special characters. [ and ] are a way to say match any of the following characters. In our use case, we're using it with ^, i.e. [^, to say do not match any of the following things. In our case, we're saying do not match the " character.
Now that we’ve gone through some common pitfalls, it’s worth noting that it’s OK to be greedy or not be as specific. The main thing I want you to take away is to really think about what you’re searching for and how much you want to find.
Regexes are super powerful for manipulating text, and now you’re armed with some knowledge you can put in your regex tool belt! Until next time folks!
Yes, I know. Many folks do newsletters already, but I post a tonne of things on Slack that get lost in the "Slack"hole, so I figured I'd compliment that with a newsletter and collect all those links there too to share with all of you awesome folks. The majority of the content will pertain to web development, programming in general, and tech industry related news, but I may also throw in some fun random stuff occasionally.
I decided to go with Buttondown for my newsletter based on @cassidoo's (Cassidy Williams) recommendation. She had mentioned it on her Twitch stream recently.
There's a newsletter archive that comes with it out of the box as well, so you can dig into past issues. I’ll be mailing it out on Sunday evenings.
Anyways, if you want yet another newsletter, I give you Yet Another Newsletter LOL available to you at newsletter.iamdeveloper.com.
Photo by Roman Kraft on Unsplash
]]>link liquid tag.
The https://github.com/forem/forem/issues/11880 repository on GitHubWatch the pairing session with Meg below to catch up on what you missed:
Meg is currently working on a pull request to fix it
The https://github.com/forem/forem/pull/13928 repository on GitHubThanks again for coming on the stream, Meg. I’m looking forward to seeing the fix in production!

Meg:
Nick:
Christina:
We hope to see you on future DEV streams! If you're interested in pairing, fill out this form. Christina and I would love to tackle an issue with you that the whole community could learn from.
P.S. Follow DEV on Twitch to be notified when future streams begin and catch old streams on YouTube
]]>As some of you know, I co-host the DEV Twitch stream. I'm also learning Rust on Tuesdays on my own stream.
But now there is some JavaScript goodness too. I decided to start streaming on Thursdays at 2pm UTC (10am Eastern for me) for an hour about all things JavaScript.
To follow along visit JavaScriptHours.com
So what is the purpose of the stream? Well it's a few things:
If you missed the inaugural stream, here's the recording up on YouTube.
We covered the following on the first stream:
Come by and lurk, ask questions, or just move a lobster or doughnut for fun on the screen!
See you at the next stream!
]]>
Watch the pairing session with Jhey below to catch up on what you missed:
Thanks again for coming on the stream, Jhey!

Jhey:
Nick:
Christina:
We hope to see you on future DEV streams! If you're interested in pairing, fill out this form. Christina and I would love to tackle an issue with you that the whole community could learn from.
P.S. Follow DEV on Twitch to be notified when future streams begin and catch old streams on YouTube
]]>We used Netlify's serverless functions to quickly set up an API to grab DEV posts with the DEV API.
Thanks again for joining us, Jason! 😎 I had a great time pairing with you on the stream.
Watch the Walkthrough Wednesday with Jason and catch up on what you missed:
Take a look at the repository we created and worked on.
The https://github.com/nickytonline/fun-with-jason repository on GitHub
Thanks again for coming on the stream, Jason!
Jason:
Nick:
Christina:
I hope to see you on future DEV streams! If you're interested in pairing, fill out this form. Christina and I would love to tackle an issue with you that the whole community could learn from.
P.S. Follow DEV on Twitch to be notified when future streams begin and catch old streams on YouTube
]]>
Thanks again for listening to me ramble on about testing, Christina!
Nick:
Christina:
Christina and I look forward to seeing you on future streams! If you're interested in pairing, fill out this form. We’d love to tackle an issue with you that the whole community could learn from!. P.S. Follow DEV on Twitch to be notified when future streams begin and catch old streams on YouTube
]]>I keep saying to myself that I want to learn Rust, so I'm killing two birds with one stone, since I wanted to start streaming again on my own stream, and not just the DEV stream. 😎
This is the inaugural post of my series on learning the Rust language.
I'd love it if you popped by on my stream on Tuesdays at 4pm UTC (noon Eastern for me) so we can learn together.
If you aren't already subscribed to my Twitch and YouTube channels, what are you waiting for? 😎
Update 2022: I've finished this so you can check out the replay if you're interested in the course as well.
Photo by Chandler Cruttenden on Unsplash
]]>
Most of my streaming efforts have been dedicated to the DEV Twitch stream, but I'm finally getting back into streaming regularly on my own stream as well.
I've been streaming for about a year now, so I've tweaked things as I've gone along and have learnt some things from fellow streamers.
Here was how my stream looked liked about a year ago.
Here is what it looks like now as of yesterday.
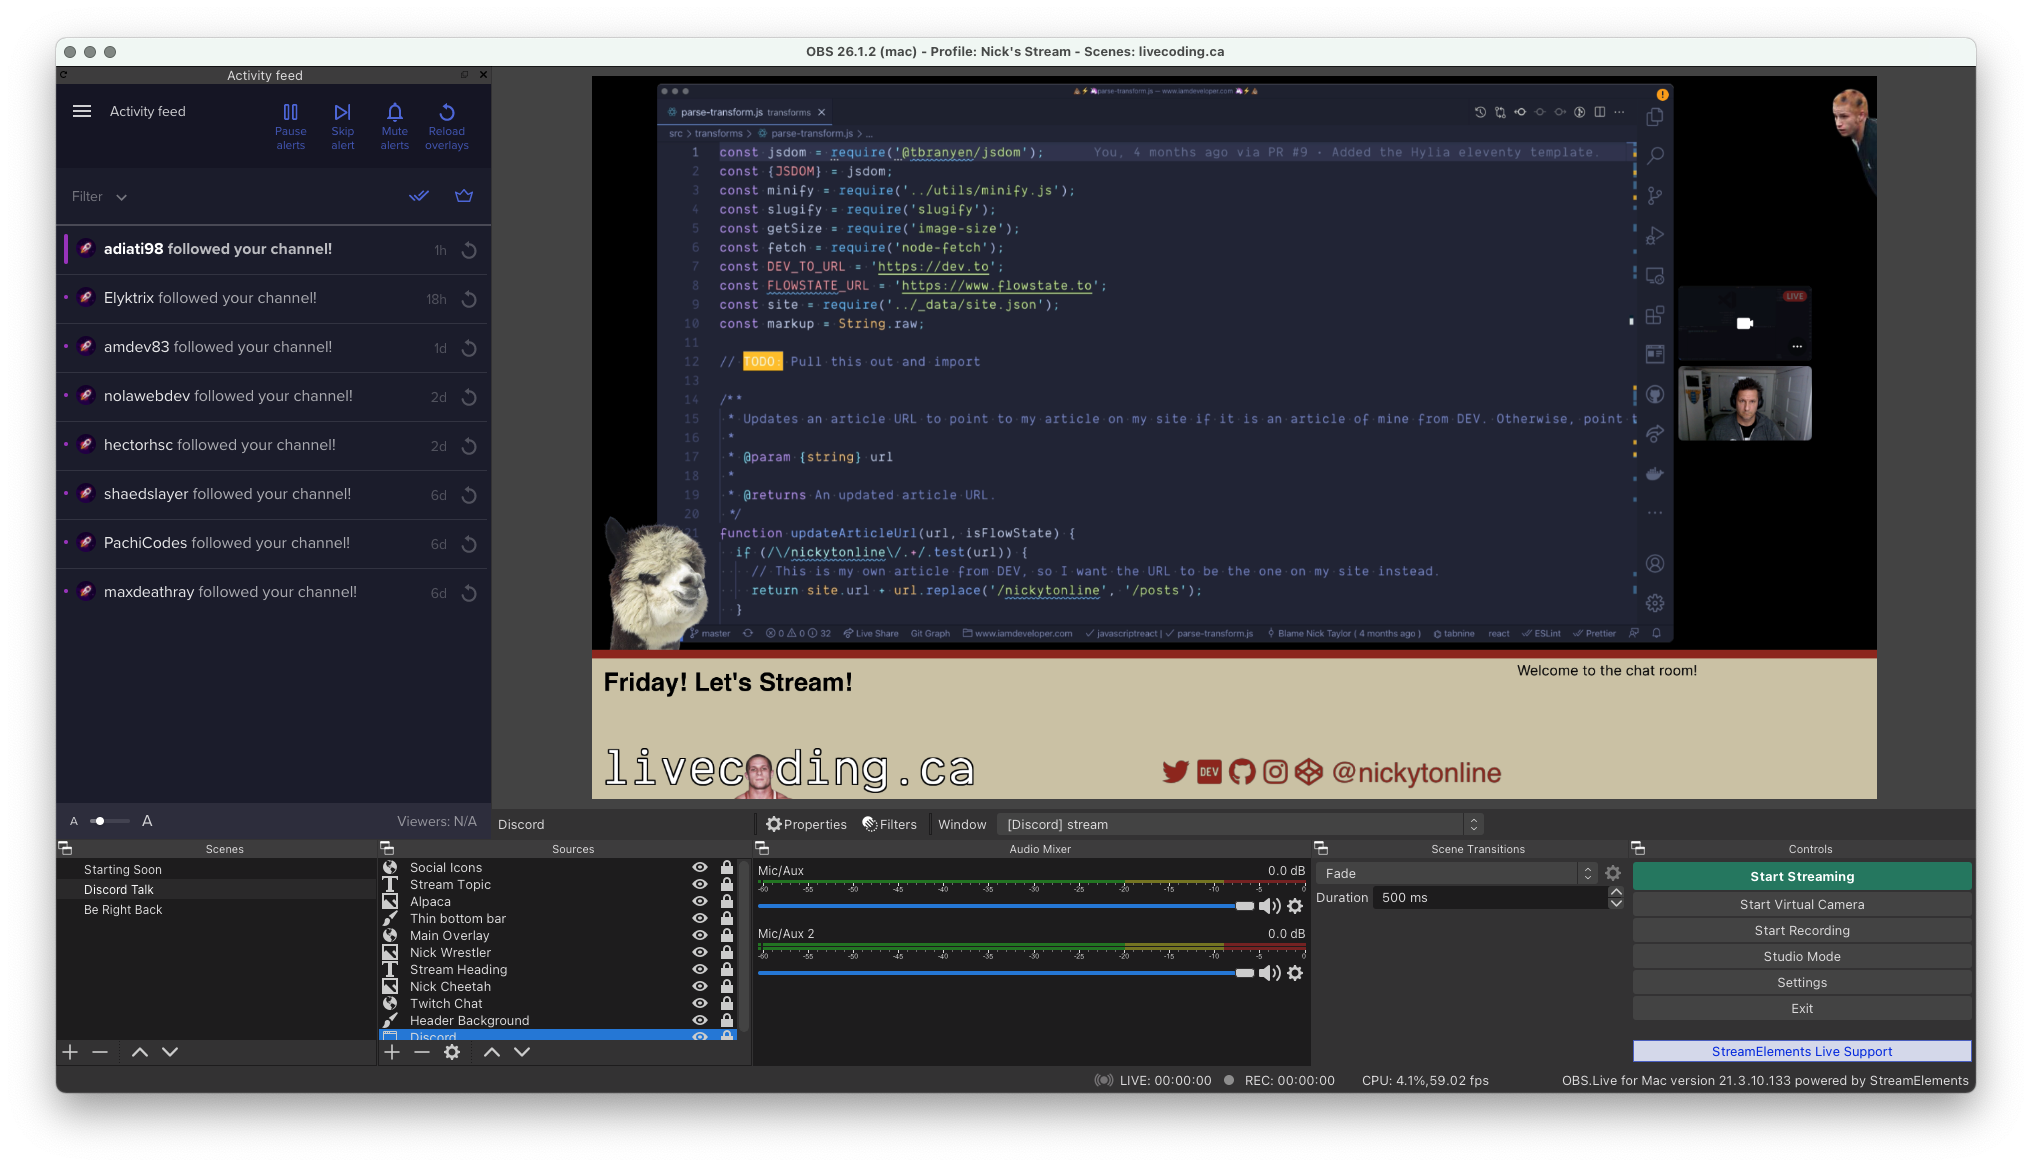
I thought to get back in the swing of things with my stream, that it made sense to go through my setup. The video is still up on Twitch, but I'm going to link to the YouTube as the Twitch recording disappears in two weeks.
Things that I cover are how I made the layout, what I use for video/screen sharing and how to provide and enable closed captioning for viewers.
I talk about using Discord for video and screen sharing, but initially I started with Zoom. It worked, but I found it clunky having to transition to the shared screen view. Maybe if I had a stream deck, this wouldn't have been an issue. There is also obs.ninja which I've used when I was on @chaelcodes's stream. I'm exploring using this right now for my own stream, and maybe eventually the DEV stream.
In this particular stream, the audio is all good, but there is a delay between the video and audio which never happens when I stream usually, so I'm chalking it up to showing my stream setup in the stream. 🙃
I forgot to talk about my hardware setup, so for that, checkout my uses page.
All streaming happens on Twitch, but as mentioned, I also upload them to YouTube. Feel free to give me a follow on both. 😎
If you are a streamer, I'm curious about your setup!
]]>Venue: Virtual Coffee Lunch & Learn
Summary: Learn how to debug JavaScript in the front-end/back-end as well as how to use your browser to debug other issues.Links:
]]>Venue: AppWrite Hacktoberfest Kickoff
Summary: Nick Taylor talks about Forem and how you can contribute to the project during and after Hacktoberfest 2021.Links:
]]>Here is the issue that we were working on:
The https://github.com/forem/forem/issues/12443 repository on GitHub
Thanks again for coming on the stream, Seth!
Seth:
Nick:
Christina:
Looking forward to seeing you on future streams! If you're interested in pairing, fill out this form. We’d love to tackle an issue with you that the whole community could learn from!
P.S. Follow DEV on Twitch to be notified when future streams begin and catch old streams on YouTube
]]>I had a lot of fun giving my talk on @storybookjs last night at the @_collab_lab meetup. Thanks for having me!
— Nick Taylor (he/him) (@nickytonline) March 11, 2021
Here’s the video and slide deck. https://t.co/UQigiz8Ae2#webdevelopment #ui #ux
Think of it as a workbench for building out components that your application consumes without the burden of running your application. It is also living interactive documentation for your entire team/consumers of components.
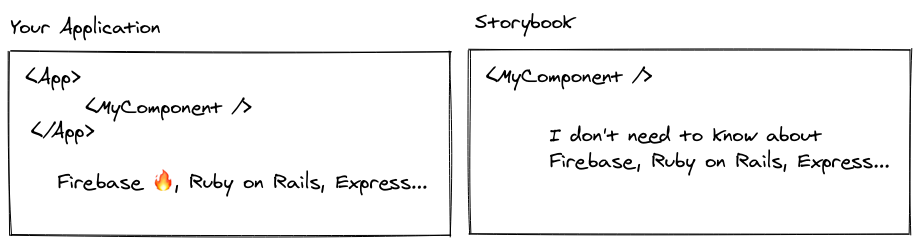
By building out your components in isolation, it forces you (in a good way) to really think about how you are building your component. Building things in Storybook will potentially (hopefully) help you avoid tightly coupling things together.
For example, at Forem, we use Elastic Search for search results including the list of users returned in the mention autocomplete component below.

This component knows nothing about Elastic Search. All it knows is that it gets a list of users from a function prop called fetchSuggestions and renders them. In Storybook, we mock that prop by creating a function that returns some mocked data.
A Storybook story is view of a component in a certain state. A component can have many stories. Here we show a button component with different variants.
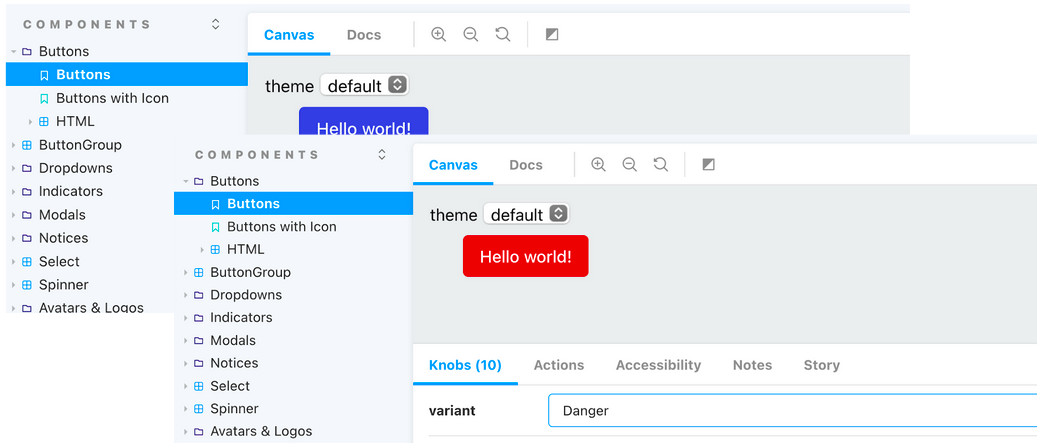
Storybook was originally built for React only but has since evolved to support most of today’s popular frameworks like Vue, Angular, and Svelte etc.
There's more, including some live coding and incorporating Storybook into a The Collab Lab project, so check out the full talk and slide deck.
If you aren't already, give The Collab Lab a follow on DEV!
]]>Venue: The Collab Lab Tech Talks
Summary: Storybook is a tool for building out components and documenting a system of components. It allows you to build components in an isolated environment. This promotes good component practices as well as potentially faster development time as you do not need to rely on the application(s) that consume them.Links:
]]>Here is the issue that we were working on:
The https://github.com/forem/forem/issues/2204 repository on GitHub
Thanks again for coming on the stream, Jono!
Jono:
Nick:
Christina:
Looking forward to seeing you on future streams! If you're interested in pairing, fill out this form. We’d love to tackle an issue with you that the whole community could learn from!
P.S. Follow DEV on Twitch to be notified when future streams begin and catch old streams on YouTube
]]>Here is the issue that we were working on:
The https://github.com/forem/forem/issues/12452 repository on GitHub
Thanks again for coming on the stream, Dan!
Dan:
Nick:
Christina:
Virtual Coffee where Dan and I are members
Looking forward to seeing you on future streams! If you're interested in pairing, fill out this form. We’d love to tackle an issue with you that the whole community could learn from!
P.S. Follow DEV on Twitch to be notified when future streams begin and catch old streams on YouTube
]]>Here is the issue that we were working on.
The https://github.com/forem/forem/issues/9585 repository on GitHubOn this stream, we covered:
contents was the culprit. This was in the explanation of the usage of the contents value for the display CSS property in the Mozilla Developer Network (MDN) docs -- "Due to a bug in browsers this will currently remove the element from the accessibility tree — screen readers will not look at what's inside. See the Accessibility concerns section below for more details."margin-top was being set.
Thanks again for coming on the stream Rafi!
You can also find the three of us all over the web here:
Rafi:
Nick:
Christina:
Looking forward to seeing you on future streams! If you're interested in pairing, fill out this form. We’d love to tackle an issue with you that the whole community could learn from!
Follow DEV on Twitch to be notified when future streams begin.
]]>I didn’t get COVID-19, but I did have something quite serious happen to me. The pandemic hit and we went into lockdown in Montreal in March. I didn’t think about it at the time, but whenever I would take a work break, I was always lying down for breaks. I just thought it was pandemic blues, but then all kinds of other weird symptoms started happening. Night sweats, calves seizing, just plain weird stuff.
During a pandemic, you don’t really want to bug your doctor unless it’s an emergency. Eventually I called the doctor, I explained some of my symptoms and they ordered me to get some blood tests. When they got the results, they said to go to emergency at the hospital right away because the levels in my blood were way off.
I was in the hospital for about three weeks and took every test on the planet. It took them a long time to figure out what was wrong with me. In the end it turned out that I had bacteria in my blood and it was running through my veins polluting my body and attacking my heart. I was literally dying on the inside. Fun stuff.
Once they figured it out, I was put on antibiotics for a month and a half. Because it was a pandemic and logistically it made no sense to go to a clinic every day, I got to inject the antibiotics myself every day. It was annoying having an IV in my arm for almost 2 months, but I noticed a changed almost immediately.
I finished the antibiotics and then had to wait to have more tests to confirm my blood was all good. I finally got cleared in November, but it was quite the scare.
And you know what the kicker was about all this? The doctors said I was just unlucky to have got this. Bad luck. Thanks 2020.
Thinking back to it now, the symptoms probably started in November 2019, but I attributed it to other things, like the end of the year, or maybe not sleeping enough. Anyways, I’m glad I’m all good now. Thank you Canada for free health care. It’s not perfect, but thank you.
Alright, now let’s get to some positives, because there are some big ones for me.
The first one is, I joined the Forem team, a.k.a. the artists formerly known as the DEV team! I won’t go into it too much here as I’ve already written about it which I’ll link. In a nutshell, I’d been a fan of DEV for a few years before I joined the team. I was actually the first external contributor and made a lot of contributions prior to joining the team.
The https://github.com/forem/forem repository on GitHubI was so excited to join the team as it checked off so many things for me. It truly is my first dream job. I have amazing coworkers, work remote, have stellar working conditions, and I work on a product that I use and love.

I joined a virtual coffee group which was the second best thing that happened to me in 2020. I’m a sociable person and typically will head out with friends, but given the current pandemic, not really an option. I came across a tweet from my now friend Bekah where she dropped a Tweet about virtual coffee. I'm not positive, but I think this is the Tweet that got me to DM her and to join virtual Coffee.
Sorry, I need to be more specific. For the past couple weeks, I've posted an invite on twitter to anyone who wants to join virtual coffee. It's been a handful of tech ppl hanging out for about an hr talking about things tech and non-tech. If someone wants to join, I DM the link.
— BekahHW (@BekahHW) April 14, 2020
From there it became a regular thing for me and all of a sudden, I had some Internet friends, something I’ve never had. Everyone has always been just folks I follow on Twitter. Bekah, thanks again so much for creating this.
If you want to learn more about Virtual Coffee, come join us on a Zoom call and maybe eventually join the community!
Another thing I started this year was live coding on Twitch.
I started this for a few reasons. Others were doing it, I wanted to learn in public through a different medium, and it was a pandemic, so YOLO. This was inspired by swyx, a.k.a. Shawn Wang, who is a big proponent of learning in public.
Loved this React Podcast episode with @swyx. Swyx on learning in public, “Your default has been zero and it doesn’t serve you well.” Do one to five to ten percent and that’ll be huge if you do. #learninginpublic https://t.co/JhwvlXsx2j
— Nick Taylor (he/him) (@nickytonline) October 17, 2020
As well, I really enjoyed watching Jason Lengstorf’s live stream (still do), so I took some inspiration from there too, although my production quality is not quite where his is at… yet. 😎
When Hacktoberfest rolled around, I got to work with my awesome coworker Christina Gorton (@coffeecraftcode). We were doing all kinds of streams on the DEV Twitch stream. Walkthrough Wednesdays, a gratitude stream dedicated to our contributors, live coding pairing sessions with community members, as well as joining the raise.dev stream.
It's been really great as I've been able to meet so many wonderful people in the community.
I had a great time on the DEV stream today with my co-host @coffeecraftcode. We spoke with @venikunche about their career and the company they have founded, @DiversifyTechCo.
— Nick Taylor (he/him) (@nickytonline) December 2, 2020
Thanks so much for coming on the stream Veni! #DEVCommunityhttps://t.co/q7KoUFOKA1
I gave two talks in 2020 that I was proud of. One was for Hacktoberfest on the Digital Ocean community titled, Getting the Most Out of Open Source. The other was a lightning talk I gave at my Virtual Coffee group's lightning talks titled, Words Matter: Conventional Comments.
I was in pretty tip top shape at the end of 2019, but then my health scare derailed all that.
Being an athlete, getting back into shape is always doable, because your body remembers. As well, when you’ve been busted up enough, mentally you know you can do it, because you’ve had to do it so many times before. All that to say, I got back into training pretty seriously in November post health scare.
Since everything is locked down, I’ve been doing Zoom group sessions with a personal trainer I know. I love these sessions. They are at 7am on Mondays, Wednesdays, and Fridays. Getting it out of the way early in the day prevents me from making excuses to not workout, and I like the good social pressure of showing up because others are expecting you to be there. Also, it would be a big waste of money if I didn’t show up, or empty the tank during a session.
Other things I’ve been proud of this year are, I’ve become slightly more handy thanks to the pandemic. I’m still not great, but doing better. The one thing that folks seem to be impressed by is I built a skating rink in my backyard.
My personal site got an upgrade/refresh just this week. I'd been looking to move to 11ty for a while, but it was low on my priority list in terms of stuff I had to do. I started the move on December 10th and then when the holidays came around, I finally had some time to finish it.
I finished migrating https://t.co/MDpP0oNwOu to @eleven_ty. I went with @piccalilli_'s wonderful Hylia template + tweaked it to handle our @ThePracticalDev as a CMS feature + some other tweaks. You can see the customizations I did here. https://t.co/vtM7ncTQiU #DEVCommunity
— Nick Taylor (he/him) (@nickytonline) December 29, 2020
I went with the Hylia template from Andy Bell (@hankchizljaw) for a few reasons. It's 100% all around on lighthouse, I liked the look of it, and I honestly didn't have time to design my whole site. My goal of my site is to provide content.
I also found working with Eleventy not hard on the brain at all. I was able to make some customizations and it wasn't that complicated. I'll have a post about my move to Eleventy in the new year.
I said it before on Twitter, but saying it again here. Thanks Andy!
We’ll see what 2021 brings, but regardless I know I’ll still be pumped to keep training, live stream, blog, and continue to build out Forem with my awesome team. Peace folks!
]]>Those test refinements are in
The https://github.com/forem/forem/pull/11685 repository on GitHubRegardless, it's still a good run down of how to test Portals.
At Forem, the software that powers DEV, we use Preact, sprinkled throughout the application, where it makes sense. The reason being, is that the application is a Rails application and for the most part we are serving up content in the form of blog posts, listings etc. via server-side rendering.
Typically these “Preact”ified interactions are for the logged on user, but there are other spots we use it too. One of those spots is search. The way search works is, initially the search form is server-side rendered (SSR) and then the Preact Search component mounts itself in the same spot. Preact’s Virtual DOM (VDOM) is smart enough to compare the DOM even on the initial render and only change things if necessary. This prevents flickering.
So the search text box is now a Preact component once the page is completely loaded. When a user enters a search query and then presses the ENTER key, Instant Click will make an AJAX call that grabs the search results based on what the user is searching for. Instant Click is a whole other topic, but feel free to read up on it.
In a nutshell, it converts a server-side rendered application into a single page application (SPA) like application. This is important to note as it’s an integral part of our story about Preact portals.
So we get our search results via AJAX and the page’s main area is updated. In the case of search, this is a search results page. Up until now, this has worked like clockwork.
My coworker Pawel has a pull request up that adds a new search form that is for mobile/smaller screens. When on mobile/smaller screens, the search text box in the top navigation gets hidden and the mobile one becomes visible. For more on that check out the PR below (it will probably be merged by the time you are reading this post)
The https://github.com/forem/forem/issues/10424 repository on GitHubPawel, ran into some issues synchronizing the main search form (larger screens) with the smaller one that is contained within the search results. Right away this screamed, use a portal since it is an element that renders in a different DOM element, i.e. a Portal's container.
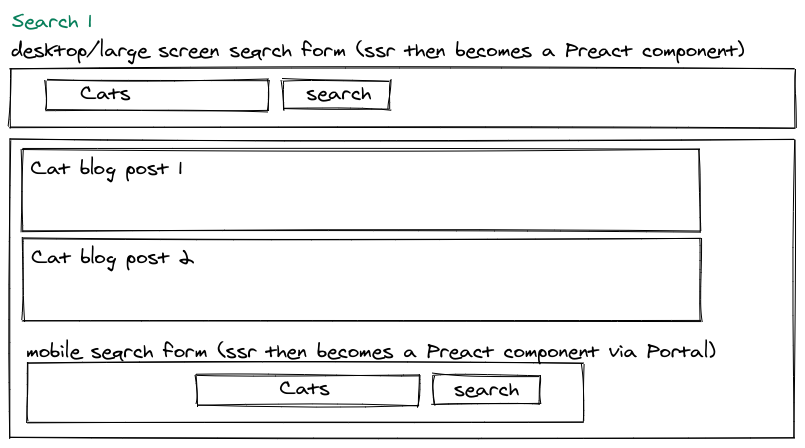
I reworked things so that there was now a parent component that managed the state of the original search text box and the mobile search text box that gets rendered within the search results using the useState hook. I did some initial tests in Pawel’s PR and it seemed to work, but on subsequent searches it stopped working.
And then it clicked. Portals are the right approach, but when new search results are rendered, a new search form for mobile view is rerendered from the server-side (via Instant Click magic), i.e. the DOM element is destroyed and recreated. Not to be confused with React updating the state of a component.
So typing in the mobile view stopped synching the search term between search text boxes because the search text box created by the portal got wiped out by the server-side render.
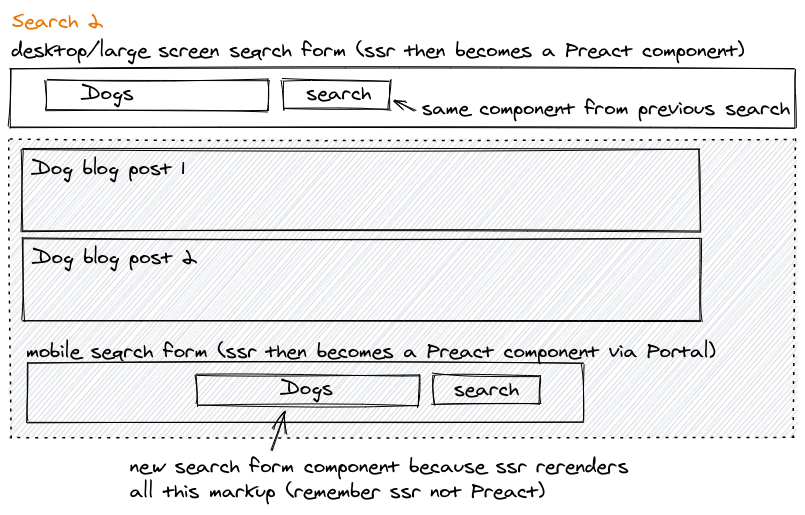
Once I figured that out, I got all the moving parts working. Check out my PR as it contains more information in the comments about this.
The https://github.com/forem/forem/pull/11525 repository on GitHubAlright, so now the component and portal work great in the actual application. With all that context under out belts lets discuss testing out this component with preact-testing-library, one of the testing libraries in the Testing Library family.
If you’re using preact-testing-library or react-testing-library, the APIs are the same. If you’re interested you can see what’s available in the API. We’re going to focus on the render function for the time being.
Typically you test a component like this. Note that you can choose what to destructure from the result of the render function based on what’s available in the API for your needs. We are going to go with a function that finds a DOM element by its label text.
it('should synchronize search forms', async () => {
    const { findByLabelText } = render(<SearchFormSync />);

    // Only one input is rendered at this point because the synchSearchForms custom event is what
    // tells us that there is a new search form to sync with the existing one.
    const searchInput = await findByLabelText('search');

    // Because window.location has no search term in it's URL
    expect(searchInput.value).toEqual('');
});
The test above does the following:
<SearchFormSync /> component and make the findByLabelText function available by destructuring it from the result of the render function.<label /> or one of the ARIA attributes for a label, for example aria-label.expect(searchInput.value).toEqual('');At this point there is nothing out of the ordinary about this test. And everything passes.
 PASS  app/javascript/Search/__tests__/SearchFormSync.test.jsx
  <SearchFormSync />
    ✓ should synchronize search forms (19 ms)

Test Suites: 1 passed, 1 total
Tests:       1 passed, 1 total
Snapshots:   0 total
Time:        1.751 s, estimated 2 s
Ran all test suites related to changed files.

Watch Usage: Press w to show more.
Alright, let’s continue with our testing. So next up we want to ensure that both the desktop and mobile search forms render the same. Under the hood, the way it works is when a search result is returned, the search results include the mobile search form and have a little snippet of JS that emits a custom event to synchronize the forms.
<div id="mobile-search-container">
  <form
    accept-charset="UTF-8"
    action="/search"
    method="get"
  >
    <input
      name="utf8"
      type="hidden"
      value="✓"
    />
    <input
      aria-label="search"
      autocomplete="off"
      class="crayons-header--search-input crayons-textfield"
      name="q"
      placeholder="Search..."
      type="text"
    />
  </form>
</div>
...
<script>
  // ... some other search related code

  // A custom event that gets dispatched to notify search forms to synchronize their state.
  window.dispatchEvent(new CustomEvent('syncSearchForms', { detail: { querystring: location.search } }));
</script>
So in our test we need to do a few things:
// simulates a search result returned which contains the server side rendered search form for mobile only.
setWindowLocation(`https://locahost:3000/search?q=${searchTerm}`);
// This part of the DOM would be rendered in the search results from the server side.
// See search.html.erb.
document.body.innerHTML =
  '<div id="mobile-search-container"><form></form></div>';
fireEvent(
  window,
  new CustomEvent('syncSearchForms', {
    detail: { querystring: window.location.search },
  }),
);
From there we need to assert that the search forms are in sync.
    const [desktopSearch, mobileSearch] = await findAllByLabelText('search');

    expect(desktopSearch.value).toEqual(searchTerm);
    expect(mobileSearch.value).toEqual(searchTerm);
Let's put that all together.
describe('<SearchFormSync />', () => {
  beforeEach(() => {
    // This part of the DOM would be rendered in the search results from the server side.
    // See search.html.erb.
    // It is where the portal will render.
    document.body.innerHTML =
      '<div id="mobile-search-container"><form></form></div>';

    setWindowLocation(`https://locahost:3000/`);

    global.InstantClick = jest.fn(() => ({
      on: jest.fn(),
      off: jest.fn(),
      preload: jest.fn(),
      display: jest.fn(),
    }))();
  });

  it('should synchronize search forms', async () => {
    const { findByLabelText, findAllByLabelText } = render(<SearchFormSync />);

    // Only one input is rendered at this point because the synchSearchForms custom event is what
    // tells us that there is a new search form to sync with the existing one.
    const searchInput = await findByLabelText('search');

    // Because window.location has no search term in it's URL
    expect(searchInput.value).toEqual('');

    // https://www.theatlantic.com/technology/archive/2012/09/here-it-is-the-best-word-ever/262348/
    const searchTerm = 'diphthong';

    // simulates a search result returned which contains the server side rendered search form for mobile only.
    setWindowLocation(`https://locahost:3000/search?q=${searchTerm}`);

    fireEvent(
      window,
      new CustomEvent('syncSearchForms', {
        detail: { querystring: window.location.search },
      }),
    );

    const [desktopSearch, mobileSearch] = await findAllByLabelText('search');

    expect(desktopSearch.value).toEqual(searchTerm);
    expect(mobileSearch.value).toEqual(searchTerm);
  });
});
Let's rerun the tests.
 PASS  app/javascript/Search/__tests__/SearchFormSync.test.jsx
  <SearchFormSync />
    ✓ should synchronize search forms (31 ms)

Test Suites: 1 passed, 1 total
Tests:       1 passed, 1 total
Snapshots:   0 total
Time:        1.326 s
Ran all test suites matching /sync/i.

Watch Usage: Press w to show more.
Awesome, so the original search form (desktop search) and the new search form (mobile/smaller screens) render properly.
Let's take a look at what happens under the hood by looking at preact-testing-library's render function
function render (
  ui,
  {
    container,
    baseElement = container,
    queries,
    hydrate = false,
    wrapper: WrapperComponent
  } = {}
) {
  if (!baseElement) {
    // Default to document.body instead of documentElement to avoid output of potentially-large
    // head elements (such as JSS style blocks) in debug output.
    baseElement = document.body
  }

  if (!container) {
    container = baseElement.appendChild(document.createElement('div'))
  }
...
There is an optional options parameter which we can see here destructured.
{
  container,
  baseElement = container,
  queries,
  hydrate = false,
  wrapper: WrapperComponent
} = {}
In our case we're not using these so based on the code, we have no baseElement option set since we are not passing it in and its default value is the container option which is undefined since we did not pass one in. So, the baseElement in our case is document.body.
Since we have no container defined, it gets set to baseElement.appendChild(document.createElement('div')) which is a <div /> appended to the document.body. Remember from our test set up, we added the portal container DOM element via
// This part of the DOM would be rendered in the search results from the server side.
// See search.html.erb.
document.body.innerHTML =
  '<div id="mobile-search-container"><form></form></div>';
So before our test runs, this is what the document.body looks like
<body>
  <div
    id="mobile-search-container"
  >
    <!-- This is where our portal will be rendered -->
    <form />
  </div>
  <!-- This is where our component will be rendered -->
  <div>
  </div>
</body>
Let's use preact-testing-library's debug so that we can see the successful test rendered as HTML.
To use debug(), we need to add it to the destructured functions like so:
const { debug, findByLabelText, findAllByLabelText } = render(<SearchFormSync />);
Alright, now let's add the debug() call to the test.
describe('<SearchFormSync />', () => {
  beforeEach(() => {
    // This part of the DOM would be rendered in the search results from the server side.
    // See search.html.erb.
    // It is where the portal will render.
    document.body.innerHTML =
      '<div id="mobile-search-container"><form></form></div>';

    setWindowLocation('https://locahost:3000/');

    global.InstantClick = jest.fn(() => ({
      on: jest.fn(),
      off: jest.fn(),
      preload: jest.fn(),
      display: jest.fn(),
    }))();
  });

  it('should synchronize search forms', async () => {
    const { debug, findByLabelText, findAllByLabelText } = render(<SearchFormSync />);

    // Only one input is rendered at this point because the synchSearchForms custom event is what
    // tells us that there is a new search form to sync with the existing one.
    const searchInput = await findByLabelText('search');

    // Because window.location has no search term in it's URL
    expect(searchInput.value).toEqual('');

    // https://www.theatlantic.com/technology/archive/2012/09/here-it-is-the-best-word-ever/262348/
    const searchTerm = 'diphthong';

    // simulates a search result returned which contains the server side rendered search form for mobile only.
    setWindowLocation(`https://locahost:3000/search?q=${searchTerm}`);

    fireEvent(
      window,
      new CustomEvent('syncSearchForms', {
        detail: { querystring: window.location.search },
      }),
    );

    const [desktopSearch, mobileSearch] = await findAllByLabelText('search');
    debug();
    expect(desktopSearch.value).toEqual(searchTerm);
    expect(mobileSearch.value).toEqual(searchTerm);
  });
});
The test runs again successfully, but now we also have some outputted markup from the rendering.
 PASS  app/javascript/Search/__tests__/SearchFormSync.test.jsx
  <SearchFormSync />
    ✓ should synchronize search forms (43 ms)
    ✓ should synchronize search forms on a subsequent search (9 ms)

  console.log
    <body>
      <div
        id="mobile-search-container"
      >
        <form
          accept-charset="UTF-8"
          action="/search"
          method="get"
        >
          <input
            name="utf8"
            type="hidden"
            value="✓"
          />
          <input
            aria-label="search"
            autocomplete="off"
            class="crayons-header--search-input crayons-textfield"
            name="q"
            placeholder="Search..."
            type="text"
          />
        </form>

      </div>
      <div>
        <form
          accept-charset="UTF-8"
          action="/search"
          method="get"
        >
          <input
            name="utf8"
            type="hidden"
            value="✓"
          />
          <input
            aria-label="search"
            autocomplete="off"
            class="crayons-header--search-input crayons-textfield"
            name="q"
            placeholder="Search..."
            type="text"
          />
        </form>
      </div>
    </body>

      at debug (node_modules/@testing-library/preact/dist/pure.js:97:15)

Test Suites: 1 passed, 1 total
Tests:       2 passed, 2 total
Snapshots:   0 total
Time:        1.516 s
Ran all test suites matching /sync/i.

Watch Usage: Press w to show more.
So from the outputted markup, we see that the original form rendered (desktop) and the mobile search form also rendered in the portal container <div id="mobile-search-container" />.
Using debug() in preact-testing-library or react-testing-library is super handy if you run into rendering issues.
And that's it! To recap, we had a component that also rendered a portal and we tested that the original component and the portal both rendered.
Until next time folks!
]]>Venue: Virtual Coffee Lightning Talks
Summary: Virtual Coffee started as a once a week zoom chat in April 2020, and has grown into a community of devs at all stages of the journey, meeting, mentoring, hosting events, and most importantly, making friends. Our mission is to form community, allow room for growth and mentorship at all levels, and to provide a safe space for everyone interested in tech. Nick goes over conventional comments and how they can help you and your team.Links:
]]>Aside from code, we talked about culinary school, and some embarrassing things that happened to me. 🤣
While Marie and I didn't get a chance to start working on the actual issue of podcast validation live, we did discuss what liquid tags are, how to create a podcast on Forem, and debugging my local environment.
After walking through these concepts together, Marie is now able to start working on the issue!
The https://github.com/forem/forem/issues/3588 repository on GitHubYou can also find the three of us all over the web here:
Marie:
Nick:
Christina:
Looking forward to seeing you on future streams! Follow DEV on Twitch to be notified when future streams begin.
I hope everyone had as fun and productive a Hacktoberfest as I did.
]]>Aside from coding, there was singing, mispronunciations and laughing. Here's the full stream.
Rachael is getting a draft pull request up soon that builds off her initial PR, which helped Forem create the Twitch liquid tag.
The https://github.com/forem/forem/pull/10577 repository on GitHubRachael:
Nick:
Christina:
Looking forward to seeing you on future streams! Follow DEV on Twitch to be notified when the next installment begins. Happy FINAL week of Hacktoberfest!
]]>We had a lot of fun and got a proof of concept running on the frontend to lint markdown. Here's the full stream.
Eliot is still working on the issue, so feel free to follow its progress.
The https://github.com/forem/forem/issues/4807 repository on GitHubYou can also find the three of us all over the web here:
Eliot:
Nick:
Christina:
Looking forward to seeing you on future streams! Follow DEV on Twitch to be notified when future streams begin. Happy Hacktoberfest!
]]>ESLint for linting frontend files: JavaScript, JSX and TypeScript (if the project uses TypeScript). There are all kinds of rules and plugins for this, but the gist of using a linter is to keep your code adhering to a project's standards/styles.

Prettier is for formatting your code. It is opinionated and offers some configuration but it is minimal, for example single quotes vs. double quotes.

stylelint as the package name implies, is a linter for Cascading Style Sheets (CSS).
ESLint, stylelint and Prettier enable you to remove any discussion of what they do from a code review, because the rules are already set in place. This is great because it allows you to focus on the actual code review which is the bug you're trying to fix or a feature you're implementing.
Note: As of Husky version 7, the setup is completely different. Please follow the steps in the 4 to 7 migration guide.
husky is a node package that makes creating Git hooks a joy. What's a Git hook? It's a script that runs during an event in a repository. For example, before a commit. Once the husky package is installed, all that is required is a configuration to decide which Git hooks to use and what to run for that particular hook.
Here is a sample configuration.
"husky": {
  "hooks": {
    "pre-commit": "echo 'hi'"
  }
}
When a file is being committed to the repository, the above configuration will run echo 'hi' before the file is committed.
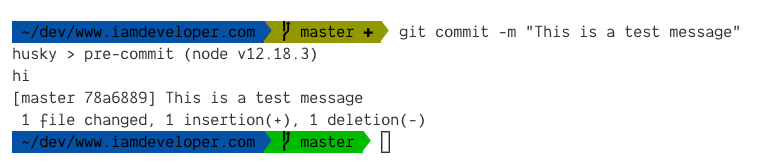
lint-staged is a node package that makes it easier to run tasks for staged files in a Git repository. If we go back to our example above that echo's hi, we can change that command to lint-staged.
"husky": {
  "hooks": {
    "pre-commit": "lint-staged"
  }
}
If we commit a file, the Git pre-commit hook will run lint-staged, but nothing will happen. We need to let lint-staged know what we want to do during the pre-commit. Let's get a configuration set up for lint-staged.
"lint-staged": {
  "*.{js}": [
    "prettier --write"
  ]
}
Now if we commit a file, the pre-commit hook will run and if any JavaScript files are being committed, the pre-commit hook, thanks to lint-staged will run prettier on the file and update the file with any formatting changes and then commit the file.
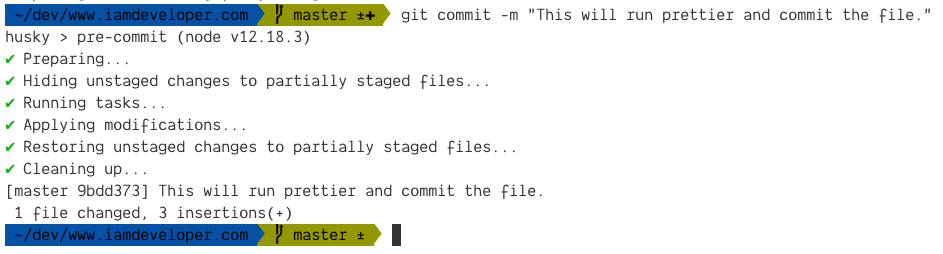
All these tools together make for a great automated workflow in regards to coding standards/style guidelines for a project.
Now let's bring it all together so you can use this in your own project.
You'll need to install all the dependencies mentioned above plus a few more. I'll explain why in a minute.
npm install -D eslint prettier eslint-config-prettier eslint-plugin-prettier husky lint-staged stylelint stylelint-config-standard
eslint-config-prettier and eslint-plugin-prettier stylelint stylelint-config-standard are required so that eslint is only in charge of rules that do not related to formatting as prettier handles formatting.
If you're wondering what the -D is for, that's so they get installed as devDependencies instead of dependencies in the package.json. For more on that, see Specifying dependencies and devDependencies in a package.json file.
In the root of your project, create a file called .eslintrc.js. This will house the eslint configuration that we want. We'll go with the eslint recommended rules.
/* eslint-env node */
module.exports = {
  extends: ['eslint:recommended', 'prettier'],
  plugins: ['prettier'],
  parserOptions: {
    ecmaVersion: 2018, // Put whatever version you want here
  },
  env: {
    browser: true,
  },
};
Note: /* eslint-env node */ is being used as it's a frontend project and the .eslintrc.js file is Node.js. It allows us to say, "This file is a Node.js file". Thanks to Rafi for pointing this out to me.
This is a base eslint configuration. If you were for example using React in your project, there would be additional configuration for React eslint rules.
In the root of your project, create a file called .stylelintrc.json. This will house the stylelint configuration that we want. We'll go with the stylelint recommended rules.
{
  "extends": "stylelint-config-standard"
}
This is a base stylelint configuration. Feel free to expand on these standard stylelint rules.
Next up we need to our husky and lint-staged configurations. In your package.json file add these two configuration sections.
"lint-staged": {
    "*.js": [
        "eslint —-fix",
        "prettier --write"
    ],

    "*.{css,scss}": [
        "stylelint"
    ]
},
"prettier": {
    "singleQuote": true,
    "trailingComma": "all",
    "printWidth": 80,
    "tabWidth": 4
}
If you don’t trust the robots for fixing your code, remove the —-fix argument off of the eslint command.
The prettier configuration above is what I use, but feel free to tweak it to your liking.
All the moving parts are running now. If you end up using a boilerplate these tools might already be included. For example the Create React App toolchain comes with eslint.
I added this as a bonus tip, because not all projects use jest.
But... if your project uses jest, you can also run tests related to files that are being committed.
"lint-staged": {
    "*.js": [
        "eslint —-fix",
        "prettier --write",
        "jest --findRelatedTests"
    ]
}
I strongly encourage you to dig further into all the tools discussed. Knowing your tools really well is a super power.
ESLint, prettier, stylelint, husky and lint-staged are great tools for the frontend, now go make something great with this setup!
Until next time folks!

Venue: DigitalOcean Tech Talk
Summary: Nick shares best practices, tips, and tools about how contributors and maintainers of all levels can have happy, productive, and meaningful interactions with the open source community.Contributing to open source should be fun and rewarding! Whether you are a beginner or seasoned open source enthusiast, you’ll come away from this talk refreshed and ready to contribute to or maintain an open source project.
Links:
]]>We didn't do a tonne of coding as we were going through some fundamentals about Ruby on Rails, Active Record and Object Relational Mappers (ORM) to get us set up for working on the issue, but still great stuff.
We also talked about polymorphic associations in Active Record, naming convention in Rails and did a brief overview of the MVC architecture.
Here's the issue that Taniyah has started working on.
The https://github.com/forem/forem/issues/4523 repository on GitHubOnce we have a PR up, I'll update this post with a link to it.
You can check out the full stream on Twitch (expires in 14 days) and/or check it out on Youtube
Taniyah is looking for her first developer role, so give her a follow on DEV and Twitter and help get her hired!
Taniyah:
Nick:
Looking forward to the next pairing and thanks again Taniyah!
P.S.: Feel free to subscribe to my Twitch channel and my YouTube channel. 😉
]]>They implemented a liquid tag for the Go Playground. For those interested, here is the PR.
The https://github.com/forem/forem/pull/9577 repository on GitHubI really enjoyed talking with Chuck, especially in this clip.
Give them a follow on DEV as well as Twitter and just a reminder... they're looking for their first role!
Looking for first #dev role as a part of a good team. #FlatironSchool grad, many years of Frontend experience, some freelance, love back end as well. #React #Rails #VueJS HTML SCSS
— Chuck Smith 💻 🇺🇦 (@EclecticCoding) June 21, 2020
Blog: https://t.co/kkyb4Gn2hx
Portfolio: https://t.co/ykG4DAfPwQ#KeepLearning #HireMe
Now that summer is over and I'm back from vacation, we're getting back into the swing of things for pairing on Forem issues.
Super excited to have @Code_Kuroi on the stream this week for a live coding pairing session on a @forem issue. We'll be streaming this Thursday at 1.30 PM EDT (5.30pm UTC) https://t.co/Xy2u7mGAQb #DEVCommunity #ForEmpoweringCommunity #LearnInPublic
— Nick Taylor (he/him) (@nickytonline) September 15, 2020
I'll be joined by TJ this week on Thursday.
Looking forward to the next pairing session!
P.S.: Feel free to subscribe to my Twitch channel and my YouTube channel. 😉
]]>Typically (not always) folks with less experience do not grasp this. This is not a bad thing. It is something that comes with experience and having a deeper understanding of the system you are working in. This is why more experienced co-workers are there to help and guide you.
I'll tell you a funny story that relates to my profile picture. I use this as my profile picture on DEV, GitHub and all social media.

I'm sporting my DEV shirt looking up slightly into the sky as if I'm trying to look tough or looking at some imaginary DEV flag that I should be saluting to. What you don't see in this picture is that I am in extreme pain. My feet are killing me and I have blisters on several toes on each foot.
I can't remember why I decided that day to take this photo and make it my profile photo, but I did.
At this point you might start asking questions like why is he in so much pain? Where did the blisters come from? Was it from a long run? An accident?
WAIT FOR IT...
WAIT FOR IT...
WAIT FOR IT...
Here is the original uncropped photo. You probably now know why my feet were in the state they were that day.
I participated in a great local fundraiser for a women's shelter called "Walk a Mile in Her Shoes" in which you literally walk a mile in high heel shoes. So what does this all have to do with software?
If you are given a feature and asked to implement it, don't just jump in and start coding that feature. Ask questions! Spend some time really thinking about the feature outside the specs that were given to you.
All hypothetical questions and thoughts about some imaginary feature, but the point is to think outside the bubble of a feature or bug fix. Think about the system as a whole and how your changes will affect it.
That's all for now folks, but I'll leave you with a fun action shot at the end of a very painful one mile walk.
]]>
I'm at a point in the book where the focus is about writing. One of the references is to the chapter Obvious to you. Amazing to others. from Derek Sivers book "Hell yeah or no".
I related to this, because like many, I debate whether I should write about something that is probably obvious, or that I think is obvious.
So of course I Tweeted that out.
I'm reading @Coding_Career and just came to the point in the book that references Derek Sivers' "Obvious to you. Amazing to others.". I can definitely relate to that. https://t.co/bDrAVV4xBX
— Nick Taylor (he/him) (@nickytonline) August 2, 2020
Hint, it may be obvious to a subset of people, but not everyone, so there is definitely an audience.
This sense that things are obvious is so prevalent, that hotels.com created the character Captain Obvious, a hilarious character in their commercials. Also, it helped me make a great title for this post. 😎
Video is no longer available.
Ben has posted about this before as well.
With so many concepts, patterns, tech stacks and new stuff popping out all the time as well as all the tech and business jargon out there, everything is not obvious and that's OK. We just need to learn from each other and keep spreading the knowledge.
For example, did you know that in JavaScript you can get an array with unique entries by using a Set?
const arrayWithDuplicateValues = [1, 2, 3, 3, 1, 5];
const uniqueArray = Array.from(new Set(arrayWithDuplicateValues);
or
const arrayWithDuplicateValues = [1, 2, 3, 3, 1, 5];
const uniqueArray = [...new Set(arrayWithDuplicateValues)];
Side note, check out Have a Handy JS Snippet You Want to Share?.
As a fun exercise, I thought it would be cool if people commented with stuff they think is obvious. It can be anything. A trick/tip in a programming language, something about a tech stack, a concept, jargon or whatever comes to mind.
Who knows? Maybe what you post in the comments could be your next blog post?
Go!
]]>
A lot of interest was generated and so we did our first live coding pairing session that was streamed on doingdevfordev.com. It was with DEV community member Sophia Li.
She worked on the <ImageUploader /> Preact component in the DEV/forem codebase. It was originally a class component that she converted to a function component using the useState hook.
For the full recording of the pairing session check out the YouTube video below. Also, feel free to subscribe to my channel. 😉
Near the end of the pairing session we discussed the possibility of using the useReducer hook instead. After the pairing session, Sophia continued working on the PR she created and implemented the necessary changes to use the useReducer hook.
For those interested, here is the merged PR.
The https://github.com/forem/forem/pull/9369 repository on GitHubIt was awesome pairing with Sophia and by the way, she’s looking for her next role!
I’m a software engineer looking for my next role!
— Sophia Li (@sophia_wyl) June 19, 2020
I’m good at solving problems collaboratively, asking the right questions to understand the "why", & soliciting feedback on ways to improve.
I also set OKRs to learn how to code: https://t.co/HoOrcsCGdo
RTs appreciated 😊
Looking forward to the next pairing session!
]]>
My goal was/is to stream actual stuff I'm working on at DEV. So far it's been fun. But you know what's more fun? Doing it with other people.
Would anyone be interested in working on a frontend issue for @ThePracticalDev during a live coding session pairing with me on https://t.co/DVCVJ0vs7b? I know it might sound a little intimidating, but like @swyx says, learn in public. #DEVCommunity #LearnInPublic #YOLO pic.twitter.com/kGYo5EJBj7
— Nick Taylor (he/him) (@nickytonline) July 13, 2020
So far I've had a bunch of people sign up for the task. Here's a few takers. While you're at it, give them a follow on DEV and Twitter!
Yea!!
— Sophia Li (@sophia_wyl) July 13, 2020
I'm interested, however I'm not familiar with Preact
— TJ_Jackson (@Code_Kuroi) July 13, 2020
No worries if you don't know Preact. Hopefully I can explain things well enough that you do once we're done. 😅 pic.twitter.com/obbJxei8y8
— Nick Taylor (he/him) (@nickytonline) July 13, 2020
I’m down 🤚
— Gift✨ (@lauragift_) July 13, 2020
Sorry I missed this one. Would love to have worked with a community on an issue. Maybe next time.
— Chuck Smith 💻 🇺🇦 (@EclecticCoding) July 13, 2020
I'll put you down Chuck. I have 4 other people at the moment, but would love if you'd participate.
— Nick Taylor (he/him) (@nickytonline) July 13, 2020
Check out the repository. There are issues labelled with frontend tags like `accessibilty`, `tech: javascript`, `tech: html/css` etc. https://t.co/RqzBSTBgP4
I'm interested. ✋
— 🇺🇦 ✦ Eliot Sanford ✧ 🇺🇦 (@techieEliot) July 13, 2020
❤️🤓
For the time being I plan to work on frontend issues only, but as things move along, I see this naturally progressing to any issue in the DEV repository.
If you are interested in participating. Send me a DM on DEV or Twitter. If you're not following me on DEV, you can still send me a message as my DMs are open.
Things to do to get you prepared for a live coding pairing session:

DEV installed locally. Check out docs.dev.to to get up and running. If you have issues getting things installed, let me know and we can get it sorted for you.
A decent Internet connection.
Our first pairing session will be Wednesday, July 15th at 3 PM ET/7 PM UTC.
Alright, we have our first Live Coding Pairing session set up for this Wednesday with @sophia_wyl at 3pm Eastern time. Come join us on Twitch at https://t.co/XhHtvMciLk #DEVCommunity #LiveCoding #LearnInPublic https://t.co/cEXDHs46kn
— Nick Taylor (he/him) (@nickytonline) July 13, 2020
Want to pair? Fill out the pairing form.
Looking forward to potentially pairing with you! 🍐
Photo by Clem Onojeghuo on Unsplash
]]>We have @ThePracticalDev in prod running @preactjs X now (10.4.4 previously 8.5.2) and we are now using @TestingLib for our frontend tests.
— Nick Taylor (he/him) (@nickytonline) June 18, 2020
A big thanks to my co-worker @Ridhwana_K for the help with the upgrade. 🥳 🔥
Let’s dig in to all the improvements we’ve been making in the frontend.
DEV is now running Preact X (currently 10.4.4 at the time of writing this post). I followed the official Preact X upgrade guide to move us from 8.5.2 to 10.4.4. So, what does the new version of Preact give us as developers? You can read about all the new things in the What’s new in Preact X
post on the Preact site. In a nutshell, a lot of the functionality that was previously only available in React is now available in Preact as well—hooks, fragments, context, componentDidCatch to name a few.
DEV has moved away from preact-render-spy and preact-render-to-json for a couple of reasons. The main one was that neither of these tools were working with the Preact upgrade. The second is that the official React documentation recommends react-testing-library and Jest as the tools of choice when working with React components. For those reasons, we moved to preact-testing-library, a project that is also a part of the Testing Library family.
As part of the move, we deprecated the usage of snapshot testing except for in design system components. I am still fairly new to Testing Library, but have found it to be fairly intuitive and it encourages building accessible applications. I’m also a big fan of the debug() function.
Testing Library encourages building accessible applications, but we can do more. Nick Colley has taken the wonderful aXe tool from Deque Systems and integrated it with Jest as a custom Jest matcher called jest-axe for testing accessibility.
When jest-axe is used in conjunction with preact-testing-library, we get notified of a11y errors allowing us to fix them. All the tests in the DEV code base related to Preact components test for a11y errors.
A typical a11y test in a component test file looks like this.
  it('should have no a11y violations', async () => {
    const { container } = render(
      <MyComponent />,
    );
    const results = await axe(container);

    expect(results).toHaveNoViolations();
  });
And when this test fails, you are presented with readable errors to fix the a11y issues.
expect(received).toHaveNoViolations(expected)

    Expected the HTML found at $('.crayons-btn--icon') to have no violations:

    <button class="crayons-btn crayons-btn--outlined crayons-btn--icon" type="button" data-testid="subscription-settings">

    Received:

    "Buttons must have discernible text (button-name)"

    Fix any of the following:
      Element does not have inner text that is visible to screen readers
      aria-label attribute does not exist or is empty
      aria-labelledby attribute does not exist, references elements that do not exist or references elements that are empty
      Element's default semantics were not overridden with role="presentation"
      Element's default semantics were not overridden with role="none"
      Element has no title attribute or the title attribute is empty

    You can find more information on this issue here:
    https://dequeuniversity.com/rules/axe/3.5/button-name?application=axeAPI
In May, I wrote an update about our usage of Storybook.
Since then, we’ve continued to use Storybook to build out design system components and some critical application components. Moving to Preact X has allowed us to finally start using some more powerful Storybook addons. I mentioned a11y testing above, so to complement this, we added the Storybook a11y addon.
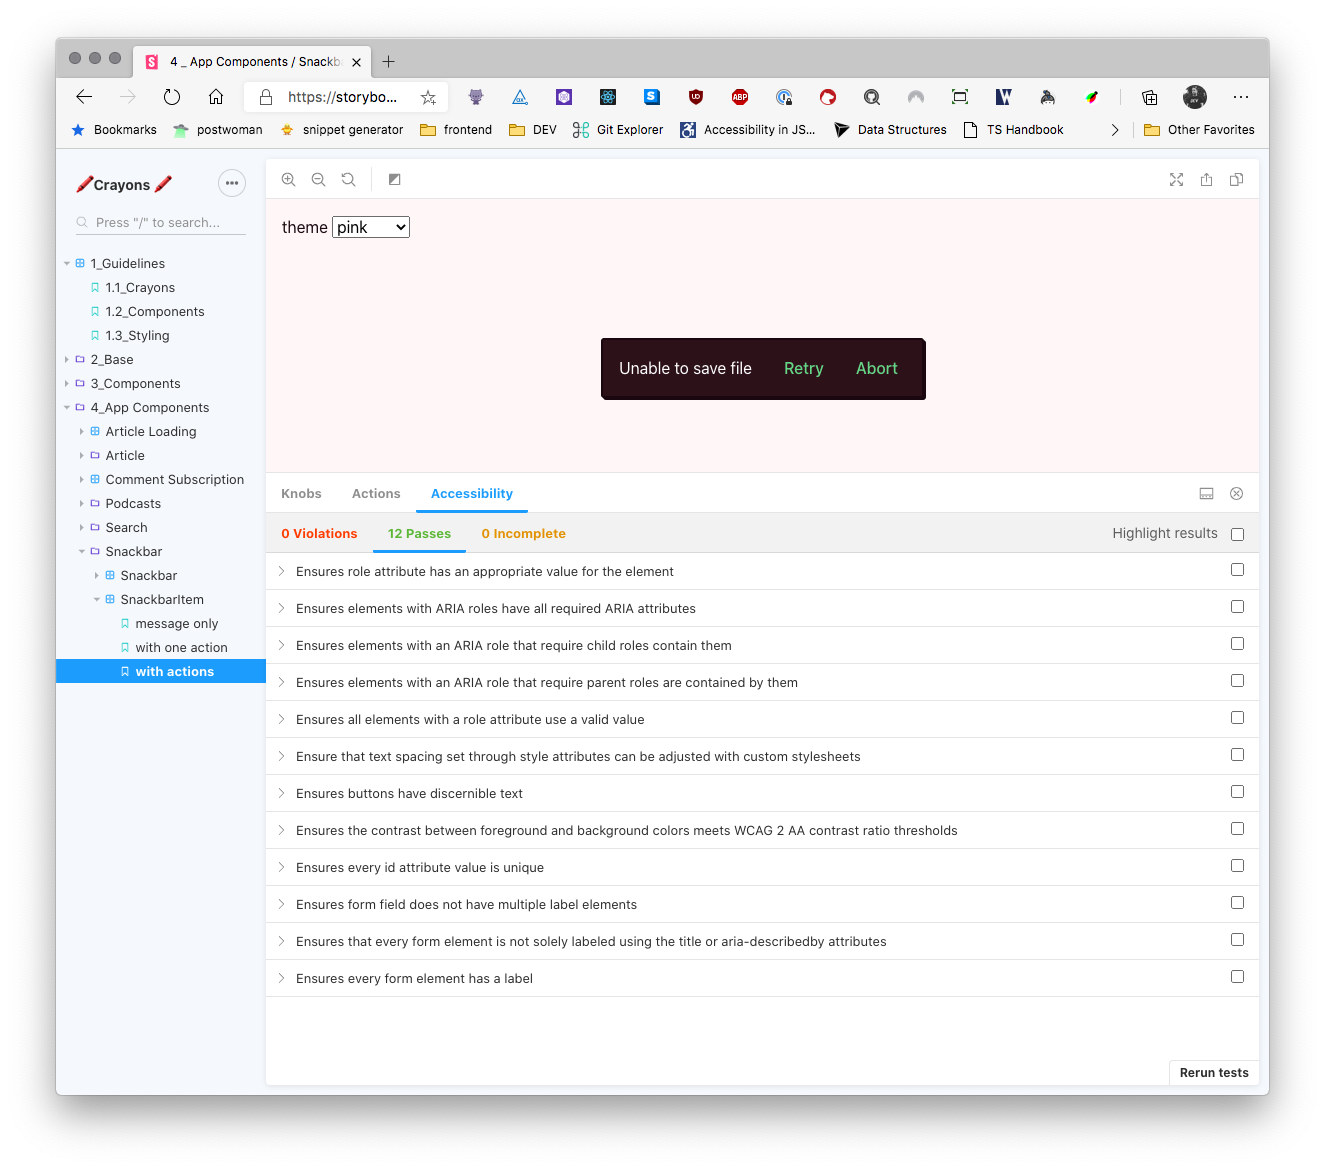
In addition to that, we have a custom Storybook decorator that allows you to change DEV themes so you can ensure you are building out things correctly for each theme we support.
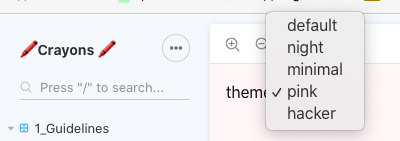
You can view DEV's work in progress Storybook here. Every merge to our main branch related to Storybook stories will deploy an updated Storybook, so what you see is always the latest and greatest. Thanks to Netlify deploy previews, you can see the Storybook related to every PR! 🔥
There are no big changes to our Jest setup, just a few tweaks. First off, as we have been testing more in the frontend, our code coverage has been increasing. So as coverage goes up, we want to avoid any drop in coverage, so we added coverage thresholds to our Jest configuration.
module.exports = {
  ...
  coverageThreshold: {
    global: {
      statements: 40,
      branches: 35,
      functions: 39,
      lines: 41,
    },
  },
...
Another super handy addition is in jest watch mode. You can now filter by a test’s name or filename.
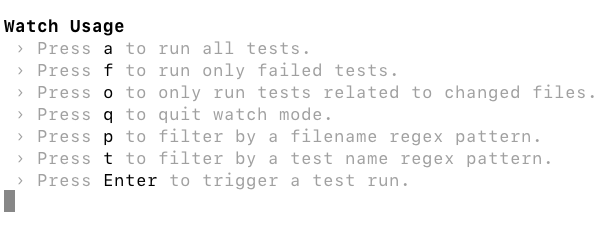

Is that all? Yes it is. Surely you jest. 😆
Previously, we were using the AirBnB Style Guide as the base for all our linting on the frontend. Although a great project, we found the rules to be somewhat rigid. We opted to go with the ESLint recommended rule set paired with the Preact recommended rule set.
Just a reminder, we use Prettier in the project, so that handles all formatting of frontend files.
A big shoutout to my co-worker @ridhwana for helping me migrate all the tests to preact-testing-library. 👏 I'm really excited about all the changes we have been making on the frontend, and look forward to continue to improve it. If you feel like contributing to the project in regards to the frontend, don’t be shy to DM me on DEV, Twitter or wherever. I’m pretty much @nickytonline everywhere. If email is your jam, hit me up at nick@dev.to.
That’s all for now folks!
]]>
If you're interested, here is the commit.
If you are new to Storybook I recommend giving this post I wrote a while back a read as well as checking out the Storybook documentation.
The TLDR is, Storybook allows you to build out components in isolation and test them visually based on the different states they could be in. Each story you write is the component in a different state.
I added some stories for some Preact components, but after that, Storybook never really got used. Fast forward to January 2020. I started working at DEV and I had some discussions with my awesome product designer Pawel, @pp, about the design system. I mentioned that Storybook was already in the project, but needed to be resuscitated. Once I got it back up and running, we started collaborating, building out design system components and some application components.
Storybook could be run locally if you had the DEV codebase but it was not deploying as part of our CI/CD pipeline. After doing some pairing with @andy this week, we got it deploying to Netlify (awesome service!) whenever JavaScript files changed on master.
Photo by Robyn Budlender on Unsplash
]]>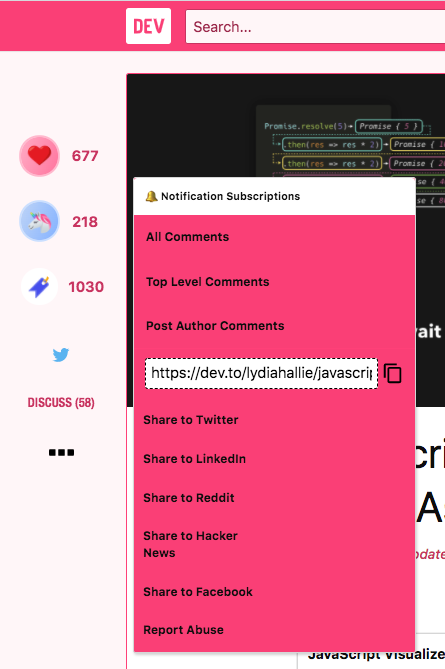
With the new comment subscription component, comment subscriptions are front and center in the discussion area of a post.
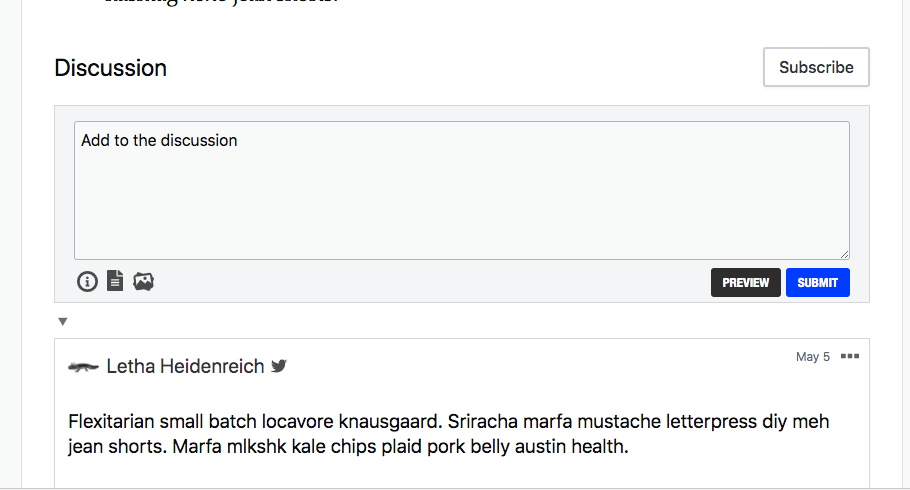
All the existing functionality still exists, it's just easier to find. 😄 You can subscribe to all comments, top comments, author comments or unsubscribe.
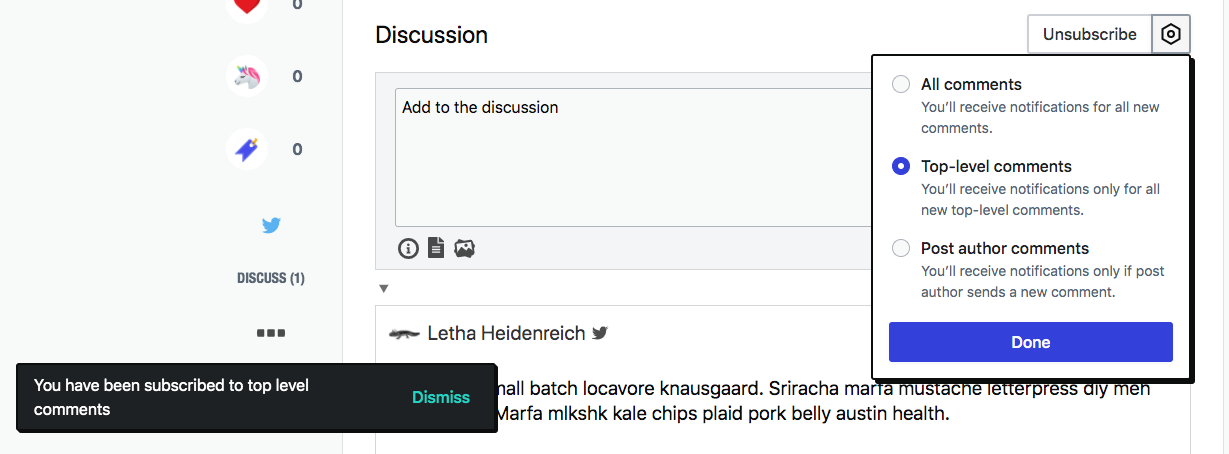
Take it for a spin to stay engaged with the posts that interest you.
Here are the PRs related to this feature for those interested.
The https://github.com/thepracticaldev/dev.to/pull/7205 repository on GitHub
I won't go into all the details as they are already mentioned in the article, but the TLDR is, by creating a site via Stackbit, you can use DEV as a headless CMS for your self-hosted site.
To get set up, you can follow these instructions that Ben references in his post.
The only difference nowadays is the initial instruction. You can start the process of creating your site from the Settings/Integrations section on DEV for your account.
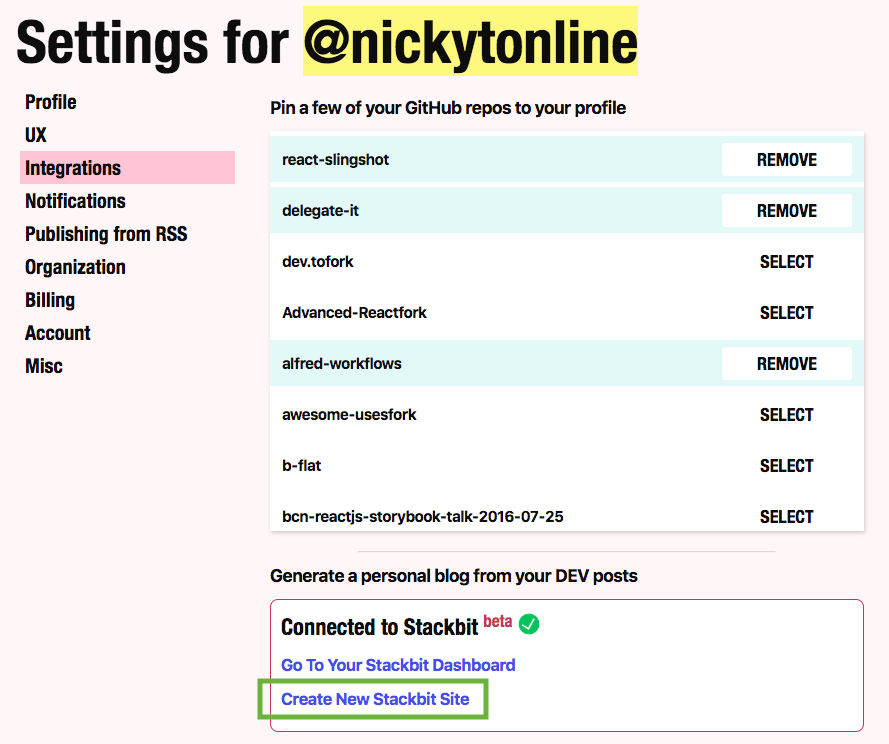
Since my previous site was a Gatsby site, I decided to generate a Gatsby site using Stackbit and went with the Fresh theme.
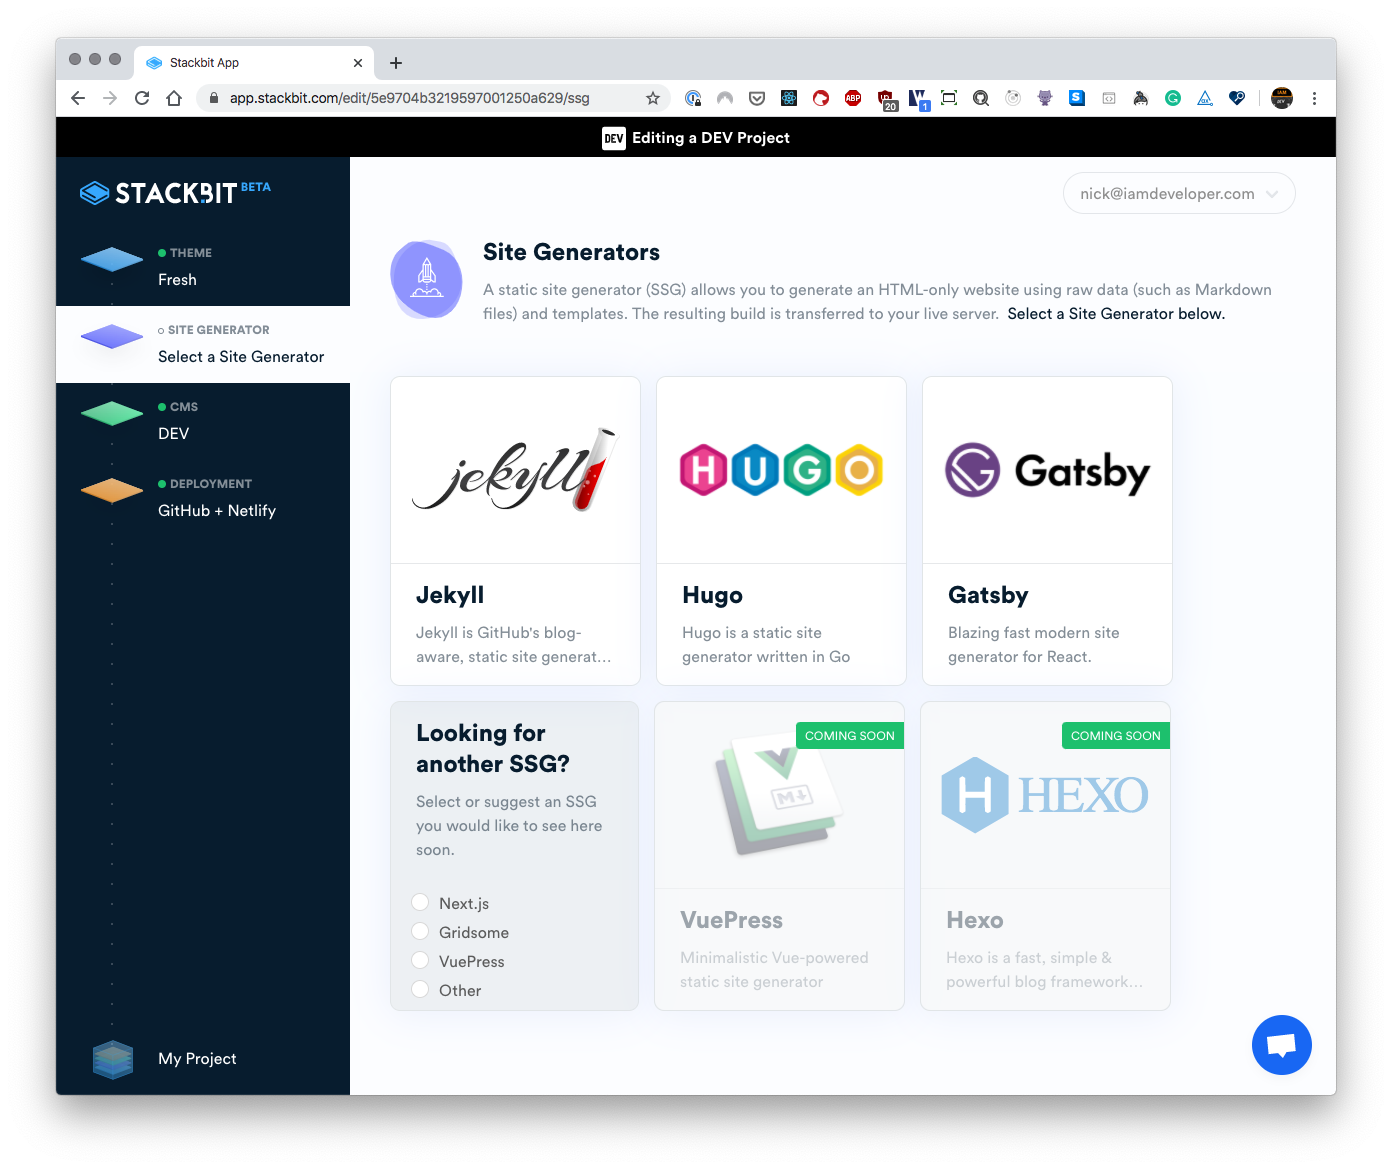
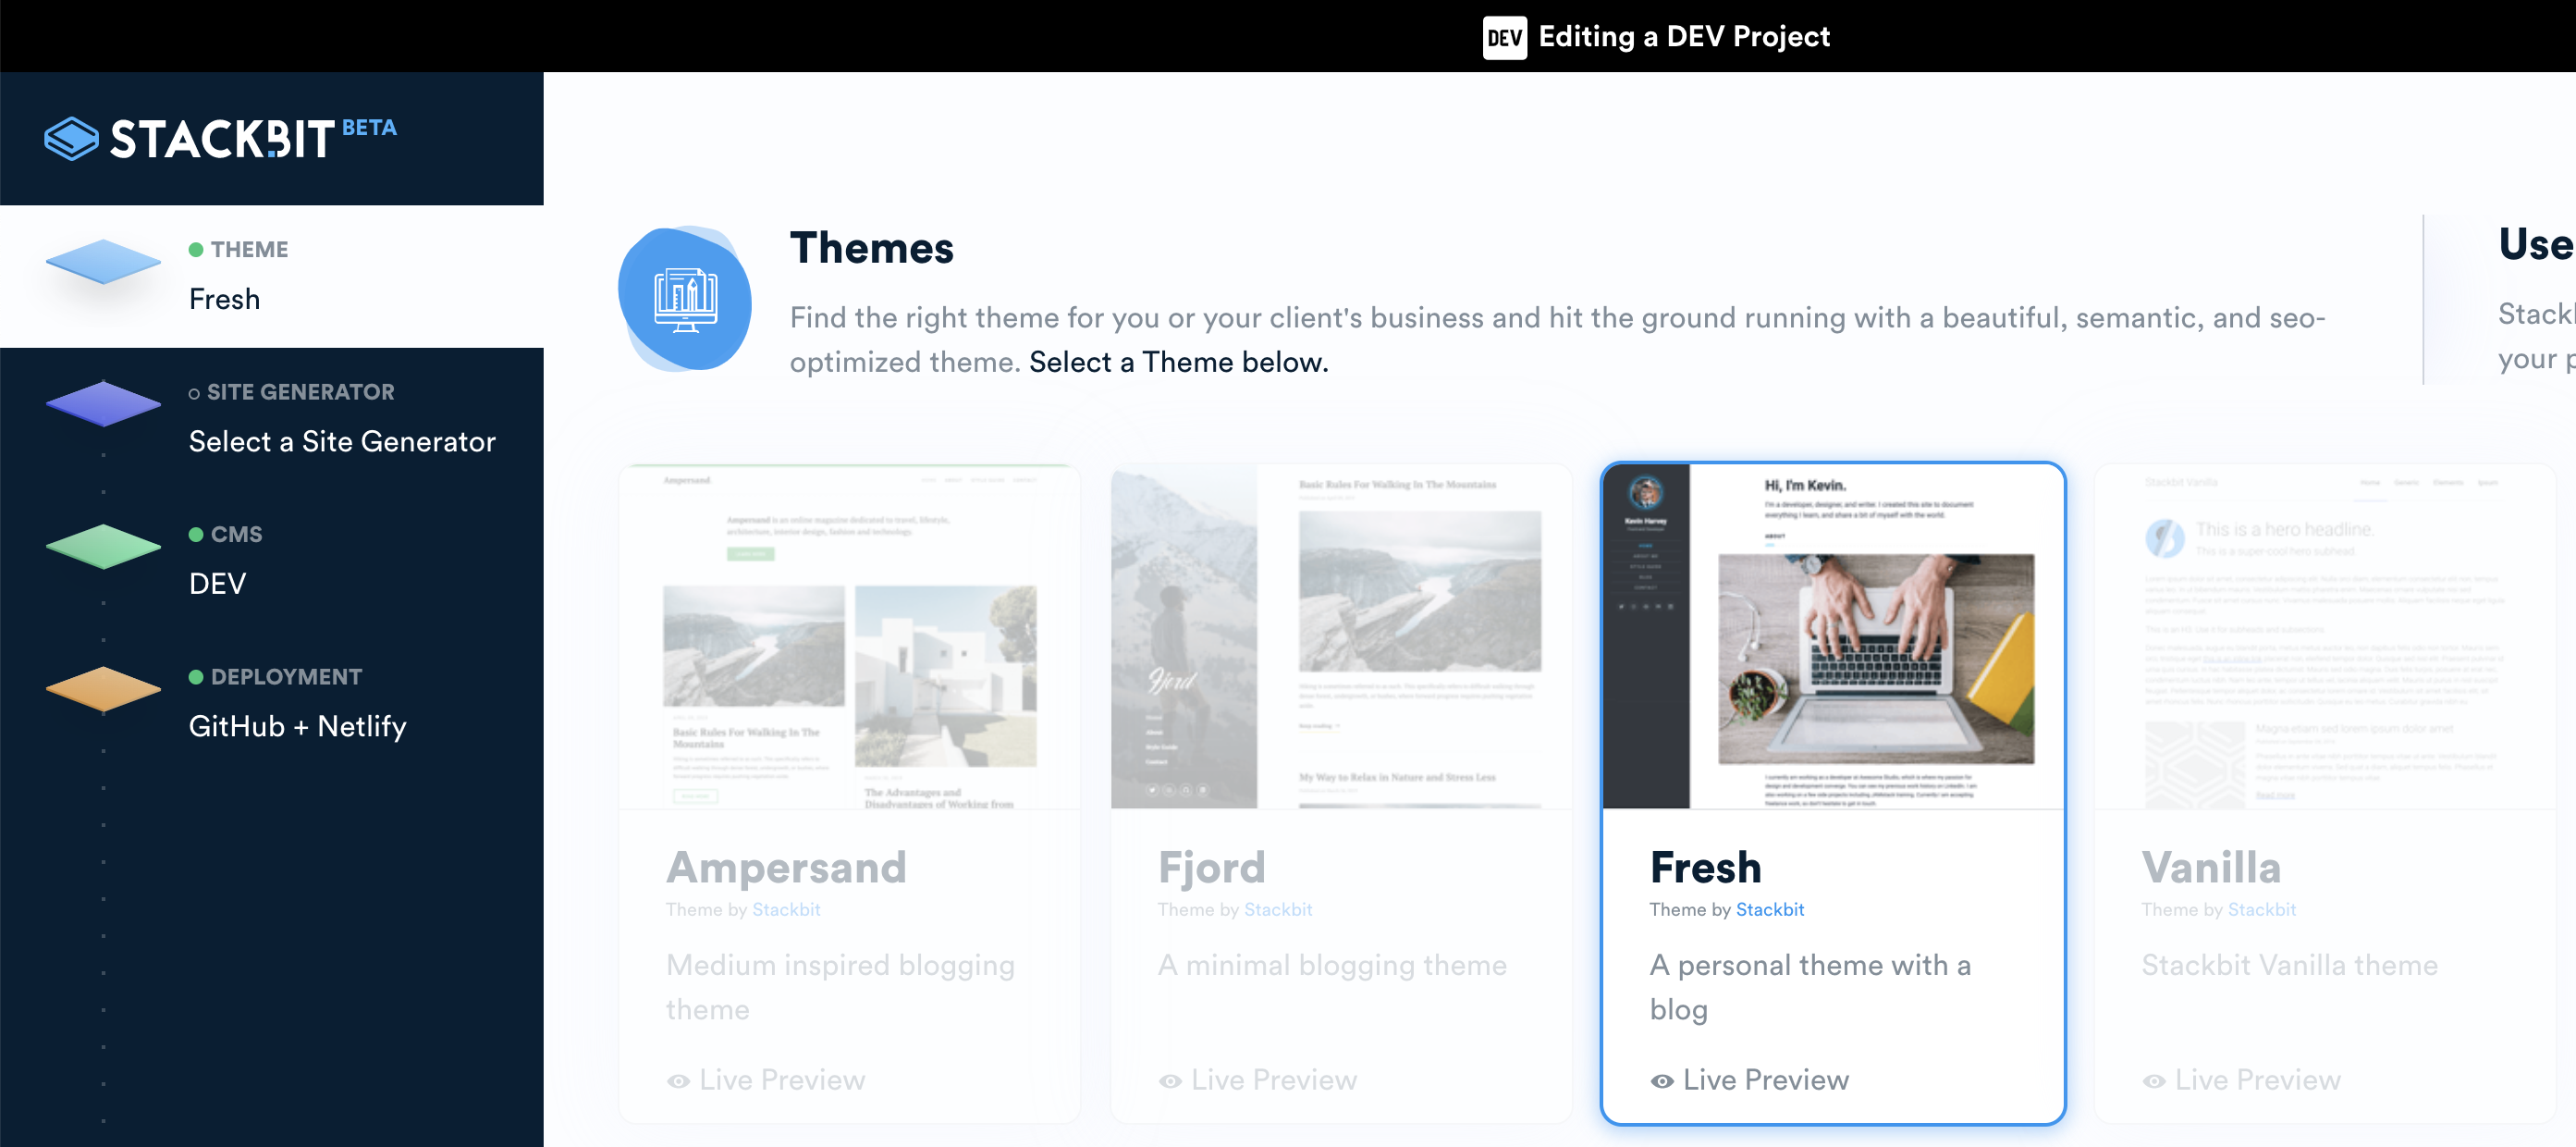
And then within about a minute, I had my new site, built and deployed to Netlify at https://robust-petunia-478cc.netlify.com.
The https://github.com/nickytonline/robust-petunia repository on GitHubMy actual website is https://iamdeveloper.com, so at that point, I just configured my site in Netlify to point to iamdeveloper.com.
So why did I decide to do this if I already had a website running Gatsby with my blog posts? For several reasons.
I ran into some a11y issues which may have been related to the template I chose, but if you look at my commits, you can see where I fixed some things. As well, there were a bunch of Gatsby plugins that I added back from my old site that I required, e.g. sitemap, Google Analytics.
I'm going to continue dogfooding the Stackbit/DEV integration because I know it will only get better. @remotesynth, I would love to do anything I can to help improve it. My DMs are open on DEV and Twitter.
I definitely recommend you give it a try, especially if you currently do not have a personal site.
That's all peeps!
]]>It felt very natural live-coding. I talked to my audience pretty much the whole time. Thank you to the 12 people that watched. 👏🏻 My colleague @maestromac was kind enough to jump in on the chat to say hi.
We're in the second week of our development cycle at DEV, so I was working on building out some Preact components to build out our new comment subscription component.
I haven't decided on the frequency of live-coding yet, but I'm hoping to do it at least twice a week.
The rest of this article will assume you are on macOS, but I imagine the process is pretty much the same.
If you are new to streaming like me, the defacto tool appears to be OBS Studio.
Before installing OBS, ensure that Twitch is set up correctly. Assuming you've created your Twitch account, navigate to your channel settings, e.g. https://dashboard.twitch.tv/u/nickytonline/settings/channel
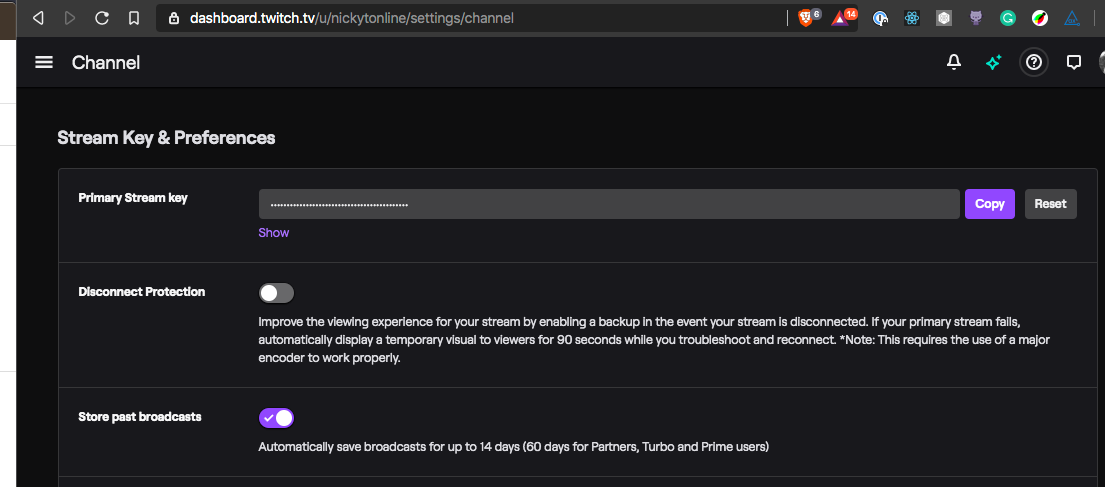
Two things to note here. One, you will need to copy the Primary Stream Key. This is required for OBS so that it can stream to Twitch. The other thing to note is that Store past broadcasts should be enabled (assuming you want to save your broadcasts). I forgot to do this initially. Since most will have a free account, broadcasts are stored for up to 14 days and then scrapped.
Once OBS is installed, go to the OBS preferences and add your Twitch Primary Stream Key.

When you load up OBS you are presented with a blank scene. The scene is what you will use to place your webcam in the stream as well as your display output. You can add a lot more to it, but let's keep things simple.
If you are going to stream, you absolutely need a second monitor. I run OBS on my laptop screen and the display capture is my external monitor. If you're interested in my setup, check out my uses page.
I got everything set up but noticed my display source in the scene was completely black. I was Googling to see if it was a macOS version, a hardware issue, etc.
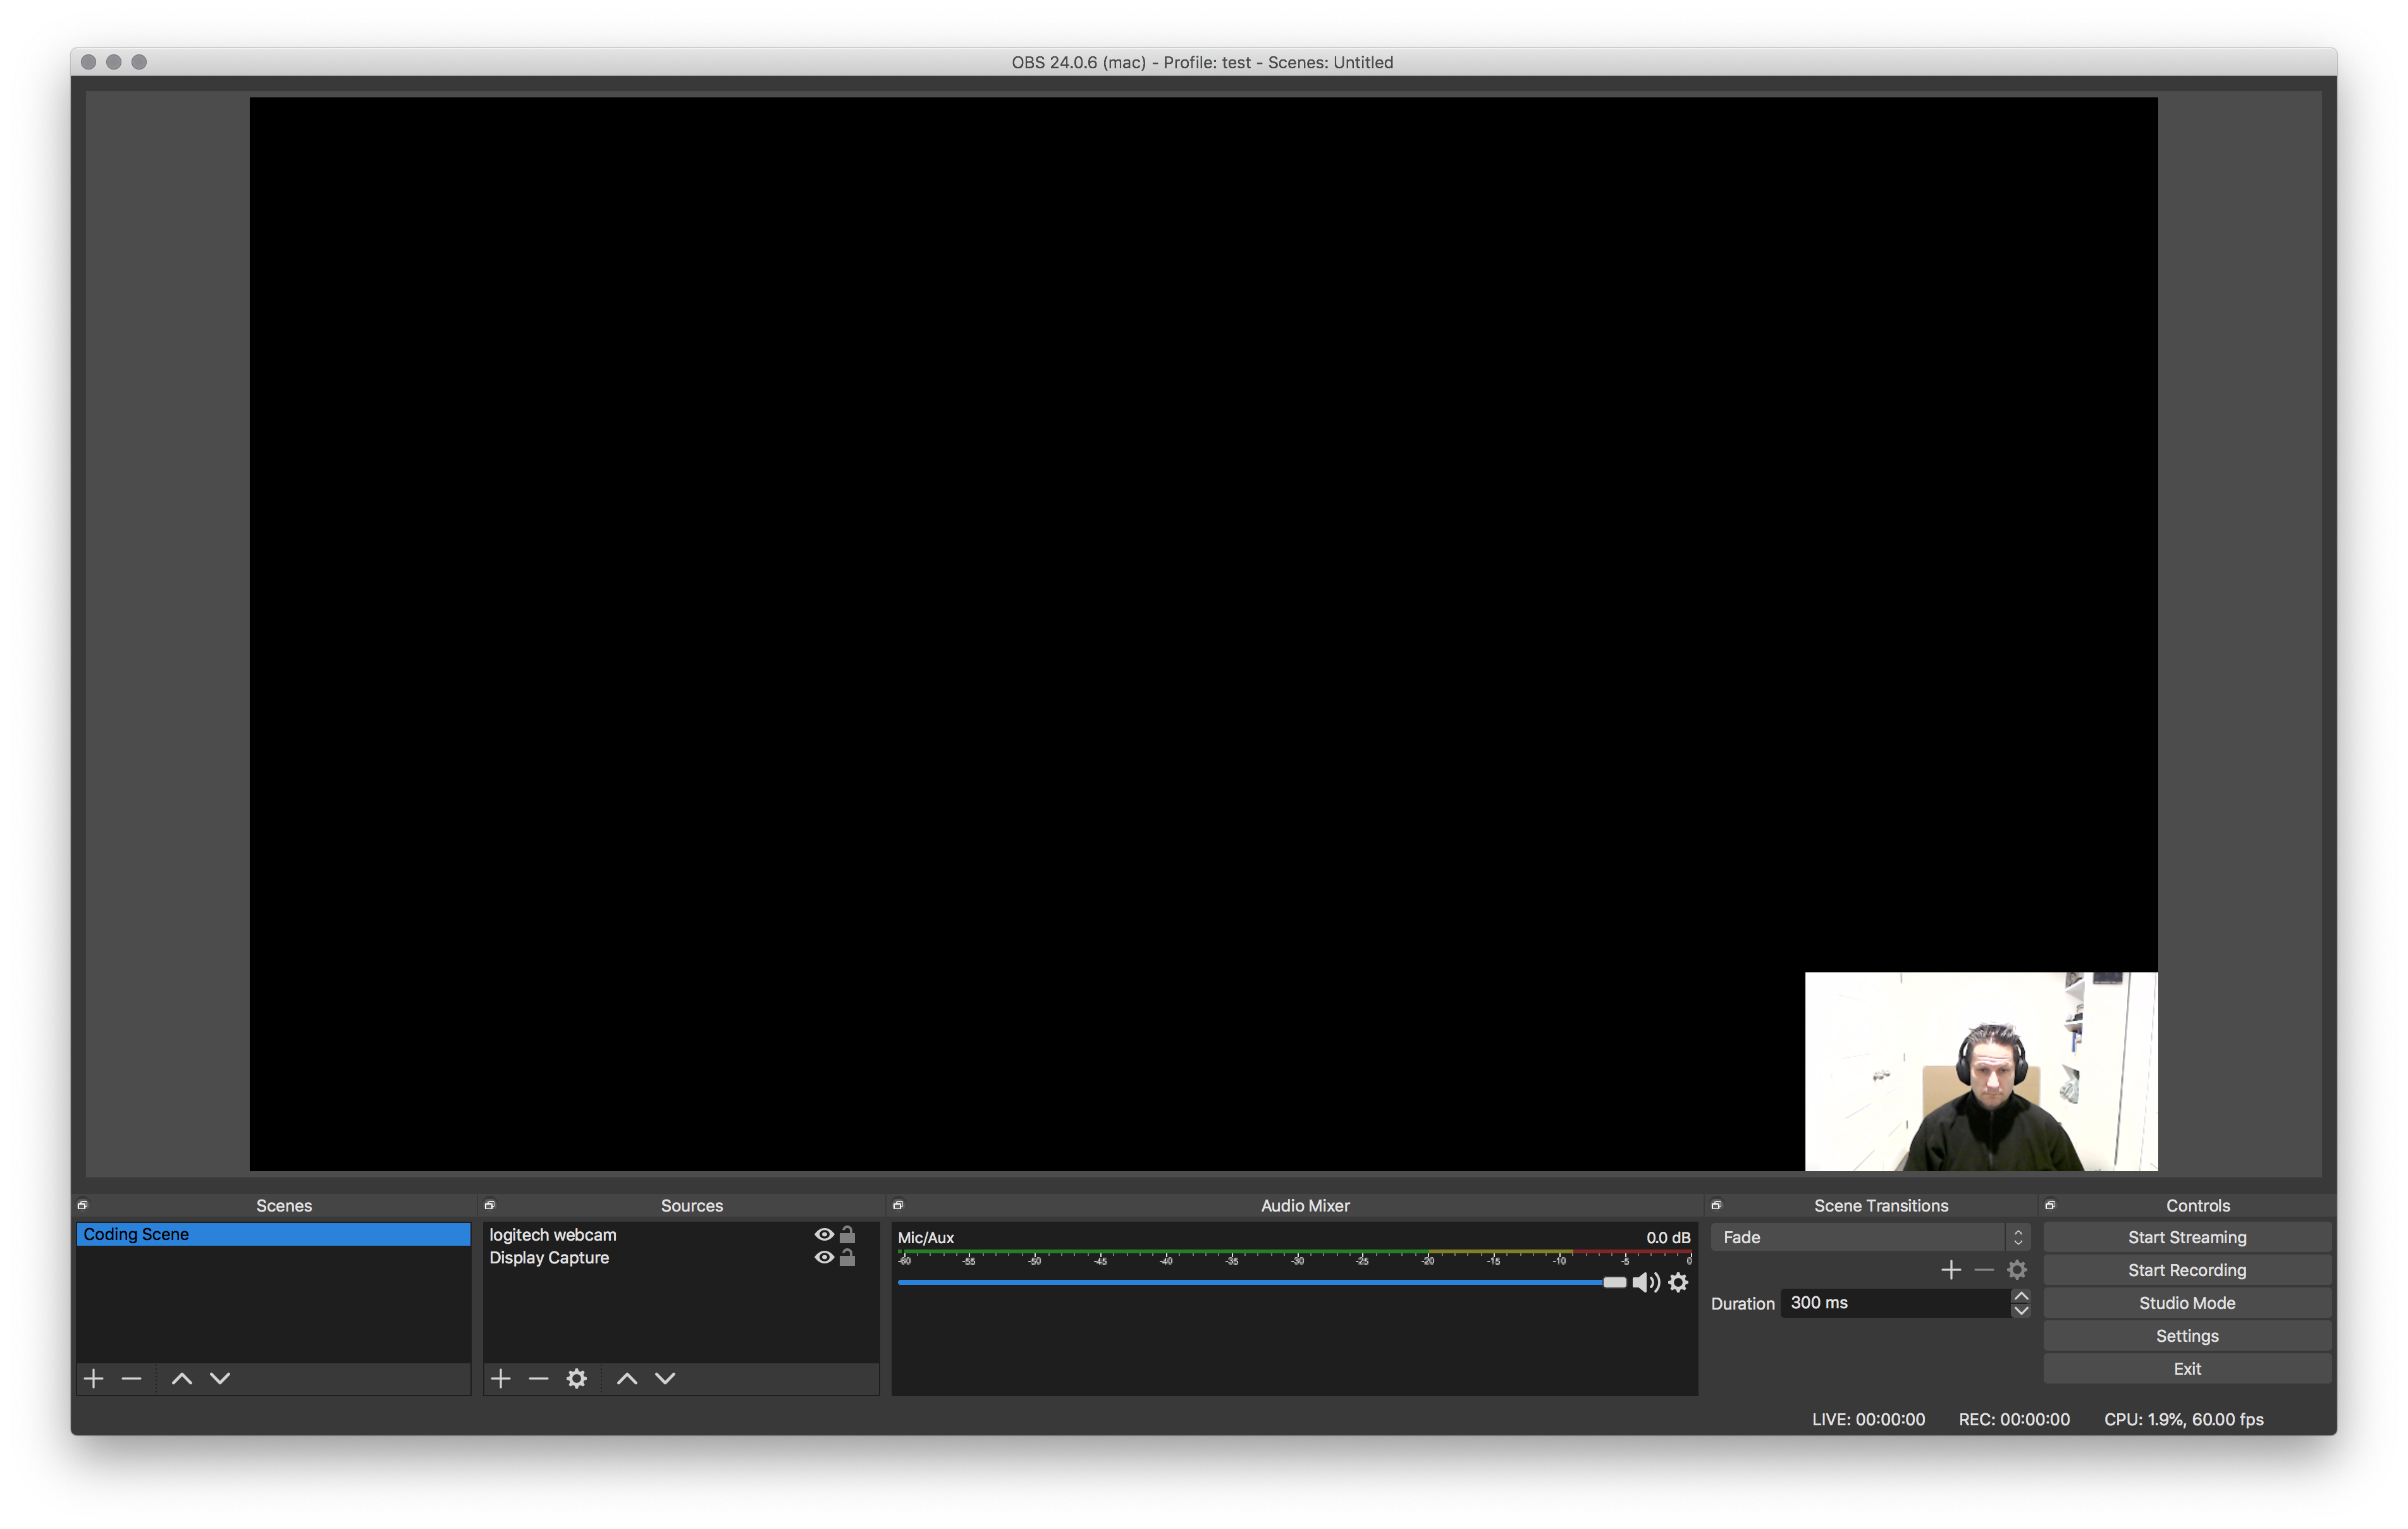
It turns out it was just a setting in the Security & Privacy system preferences. Ensure that OBS has access to Screen Recording.
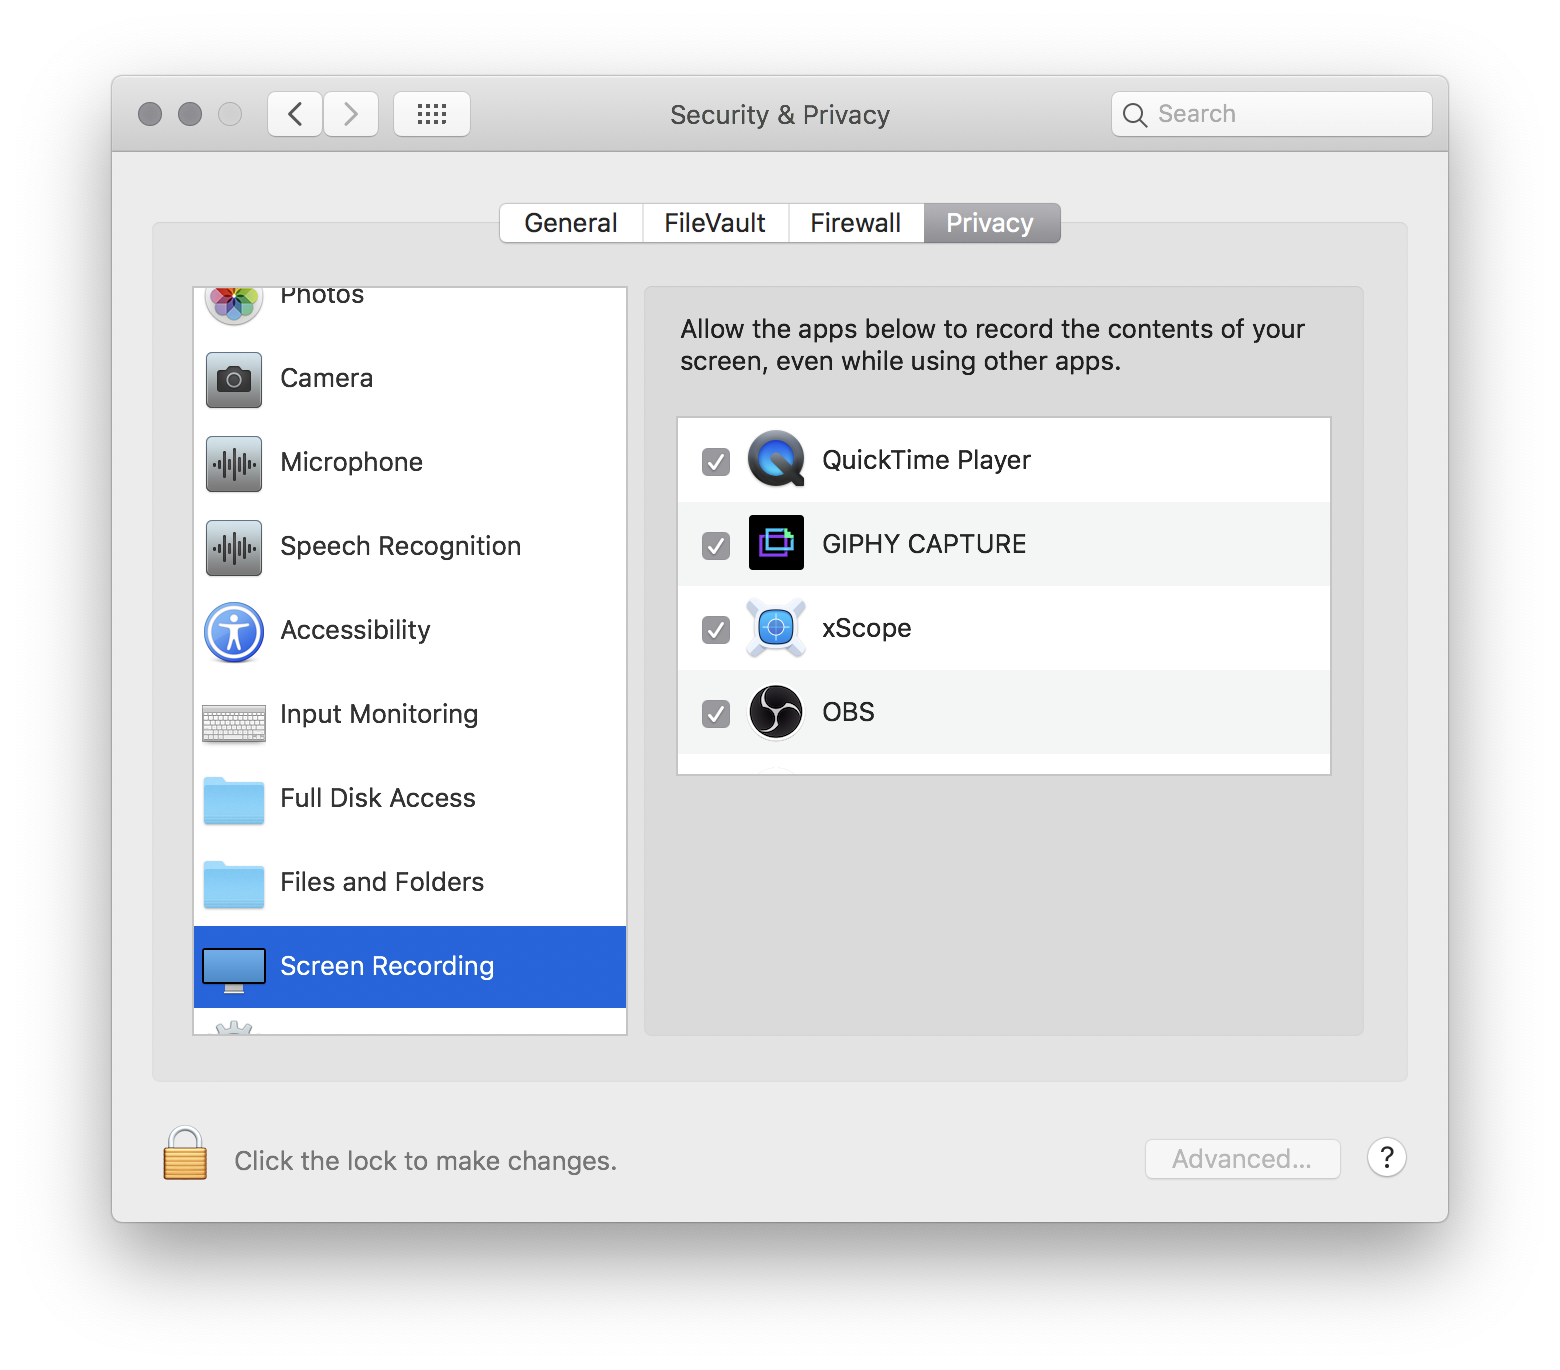
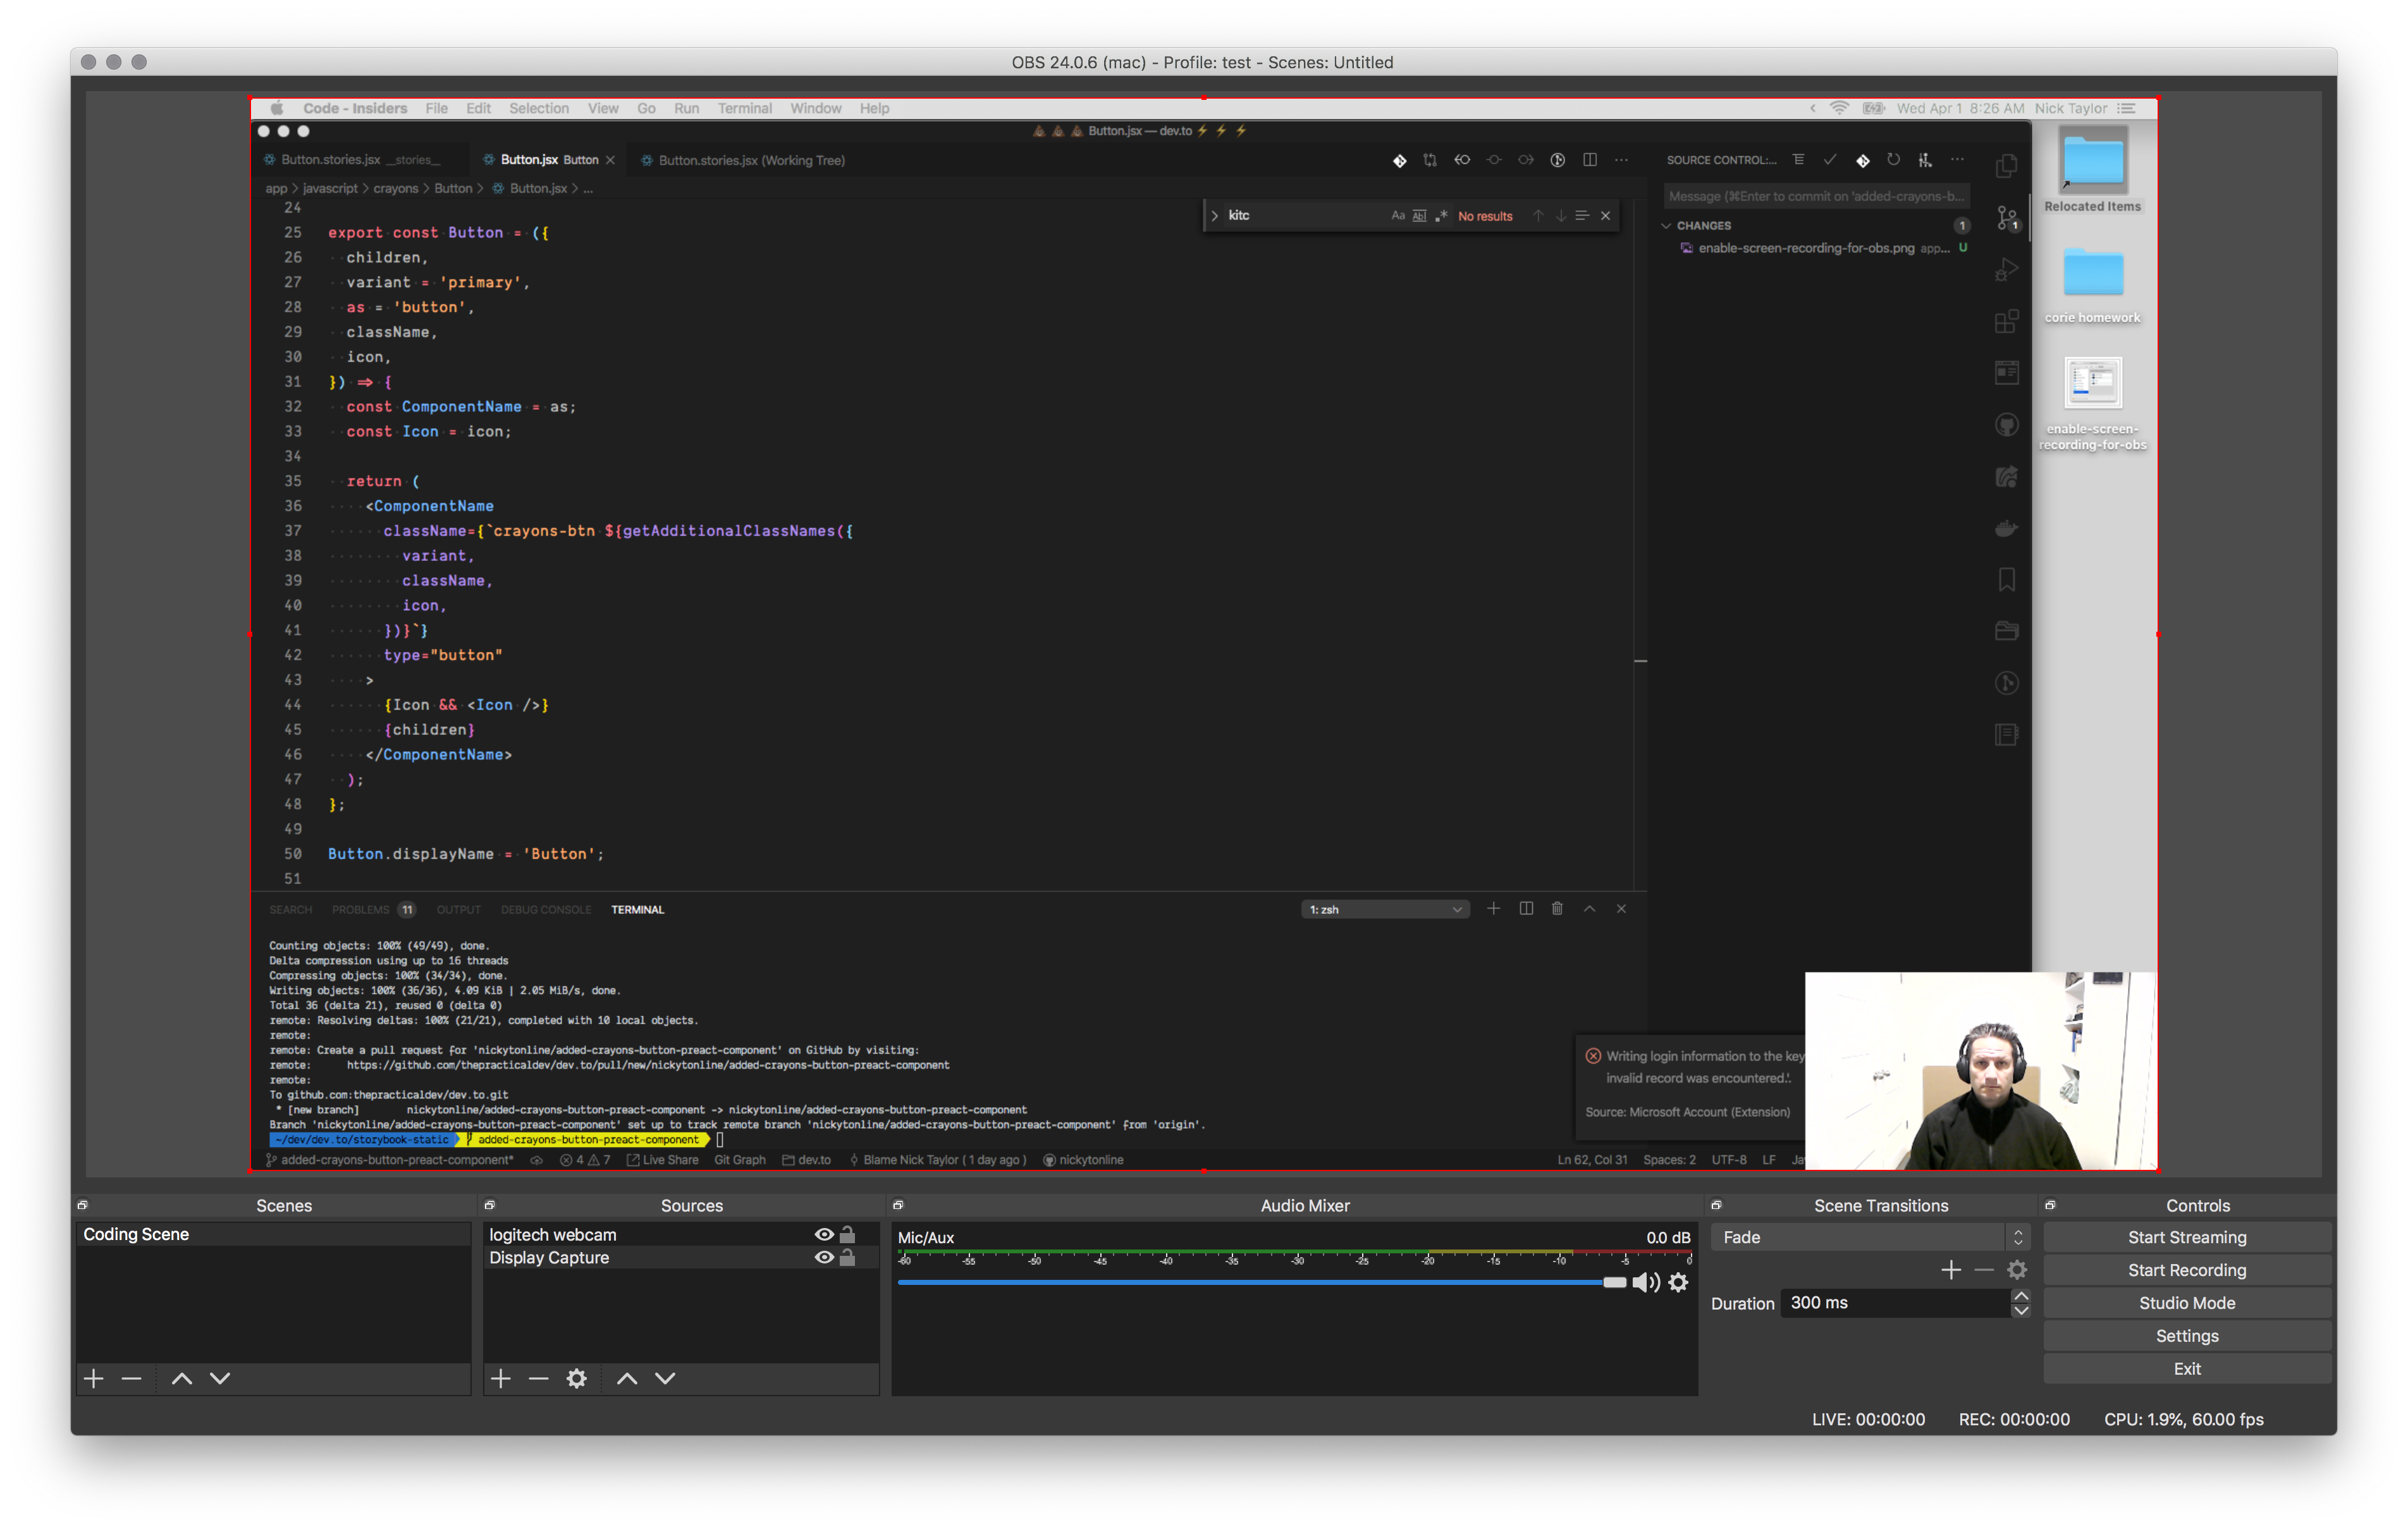
From there as soon as you are ready to stream on Twitch, simply click the Start Streaming button in the Controls section at the bottom right of the OBS window.
Happy streaming!
UPDATE APR 3, 2020:
]]>Thanks for everyone who popped by the stream today!
— Nick Taylor (he/him) (@nickytonline) April 3, 2020
I've pretty much decided on my streaming frequency. I'll be streaming Monday-Friday 10-11am Eastern. Enjoy the weekend peeps and see you Monday. 👋🏻 https://t.co/SsZbl7rQ9V
If you're not familiar with webpacker, I encourage you to check out the project. The TLDR though is that it's a Ruby gem that makes integrating webpack bundles into a Rails app very easy.
The https://github.com/rails/webpacker repository on GitHubThe upgrade opens up a lot of things that were being held back by the webpacker 4 upgrade. With the upgrade, we can now do the following:
Another benefit of the upgrade is faster builds in the frontend.
I won't bore you with the details of the upgrade process as they are documented already in the webpacker repository.
The issues that I ran in to during my initial attempts were false negatives. DEV, for those who aren't aware, uses Preact in the frontend, not React. Why do I bring this up? One, for awareness, but also because the issues I ran into were related to running an older version of Preact (we have a blocker for upgrading to Preact X) that was not compatible with the React DevTools.
Because the tooling was not compatible, it was creating weird UI issues when the React Devtools were running. In some cases I saw components twice, in other cases I received errors about root something something. In the end, with a clear head this week, I realized that was the issue and was able to get it all sorted.
For those interested, here is the merged PR.
That's all for now peeps!
Photo by Sebastian Herrmann on Unsplash
]]>
For those of you that don't know me, my name is Nick Taylor, a senior software developer from Montreal, Quebec, Canada. 👋 You can find out all about me on my site, iamdeveloper.com which I cross-post to DEV.
Aside from DEV, you can also find me on GitHub, Twitter and Instagram as @nickytonline. I also run the Twitter handle @vscodetips.
Over the years I have worked in many different kinds of places. From a social media platform, to e-commerce, fintech, security, AI startup land, and most recently the film/VFX industry.
The majority of my career has been in the .NET ecosystem in some full-stackish capacity, but I have always loved JavaScript, so I made a conscious decision to switch to the frontend back in 2016. You can read a bit about that in one of my rare career advice posts.
I love this community and have been a code contributor and content creator on the platform for quite some time now. I also moderate a couple of tags.

One of the many things I love about DEV is that the team interacts with the community. I give you exhibit A.
Some fun facts about me:
In my role at DEV, I'll be focusing primarily on the frontend (although I wouldn’t mind getting my feet wet in some ruby), building out new features, improving the codebase and interacting with and learning from all the lovely humans on this platform.
That's all folks! Super stoked!

P.S. I made this very expensive short film to accompany my announcement that I'm joining DEV. If you’re viewing this on mobile, it’s best viewed full-screen in landscape mode. And the Oscar goes to...
defaults write com.apple.Dock autohide-delay -float 1000000
I use Alfred and that basically gives me all I really need in terms of opening apps and then I can use ⌘ + TAB to switch apps.
I also do not really use the touch bar except for mapping it to function keys (F1 - F12) when I have a browser open or VS Code.
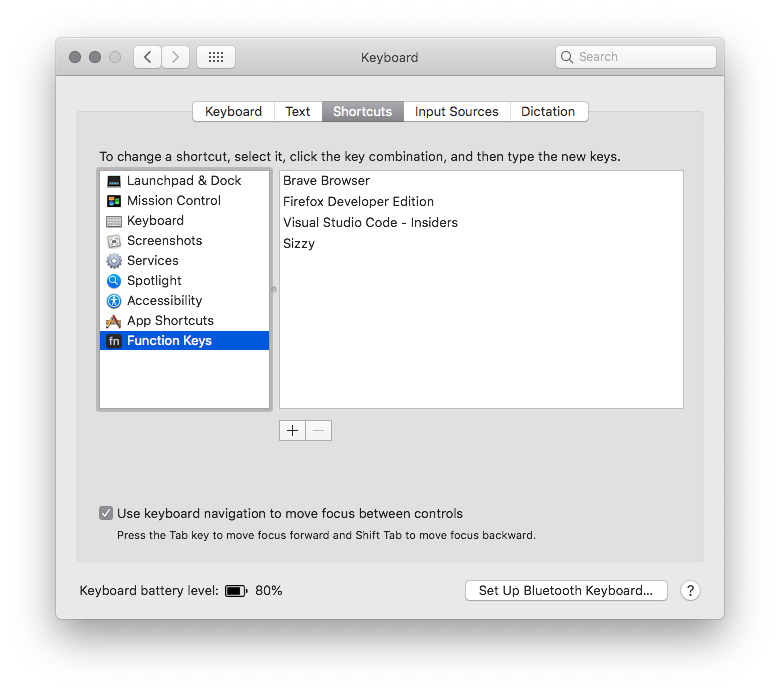
Having said that, I came across a very interesting project a few weeks ago called Pock that lets you put the Dock into the touch bar. This combined with "permanently" hiding the Dock makes the touch bar more useful for me. If I'm honest, it's just to see if I have a Slack notification, but that alone is worth it.
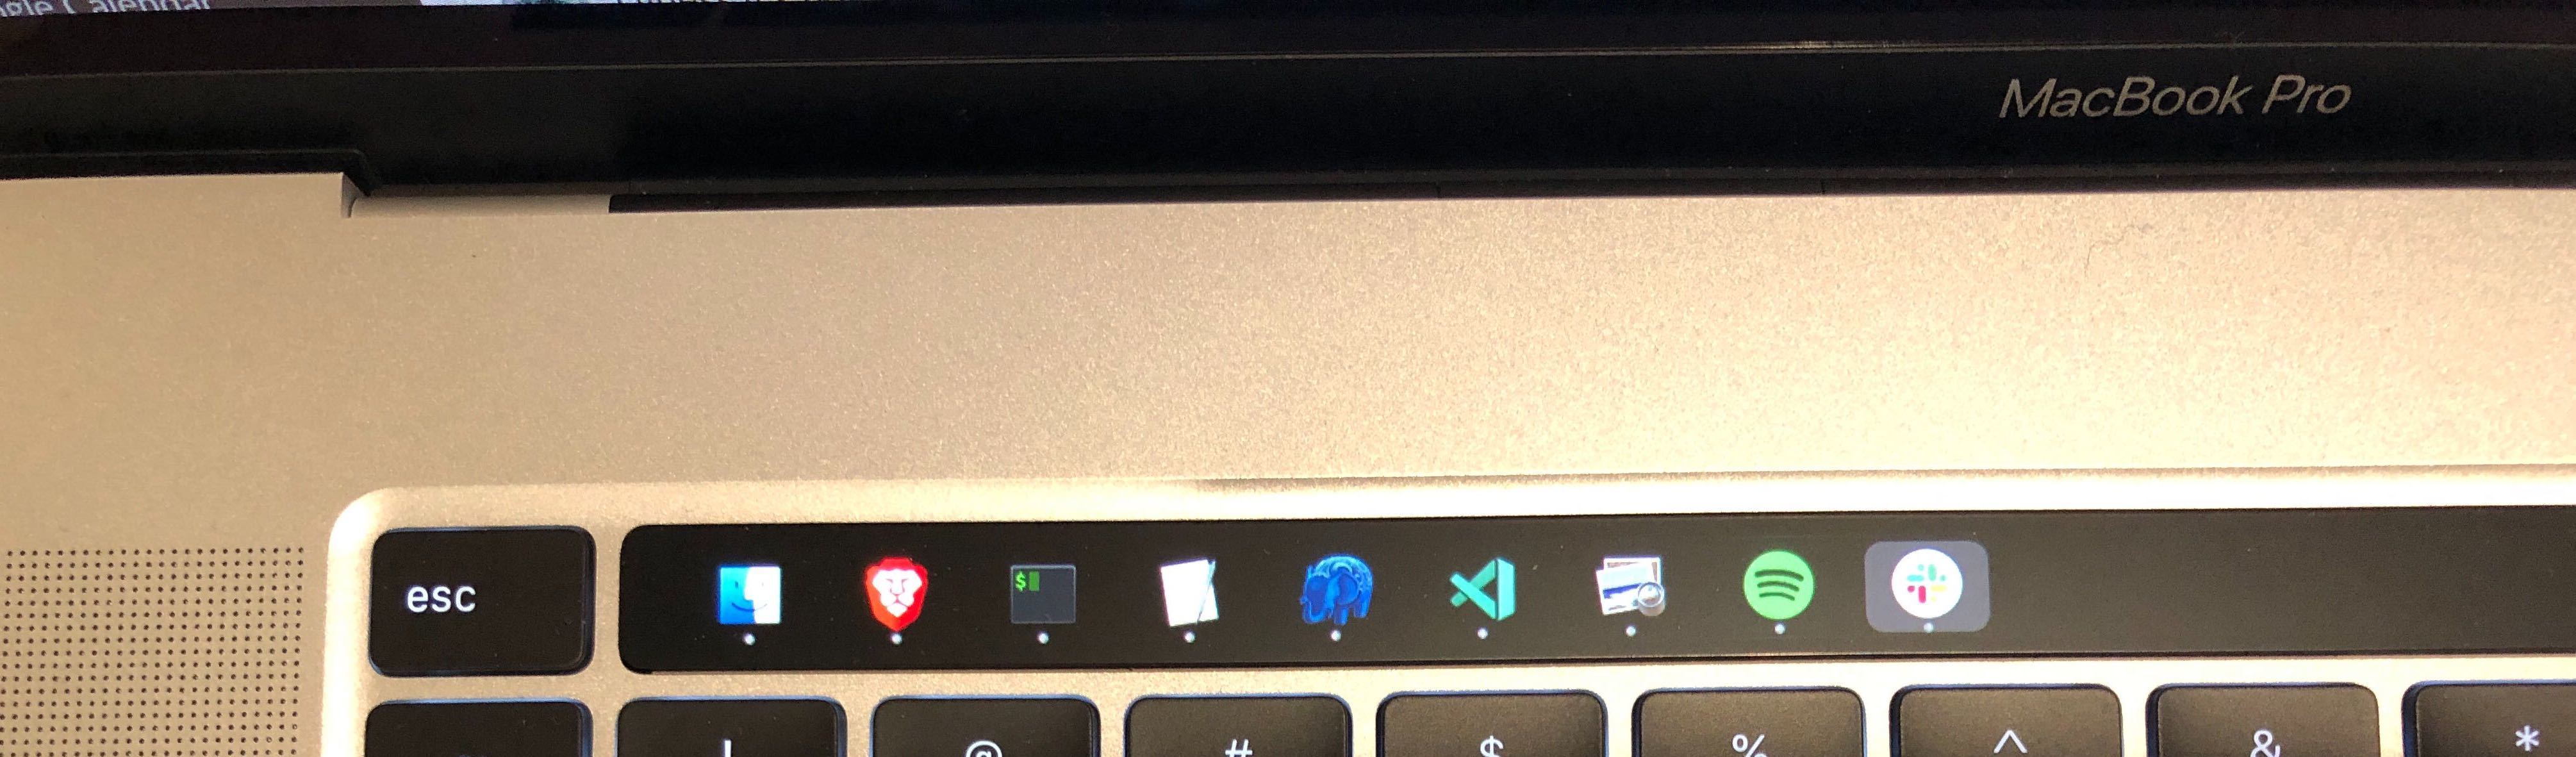
Photo by ian dooley on Unsplash
]]>I've been using @unDraw_co for illustrations on my site and changed them up tonight. I like the little round creatures that have been added. I give you exhibit A, https://t.co/xImfXLn5Po pic.twitter.com/L3rsEXDvOd
— Nick Taylor (he/him) (@nickytonline) January 5, 2020
I was updating my personal site the other day and thought, why don’t I write about some of the tech I’ve been using, some tools I use in my day-to-day as well as other resources that I use, even if they aren't everyday "go-to"s in regards to frontend. I've also popped in some resources that I think will just be helpful.
Let's get to it!
I use Netlify on the free tier to host my site. They offer a great service and it integrates well with GitHub and continuous integration. I am not cheap, it is just that at the moment, I do not need more than the free tier. I actually went over my build minutes last month and paid a small fee, so now that they have my credit card... 😆
I wrote about automating my deployments to Netlify here. 👇
Note: Zeit is amazing as well. I just happen to be using Netlify.
I have not used this on a project yet, just the Lighthouse audit tools in the browser, but Lighthouse CI looks pretty amazing. Integrate Lighthouse audits into your continuous integration (CI).
The https://github.com/GoogleChrome/lighthouse-ci repository on GitHubThis site is amazing if you're looking for some quality illustrations in SVG or PNG format. Katerina Limpitsouni, who created undraw.co has done some fantastic work. She's not on DEV, but give her a follow and undraw on Twitter.
I am not an accessibility expert (so many things in the frontend! 😆), so tools like the ones below are super helpful. Someone who knows quite a bit about this topic though, is Lindsay Kopacz (@lkopacz). Definitely a great follow.
This is a great accessibility visualization toolkit that was started by Jordan Scales while he was working at Khan Academy.
The https://github.com/Khan/tota11y repository on GitHubFun fact, I converted it to a Chrome/Firefox extension for those interested.
Deque's axe browser extension is another great one. It is available for Chrome and Firefox. It's great for finding accessibility issues in your app.
WebAIM's WAVE browser extension is great as well for finding accessibility issues in your app.
@wesbos has great courses. He teaches things so well and in a fun way. cssgrid.io is a great course for learning CSS grid that Mozilla sponsored, which is how Wes was able to make this course free. I highly recommend it. Note to self to go through this course again.
Wes at it again with another great free course. Check out JavaScript 30 to up your JavaScript game with fun little projects.
I purchased Every Layout while on sale last year, but the site content is all free. Andy Bell (@hankchizljaw) and Heydon Pickering do an amazing job.
There are tonnes of sites out there, so I'm just going to drop a few since this post is already an 11 minute read LOL.
I do not know the list of all CSS triggers by heart, so CSS Triggers is a great resource.
Also, speaking of CSS Tricks, here's a short but quick explanation by Chris Coyier (@chriscoyier) about CSS triggers.
One that I revisit every now and then is JS Katas, previously called ES6 Katas. This is a great way to keep your JS skills fresh.
This is a great genre of learning. There are paid resources, but a couple of notable free ones are:
All the below resources can be found at Stephanie's web site.
This one, I will admit, is probably overkill for my personal site which is currently pretty much just a blog, but at my current job, we're not using TypeScript, so I decided to keep my TypeScript skills fresh by using it.
Having said that, I've worked on several large projects using TypeScript and can 100% say, it allows for quicker refactorings, discoverability and avoiding silly errors. I have a mini-series on TypeScript for those interested.
If you've been on the fence about TypeScript, consider giving it a try in 2020. There is a huge ecosystem of types now and a lot of the popular frameworks either provide out of the box support or pretty easy setups to get going with TypoScript:
npx create-react-app my-app --template typescriptThere is also TSDX, which is some fantastic work by Jared Palmer (@jaredpalmer). It's a great bootstrapping tool for TypeScript for different types of projects and it's officially endorsed by the TypeScript team.
The https://github.com/jaredpalmer/tsdx repository on GitHubAnd you know what? If you're still not a fan of types, that's OK. 😺
Philip Roberts talk at JSConf EU "What the heck is the event loop anyway?" is a great explanation of the event loop.
This is definitely a great watch for those looking to understand JavaScript's event loop building off of Philip Robert's talk above.
Jake also has a great blog post about Tasks, microtasks, queues and schedules.
Storybook is such a great tool for building components and design systems. It started off as a tool just for React and since then has expanded to all the major frameworks as well as plain old HTML. Check out learnstorybook.com.
I will be the first to admit that I have not done a lot of work with animations, so I tend to Google stuff a lot when it comes to this space. Two gentleman that are experts in animation though have a great podcast and YouTube channel where they rebuild animations. The Keyframers is an awesome collaboration by @davidkpiano and @shshaw.
One of my favorite @keyframers episodes this past year:
— Shaw (@shshaw) December 31, 2019
Animating a chocolate button with clip-path!
🎥https://t.co/tqQU9rrT7v
What was your favorite episode or animation?
I still have many episodes to watch and to learn from.
A newer frontend tool out there that looks really interesting is VisBug. I tried it out briefly, but I must admit, I have not dug into this too deep yet.
This is the handy work of Adam Argyle.
Update January 8th 2020: Adam Tweeted back to me that you can launch tota11y from VisBug. Cool stuff. Thanks Adam!
great article!!
— Adam Argyle (@argyleink) January 8, 2020
btw, you can launch tota11y from visbug, it'll proxy run it so you dont need both installed 👍
- in the search box, type "/tota11y" to invoke the plugin
- close visbug (since it competes with tota11y)
- rejoice and accessibility inspect your heart out
Note: This browser extension is currently only available for Chrome.
This might sound like an obvious tool, but I have worked with people who do not use them that much.
Someone that knows these tools well and that I highly suggest you follow is Umar Hansa (@umaar). He is on DEV and has no activity, but links in his bio can lead you to other places to find him on the web. He has a great newsletter for dev tips, that I highly recommend subscribing to.
What's going on with your web requests? Looks like there is a traffic jam. These tools have your back:

Josh Comeau is a talented frontend who currently works for Gatsby. He Tweeted during the holidays some other great open-source/free resources that I suggest you check out. Here's the Tweet thread. He's also a great follow.
Happy New Year!!
— Josh W. Comeau (@JoshWComeau) January 1, 2020
I know many of you work on side-projects, projects where you don't have the benefit of a product & design team. I'm betting a bunch of y'all have goals to create something new in 2020!
Thought I'd share a thread with all my favourite resources:
Emily Freeman (@editingemily) started this in I believe 2017. Lots of great articles on JavaScript. It's a new January, so check out javascriptjanuary.com.
DEV has so many great posts from people from all over the globe in regards to frontend. I'll share some that I love, but definitely navigate around. So many great ones.

Lydia Hallie's (@lydiahallie) posts on JavaScript
All of these JavaScript Visualized posts by @lydiahallie are also amazing 🔥🔥🔥
— nader dabit (🧱, 🚀) | sha.eth | nader.sol (@dabit3) January 3, 2020
JS Enginehttps://t.co/dcroyzRf12
JS Event Loophttps://t.co/tRNpJS5DGp
JS Scope (Chain)https://t.co/CF4LluhXeX
JS Hoistinghttps://t.co/TVg3lBqhAm https://t.co/gex16Fu0Ou
Michael Chan's React Holiday Series

This falls under the obvious category probably, but it's worth mentioning it since it is open-source.
This has been my go-to editor for work-related stuff since believe it or not 2015. Back in 2015, I was working on a product for an e-commerce company and TypeScript was to be used in the frontend. At the time, VS Code was the only editor to have TypeScript support. Back in 2015, there were no extensions for VS Code. It was only about a year and a half later that extension support was added. Since then, the extension ecosystem has exploded.
A great addition to the ecosystem has been the Live Share extension pack. This is such a great way to do pair programming. 🍐
📣 Live Share sessions work best with a real-time chat going alongside @code. If you want something simple to start collaborating, you can grab the Live Share extension pack (https://t.co/6jpLIkLi0w) and get integrated text and audio chat, without _any_ extra tools or sign-ins 🙌 pic.twitter.com/EgZrL0O0nI
— Jonathan Carter (@LostInTangent) December 18, 2018
If you're interested, it is a little outdated, but here is my VS Code setup. These days, I roll with Sarah Edo's Night Owl theme and the wonderful font, Dank Mono (yes I paid for it, but it's nowhere near the price of Operator Mono).
I created the @vscodetips Twitter account back in September 2017. People seem to enjoy the tips I post or things I retweet related to VS Code. If VS Code is your jam, consider giving it a follow.
VS Code tips is also on DEV, but I have not done much there yet. You can check out the profile here
Refined GitHub is not frontend specific, but a lot of us use GitHub for work. It's a great extension available for Chrome or FireFox. The Chrome extension also works for some Chromium-based browsers. The ones I can confirm it does work on are Brave and the new Microsoft Edge.
There are too many features to mention, but my favourites are automatically deleting a branch after it is merged, and prompting you to create a PR if you're on GitHub and just pushed a branch or made changes to a branch that currently does not have a PR open.
The extension integrates so well, I no longer know what is a new GitHub feature or a Refined GitHub feature.
The https://github.com/sindresorhus/refined-github repository on GitHubMore and more development is being done directly on the web, whether it be proof of concepts or full-blown apps. So much has happened in this space in the past few years. 👏

Here's some staples:
I do not have any affiliate links in any of the stuff posted below. They are just great resources that help me. Let's get started.
I purchased the Refactoring UI book last year and loved it. I've given it a full read and will probably give it another read. The price varies depending on the type of package you go with. I got a great pre-release sale deal, so I grabbed the whole enchilada.
There is also a YouTube channel that you can subscribe to or just search for Refactoring UI on YouTube.
Also, Steve Schoger (@steveschoger on Twitter), one of the authors of the book, Tweets a lot too about Refactoring UI. A great follow.
As mentioned above, I purchased Every Layout. This is a great buy and the additional resources are great. I've been reading the ebook (not finished yet) and have really been enjoying it. Great work Andy and Heydon!
There are browser extensions that do part of what xScope does, but a few years ago, a co-worker introduced me to xScope. The only downside to this tool is that it is only available for Mac. If you are on a Mac though, I highly recommend it.
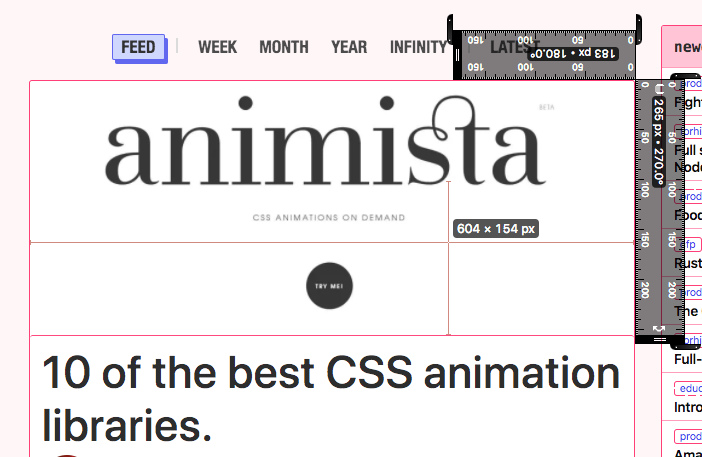
Sizzy is a new one in my toolbelt, but so far I am loving it. I snagged it at a great price during Boxing Day week. In a nutshell, it allows you to work on a site or application and see how it appears in different devices. It has more to it than that, but I am still new to it, so I probably haven't unleashed all its awesomeness yet. Kudos to @thekitze for building this awesomeness.

These will most likely not come as a surprise, but it's worth mentioning them.
Also, there is a new kid on the block, Educative. Looks like they are gaining some traction, so probably worth checking out as well. They're also on DEV, posting great content.
There are so many resources out there but this is what my current brain dump brought to the table and at some point we all have to go to the bathroom. 😆 I probably could have organized this better, but for now, this is how the dump came out.
If you have resources not listed that you think other frontend developers would benefit from, drop them in the comments! I hope you enjoyed the read and you can go to the bathroom as well now.
Until next time peeps!

The cover image is a partial screenshot of my site's thank you page, but the illustration comes from the wonderful work of Katerina Limpitsouni's undraw.co
]]>2019 was great. Lot’s of interesting stuff happened. Let’s dig in. But first, I say to you 2019... good day.

I enjoyed another great year in open source and also contributed to some new projects. I'll go through the most notable ones, not because the others are not important, it's just that these were the ones that sprung to mind while writing my review of 2019.
My site which is pretty much just a blog at the moment uses Gatsby. One interesting plugin I came across was from @raee called gatsby-remark-oembed. It allows you to embed resources as widgets that support oembed, e.g. Twitter.
The https://github.com/raae/gatsby-remark-oembed repository on GitHubI got it all installed but ran into issues. In the end, the documentation for setting up the plugin needed to be updated. I put up a PR to update the documentation, so others wouldn't stumble on the issue I ran into. And of course I wrote about it.
This was a big contribution LOL. I added my site to the list of showcased sites. As a thank you for my first PR, I got myself some Gatsby socks. I also wrote a short post about this.
For this project, I helped migrate the Refined GitHub extension to TypeScript. This was a huge endeavour that spanned several months. I am currently not using TypeScript at work, so this was one of my outlets to flex some TypeScript muscle. I comment about this as a big win for me in April on DEV.
This was a contribution to the TypeScript repository but in the form of filing an issue. While working on the Refined GitHub extension refactor to TypeScript, I discovered an issue with the NamedNodeMap interface in the core types that ships with TypeScript. The issue got labelled as a bug so it is in their backlog now.
The https://github.com/Microsoft/TypeScript/issues/30928 repository on GitHubI continued to contribute to my favourite open source project, DEV.
The https://github.com/thepracticaldev/dev.to repository on GitHubThis year was my first year participating in Hacktoberfest. It was a fun endeavour which included contributions to DEV as well as adding some automation for properly formatting markdown files for the learnstorybook.com project.
I will definitely continue to contribute to open source in 2020. What about you?
I’ve been athletic pretty much since elementary school, but in recent years, I’ve had a few setbacks with injuries. Last fall, I joined the corporate soccer team and a few practices in, I ended up tearing one of my calves. While I was recovering from my injury, I ended up putting on quite a few pounds, so end of April this year, I hit the tipping point and began my journey to getting back in shape.
Initially, it was quite tough, because even though I had completed my physiotherapy for my torn calf, I was nowhere near being in any kind of running shape. I ended up joining an Orange Theory and the rest was history. I busted my butt and got back into pretty awesome shape, dropping literally 35-40lbs of fat.
I put a couple back on as it’s the Christmas holidays, but will be getting back into the swing of things post-holidays.
I don’t know about you, but updating dependencies for your site is a pain because if you need to build with the new dependencies and make sure everything still works fine. Or even code changes for new stuff. For my blog, it is not a mission-critical site, but I took my Cypress knowledge, a dash of Dependabot and Netlify to put it all together. Let the robots do the heavy lifting.
I have probably already saved a good 50 hours this year not updating and testing dependency updates and will probably save myself hundreds of hours, maybe the low thousands of hours next year.
And yes, I wrote a post about it.
I improved the page load times of the product I work on, Shotgun, with some webpack and frontend build changes I made. One of our high profile clients, Lucasfilm Ltd. was very happy about the improvements. It felt really good when our support team posted in Slack that Lucasfilm noticed a 20% speed improvement based on their own internal testing. 🔥
One day, I received a message on LinkedIn and noticed that it was a message from a recruiter from Facebook. Even though I was quite happy with my current job, it seemed silly not to entertain the thought of potentially working at Facebook and the fact that they contacted me made me feel pretty good.
I passed the initial phone screen and then prepped for my first interview that would be with a frontend engineer from one of the teams at Facebook. I spent a lot of time preparing, and ended up doing really well. To be honest, I didn’t think I would make it past the first interview. I just always assumed the big companies were never achievable. A side effect of having imposter syndrome even after years of experience. 🙃
I moved on to the second interview, and once again did well. I got the phone call from Facebook that they wanted to move to the final step, an interview in Menlo Park. They flew me down for the weekend and then I was to interview on Monday. I had never been to California, so I was very excited to go.
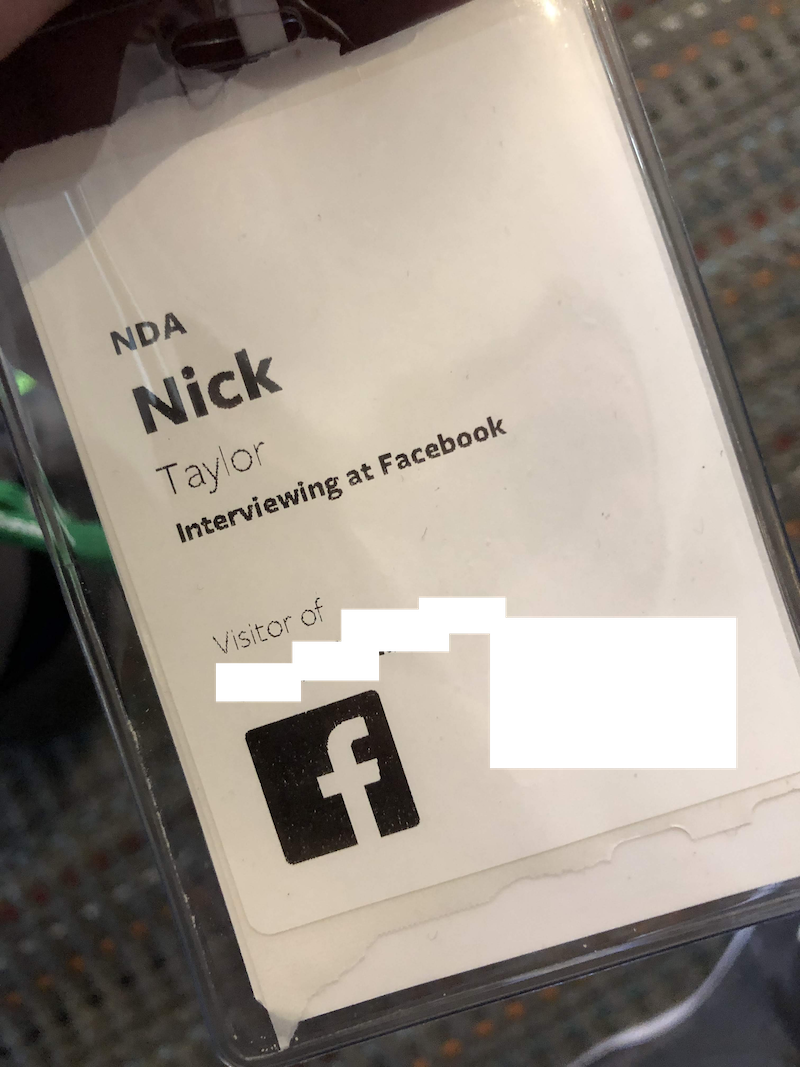
One of my cousins lives in California, so I also took the opportunity to visit some family. Aside from that, I contacted Brian Vaughn, one of the core React team members just to see if he wanted to grab a bite to eat/coffee with a random Canadian. I’ll be honest, I generally do not ask strangers to meet up, but he seemed like such a nice person on Twitter and GitHub, that I just went for it. We grabbed some sushi and a coffee on Sunday and just chit-chatted. It was really nice of him to do that while I was there.
Thanks Brian and I am definitely hooked on Philz coffee now! Philz Coffee… please come to Canada, specifically Montreal. 😆
On Monday, I had an intense day of interviewing at Facebook, but there was a lunch break. At lunchtime, none other than Andrew Clark from the React core team joined me for lunch. It was awesome. We spent an hour together at lunch talking about all kinds of things including React. Thanks for lunch Andrew! Andrew is super nice BTW.
It gets better. After lunch, Andrew took me to grab a coffee on the Facebook campus. He mentioned that Sebastian Markbage, another React core team member, instituted a mandatory coffee break a couple of times during the day based on a Swedish tradition called Fika. So we grabbed our coffees and I got to sit with the React team that is based in California. It was only about 15 minutes, but it was just another amazing unexpected thing to come out of interviewing with Facebook. Honestly, the entire team was super nice. I don't know if this is the norm when a frontend interviews at Facebook, but I am definitely not complaining.
I finished my day at Facebook exhausted and headed back on a redeye to Montreal. Regardless of what the final outcome was of the interview process with Facebook, it was an amazing experience for me. In the end, things did not work out, but had I never accepted that initial phone call with the recruiter from Facebook, I never would have met any of the React team or visited my cousin. Remember folks, take chances!
And yes, I have a post about that.
This is a work in progress, but I started work on a TypeScript course. It's not finished yet and I have never written a course or any type of education material, but I am very excited to get it completed. Special shoutout to @aspittel for providing me with some great coaching for writing this course.
I will definitely let you all know when it's available.
I created the @vscodetips Twitter account back in September 2017 and it looks like this year, it’s gained a lot of traction. It gained ~2000 users in 2019. By no means a huge amount of followers in the Twittersphere at almost 3500 users, but I’m still pretty happy about that. People seemed to enjoy the tips I post or things I retweet related to VS Code. If you’re one of VS Code Tips followers, thanks!
[VS Code tips is also on DEV](It’s 2020, post year in review, so let’s start off with some 2020 content.
I've been using @unDraw_co for illustrations on my site and changed them up tonight. I like the little round creatures that have been added. I give you exhibit A, https://t.co/xImfXLn5Po pic.twitter.com/L3rsEXDvOd
— Nick Taylor (he/him) (@nickytonline) January 5, 2020
I was updating my personal site the other day and thought, why don’t I write about some of the tech I’ve been using, some tools I use in my day-to-day as well as other resources that I use, even if they aren't everyday "go-to"s in regards to frontend. I've also popped in some resources that I think will just be helpful.
Let's get to it!
I use Netlify on the free tier to host my site. They offer a great service and it integrates well with GitHub and continuous integration. I am not cheap, it is just that at the moment, I do not need more than the free tier. I actually went over my build minutes last month and paid a small fee, so now that they have my credit card... 😆
I wrote about automating my deployments to Netlify here. 👇
Note: Zeit is amazing as well. I just happen to be using Netlify.
I have not used this on a project yet, just the Lighthouse audit tools in the browser, but Lighthouse CI looks pretty amazing. Integrate Lighthouse audits into your continuous integration (CI).
The https://github.com/GoogleChrome/lighthouse-ci repository on GitHubThis site is amazing if you're looking for some quality illustrations in SVG or PNG format. Katerina Limpitsouni, who created undraw.co has done some fantastic work. She's not on DEV, but give her a follow and undraw on Twitter.
I am not an accessibility expert (so many things in the frontend! 😆), so tools like the ones below are super helpful. Someone who knows quite a bit about this topic though, is Lindsay Kopacz (@lkopacz). Definitely a great follow.
This is a great accessibility visualization toolkit that was started by Jordan Scales while he was working at Khan Academy.
The https://github.com/Khan/tota11y repository on GitHubFun fact, I converted it to a Chrome/Firefox extension for those interested.
Deque's axe browser extension is another great one. It is available for Chrome and Firefox. It's great for finding accessibility issues in your app.
WebAIM's WAVE browser extension is great as well for finding accessibility issues in your app.
@wesbos has great courses. He teaches things so well and in a fun way. cssgrid.io is a great course for learning CSS grid that Mozilla sponsored, which is how Wes was able to make this course free. I highly recommend it. Note to self to go through this course again.
Wes at it again with another great free course. Check out JavaScript 30 to up your JavaScript game with fun little projects.
I purchased Every Layout while on sale last year, but the site content is all free. Andy Bell (@hankchizljaw) and Heydon Pickering do an amazing job.
There are tonnes of sites out there, so I'm just going to drop a few since this post is already an 11 minute read LOL.
I do not know the list of all CSS triggers by heart, so CSS Triggers is a great resource.
Also, speaking of CSS Tricks, here's a short but quick explanation by Chris Coyier (@chriscoyier) about CSS triggers.
One that I revisit every now and then is JS Katas, previously called ES6 Katas. This is a great way to keep your JS skills fresh.
This is a great genre of learning. There are paid resources, but a couple of notable free ones are:
All the below resources can be found at Stephanie's web site.
This one, I will admit, is probably overkill for my personal site which is currently pretty much just a blog, but at my current job, we're not using TypeScript, so I decided to keep my TypeScript skills fresh by using it.
Having said that, I've worked on several large projects using TypeScript and can 100% say, it allows for quicker refactorings, discoverability and avoiding silly errors. I have a mini-series on TypeScript for those interested.
If you've been on the fence about TypeScript, consider giving it a try in 2020. There is a huge ecosystem of types now and a lot of the popular frameworks either provide out of the box support or pretty easy setups to get going with TypoScript:
npx create-react-app my-app --template typescriptThere is also TSDX, which is some fantastic work by Jared Palmer (@jaredpalmer). It's a great bootstrapping tool for TypeScript for different types of projects and it's officially endorsed by the TypeScript team.
The https://github.com/jaredpalmer/tsdx repository on GitHubAnd you know what? If you're still not a fan of types, that's OK. 😺
Philip Roberts talk at JSConf EU "What the heck is the event loop anyway?" is a great explanation of the event loop.
This is definitely a great watch for those looking to understand JavaScript's event loop building off of Philip Robert's talk above.
Jake also has a great blog post about Tasks, microtasks, queues and schedules.
Storybook is such a great tool for building components and design systems. It started off as a tool just for React and since then has expanded to all the major frameworks as well as plain old HTML. Check out learnstorybook.com.
I will be the first to admit that I have not done a lot of work with animations, so I tend to Google stuff a lot when it comes to this space. Two gentleman that are experts in animation though have a great podcast and YouTube channel where they rebuild animations. The Keyframers is an awesome collaboration by @davidkpiano and @shshaw.
One of my favorite @keyframers episodes this past year:
— Shaw (@shshaw) December 31, 2019
Animating a chocolate button with clip-path!
🎥https://t.co/tqQU9rrT7v
What was your favorite episode or animation?
I still have many episodes to watch and to learn from.
A newer frontend tool out there that looks really interesting is VisBug. I tried it out briefly, but I must admit, I have not dug into this too deep yet.
This is the handy work of Adam Argyle.
Update January 8th 2020: Adam Tweeted back to me that you can launch tota11y from VisBug. Cool stuff. Thanks Adam!
great article!!
— Adam Argyle (@argyleink) January 8, 2020
btw, you can launch tota11y from visbug, it'll proxy run it so you dont need both installed 👍
- in the search box, type "/tota11y" to invoke the plugin
- close visbug (since it competes with tota11y)
- rejoice and accessibility inspect your heart out
Note: This browser extension is currently only available for Chrome.
This might sound like an obvious tool, but I have worked with people who do not use them that much.
Someone that knows these tools well and that I highly suggest you follow is Umar Hansa (@umaar). He is on DEV and has no activity, but links in his bio can lead you to other places to find him on the web. He has a great newsletter for dev tips, that I highly recommend subscribing to.
What's going on with your web requests? Looks like there is a traffic jam. These tools have your back:
Josh Comeau is a talented frontend who currently works for Gatsby. He Tweeted during the holidays some other great open-source/free resources that I suggest you check out. Here's the Tweet thread. He's also a great follow.
Happy New Year!!
— Josh W. Comeau (@JoshWComeau) January 1, 2020
I know many of you work on side-projects, projects where you don't have the benefit of a product & design team. I'm betting a bunch of y'all have goals to create something new in 2020!
Thought I'd share a thread with all my favourite resources:
Emily Freeman (@editingemily) started this in I believe 2017. Lots of great articles on JavaScript. It's a new January, so check out javascriptjanuary.com.
DEV has so many great posts from people from all over the globe in regards to frontend. I'll share some that I love, but definitely navigate around. So many great ones.
Lydia Hallie's (@lydiahallie) posts on JavaScript
All of these JavaScript Visualized posts by @lydiahallie are also amazing 🔥🔥🔥
— nader dabit (🧱, 🚀) | sha.eth | nader.sol (@dabit3) January 3, 2020
JS Enginehttps://t.co/dcroyzRf12
JS Event Loophttps://t.co/tRNpJS5DGp
JS Scope (Chain)https://t.co/CF4LluhXeX
JS Hoistinghttps://t.co/TVg3lBqhAm https://t.co/gex16Fu0Ou
Michael Chan's React Holiday Series
This falls under the obvious category probably, but it's worth mentioning it since it is open-source.
This has been my go-to editor for work-related stuff since believe it or not 2015. Back in 2015, I was working on a product for an e-commerce company and TypeScript was to be used in the frontend. At the time, VS Code was the only editor to have TypeScript support. Back in 2015, there were no extensions for VS Code. It was only about a year and a half later that extension support was added. Since then, the extension ecosystem has exploded.
A great addition to the ecosystem has been the Live Share extension pack. This is such a great way to do pair programming. 🍐
📣 Live Share sessions work best with a real-time chat going alongside @code. If you want something simple to start collaborating, you can grab the Live Share extension pack (https://t.co/6jpLIkLi0w) and get integrated text and audio chat, without _any_ extra tools or sign-ins 🙌 pic.twitter.com/EgZrL0O0nI
— Jonathan Carter (@LostInTangent) December 18, 2018
If you're interested, it is a little outdated, but here is my VS Code setup. These days, I roll with Sarah Edo's Night Owl theme and the wonderful font, Dank Mono (yes I paid for it, but it's nowhere near the price of Operator Mono).
I created the @vscodetips Twitter account back in September 2017. People seem to enjoy the tips I post or things I retweet related to VS Code. If VS Code is your jam, consider giving it a follow.
VS Code tips is also on DEV, but I have not done much there yet. You can check out the profile here
Refined GitHub is not frontend specific, but a lot of us use GitHub for work. It's a great extension available for Chrome or FireFox. The Chrome extension also works for some Chromium-based browsers. The ones I can confirm it does work on are Brave and the new Microsoft Edge.
There are too many features to mention, but my favourites are automatically deleting a branch after it is merged, and prompting you to create a PR if you're on GitHub and just pushed a branch or made changes to a branch that currently does not have a PR open.
The extension integrates so well, I no longer know what is a new GitHub feature or a Refined GitHub feature.
The https://github.com/sindresorhus/refined-github repository on GitHubMore and more development is being done directly on the web, whether it be proof of concepts or full-blown apps. So much has happened in this space in the past few years. 👏
Here's some staples:
I do not have any affiliate links in any of the stuff posted below. They are just great resources that help me. Let's get started.
I purchased the Refactoring UI book last year and loved it. I've given it a full read and will probably give it another read. The price varies depending on the type of package you go with. I got a great pre-release sale deal, so I grabbed the whole enchilada.
There is also a YouTube channel that you can subscribe to or just search for Refactoring UI on YouTube.
Also, Steve Schoger (@steveschoger on Twitter), one of the authors of the book, Tweets a lot too about Refactoring UI. A great follow.
As mentioned above, I purchased Every Layout. This is a great buy and the additional resources are great. I've been reading the ebook (not finished yet) and have really been enjoying it. Great work Andy and Heydon!
There are browser extensions that do part of what xScope does, but a few years ago, a co-worker introduced me to xScope. The only downside to this tool is that it is only available for Mac. If you are on a Mac though, I highly recommend it.
Sizzy is a new one in my toolbelt, but so far I am loving it. I snagged it at a great price during Boxing Day week. In a nutshell, it allows you to work on a site or application and see how it appears in different devices. It has more to it than that, but I am still new to it, so I probably haven't unleashed all its awesomeness yet. Kudos to @thekitze for building this awesomeness.
These will most likely not come as a surprise, but it's worth mentioning them.
Also, there is a new kid on the block, Educative. Looks like they are gaining some traction, so probably worth checking out as well. They're also on DEV, posting great content.
There are so many resources out there but this is what my current brain dump brought to the table and at some point we all have to go to the bathroom. 😆 I probably could have organized this better, but for now, this is how the dump came out.
If you have resources not listed that you think other frontend developers would benefit from, drop them in the comments! I hope you enjoyed the read and you can go to the bathroom as well now.
Until next time peeps!
The cover image is a partial screenshot of my site's thank you page, but the illustration comes from the wonderful work of Katerina Limpitsouni's undraw.co ), but I have not done much there yet. You can check out the profile here
As the year came to a close, I decided to accept an unbelievably amazing opportunity. I am very excited about it! It is a fully remote position working with a dope team. I cannot wait to get started. I will share more about this in early 2020.
Thanks for reading and Happy New Year!
Photo by NordWood Themes on Unsplash
]]>Today we launch an early alpha version of Makepad basic! Play with Rust+Wasm live. Compile and run the makepad desktop application for mac/win/linux yourself with Rust: https://t.co/LiD8P0wDVO pic.twitter.com/4nntv2IClC
— Rik Arends (@rikarends) December 6, 2019
It looks like a really great way to learn Rust and WASM. 👏
Photo by takis politis on Unsplash
]]>Trying out the @MicrosoftEdge beta for the next couple of weeks. Got all my extensions installed and bookmarks imported. Let's see how she goes.
— Nick Taylor (he/him) (@nickytonline) October 6, 2019
Woohoo! We can't wait to hear your thoughts.
— Microsoft Edge (@MicrosoftEdge) October 7, 2019
So the first thing I did was grab the Edge Beta since there is currently no official release yet. I am using a Mac, so all the following applies to Mac usage.
Once installed, I enabled sync by logging in with my Microsoft account. This is pretty standard browser stuff. FireFox and Chrome do this as well. I guess the one caveat is that if you do not have a Microsoft account, you will need to create one if you wish to sync your settings.
So far so good. The next thing was to install all the Chrome extensions that I had installed on Chrome and Brave browser. Once again, this process was fairly easy. The only thing that was required was to allow extensions to be installed from an external source, i.e. the Chrome Web Store.
After a month of usage, I can say that it pretty much behaves as I would expect a Chromium-based browser to work. The one thing I do not like, and maybe this is just because it is a beta build for the time being, but having to go through the Microsoft update application is annoying. I would rather it just auto-update like Chrome or Brave does. This is minor, but this is a review. 😉
For mobile, it was pretty easy to find and install in the Apple App Store. I have not tried it on an Android device, but I imagine it's just as easily available from the Google Play Store.
I started to use it daily on my phone. Overall, I did not notice any issues except for one on GitHub. It does not seem able to load contributor graphs or the GitHub feed. I have no idea why and did not take the time to investigate. I am sure this will get sorted, but it is worth a mention. Perhaps other sites have similar issues, but for the life of a software developer, this appeared to be the only site that I experienced this.
Another odd thing that I experienced on Github was that it was reporting Edge as an outdated version of Safari. Maybe this is a user agent thing. I am not sure.
The one thing that I do not understand is why they provide a continue browsing later feature if it is not supported on macOS and Linux, since the feature clearly states to have the latest version of Windows installed on your PC. Once again, the browser is currently in BETA, so I imagine, this will get sorted out.
Those things are somewhat minor, but the big one for me was about a week or two ago, I started getting warning messages about legitimate sites I browse every day being considered as unsafe, i.e. https://dev.to, https://netlify.com to name a couple.

In the end, I found this too annoying and reverted back to using Brave browser on my mobile.
I will just end with this. The new Microsoft Edge is still in Beta, so the annoyances and errors I mention above will probably get sorted out.
In the meantime, I am going to Tweet them this post to provide them with my constructive feedback.
]]>I'm gonna buy a motarized standing desk with some award points I got from work. Which colour top should I go with? Pictures in the next tweet.
— Nick Taylor (he/him) (@nickytonline) October 27, 2019
Here is the desk, MotionGrey Adjustable Dual Motors Electric Sit to Stand Computer Office Standing Desk
And here are the tabletop colours (both colours are in the Tweet. The liquid tag just doesn't show it).
]]>Here's the link to the standing desk, https://t.co/TQdKIoWHPM, and here's the pics. pic.twitter.com/Qv5P9JqMEV
— Nick Taylor (he/him) (@nickytonline) October 27, 2019
See the Pen https://codepen.io/nickytonline/pen/OJJmLyK by nickytonline (@nickytonline) on CodePen.
I was just having a little fun, but it brought up a question for me. What type of HTML element should a toast message be?
What is the semantic element that should be used for a toast message? It doesn't feel like <dialog /> or <button />. For the moment, I have it as <div />, but would definitely love to use something with more meaning. Here's my little demo I put together. https://t.co/gr98HmpWPF
— Nick Taylor (he/him) (@nickytonline) October 24, 2019
I will have a follow up post sometime in the near future explaining all the moving parts. 😉
Photo by Jonathan Pielmayer on Unsplash
]]>If you are not familiar with the classnames package, it allows you to build a set of CSS classes based on some conditionals. Straight from there documentation:
classNames('foo', 'bar'); // => 'foo bar'
classNames('foo', { bar: true }); // => 'foo bar'
classNames({ 'foo-bar': true }); // => 'foo-bar'
classNames({ 'foo-bar': false }); // => ''
classNames({ foo: true }, { bar: true }); // => 'foo bar'
classNames({ foo: true, bar: true }); // => 'foo bar'
Note: true and false are used to simplify the example, but normally these would be conditional variables, methods or functions.
Having said that, JavaScript has come a long way and there are features in the language that allow us to do pretty much the same thing, specifically template strings or as it is also called, template literals.
If you are not familiar with template strings, you can build a string with variables mixed in. Let us look at the previous examples, but this time with template strings.
`foo bar` // => 'foo bar', not that exciting
`foo ${ true ? 'bar': '' }`; // => 'foo bar'
`${true ? 'foo-bar': '' }`; // => 'foo-bar'
`${ false ? 'foo-bar' : ''}` // => ''
`${ true? 'foo': '' }, { true ? 'bar': '' }`; // => 'foo bar'
`${ true ? 'foo' : ''} ${ true? 'bar' : '' }`; // => 'foo bar'
These are trivial examples, but it is just to show you that you can do pretty much the same thing with template literals. If you want to see this in action, here is an example from my site's source:
The https://github.com/nickytonline/iamdeveloper.com repository on GitHub
...
<nav
   className={`navbar is-transparent ${styles.navbar}`}
   role="navigation"
   aria-label="main-navigation"
   data-cy="nav-bar"
>
...
https://github.com/nickytonline/www.iamdeveloper.com/blob/master/src/components/Navbar.tsx#L51
This is not mind blowing code, but just another way to do it.
Happy coding!
Photo by David Rotimi on Unsplash
]]>Like many of you, I am participating in Hacktoberfest as well. Most of the contributions I have made in October have been for DEV. Here are the PRs that have been merged so far:
The https://github.com/thepracticaldev/dev.to/pull/4257 repository on GitHubThe other PR that is still under review got merged is for the learnstorybook.com website.
The PR adds a precommit hook to format markdown files via prettier and as well, I ran prettier on all the markdown files as a lot of files had not run through prettier previously.
The https://github.com/chromaui/learnstorybook.com/pull/181 repository on GitHubAlthough this is not from Hacktoberfest, the beauty of open source is that anyone can checkout what you are up to. I was super surprised and felt pretty good when Addy Osmani liked one of my PRs for DEV.
Feels good when you get a like from Addy in your PR. https://t.co/20JX5RxOF1 pic.twitter.com/srM6LUJ1Ru
— Nick Taylor (he/him) (@nickytonline) December 20, 2018
I will probably contribute some more to the DEV codebase, but who knows, I may tackle an issue in another repository. YOLO.
]]>
It is not a long list, but I have some that I find useful that you may find useful as well. Currently, my preferred shell is zsh. Here is what I currently have in my config.
alias rimraf='rm -rf'
alias flushdns='sudo killall -HUP mDNSResponder'
alias zshconfig='vi ~/.zshrc'
alias nr='npm run'
alias ni='npm i'
alias y='yarn'
alias story='yarn storybook'
alias code='code-insiders'
alias tw='yarn test:watch'
alias '$'=''
alias zshconfig='vi ~/.zshrc'
What's in your shell aliases?
Photo by Krzysztof Niewolny on Unsplash
]]>In terms of hosting my site, I use Netlify. They have great tools and it’s very easy to get setup so that PRs and pushes to master create deployments. If you want to check out Netlify, I highly recommend checking out their awesome documentation.
If you are in charge of any repositories you’ve certainly had to deal with updating dependencies of your project. There are great tools that can manage this for you. One of those great tools is Dependabot (congrats on being acquired by GitHub!). If you want to learn how to get setup with Dependabot, check out their documentation. Dependabot creates pull requests in your repository and then you can merge them yourself. This was what I was doing as I wanted to test things out first before merging the dependency update PR. This becomes tedious and time consuming even if PRs are already being created for you.
Dependabot has settings that allows Dependabot to automatically merge PRs it generates. This sounds great at first, but not ideal as just having unit tests pass (or no tests! 😱) and then merging does not install a lot of confidence. While on vacation, I thought to myself, just bite the bullet and add Cypress for end to end (e2e) testing to my Continuous Integration/Continuous Delivery (CI/CD) pipeline. I use it at work and it’s a great tool. If you’re new to Cypress, I highly recommend checking out their documentation.
I automated dependency updates and changes I make to my blog (not content) thanks to Cypress, Netlify and Dependabot. Cypress caught a UI regression when I updated my burger button tonight. 🔥 https://t.co/WRUeaayGht #DevDiscuss
— Nick Taylor (he/him) (@nickytonline) August 14, 2019
If you’re not familiar with e2e testing, basically they are tests you write that act as if they were a user on your site. For example an e2e test can click on items and add them to a shopping cart. For Cypress, during the development phase, they have a great task runner that allows you to run e2e tests against Chrome (other browsers are on the way). It is an Electron app and gives you all the power of the developer tools you are used to in a browser. In the context of CI/CD, when Cypress runs, it executes tests against a headless browser (Chrome only for the time being).
So armed with all this information, lets put all the pieces together. One last bit is that my blog runs on Gatsby, so some of the configuration will be Gatsby related. Regardless, the meat of this post can apply to other projects.
My site is hosted on GitHub, so we'll go through the settings there. If you use another service like GitLab, the settings are similar.
From your repository main page, click on the Settings tab. From there click the Branches section to create a branch protection rule.
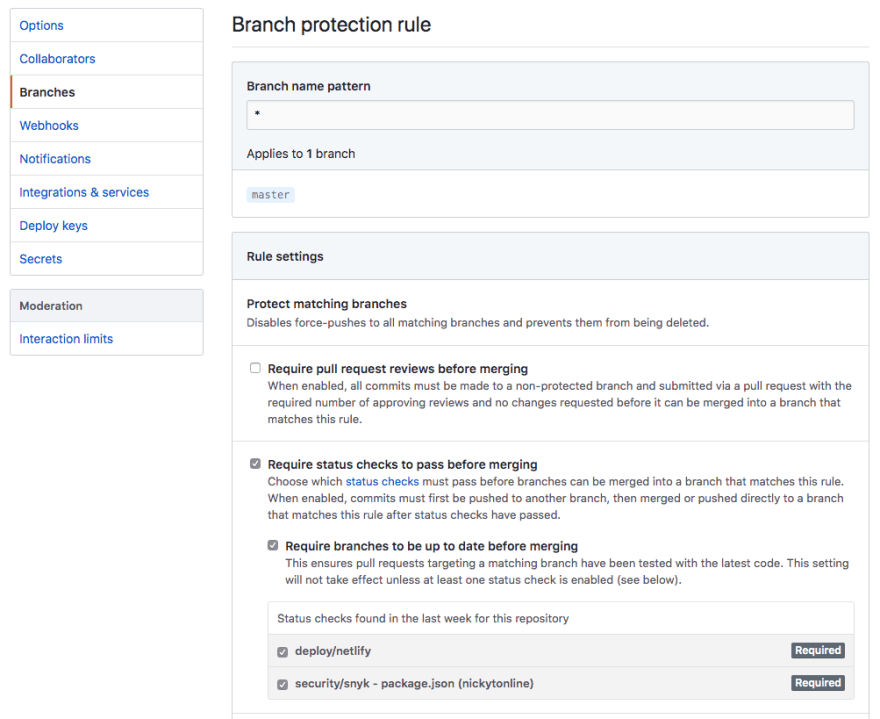
In my case, since I use Netlify and Snyk, I want both those status checks to pass before merging. Click on the Save Changes button.
Since we’re currently talking about a JavaScript project, let’s add the npm scripts we need to get Cypress up and running for local development.
npm install cypress -D (-D because it’s a dev dependency)npm install fkill-cli -D
  "scripts": {
		...
    	"prebuild": "CI=1 npm i cypress",
    	"e2e": "cypress run",
    	"e2e:dev": "CYPRESS_baseUrl=http://localhost:8000 cypress open"
		"build":"gatsby build",
		"postbuild":"gatsby serve & npm run e2e && fkill:9000",
		"develop":"gatsby develop",
		...
  },
Let’s start off with the e2e:dev script. What this script does is start Cypress’ test runner. The environment variable CYPRESS_baseUrl is set here, because we want to override the value in the cypress.json file. The value stocked in there is the one we will be using for our CI/CD pipeline. If you want to learn more about the cypress.json configuration file, check out their totally tubular documentation on it.
Alright, let’s run the Cypress task runner. From the command line, run npm run e2e:dev. It takes about 5-10 seconds to start up usually. Because it’s the first time you run it, Cypress is going to create a cypress folder in the root of your project with a bunch of example files to get you up and running. Feel free to remove these later or keep them around as a learning tool. Let’s stop the task runner. You can quit it or simply press CTRL + C from the command line where you started it.
For the sake of this post, we’re just going to create one simple test. Let’s create a file in the cypress/integration folder called, smoke.spec.js. Open that file and add the following:
describe('Smoke test site', () => {
    it('Should load the main page', () => {
        cy.visit('/');
    });
});
Save the file. Since we’re in the context of a Gatsby site, let’s start up the Gatsby local development server by running npm run develop. All this does is run the following Gatsby CLI command, gatsby develop. Once the site is built, it will be running on port 8000 (default).
Let’s start up the task runner again by running, npm run e2e:dev from the command line. In the task runner, the smoke.spec.jsshould be in the list of test files now. Click on it to start running the tests.
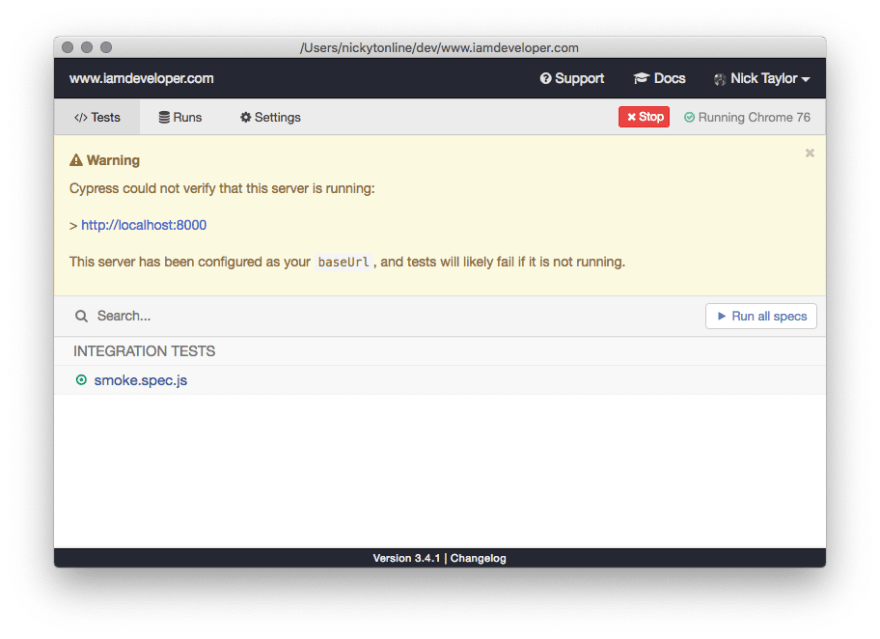
If you’re Gatsby site is running the test should pass.
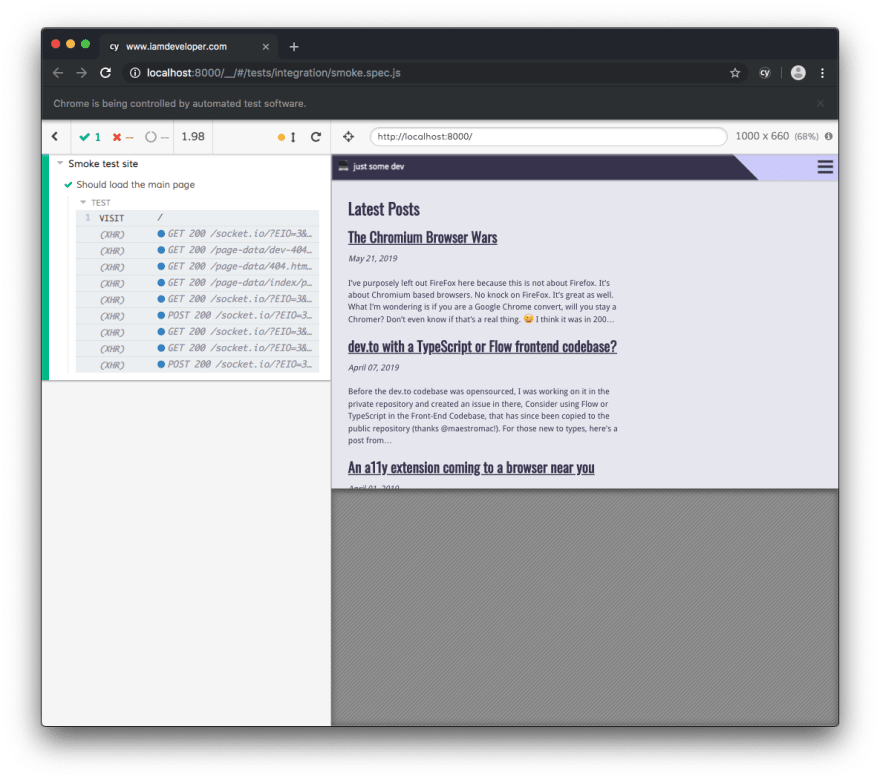
Congrats, you are awesome. At this point you would right more tests to the point that you are confident that if these all pass, you are good to ship.
At this point we’re ready to revisit our Dependabot configuration for our repository. Let’s change the settings to allow for automatic PR merging of all our dependencies (or configure it to the level you prefer.
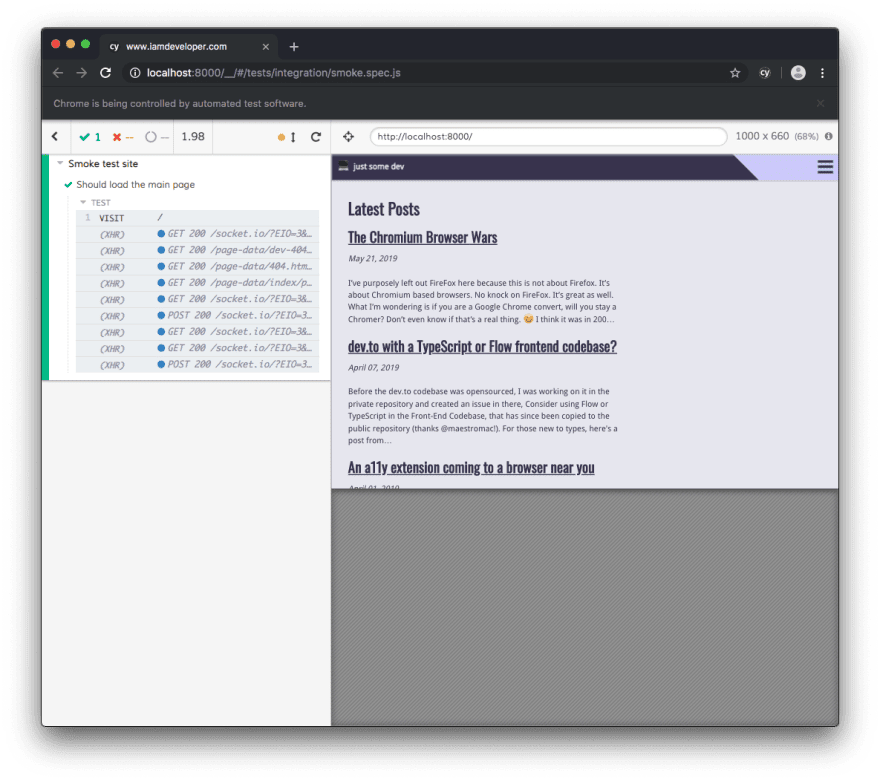
Alright, let’s go through the extra setup to have Cypress run as part of our CI/CD pipeline. The prebuild script is required because, at least on Netlify, you cannot cache binaries. See this article, Test on Netlify | Gatsby + Netlify + Cypress.io, for more information.
"prebuild": "CI=1 npm i cypress",
The e2e script is what we’ll use to run Cypress in our CI/CD pipeline. It runs all the e2e test files in a headless browser.
"e2e": "cypress run",
The build script is what I used to build my site. It’s included just to explain the postbuild. 😉 If you’re not aware, you can run pre and post scripts on npm script. For more information, see the npm documentation.
"postbuild":"gatsby serve & npm run e2e && fkill:9000",
For our postbuild script, we want to run our Gatsby site in the container. The Gatsby CLI has a bunch of great commands, including gatsby serve which starts your site on port 9000 (default). While the server starts, we also want to start up the e2e tests. This is where our e2e script comes in. Once the tests finish running in the container (hopefully successfully 😉), we want to gracefully stop the site. This is where the fkill CLI comes in handy. Now since this is a post build step, things will continue along in Netlify deployment land and eventually the site will go live. In the case of a PR for dependency updates, this check will pass and because Dependabot is configured to merge PRs automatically, we’ve reached full automation of our dependency updates.
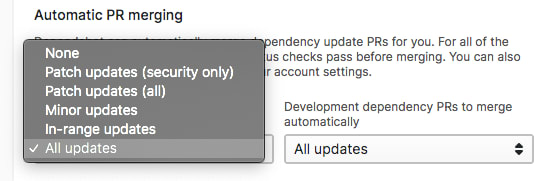
If you’d like to see the whole setup of this on my site, check out my repository on GitHub.
The https://github.com/nickytonline/iamdeveloper.com repository on GitHubI decided to write this post because I’ll be contributing to this documentation issue and thought it would be beneficial for everyone, including myself. I’m hoping people will ask questions in the comments and/or fill in missing gaps in the post.
There is a lot of the frontend code base in the app/assets/javascripts folder. This part of the code base does not use ES modules. It loads scripts, runs stuff once the DOM has loaded, has stuff in the global scope and provides a lot of the functionality on the client-side for dev.to.
The assets are loaded through standard rails/fastly methods that add the <script /> tags to load the front-end code. Most, if not all of these scripts are deferred (See the defer attribute in <script>: The Script element - HTML).
There is a more modern JavaScript portion of the application as well, but it is not a Single Page Application (SPA). It is a set of components that are dispersed in key locations, e.g. search, v2 editor, onboarding etc.
Preact components are managed using the webpacker gem and webpack. If you're curious about webpacker, @maestromac on the team is a great person to speak to.
Scripts for webpack entry points are added to Ruby ERB templates, but they use the webpacker javascript_pack_tag to add the script server-side. There is a webpack configuration file, but it is in yaml format. In that config, there are settings that determine where the code is and how entry points are defined.
dev.to/webpacker.yml at master · thepracticaldev/dev.to · GitHub
...
default: &default
  source_path: app/javascript
  source_entry_path: packs
...
Looking at the configuration above, this part of the frontend code base can be found in the app/javascript folder with webpack entry points found in the app/javascript/packs folder.
This represents the base configuration for webpack. If additional configuration is required for an environment, webpacker allows you to enhance the configuration via webpack configuration export.
dev.to/development.js at master · thepracticaldev/dev.to · GitHub
const environment = require('./environment');
const config = environment.toWebpackConfig();

// For more information, see https://webpack.js.org/configuration/devtool/#devtool
config.devtool = 'eval-source-map';

module.exports = config;
As the project continues to move forward, expect to see some more things client side becoming preactitized (I just made that up, boom!).
The https://github.com/thepracticaldev/dev.to/issues/354 repository on GitHubjavascript_pack_tag, e.g. <%= javascript_pack_tag "Search", defer: true %>.dev.to/application.html.erb at master · thepracticaldev/dev.to · GitHub
<!DOCTYPE html>
<html lang="en">
  <head>
    <meta charset="utf-8">
    <% title = yield(:title) %>
    <title><%= title || "#{ApplicationConfig['COMMUNITY_NAME']} Community" %></title>
    <% if internal_navigation? %>
      <style>
			...
      </style>
    <% else %>
      ...
      <style>
        ..
      </style>
      ...
      <%= javascript_pack_tag "Search", defer: true %>
...
dev.to/_top_bar.html.erb at master · thepracticaldev/dev.to · GitHub
...
    <div id="nav-search-form-root">
      <div class="nav-search-form">
        <form acceptCharset="UTF-8" method="get">
          <input class="nav-search-form__input" type="text" name="q" id="nav-search" placeholder="search" autoComplete="off" />
        </form>
      </div>
    </div>
...
dev.to/Search.jsx at master · thepracticaldev/dev.to · GitHub
import { h, render } from ‘preact’;
import { Search } from ‘../src/components/Search’;

document.addEventListener(‘DOMContentLoaded’, () => {
  const root = document.getElementById(‘nav-search-form-root’);

  render(<Search />, root, root.firstElementChild);
});
Like the tag line says, “InstantClick is a JavaScript library that dramatically speeds up your website, making navigation effectively instant in most cases.”. Basically the way it works is if a user hovers over a hyperlink, chances are their intentions are to click on it. InstantClick will start prefetching the page while a user is hovering over a hyperlink, so that by the time they do click on it, it's instantaneous. Note, on mobile devices, preloading starts on "touchstart".
Aside from prefetching pages, InstantClick also allows you to customize what happens when an InstantClick page changes.
dev.to/githubRepos.jsx at master · thepracticaldev/dev.to · GitHub
...
window.InstantClick.on('change', () => {
  loadElement();
});
...
You can also decide whether or not to reevaluate a script in an InstantClick loaded page via the data-no-instant attribute. I don’t believe there are any examples in the code base that blacklist script reevaluation. You can also blacklist a link. Here is an example from the codebase.
dev.to/buildCommentHTML.js.erb at master · thepracticaldev/dev.to · GitHub
...

function actions(comment) {
  if (comment.newly_created) {
    return '<div class="actions" data-comment-id="'+comment.id+'" data-path="'+comment.url+'">\
              <span class="current-user-actions" style="display: '+ (comment.newly_created ? 'inline-block' : 'none') +';">\
                <a data-no-instant="" href="'+comment.url+'/delete_confirm" class="edit-butt" rel="nofollow">DELETE</a>\
                <a href="'+comment.url+'/edit" class="edit-butt" rel="nofollow">EDIT</a>\
              </span>\
                <a href="#" class="toggle-reply-form" rel="nofollow">REPLY</a>\
            </div>';
  } else {
...
For more information on this, see the Events and script re-evaluation in InstantClick documentation.
The project uses eslint with the Prettier plugin. This means that all eslint rules related to code formatting are handled by prettier. For the most part we use the out of the box rules provided by the configurations that we extend but there are some tweaks.
As well, as mentioned above, there are some objects that live in the global scope, e.g. Pusher. We need to tell eslint that it is defined otherwise it will complain that it is not defined. This is where the eslint globals section comes in handy.
...
  globals: {
    InstantClick: false,
    filterXSS: false,
    Pusher: false,
    algoliasearch: false,
  }
...
The code base comes with pre-commit hooks that allow us to do things like run eslint before things are committed. If there are listing issues that can be fixed, they will get auto fixed and committed. If there are issues that cannot be resolved, the commit fails and the changes need to be handled manually.
The dev.to frontend codebase uses Storybook. This is used to develop/showcase components. There is custom configuration for it that can be found in dev.to/app/javascript/.storybook at master · thepracticaldev/dev.to · GitHub.
The Storybook documentation is quite good, but if you're looking for some examples, see dev.to/app/javascript/src/components/stories at master · thepracticaldev/dev.to · GitHub.
This is currently not deployed to Netlify, but there is an issue open for it.
The https://github.com/thepracticaldev/dev.to/issues/338 repository on GitHubThis part of the code base probably needs some love. There is probably a lot of low hanging fruit in here for frontends interested in contributing as I believe there are several components that are not in Storybook.
I was not a part of this initiative, but I know it uses CSS variables heavily for theming, with fallbacks. A great way to do modern theming.
So all that is themeable always applies the CSS variables with whatever their current value is (unless all you have is the fallback because your browser doesn’t support CSS variables).
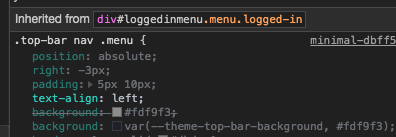
The magic of theme toggling can be seen in action in the user configuration. Here we can see some style being applied if it’s the night theme or if it’s the pink theme.
dev.to/_user_config.html.erb at master · thepracticaldev/dev.to · GitHub
<script>
  try {
    var bodyClass = localStorage.getItem('config_body_class');
    document.body.className = bodyClass;
    if (bodyClass.includes('night-theme')) {
            document.getElementById('body-styles').innerHTML = '<style>\
              :root {\
        --theme-background: #0d1219;\
        --theme-color: #fff;\
        --theme-logo-background: #0a0a0a;\
			...
        --theme-social-icon-invert: invert(100)</style>'
    } else if (bodyClass.includes('pink-theme')) {
      document.getElementById('body-styles').innerHTML = '<style>\
      :root {\
      --theme-background: #FFF7F9;\
      --theme-color: #333;\
      --theme-logo-background: #fff7f9;\
			...
      --theme-social-icon-invert: invert(0)</style>'
    }
  } catch(e) {
      console.log(e)
  }
</script>
So if you’re contributing to anything CSS related in the project, keep in the back of your head if you need theming applied to what you’re working on. Don't be shy, just ask if it's not obvious in the issue. @venarius has worked a lot on this, so he’s probably a good person to talk to about theming.
I haven’t worked at all on anything service worker related in the codebase, so if someone can chime in on it’s usage, that’d be awesome 😺. I know it supports the offline page which is a lot of fun to draw on. Shout out to @aspittel for her great work on the off-line page! As well, I’m sure it also does a lot of caching, but again, I don’t know all the details in regards to this part of the code base.
I have not done any work in regards to edge caching, but I know that dev.to uses Fastly. I imagine all the frontend is heavily cached on a CDN worldwide. @ben I feel like you could probably elaborate more on this part. 😺

Hopefully this sheds some more light on the dev.to frontend for folks. 👋
Additional resources:
Photo by Milad Fakurian on Unsplash
]]>Before the dev.to codebase was opensourced, I was working on it in the private repository and created an issue in there that has since been copied to the public repository (thanks @maestromac!).
The https://github.com/thepracticaldev/dev.to/issues/383#issue-351630725 repository on GitHubFor those new to types, here's a post from Preethi Kasireddy about types.

Also, here's a fairly recent episode from the Script and Style podcast about types in JavaScript, Static Typing for JavaScript.
I'm partial to TypeScript myself. I've written about it here before.
There appears to be a shift towards TypeScript for those that are interested in types. I wrote a bit about it here
There is also a great episode on the React Podcast that talks about TypeScript with Jared Palmer.
I love chatting with @jaredpalmer about hyped technologies.
— chantastic is automated (@chantastic) March 28, 2019
He's pragmatic, considered, and methodical when exploring new tech.
If you want to successfully explore @typescriptlang in your React apps, this is a great place to start. https://t.co/6EFANvmrM8
Take TypeScript for a spin in one of the playgrounds:
Flow is another option in the frontend in regards to types, although I've never used it myself.
Here are some links if you want to read up on Flow.
Take Flow for a spin in the Flow REPL
I've narrowed it down to TypeScript and Flow as they are the most popular, but feel free to bring others to the table to discuss, e.g. Elm, Reason. (Thanks for chiming in on Twitter @magellol!)
Nice. I think It would also be interesting to mention how Elm and possibly Reason compare to TS as well. I've been looking at Elm these days and I feel resources are much lighter.
— Thomas Lefebvre (@thomlbvr) April 8, 2019
If you really don't want to see the codebase converted to use types, that's OK too.

Are static types something that would interest people in the dev.to community who are contributing to or are thinking about contributing to the frontend codebase? Feel free to discuss in the comments here and/or jump on over to the GitHub issue and comment there.

In a nutshell, I put up a PR to Khan’s tota11y repository to convert their a11y tool to a browser extension.
The https://github.com/Khan/tota11y repository on GitHubThe goal of the PR was, aside from standing out, was to make it an extension without interfering with how their tool works when loaded as a bookmarklet.
I’ll be up front, I’m not an a11y expert, so this tool was actually really good for me to learn a few things. Here’s a shot of it in action.
Here it is in action. pic.twitter.com/VKevMaxKGg
— Nick Taylor (he/him) (@nickytonline) September 15, 2018
One of the coolest features is the screen reader wand (Khan's work, not mine).

The PR isn’t merged yet, but will hopefully be in the next month or so. Regardless, you can try it out today as an unpacked extension in Chrome, FireFox, Brave or any browser that lets you load Chrome Webstore extensions. All you need to do is clone my branch and build it locally. See the README for instructions for loading it as an unpacked extension.
I hope you find it useful and shoutout to the devs at Khan for making this great tool.
]]><form /> element and some of the things you can do with it in the DOM.
For web devs who are getting a little long in the tooth, you’re probably familiar with most of this, but for newer devs, this might be news to you. Either way, buckle up because we’re about to go old school with forms.

With newer DOM APIs like querySelector and querySelectorAll, we can access forms via a selector, e.g. document.querySelector(‘form’);. Did you know that you can also access forms directly from the document? There is an HTMLCollections of forms available via document.forms. Go ahead, I’ll let you open the dev tools in your favourite editor. Pretty neat eh?
So let’s say we’re on amazon.ca.
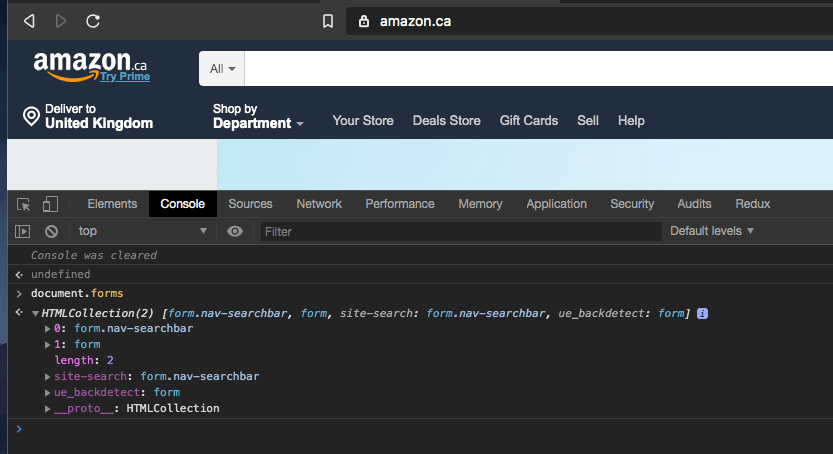
You have a form that looks like this:
<form class="nav-searchbar" name="site-search">
...
</form>
OK, so you know there is a document.forms object. Let’s take a peek in the dev tools.
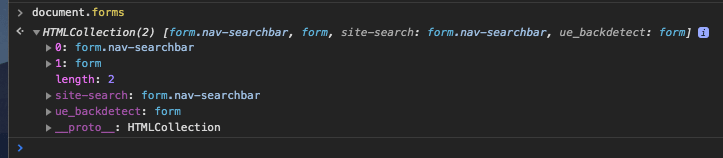
document.forms[0] finds our form, and there is one other form on the page, but there’s also two more properties on document.forms. There’s site-search and ue_backdetect. If we look at the markup above for our form, we see it has a name attribute with the value ’site-search'. That’s one of the extra properties on document.forms. Sure enough, document.forms[‘site-search’] gives us a form. If we do document.forms[0] === document.forms[‘site-search’] in the console of our dev tools, we’ll see that it returns true.

If you haven’t caught on yet, this means that you can access forms via an index, which represents the order they appear in the DOM, but you can also access it via a form’s name attribute.

Alright, there’s more folks. Let’s get a reference to our form by running the following in the console, const siteSearchForm = document.forms['site-search'].
Now let’s see what properties are available on our form.
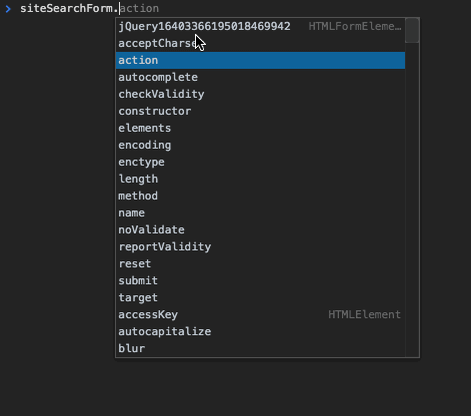
OK, so we see some properties like action, for the URL to GET/POST to, but as we go down the list, there’s one called elements. Hmm, what could that be? 😉 If we access it in the dev tools console, we get the following:
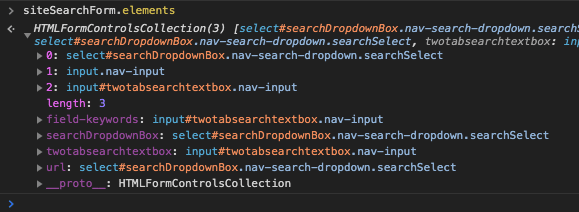
What? All the form inputs are in there! That’s right folks, you have access to all the <input />s, <textarea />s etc via this property. Pretty cool eh? Not only that, if the form inputs have a name attribute, we can do the same thing we did for document.forms. We can access the form inputs by index or their name, e.g. siteSearchForm.elements[‘field-keywords’].
So accessing forms and form inputs can be done right off the document via the document.forms property.
One last fun fact. Each form element has a form property which is a reference to the <form /> DOM node that the form element is contained within.

Hope you enjoyed this DOM Throwback Thursday.
 ]]>
]]>
Are you familiar with React? Then you know Ink. I haven't tried this out yet, but basically it's a custom React renderer that allows you to build beautiful CLIs.
The https://github.com/vadimdemedes/ink repository on GitHubFlexbox in a CLI? 🤯 React hooks in a CLI? YOLO my friend, YOLO.
Here's a little example straight from the repository's ReadME:
import React, {Component} from 'react';
import {render, Color} from 'ink';

class Counter extends Component {
	constructor() {
		super();

		this.state = {
			i: 0
		};
	}

	render() {
		return (
			<Color green>
				{this.state.i} tests passed
			</Color>
		);
	}

	componentDidMount() {
		this.timer = setInterval(() => {
			this.setState({
				i: this.state.i + 1
			});
		}, 100);
	}

	componentWillUnmount() {
		clearInterval(this.timer);
	}
}

render(<Counter/>);
Even the folks at npm think it's kinda cool.
ink is extremely exciting and you should all check it out. The @npmjs CLI team intends to move a lot of our UI over to it, and I've had so much fun developing some early prototypes of interactive installers and updaters with this! Kudos to Vadim for some amazing work! https://t.co/JwAd3jwuj5
— kat (@zkat__) March 6, 2019
Vadim, the author of Ink has a great intro post to it, Building rich command-line interfaces with Ink and React.
So what are you going to build with Ink? 😉
Happy coding!
Photo by Pierre Bamin on Unsplash
]]>It's pretty simple to do. Just follow the instructions here. In a nutshell, you fork Gatsby on GitHub and add your site details to their showcase configuration file. Once the PR is approved and merged, the next time they deploy the Gatsby site, your site will be in the list!
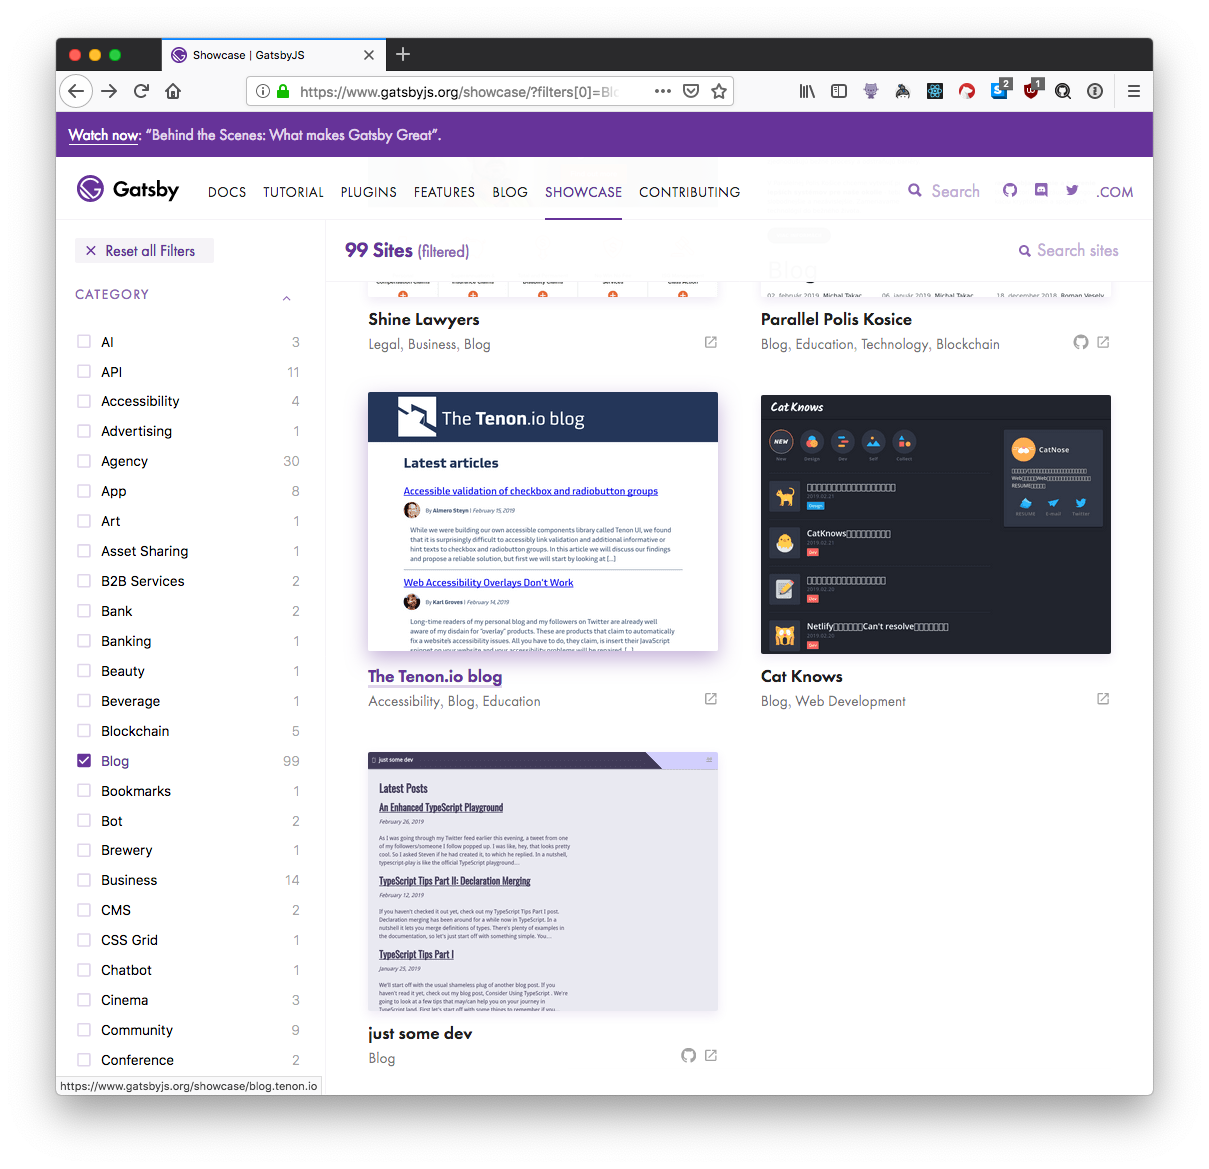
As a bonus to doing this:

I'm under blogs in the showcase, but you can also go directly to my site profile.
And for those interested, here's my site's source code full of TypeScript, React and Netlify CMS goodness.
The https://github.com/nickytonline/www.iamdeveloper.com repository on GitHubJust update your bookmark to the better playground here 😉 https://t.co/STFVHK8lOQ
— Steven ⬢ (@styfle) February 26, 2019
I was like, hey, that looks pretty cool. So I asked Steven if he had created it, to which he replied.
Neither! It was created by Agent Cooper awhile ago and offered to replace the official one of the TS team was willing https://t.co/nJPXQmCb7Q
— Steven ⬢ (@styfle) February 26, 2019
In a nutshell, typescript-play is like the official TypeScript playground but with some great enhancements:
What's even cooler is the fact that it's open sourced, so you can deploy it locally.
The https://github.com/agentcooper/typescript-play repository on GitHub
If you don't feel like cloning it, check it out at typescript-play.js.org.
Happy coding!
Photo by Jorge Gonzalez on Unsplash
]]>A really cool way to view git history for those that like a nice visual. Slide through the history and see previous changes elegantly slide in.
I made a CLI for Git History, it works with any local git repo.
— Rodrigo Pombo (@pomber) February 11, 2019
Try it: "npx git-file-history your/file.foo".
The repo is here (5k⭐️ already!) https://t.co/3benAi3rTP pic.twitter.com/KaMCD5FJCv
"Quickly browse the history of any GitHub (GitLab and Bitbucket comming soon)"
The https://github.com/pomber/git-history repository on GitHubThanks for the interesting project @pomber!
Photo by Nathan Anderson on Unsplash
]]>
enum HardDriveType {
	ssd,
	sata
}

enum ProcessorType {
	i3,
	i5,
	i7,
	i9
}

interface Computer {
	processor: ProcessorType;
}

interface Computer {
	hardDriveType: HardDriveType;
}

// interface has been merged
const myPC: Computer = {
	hardDriveType: HardDriveType.ssd,
	processor: ProcessorType.i9
};

// interface is merged so type checking fails since the processor property is missing
const myBadPC: Computer = {
	hardDriveType: HardDriveType.ssd,
};
You can play around with the example in the TypeScript Playground.
So two interfaces called Computer are declared and all the properties of those interfaces are merged together into one declaration for the Computer interface. This is a simple example to show how it works, but in a real world app, you wouldn't be declaring the interface in two pieces in a file. Let's go with something more realistic.
You are using a third-party library or it's something in your project that needs to live on the window. The window has it's own type, the Window interface. This type has all the properties you'd expect to find on MDN about window.
Let's use our a fictitious 3rd party library called awesomeThing. It gets loaded onto the window object so we need to enhance the Window interface.
export interface AwesomeThing {
	doIt: () => void;
}

declare global {
	interface Window {
		awesomeThing: AwesomeThing
	}
}

// The window interface has been merged with our interface to add awesomeThing.
window.awesomeThing.doIt();

// Errors because it's not on the `Window` interface.
window.thingThatIsNotOnWindow.doIt();
You can play around with the example in the TypeScript Playground.
If you'd like to see some real world examples in open source, look no further than a recent PR of mine that got merged to the Refined GitHub browser extension repository. I was really happy getting this PR in because it's an extension I use everyday.
The Refined GitHub browser extension just passed 1000 commits and we also just finished the transition to TypeScript, thanks to @nickytonline and @bfred_it 👏 https://t.co/APJxy0RSHB
— Sindre Sorhus 💙💛 (@sindresorhus) February 8, 2019
Specifically, check out globals.d.ts in the project.
That's pretty much all there is to it. To summarize, declaration merging is a great way to enhance existing types.
Photo by Mike Enerio on Unsplash
]]>I came across dom-chef while working on a PR for migrating Refined GitHub to TypeScript (WIP and something that is interesting on its own if you're new to TypeScript).
At a quick first glance, I thought Refined GitHub was built with React, but as soon as I had that second sip of coffee, I realized it was just JS with some JSX in it.

The TLDR:
This is definitely interesting if you're a fan of JSX.
Check out the repository
The https://github.com/vadimdemedes/dom-chef repository on GitHubWe're going to look at a few tips that may/can help you on your journey in TypeScript land.
First let's start off with some things to remember if you're migrating a React application to TypeScript.
When porting components to TypeScript, ensure that the file extension is .tsx, not .ts. If you don't, you'll be scratching your head for hours as to why JSX is not being recognized.
Also, ensure that you have the "jsx" TypeScript compiler option set properly as well. By default, it's set to "preserve". You want it to be set to "react". e.g. https://github.com/nickytonline/www.iamdeveloper.com/blob/master/tsconfig.json#L12
An issue that's happened to me several times in the past+recently is whenever I migrate a React app to TypeScript where components are in .js files,I port them to .ts instead of .tsx and wonder for a long time why JSX isn't recognized.Saved you some debug time. #TypeScriptDiaries
— Nick Taylor (he/him) (@nickytonline) January 25, 2019
Create a reusable children prop and add it to your component props' type via an intersection.
// some file housing the ChildrenProp
export type ChildrenProp = { children: React.ReactNode };

// some other component file that consumes it.
export type SomeComponentProps = ChildrenProp & {
    someOtherProp: boolean;
    ...
};
Bonus points, make it generic with a default, https://github.com/nickytonline/www.iamdeveloper.com/blob/master/types/children-prop.d.ts
Alright, let's move on to outside of React Land.
any until you start to figure things out. If you're using TypeScript 3.0 and up, don't. Prefer the unknown type.You get all the benefits of the any type, but as soon as you try to access anything on the object, you will need to do a type assertion. For more information, see the documentation on the unknown type
{% twitter "1087886002063138816" %}
Here's a TypeScript Playgound example if you want to see it in action.
! operator to basically say, "Hey TypeScript, trust me, I know what I'm doing.".For example, instead of doing this
const someElementReference = document.querySelector('.awesome-selector');

if (someElementReference) {
  someElementReference.setAttribute('data-i-checked-first', `I wasn't sure if you'd exist`);
}
you could do this
const someElementReference = document.querySelector('.awesome-selector');

someElementReference!.setAttribute('data-yolo', `I know what I'm doing!`);
Use this sparingly because, well, this giphy.

That's all for now, until part II. I said it, so I need to write it now. 😉
]]>My site, iamdeveloper.com, is currently using Gatsby, an awesome React based static site generator on steroids.
(Belated) life update: Happy to say that @gatsbyjs is (officially) my jam! 🚀
— amberley (@amber1ey) September 20, 2018
Stoked to join such a great team of folks 💫 pic.twitter.com/Q52spAxYau
For tweets on my blog posts, I had installed the gatsby-plugin-twitter about a year ago. It was working well for me, but then I came across this tweet.
My first ever @npmjs package! Yeah me 👊
— Benedicte Raae 👑 (@raae) January 18, 2019
A @gatsbyjs plugin that lets you easily embed twitter, instagram, youtube, vimeo, codepen, soundcloud, reddit and more on your site!
Please try and report back :D
Example site: https://t.co/own82Sko24
NPM: https://t.co/NrTiMRd3jQ pic.twitter.com/JO6FRhA2Uo
I checked out the npm package, @raae/gatsby-remark-oembed and then followed the links to the repository and demo. It looked pretty awesome and fast and it supported much more than Twitter. I installed the package, copied the code snippet to add to my gatsby-config.js and was all good to go.
I fired up my development environment and I was getting errors about the plugin not being found.
Error: Unable to find plugin "gatsby-remark-oembed". Perhaps you need to install its package?
I was a little perplexed, read over things several times in the documentation and then came to the realization, that since the author published the package, the name of the npm package was not the same name, it was a scoped package, i.e. @raee/gatsby-remark-oembed instead of gatsby-remark-oembed (like in the code snippet in the documentation). I was glad I figured out what was up. I got the plugin running locally and then I published my site and was good to go. I was also happy to have migrated it to TypeScript, but we'll save that for another post.
Alright, got my @gatsbyjs site migrated to TypeScript. Pretty happy with the result. For those interested, check out https://t.co/fGUCMqvRaI . I'll probably write a blog post about it in the next week or so. #reactjs #TypeScript
— Nick Taylor (he/him) (@nickytonline) January 20, 2019
At this point, I was like, well if I spent 15-20 minutes trying to figure out what was up, I'm sure others would appreciate what I had discovered, so I put up a PR to update the documentation. It got merged and I felt just as good about adding these 6 characters, @raae/ to the code snippet in the documentation as I do when I fix a bug or add new functionality to a project.
Every contribution to open source is valuable.
So much fun so to have ones own @npmjs package 🎉
— Benedicte Raae 👑 (@raae) January 21, 2019
Already had my first pull request. Thanks to @nickytonline for catching an error in the example code. Much appriciated!
Check out the plugin: @gatsbyjs-remark-oembed.#JAMstack #webdev pic.twitter.com/A6FZ2m9Vcy
Thanks for the thanks @raae!
Photo by Slava Bowman on Unsplash
]]>mask property. Think of it like a cookie cutter. You want to bake a cookie, not a rectangular piece of dough. So how does this fit into a real world example on the web?
Have you ever had an icon you liked and wanted to put on your site, but were like, "It would look so much better if I could integrate it with the colours in my site"? CSS mask property to the rescue. As you can see, if you interact with the codepen below, as you change the colour via the colour picker, the colour of the logo, dev.to in this example, will only apply the background colour to the parts of the SVG that are filled. Shout out to simpleicons.org for the dev.to icon!
If you want to see it in action, take a look at the icons in the menu of my website, iamdeveloper.com.
Support for the CSS mask property is pretty good unless you still need to support Internet Explorer. If that's the case, a quick Google will provide you with some fallback options.
Also, there's a little bonus with this blog post. I use CSS variables and JavaScript to get the logo colour to change, so check that out too in the codepen.
Note: If you're using a browser that does not support <input type="color" /> it will act like a regular text input. You'll need to type in a valid hex colour and press ENTER on your screen keyboard for the colour to change
Have some fun and try it out in the codepen! 👋
See the Pen https://codepen.io/nickytonline/pen/ebxrpv by nickytonline (@nickytonline) on CodePen.
Photo by Neven Krcmarek on Unsplash
]]>In May of 2016, I decided to embark with a startup and live in Barcelona for the summer in a front-end focused developer role using React, TypeScript, Node and other goodies. My bosses and I (future Montreal office) were in Barcelona to learn the business, help get the office in Spain staffed and then the plan was to return to Montreal to open the Montreal office.
The risk for me was that although I had just over a year of professional TypeScript experience and plenty of JavaScript under the belt, I had no professional experience with React or Node (aside from some build tools) and had only ever had mainly full-stackish roles all in the .NET ecosystem. In the past, when opportunities like this would come around, I would have said to myself, you’re not what they’re looking for. But I had already been interviewing for JS full-stack and front-end roles, so I knew this was what I wanted. And so I took the plunge. It was probably the best decision in my career as it put me on the path that I really wanted to be on.
Most of my career has been in the .NET ecosystem doing full-stack during parts of my career. I dropped it completely in 2015 and just went full JS/Node/TypeScript/React. Best decision of my life and I didn't need to take a paycut.
— Nick Taylor (he/him) (@nickytonline) March 4, 2018
Although I had no professional React experience, I had started to contribute to a pretty popular React/Redux boilerplate called React Slingshot (eventually I was asked to become a maintainer and accepted 😉) to help me learn React along with Dan Abramov’s awesome free egghead.io Redux Course. With that under my belt, I took off for Barcelona.

I met/worked with a lot of great people, got to head to London a couple of times to visit/work with my UK co-workers and finished off the summer by spending a bit of downtime on the coast of Spain as well as seeing a free (thank you Tourism Andorra) outdoor show of Cirque du Soleil's Scalada : Vision in Andorra in the mountains.
During interviews for my next role, one of the places that stood out was Intel (now McAfee... long story, just Google it). The role was for a front-end developer to work on their password manager browser extension offering. I had never worked in the browser extension space, so that’s what got my attention. The interviews went really well and then it was time to complete the take home test. I was to make a rudimentary password manager browser extension.
One of the developers had expressed interest in TypeScript, which as mentioned, I already had experience with, so I used my React, Redux and TypeScript skills to build a browser extension.
It was a lot of fun building the extension. I got it working, including hot reloading. You could log in to the big sites, Twitter, Facebook etc. and the extension would save your login/password. If you were logged out and revisited one of those sites, you’d be automatically logged on. As well, there was a bonus part of the homework to make a basic admin page to modify your credentials per domain, which I built as well. I even added Storybook to showcase some of the components the extension used. I was pretty happy with what I had built. When I spoke to my future co-workers, they had said that aside from being competent, it was my take home test that had stood out. Everyone else had done the bare minimum. Success... hired! 💯
While I was interviewing for a new job at several places last summer/fall, Khan Academy seemed like an interesting place to potentially work at. Once again though, I looked at the requirements, and I was like, I don't think they'd be interested in me. I actually put off applying for about 5 weeks. Eventually I applied with what I thought was a unique cover letter, along with the usual stuff, like my GitHub profile.
I wasn't expecting to hear back from them, but eventually I did. I initially corresponded with one of their talent recruiters via e-mail who set me up with an interview with my potential Engineering manager. That interview seem to go well, and I mentioned that I had put up a PR for their t0ta11y project.
The https://github.com/Khan/tota11y repository on GitHubHere's a screen capture of my PR in action
I was lucky enough to get a second interview, with none other than John Resig, the creator of jQuery. I did not know that he was working at Khan, so I was a little nervous but excited at the same time. I got to speak with John for a solid hour about front-end. It was amazing.
Things moved on to a third interview with a potential future co-worker and then from there, it'd be wrapping things up. Unfortunately things did not work out in the end, but even though I was disappointed, it was still amazing because I got to PR what I thought was a cool browser extension of their a11y tool and I got to speak to John Resig for a solid hour, just the two of us.
So remember:

Photo by Nick Ewings on Unsplash
]]>I'll start. Did you know that you can write your webpack config in TypeScript if you have the ts-node dev dependency installed? Type checking for my webpack config? Yes please!
]]>Discovered that if you have ts-node installed as a dev dep, you can write your webpack.config in #TypeScript + then simply run as usual, but with an explicit --config parameter, e.g. webpack --config webpack.config.ts. Thanks for the article @devonzuegel! https://t.co/UJtuXwMxfl
— Nick Taylor (he/him) (@nickytonline) November 13, 2017
A new kid on the CSS in JS block.
Plays nicely with Preact, React, Hyperapp and InfernoJS.
An example from the readme for React:
import React from "react"
import scoped from "scoped-style"

const styled = scoped(React.createElement)


// define global css
styled.global`
  * {
    margin: 0;
  }

  html,
  body {
    width: 100%;
    height: 100%;
  }
`;

// and scoped css
const Button = styled("button")`
  background: ${props => props.primary ? "orange": "gray"};
  border: none;
  border-radius: 2px;
  :hover {
    padding: 10px;
  }
`

const App = () => (
  <div>
    <Button primary>Login</Button>
  </div>
)

// Your rendering code
My other focus was the dev.to repository.
The https://github.com/thepracticaldev/dev.to repository on GitHubI was accepted as an early contributor before the project went open source and continued to contribute after it went public. It felt really good to be the first contributor outside of the core team to have a PR merged.

Work and life got busy so not as much blogging as I’d had hoped.
See the Pen https://codepen.io/nickytonline/pen/ppMmyZ by nickytonline (@nickytonline) on CodePen.
I failed miserably on resolution #4. 🙃
— Nick Taylor (he/him) (@nickytonline) December 28, 2018
Having said that, I highly recommend this tool for offline reading. I’m gonna try and catch up on some reading while I head away to a chalet for a few days.
It’s fun making resolutions, but honestly, I did not lose any sleep over not completing some of these. Aside from resolutions, it was a busy year in work land and in the fall I decided to move on to an amazing role at Autodesk on the Shotgun team.
- Still alive and kicking
— Nick Taylor (he/him) (@nickytonline) December 28, 2018
- Solid contributions to OSS
- Landed an awesome gig at @autodesk working on the @shotgunsoftware team https://t.co/jMpiZ7Vdio
Prior to starting work, I attended a week long conference with the whole team. We’re distributed, so they try to have these team conferences once or every two years. As a brand new employee who hadn’t even started work yet, it was amazing to meet, wine/dine with my future co-workers and work on ways to improve the product. I’ve been loving it since day 1. Great work/life balance and all the good things you look for in a job. 💯
Aside from the new gig, I'm about to pass 12000 followers on dev.to! 🔥
So as we close off 2018, I just want to say thanks to the dev.to core team and the community. You're all great.

There's a great free video course on Redux from Dan Abramov on egghead.io, Getting Started with Redux. I highly recommend watching it.
In one of the videos in the series, Redux: Implementing Store from Scratch, he explains how to create the great Redux store. It's essentially what the store is, minus some edge cases etc.
Do you think you can create it from scratch without looking at the video?
This challenge isn't a who got it first kind of challenge. It's really just for you. Really try to do it without looking at the video. Once you're done, watch the video and see how close you came to the solution.
]]>npx -p @storybook/cli sb init --type preact.
In my last Storybook post, Getting Started with Storybook for React, I showed you how to install Storybook for React and gave a quick breakdown of what all the pieces were. I suggest giving that a quick read before continuing here.
In this post, I’ll show you how to get React Storybook up and running with Preact. The assumption is that the project you want to add Storybook to already has Preact installed as a dependency.
npm install reactnpx @storybook/cli (most people should have this if you’re on a newer version of node). If not run npm install @storybook/cli -g.getstorybookreact from our dependencies as we want to use preact!npm install preact-compat. Otherwise install it as a dev depency, i.e. npm install preact-compat -D.storybook. In there it contains files related to Storybook configuration. Create a new file in there called webpack.config.js and paste the following contents and save the file.
module.exports = {
  resolve: {
    extensions: [".js", "jsx"],
    alias: {
      react: "preact-compat",
      "react-dom": "preact-compat"
    }
  }
};
Note that this is a super bare bones webpack configuration. You can add anything else here you may need just like a regular webpack configuration file.
./stories/index.stories.jsimport { h } from "preact";npm run storybook and navigate to Storybook in a browser.
If you want to see an example of the final result, have a look at my first commit to the dev.to repo I made in March of this year.
I haven’t had time yet, but I was discussing with the Storybook maintainers about potentially having a config for Preact out of the box.
Maybe I’ll get to it at some point, but if you’re interested, by all means go for it. 🙃
]]>This post’s birth comes from a gist which is essentially a copy paste of my git aliases.
I’m going to provide my list of git aliases and explain what each alias does, plain and simple. Let’s get started! 🏁 For those new to git aliases, please see the defacto docs on aliases. In a nutshell though, to create your own aliases, use the following git command.
git config --global alias.somealias some-git-command
Before we get started, why git aliases? Well for one thing, I don’t know about you, but some git commands are hard to remember and also, we’re programmers, which means we’re lazy by default to be efficient. 🐢 —> 🐇
a = add . — Running git add will add all files that have changed as staged.b = branch — Lists all branches for your repository on your local machine.bi = bisect — Running git bi will run git’s bisect to help you figure out which commit has a bug.ci = commit -m — This will commit a file with the message you specify, e.g. git ci "awesome commit!".co = checkout — This will checkout the branch you specify, e.g. git co my-awesome-branchcolast = checkout - — Running git colast will checkout the previous branch you were working in.db = branch -D — This will delete the branch you specify, e.g. git db my-not-so-awesome-branch. Note that this will only work if the branch you’re deleting is not the one you’re currently working in.laf = fsck --lost-found — Running git laf will bring you to git’s lost and found. I’ll admit that I rarely use this, so perhaps it doesn’t warrant an alias and just some professional Googling.last = log -1 HEAD — Running git last will show you what your last commit was.lc = diff HEAD^ HEAD - Compares the head of your branch to the previous commit.pf = push --force-with-lease — Running git pf forces a push, but it is a little less destructive than forcing a push. See here for more info on —force-with-lease vs. —force.psu = push --set-upstream — Run this when you want to push a branch for the first time to the remote (typically origin), e.g. git psu origin my-awesome-branch.pr = pull --rebase — This will rebase your current branch with the branch specified, e.g. git pr develop.ra = rebase --abort — Running git ra will abort a rebase. Run this when you’re like, my rebase is currently messed up. Get me outta here!rc = rebase --continue — Running git rc will continue a rebase. You typically run this when you’ve handled any conflicts in a rebase.remotes = remote -v — Running git remotes shows all the remotes currently configured for a repository.renb = branch -m — When you want to rename a branch, run e.g. git renb my-awesom-branch my-awesome-branch.rhh = reset --hard HEAD — The nuclear option. Run git rhh to wipe out all your changes and start from the HEAD.rh = reset --hard — When you specify what to reset to, a hard reset is performed, e.g. git rh HEAD~2.sfc = diff-tree --no-commit-id --name-only -r — Shows files (relative file paths) for a specific commit, e.g.
❯ git sfc HEAD
src/posts/any-contribution-to-open-source-is-valuable-57d3.md
src/posts/april-16th-2021-what-did-you-learn-this-week-3e72.md
src/posts/are-there-plans-for-reviewers-of-articles-we-post--42nf.md
s = status -s — Running git s will give you a more terse status. Instead of this
On branch post/my-git-aliases
Your branch is up to date with 'origin/post/my-git-aliases'.

Changes not staged for commit:
 (use "git add <file>..." to update what will be committed)
 (use "git checkout -- <file>..." to discard changes in working directory)

       modified: src/pages/articles/2018-08-24-my-git-aliases/index.md

no changes added to commit (use "git add" and/or "git commit -a")
You get this
M src/pages/articles/2018-08-24-my-git-aliases/index.md
stashes = stash list — Running git stashes shows you all the stashes you have from stashing. e.g.
stash@{0}: WIP on upgrade: bff6257 Destructuring OCD...
stash@{1}: WIP on upgrade: 3d73199 Fixed LiceCap link.
stash@{2}: WIP on upgrade: c2f78g6 Update default title.
unstash = stash pop — Running git unstash pops a stash off the list of saved stashes.vc = clean -dfx — Running git vc cleans your git repository, so anything not in git is wiped, e.g. node_modules, settings files which aren’t supposed to be in a repo etc. So BEWARE before you run this.mend = commit --amend — Running git mend lets you amend a commit.trigger = commit --allow-empty -m "Trigger Build" — Creates an empty commit. This is handy when you need to restart a build remotely in your CI/CD pipeline without committing changes.alias = ! git config --get-regexp ^alias\. | sed -e s/^alias\.// -e s/\ /\ =\ / — Running git aliases will show all the aliases you have configured globally in git.Although it's not Git aliases, I also highly recommend using the GitHub CLI.
Photo courtesy of Flickr user cindy
]]>Storybook is a great tool for developing and showcasing components. I love it so much, I did a talk about it at js-montreal last summer. Storybook forces you, a good thing, to develop your components as components because you’re not in the actual application. It supports React, React Native, Vue and Angular.
We’ll assume you already have a React project created.
npx installed, run npx @storybook/cli. For more info about npx, check out Introducing npx: an npm package runner – Kat Marchán – Medium. If you don’t have npx installed, you’ll need to install the CLI globally via npm install @storybook/cli -g.getstorybook. Because you have React installed as a dependency, getstorybook will know to install the necessary packages for Storybook for React as dev dependencies.
"@storybook/addon-actions": "3.3.15",
"@storybook/addon-links": "3.3.15",
"@storybook/addons": "3.3.15",
"@storybook/react": "3.3.15",
package.json file, you’ll have two new scripts.
"storybook": "start-storybook -p 6006",
"build-storybook": "build-storybook"
npm run storybook.http://localhost:6006 (or whichever port Storybook gives you in the storybook npm script.
build-storybook, if run, will generate a static Storybook site that you can deploy to wherever you like. By default, it will be generated into a folder called storybook-static.Now that you’ve got Storybook running in your project, you probably took a look at the out of the box stories that ship with it.
Let’s break down what’s going on in one of the sample stories.
// We need the storiesOf function to write our stories.
import { storiesOf } from '@storybook/react';

// A function that allows you to simulate an action.
import { action } from '@storybook/addon-actions';

// The React component that we want to use in our Storybook stories.
import { Button } from '@storybook/react/demo';

// Here Button is the component name that you will see in the collapsible component tree
// in the Storybook application.
storiesOf('Button', module)

  // A first story to show what the button looks like with text.
  // Notice the simulated action as well.
  .add('with text', () => <Button onClick={action('clicked')}>Hello Button</Button>)

  // A second story to show what the button looks like with emojis.
  .add('with some emoji', () => <Button onClick={action('clicked')}>😀 😎 👍 💯</Button>);
That’s pretty much all there is to writing stories. It’s really easy to use and such a great tool. In my next post, we’ll dig into some of the cool features of Storybook.
If you want to see the previous Code Pen I did, check out A 💩 Notification Code Pen.
Continuing along with my 2018 Resolutions to make Code Pens this year, here is my latest.
As mentioned previously, one of the reasons I wanted to start making Code Pens was to see how much I can do without the help of JS. In this example, Javascript is only used to build the markup for the board because I was too lazy to make it all by hand. There's also a small function to simulate a game move as a miss/hit.
I've been doing @wesbos's awesome CSS Grid course, so I thought it would be fun to use these new skills to recreate a classic board game, Battleship. I'm sure there are probably tonnes of these on Code Pen, but honestly, I don't care. It was just fun making it. There's some tweaking to do still (centering of game pieces is off when I look at it on mobile), but so far, I'm happy with it.
Maybe at some point, I'll make the full game, but for now, a board with some simulated hits and misses.
See the Pen https://codepen.io/nickytonline/pen/zRNMvO by nickytonline (@nickytonline) on CodePen.
I'll end with some cheese, "You sank my battleship!".
]]>Continuing along with my 2018 Resolutions to make Code Pens this year, here is my latest.
A fun little poop notification component. Maybe Squatty Potty can use it 😂 (watch their commercial if you're having a bad day).
One of the reasons I wanted to start making Code Pens was to see how much I can do without the help of JS. In this example, Javascript is only used to increment a CSS variable.
The easiest way to work on the hover effect is to use the "force state" feature in Chrome. See it in action at 2:40, the Bonus Tip! part of the What's New in DevTools video on how to work with "force state".
Yes, the poop emoji looks like a pilgrim. That's the best I could do for their hat for now. That's all folks. Now go hover over that 💩 notification!
See the Pen https://codepen.io/nickytonline/pen/ppMmyZ by nickytonline (@nickytonline) on CodePen.
]]>I'll get the ball rolling and start with some examples:
const originalArray = [1, 2, 3];
const shallowArrayClone = [...originalArray];
Array.protoype.slice.
const originalArray = [1, 2, 3];
const shallowArrayClone = originalArray.slice();
You could just do const new array = this.props.slice().sort()
— Nick Taylor (he/him) (@nickytonline) September 15, 2017
const originalObject = { a:1, b: 2, c: 3 };
const shallowObjectClone = {...originalObject};
const originalObject = { a:1, b: 2, c: 3 };
const shallowObjectClone = {...originalObject, c: 45 };
Set
const arrayWithDuplicateValues = [1, 2, 3, 3, 1, 5];
const uniqueArray = Array.from(new Set(arrayWithDuplicateValues);
or
const arrayWithDuplicateValues = [1, 2, 3, 3, 1, 5];
const uniqueArray = [...new Set(arrayWithDuplicateValues)];
const a = [1, 2, 3];
const b = [2, 3, 4];

const uniques = new Set(a.concat(b));
const haveSameValues = uniques.length === a.length // or uniques.length === b.length;
TIL you can flatten multi-dimensional arrays using concat and the ES6 spread operator ☀️ pic.twitter.com/zPK4a490w2
— Jonathan Z. White 👾 (@JonathanZWhite) April 16, 2018
const arrayToFlatten = [ [1,2,3], [4,5,6], [7,8,9] ];
const flattenedArray = [].concat(...arrayToFlatten);
2020 Update for the above is
[ [1,2,3], [4,5,6], [7,8,9] ].flatMap(x=>x)
And go!
Cover image care of Flickr user Wayne Grivell.
]]>Continuing along with my 2018 Resolutions to make Code Pens this year, here is my latest. A super simple rating component showing how with just CSS you can go from 1 to 5 stars. I'll admit that there is nothing mind blowing in terms of what the pen does, but the point of it is to demonstrate a way to overcome the lack of previous sibling selector in CSS via Flexbox with row-reverse.
Here's last week's Code Pen, Quick Hulk Code Pen, if you wanna check it out.
See the Pen https://codepen.io/nickytonline/pen/XVoKom by nickytonline (@nickytonline) on CodePen.
]]>See the Pen https://codepen.io/nickytonline/pen/jYKYWY by nickytonline (@nickytonline) on CodePen.
Cover photo courtesy of Flickr user steelex709legocreations.
]]>I participated in this week’s #devdiscuss about tooling, and I posted a few links to gists that are my setup on my Mac.
Notables are @code, https://t.co/Cn6SqW1SfF and @alfredapp. Other Mac tooling at https://t.co/PFVjlJ5wzR and Git CLI with https://t.co/nwai7eEx4D #devdiscuss #devtools #productivity
— Nick Taylor (he/him) (@nickytonline) January 10, 2018
/usr/bin/ruby -e "$(curl -fsSL https://raw.githubusercontent.com/Homebrew/install/master/install)" from the command line to install it.brew tap caskroom/cask from the command line to install it.brew cask install spectacle from the command line to install it.brew cask install alfred from the command line to install it.Alfred is so awesome, it deserves it’s own section in this post. It’s basically Spotlight on steroids and a bag of chips. It’s more than an application launcher. It allows you to create workflows for repetitive tasks you do everyday and there is also a huge array of existing workflows for it available. I even decided to make some of my own, nickytonline/alfred-workflows: Hopefully useful workflows for Alfred.
Also, this Alfred workflow is awesome for my workflow with GitHub, https://t.co/fjNOo6iuvL #devdiscuss #git
— Nick Taylor (he/him) (@nickytonline) January 10, 2018
I never used Alfred until this past summer. Why did I not use it sooner?!
The Syntax FM podcast has a great episode on tooling, including Alfred, Our favourite Productivity Hacks 🔥 — Syntax Podcast 011. You should check it out.
Along with workflows, you can also install themes. I like Wes Bos’ Cobalt 2 theme for other things and I guess since Wes is a huge fan of Alfred, he decided to make the theme for Alfred as well. Download the raw Cobalt 2 theme file from the github.com/wesbos/Cobalt2-Alfred-Theme repository. Once downloaded, open the file and it will ask you if you want to import the theme into Alfred.
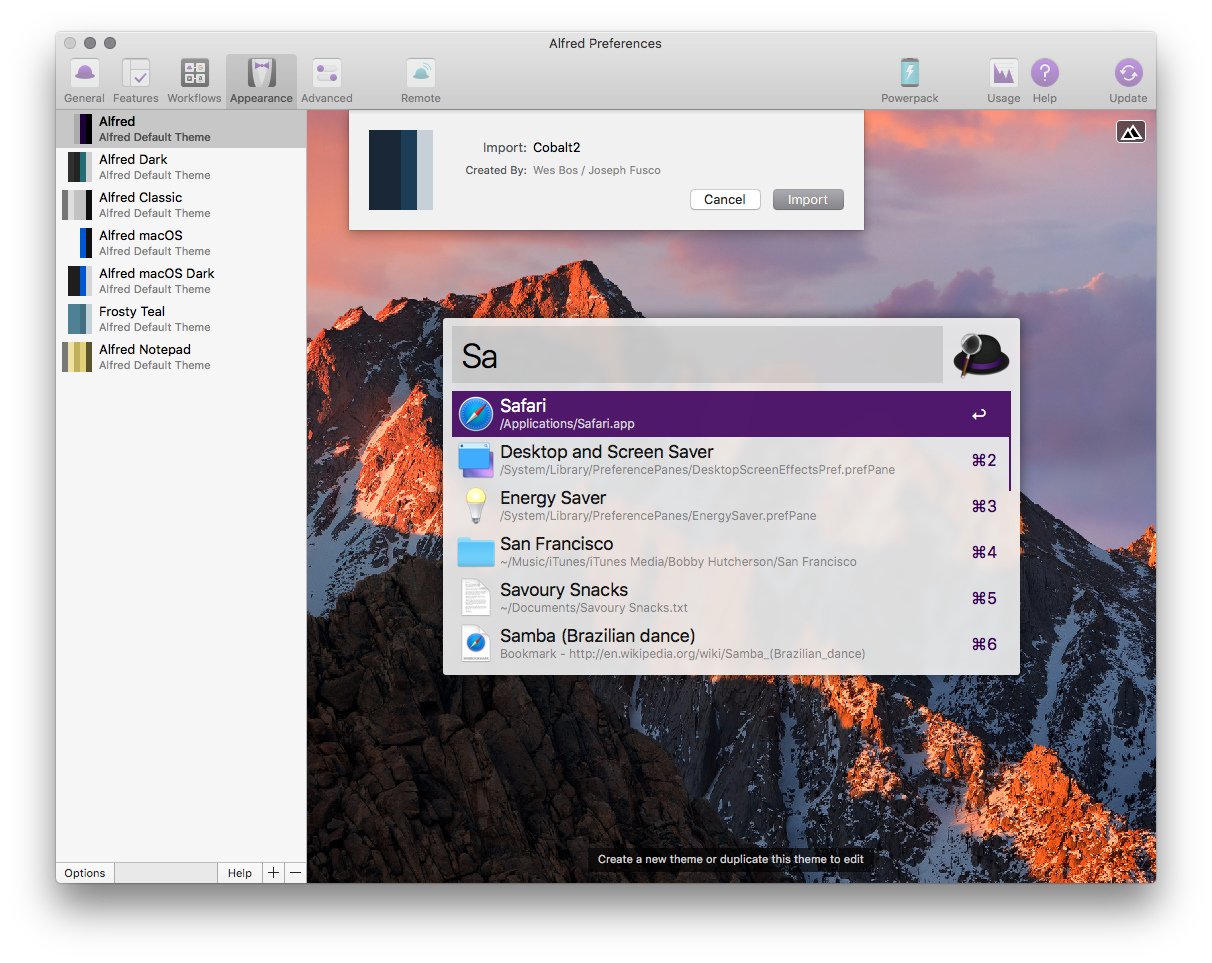
Click the import button and Alfred has been Cobalted.
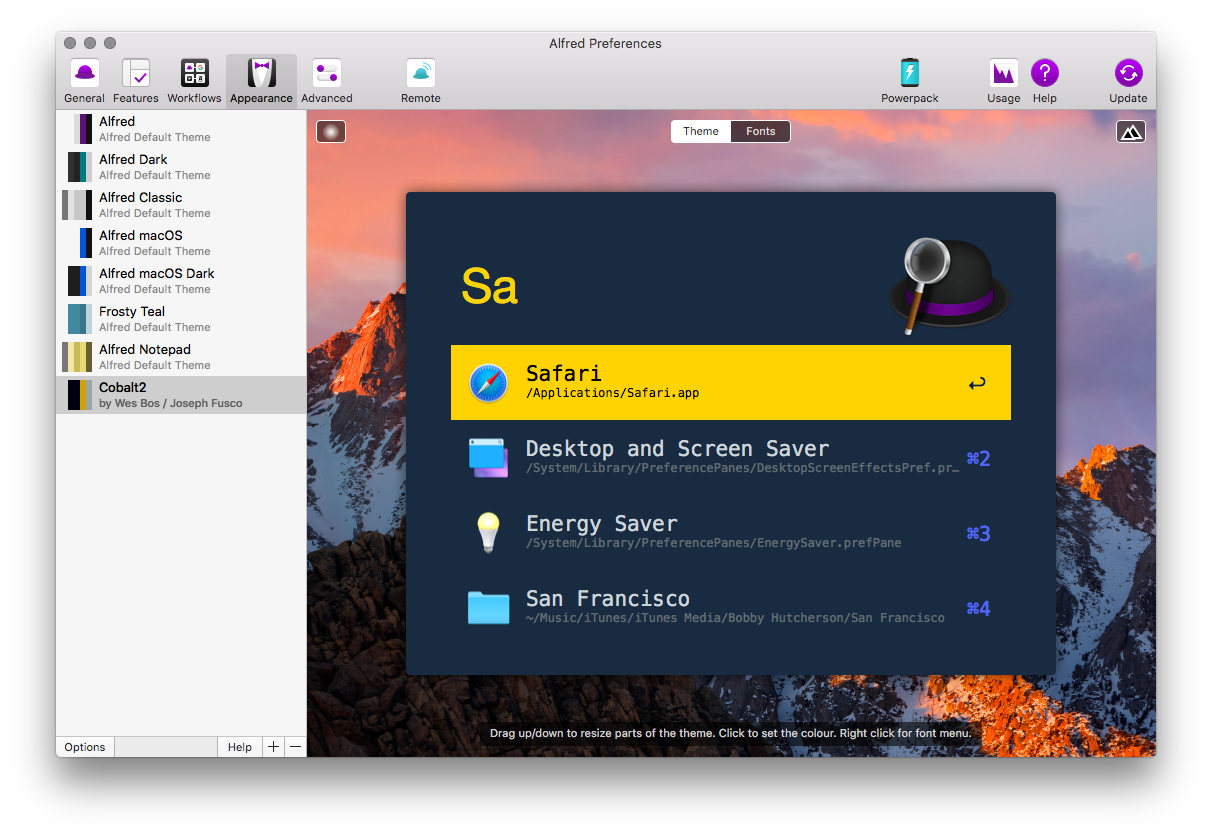
At the time of this writing, here’s all the workflows that I currently have installed:
.so to sos. Otherwise it launches the RunCommand workflow and errors out because of the initial . running an invalid command. I also find it funny that I called it sos. Send help! 🆘If you use Alfred and have some workflows that are not listed here, please mention them in the comments. I’m always looking for new ones to improve my whole dev workflow.
You can also launch the terminal from Alfred, by typing > in the Alfred search bar followed by the command you wish to run. Since I use iTerm, I want that to open instead of the default Terminal app. Since Alfred 2.7.2, you can run a custom Applescript to launch another terminal application. Open the Alfred preferences window and click on the Features button in the top of the preferences window then click on the Terminal / Shell button at the bottom. In the Application drop down menu, select Custom and paste in this script from the Custom iTerm Applescripts for Alfred repository.
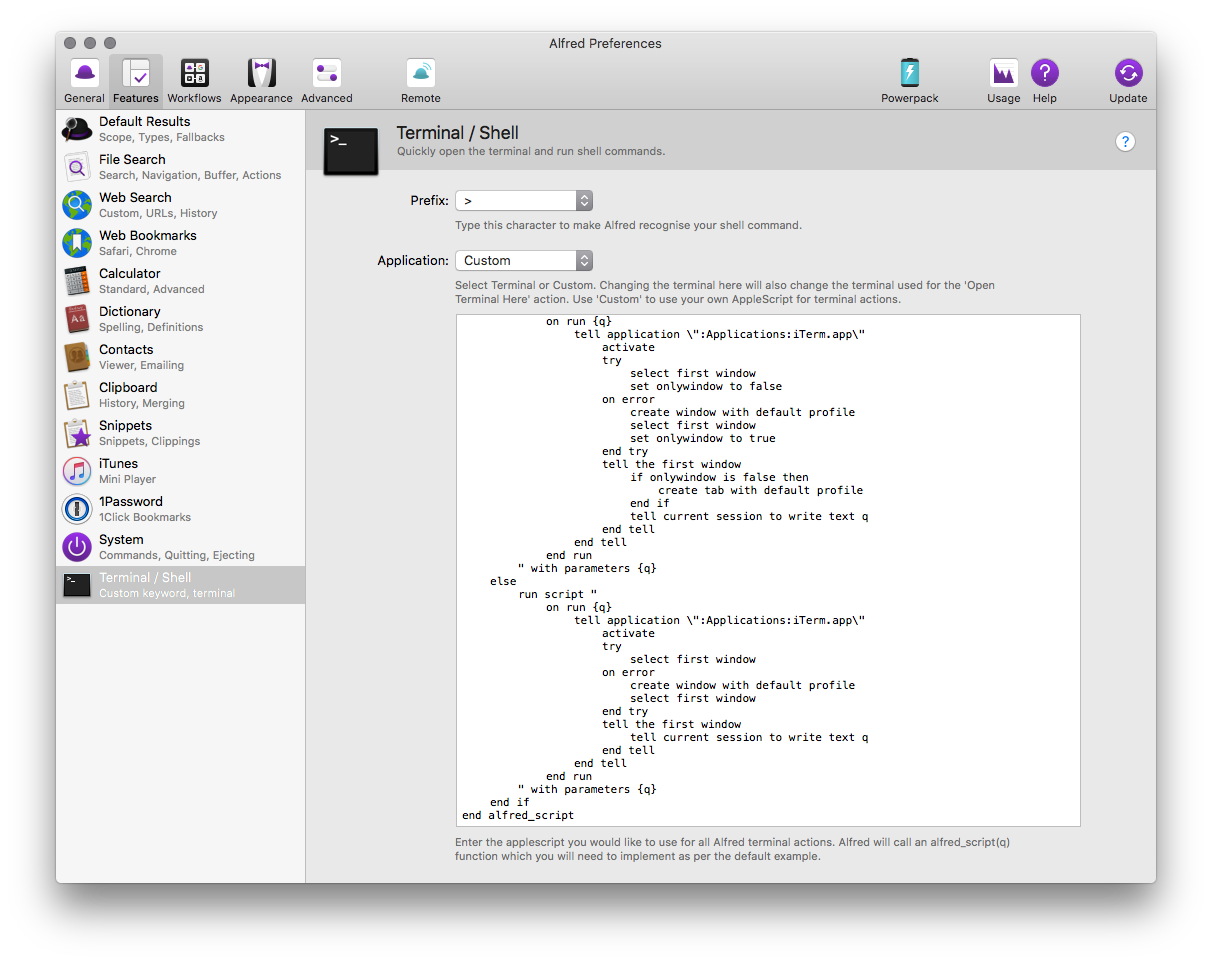
You're all good to go. To test it out launch Alfred and in the search bar type > ls and press ENTER. iTerm should open up with a listing of the current directory.
brew cask install visual-studio-code from the command line to install it.brew install n from the command line to install it.brew cask install now from the command line to install it.brew cask install docker from the command line to install it.brew tap caskroom/fonts. Once that is installed, you can install Fira Code by running brew cask install font-fira-code.npx, so I’ve also added that to my tool belt. Thanks Peter Kühne!brew cask install iterm2 from the command line to install it.brew cask install fish from the command line to install it.curl -Lo ~/.config/fish/functions/fisher.fish --create-dirs https://git.io/fisher from the command line to install it.fisher edc/bass from the command line to install it.
alias cg="eval \"git clone git@github.com:$argv.git\"" # Clones a gist, just pass in the gist ID
funcsave cg

alias flushdns="sudo killall -HUP mDNSResponder" # Because I never remember this command
funcsave flushdns

alias g="git"
funcsave g

alias glog="git log --oneline --decorate --all --graph"
funcsave glog

# Check out a PR
alias copr="git fetch origin pull/$argv/head:pr$argv;"
funcsave copr

alias y="yarn"  # Some say I live dangerously aliasing this to 'y'. I say yolo.
funcsave y

alias nib="node --inspect-brk" # nib path-to-my-file/my-file.js
funcsave nib

# When you want to just hash out an idea for something web
# Automatic page reloading and assets. Requires npx so
# ensure your npm is upgraded to the latest and greatest.
alias hot="npx browser-sync start --server src/ --files \"src/*.html\" \"src/css/*.css\" \"src/js/*.js\""
funcsave hot
brew cask install the-unarchiver from the command line to install it.brew cask install vlc from the command line to install it.brew cask install flux from the command line to install it.brew cask install dropbox from the command line to install it.brew install dark-mode from the command line to install it.brew cask install vanilla from the command line to install it.brew cask install licecap from the command line to install it.brew cask install onyx.That’s pretty much the round up of what I have on my machine at the moment. I should probably get around to writing a script that installs all this, but for the time being, other priorities.
I’m always looking for new tools to make me more efficient, so feel free to chime in in the comments below.
And here's the link to my mac setup script which I made a little while's after this blog post. It's not perfect, but it's helped me set up a few machines pretty easily.
]]>-Keep contributing to #oss but specifically I want to contribute at least one PR to @code, @typescriptlang and @brave
— Nick Taylor (he/him) (@nickytonline) January 3, 2018
-Keep on blogging
-Start making codepens on Code Pen.
-Read everything I put in Pocket. https://t.co/1rmqlEttnL
-Read the @FLJSbook I bought/backed#DevDiscuss
So let’s break down the list:
I really love the work that I have been able to do with @housecor and @nickytonline on react-slingshot. Such a fun project and a foundational part of me learning react.
— Kyle Welch (@kylewelch) January 2, 2018
In 2018, I will keep contributing to OSS including react-slingshot, but specifically I will contribute at least one PR to Visual Studio Code, TypeScript and the Brave Browser. These are all fantastic projects that I use everyday, so it just makes sense. 2. Keep on blogging ✔ thanks to this post. 😉 3. Start making code pens on codepen.io. I’ve never made any so yolo, here we go. 4. Read everything I put in Pocket. This is a toughy, but let’s see how it goes.
Main dev New Year's resolution for 2018 is too make sure I read everything I add to @Pocket.
— Nick Taylor (he/him) (@nickytonline) December 31, 2017
Now it’s time to add a reminder in Google Inbox for the end of the year to see if I’m all talk or not. 😉 💪
]]>This originally was just a gist, but I thought it made sense to just convert it to a blog post.
As the stateofjs.com survey this year noted, Visual Studio Code is quickly becoming the editor of choice for many web developers.
Perhaps the most striking stat on the 2017 State of #JavaScript Survey: VS Code (@code) is by far the most popular editor - and it's only 2.5 years old!
— Cory House (@housecor) December 13, 2017
❤️ the new Microsoft.https://t.co/BwfJBHln4y pic.twitter.com/pd1GWQJB7X
VS Code is my editor of choice. It's great for web dev, and if you're developing with TypeScript, it's definitely the way to go. Fun fact... it's written in TypeScript. If you're interested in learning more about TypeScript, check out my blog post Consider Using TypeScript.
TypeScript is what gives VS Code its refactoring and intellisense capabilities. Here's the really cool part. You get typed intellisense even if you're not using TypeScript via Automatic Type Acquisition.
Alright, let's get to it. Here's my current Visual Studio Code setup.
VS Code has a huge array of extensions available on their marketplace. As well as extensions, in 2017, extension packs became available. tl;dr, they're a grouping of extensions.
Settings Sync is a must have extension and I recommend installing it as your first extension. With this extension, you'll be able to backup most of your settings to a private gist. From there, restoring your settings is pretty easy. It's great for backing up settings as well as synching settings, which is what I do between my work and personal laptop.
Language extensions like Go and Python (see below) when installed get all the proper tooling set up to debug for those specific languages. Here's some others. The easiest way to get started with debugging is to press F5 and VS Code will offer you debugging configurations to get set up with.
Hey @syntaxfm, have you seen the new Polacode extension for @code? It's 🔥 https://t.co/lnWgxDq9Hu #vscode pic.twitter.com/cama1UWzh4
— Nick Taylor (he/him) (@nickytonline) February 16, 2018
Update 2018/01/28: The Custom CSS and JS Loader can also be used to get a kind of Operator Mono look by using two fonts. See the tweet below. I did run in to some issues though. The main one was that the CSS class names had changed. Just read the whole tweet thread for all the info.
Multiple Fonts: Alternative to Operator Mono in VSCode. #vscodetips https://t.co/dujI40zUAv
— VSCodeTips (@vscodetips) January 28, 2018
TLDR; check out https://gist.github.com/nickytonline/8086319bf5836797ee3dea802a77000d. (maybe another gist to blog post? 😉). And the end result is this. Not sure if I like the cursive in code yet, but maybe it'll grow on me.
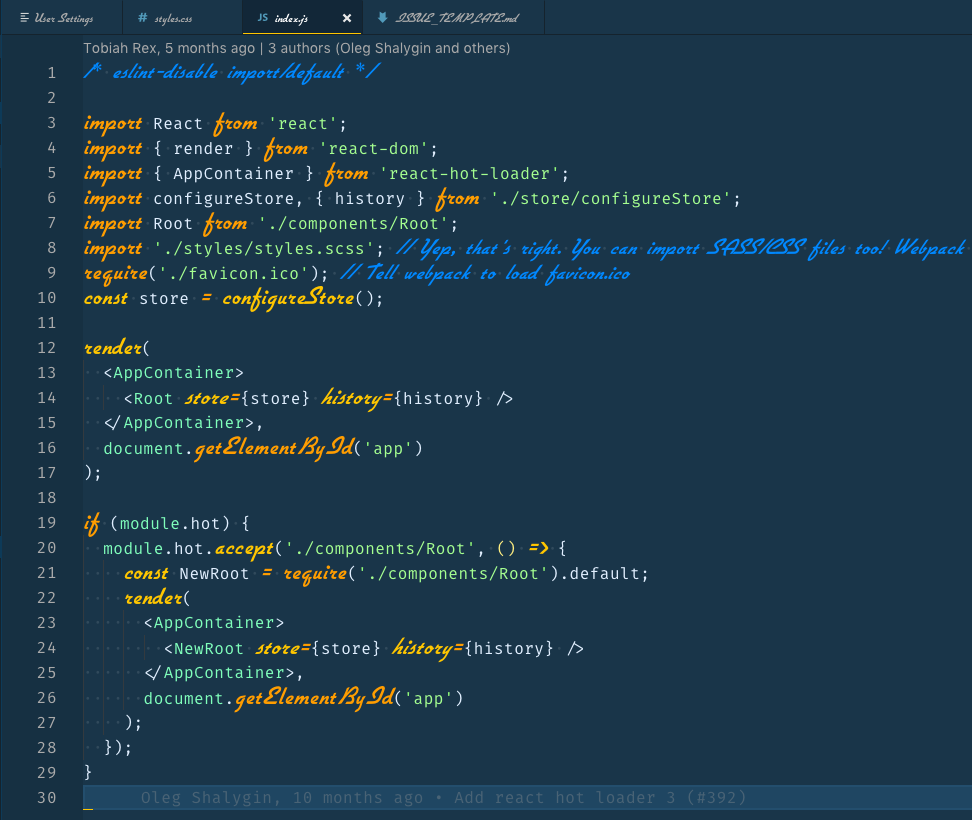
I'm currently taking the Cobalt 2 theme for a spin with the Fish Shell Fisherman Agnoster theme.
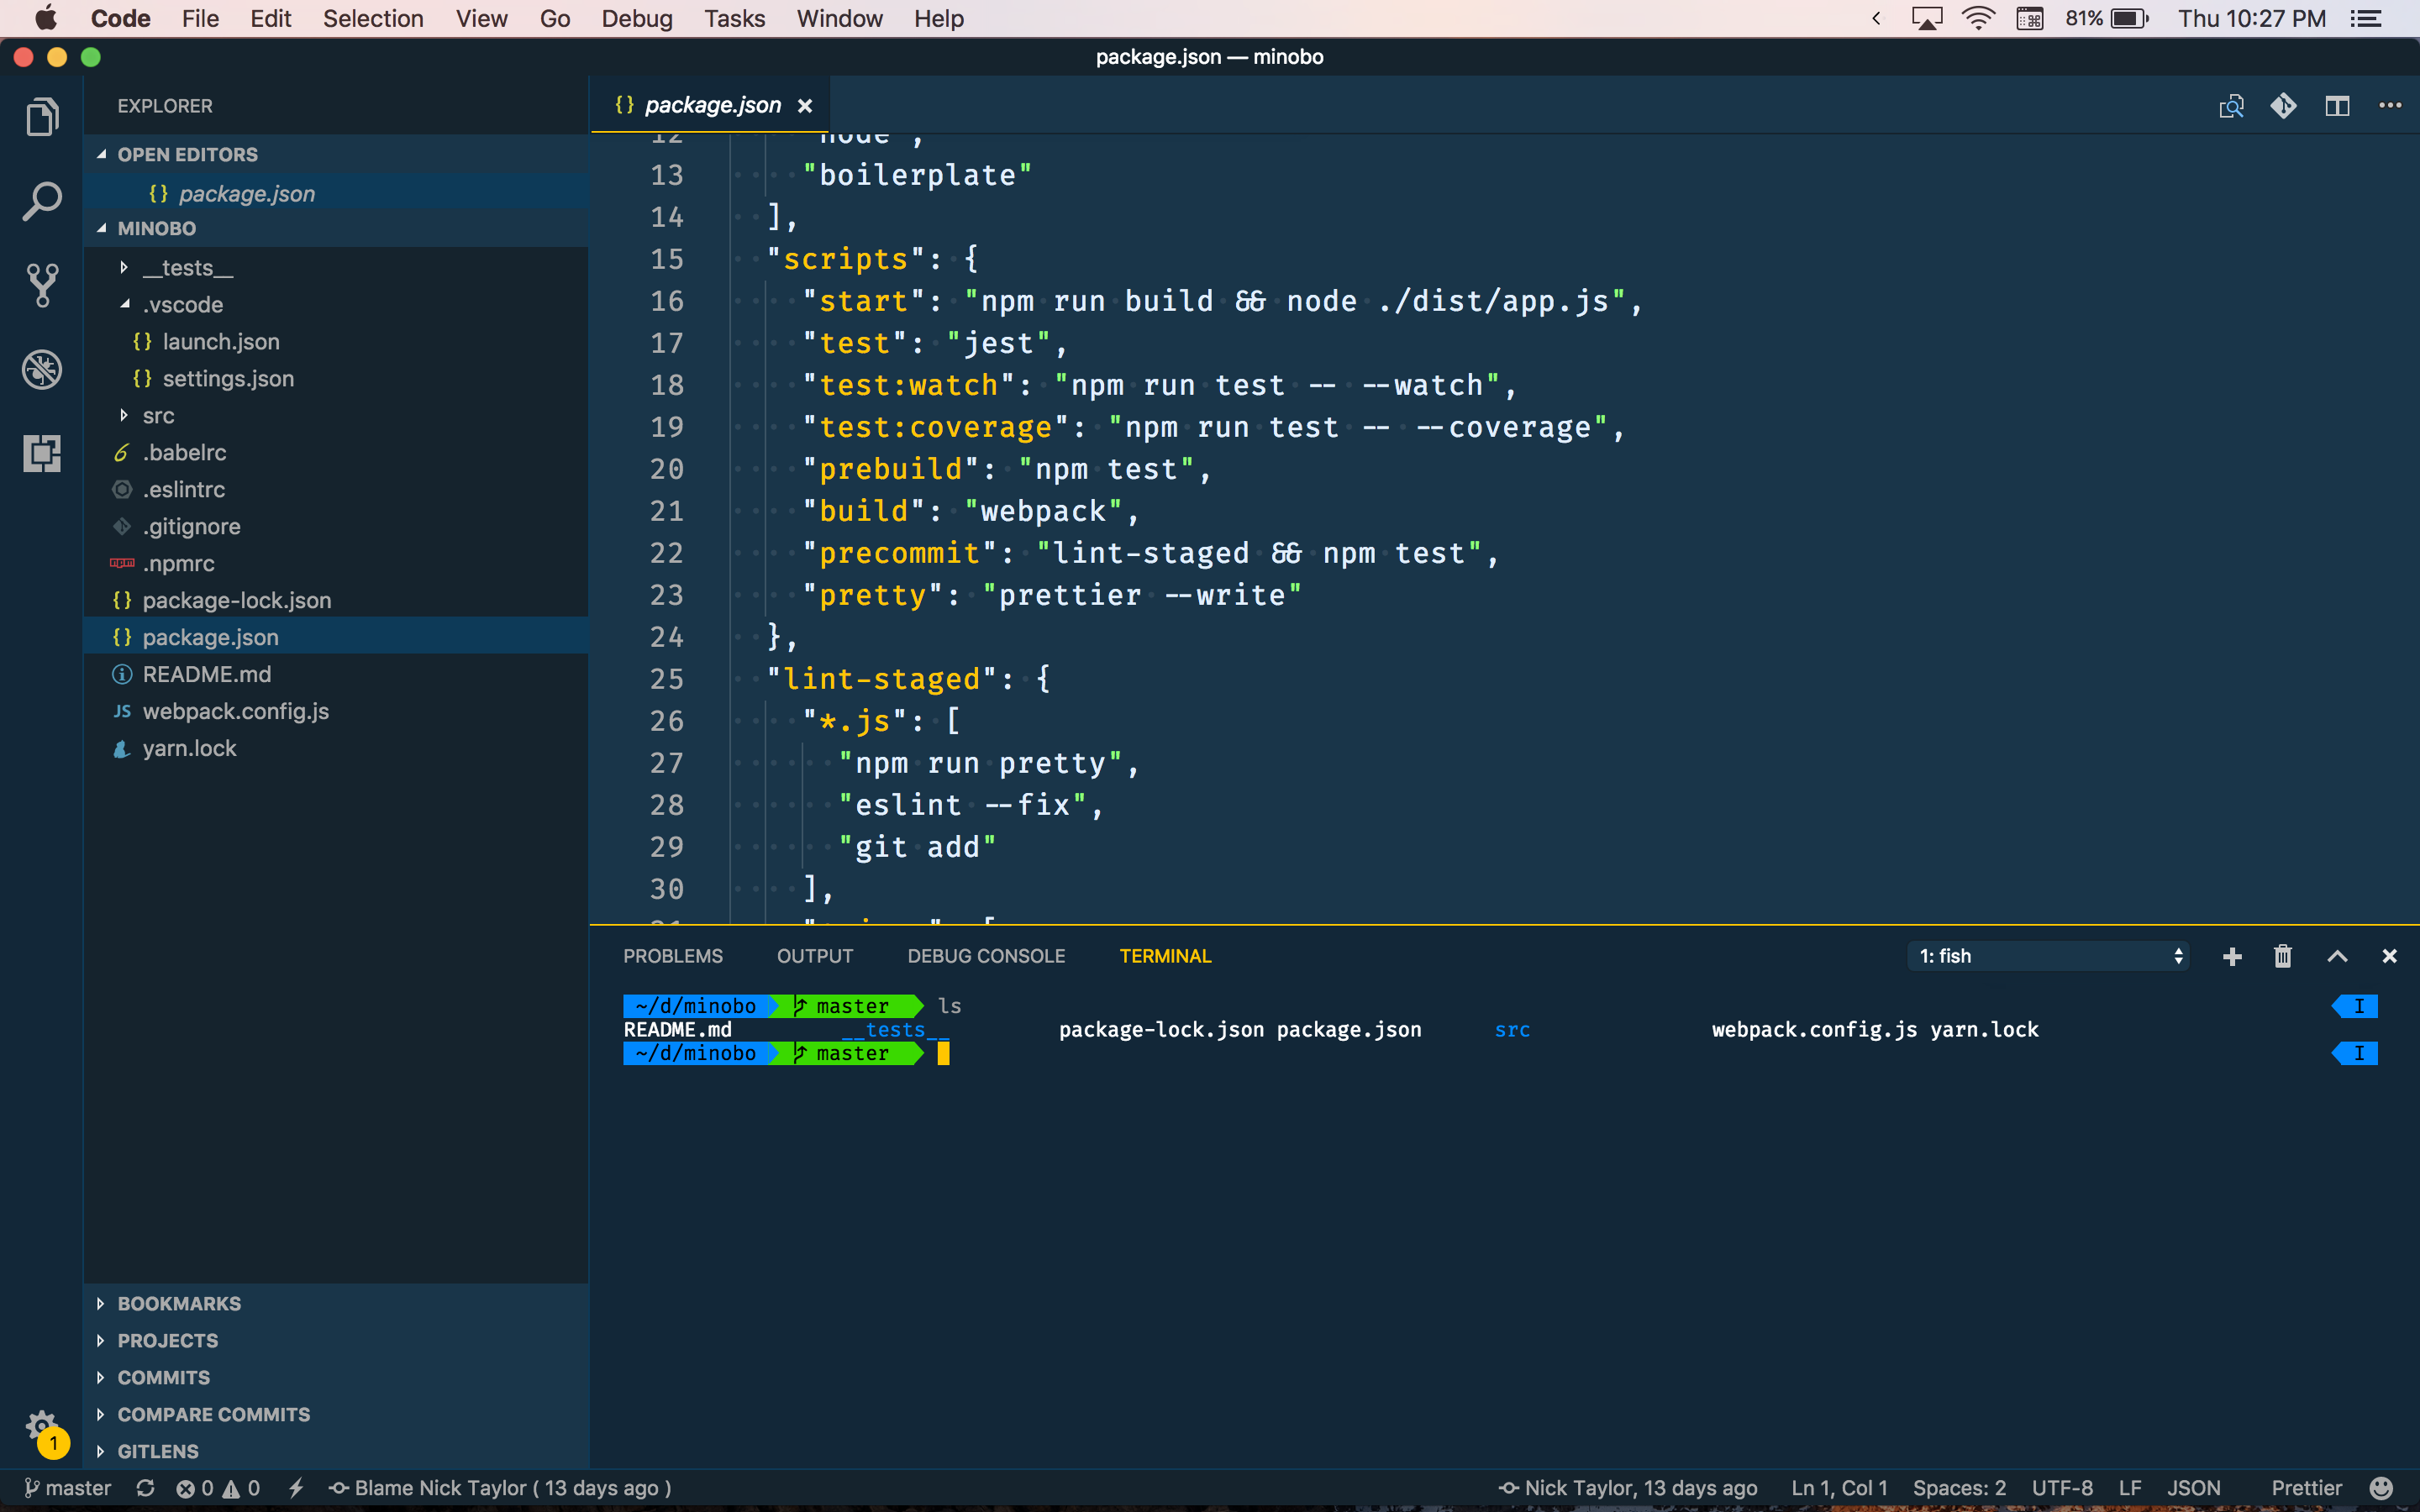
I still love using the Dracula theme with the Fish Shell Fisherman Joker theme, but thought I'd switch it up for a bit.
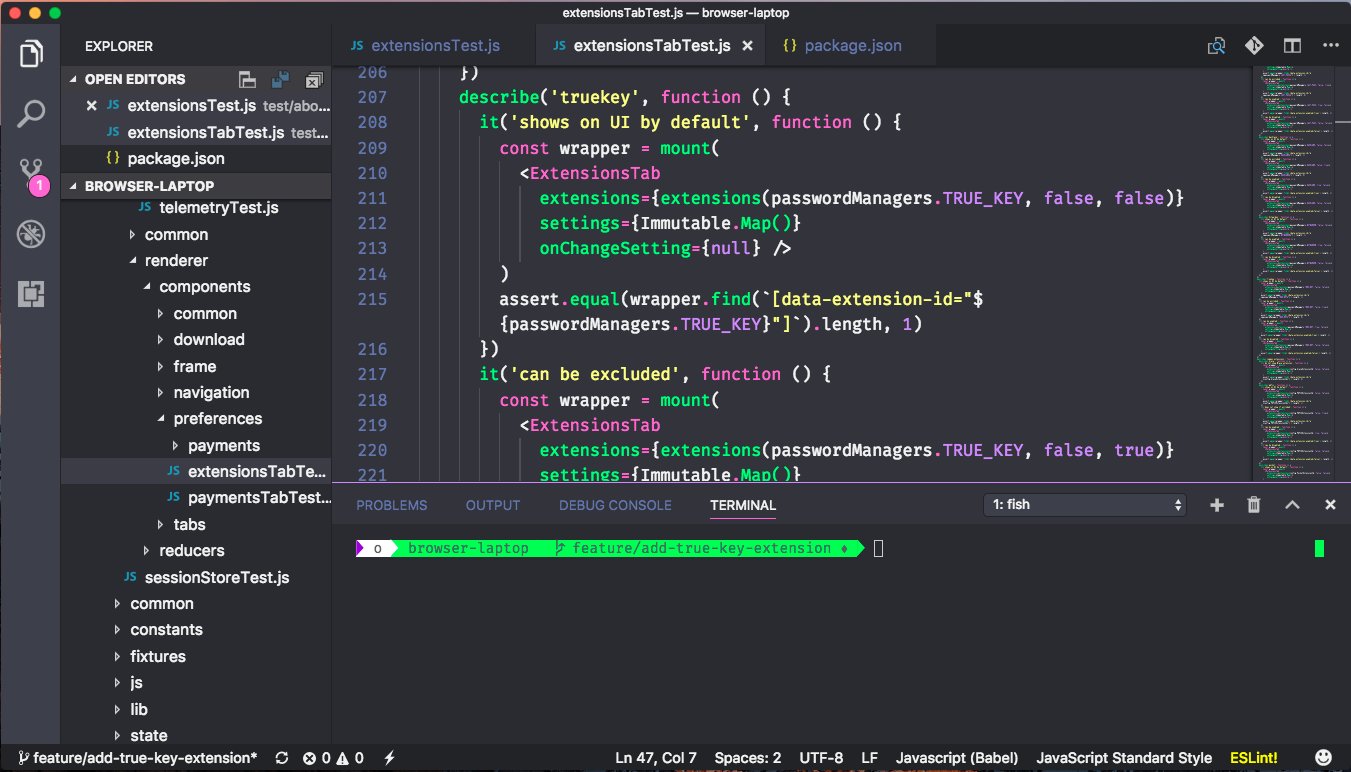
I've also used One Dark Pro, and Material theme which are great as well.
I use Fish Shell and Fisherman with the Agnoster theme right now.
I use Fira Code in VS Code. Once you've installed Fira Code, the setup in Code is quite easy.
Open your user settings and add the following:
  // Controls the font family.
  "editor.fontFamily": "Fira Code",
  "editor.fontLigatures": true,
  // Controls the font size.
  "editor.fontSize": 14,
Boom! Bob's your uncle and you now have Fira Code in all it's awesome ligatureness (is that a word?).
// Place your key bindings in this file to overwrite the defaults
[
  {
    "key": "cmd+shift+z",
    "command": "workbench.action.terminal.focus"
  },
  {
    "key": "cmd+shift+a",
    "command": "workbench.action.terminal.focusNext"
  },
  {
    "key": "cmd+shift+s",
    "command": "workbench.action.terminal.focusPrevious"
  },
  {
    "key": "cmd+shift+x",
    "command": "workbench.action.terminal.kill"
  }
]
Also, if you're looking for great tips and tricks on Visual Studio code, check out www.vscodetips.com. One last thing that I'm really looking forward to is the availabilty of Live Share.
Questions or comments? Hit me up on Twitter.
]]>I've been using TypeScript since fall 2014 (v. 1.3). It's come a long way. The amount of care that has gone into the language to keep it as a superset of JavaScript (not altering the JS language) is amazing. Kudos to Anders Hejlsberg, the entire TypeScript team and OSS peeps that have made this such a great project.
So let's get to it. If you've never used a statically typed language like Java or C#, this may seem foreign to you. You're probably asking yourself, why TypeScript?
const index: number = 'hi'; // index can't be a string or if a property on an object has a typo. This allows us to catch errors early on during development instead of at run-time (since JS is a dynamically typed language). Here's a good explanation of statically typed vs. dynamic languages.If you're not using @typescriptlang, you can still benefit from it in @code. Packages u import that have typings provide typed intellisense. pic.twitter.com/hA81wrdMO0
— VSCodeTips (@vscodetips) September 21, 2017
Great, looks awesome, but what about consuming npm packages from projects that don't use TypeScript? As mentioned briefly above, Visual Studio Code can grab the declaration files even if your project doesn't use TypeScript. So where are these declaration files coming from?
What is a TypeScript declaration file? In a nutshell, it's a file that describes what types are in a package. For authors of TypeScript based projects, they will almost always author TypeScript declaration files. For projects that aren't written in TypeScript, sometimes, package authors will write the declaration files by hand and maintain them in their projects. In most cases though, the community has stepped in/up to write declaration files by hand of projects that aren't written in TypeScript. They're all housed in a repository called DefinitelyTyped, a repository of high quality TypeScript type definitions maintained by the JS/TS OSS community.
To add types for a package that does not have its own declaration file, install its equivalent @types package. e.g. npm install lodash --save;npm install @types/lodash --save-dev; Now when you use lodash in your TS project in a TS capable editor, you will get typed Intellisense.
The hard (smart) work and love that has gone into TypeScript has not gone unnoticed. In recent times, some fairly large projects that you may know have migrated to TypeScript.
Note: I update this list from time to time.
1/ It seems like a lot of big companies lately are migrating to a type system for big projects. @github, https://t.co/WbXrUbR1Xj,
— Nick Taylor (he/him) (@nickytonline) September 28, 2017
I'm sure there are others, but these are the big ones I'm aware of. You can always check GitHub for trending TypeScript projects.
Here are some additional resources to get you up and running.

To summarize, TypeScript is a great option if you're looking to scale a team up quickly on a codebase (Intellisense, refactoring) as well as catching silly errors via type checking.
Thanks goes out to @drosenwasser, @RichSeviora and @nojvek for taking the time to review this blog post. 💯 🔥
Questions or comments? Hit me up on Twitter @nickytonline.
]]>Photo by Sincerely Media on Unsplash
]]>I live in Montreal, Quebec, Canada.
I mostly program in JavaScript/TypeScript and love React.
Nice to meet you.
]]>